
Manual


10. Adjust end links so that the arms of the sway bar are parallel with the ground. When satisfied with fit, attach
end links to the rearmost hole of sway bar with 7/16 x 2-3/4 bolts, washers, and locknuts. On the passenger
side install a spacer between the sway bar and end link bushing to provide tailpipe clearance.
11. Tighten end link bolts on sway bar and frame brackets to 40 ft-lb. Tighten 9/16” nut on end links to lock
threads in place.
12. Center sway bar on axle and tighten axle U-bolts to 60 ft-lb. Double nut axle u-bolts after torquing to spec.
13. Bounce the vehicle checking for clearance on all under carriage components: fuel tank, shocks, exhaust,
differential, brake and fuel lines, etc. Test drive the vehicle and recheck all clearances and the installation
alignment. Adjust as needed. Re-check your installation after one week of driving and periodically on a regular
basis.
14. The sway bar has three end link mounting holes. The end link MUST be mounted on the outer hole for
initial use. For a firmer setting, use the inner holes. You must use the outer mounting hole until you are
accustomed to the vehicles new handling characteristics. After driving vehicle, a firmer setting may be
selected if desired. It is recommended that the outer hole be used for street driving.
ATTENTION INSTALLER: PLEASE MAKE SURE CUSTOMER RECEIVES THIS INSTRUCTION
SHEET,ALL IMPORTANT NOTE CARDS, WARNING CARDS AND THE
WARRANTY FORM
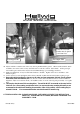
Driver’s Side
559-734-7451 800-367-5480 FAX 559-734-7460
Passenger Side Passenger Side
Center hole in frame
bracket must be placed
over frame rivet.
7698 (R-7698) 10/12/2007
Spacer