
Corp. Fryer User Manual
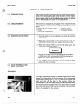


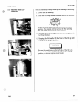

5. Remove capillary bulb from bulb holder inside the cookpot.
6. Straighten the capillary tube.
7. Remove larger outside nut that threads into pot wall.
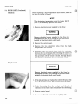
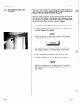
8. Remove the two nuts securing the high limit bracket at
the front of the fryer, and remove bracket.
9. Remove the two screws that secure high limit to the high
limit bracket.
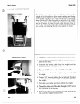
10. Remove defective control from control panel area.
11. Insert new control and replace screws.
12. Uncoil capillary line, starting at capillary tube, and insert
through cookpot wall.
To avoid electrical shock or other injury, the capillary
line must run under and away from all electrical power
wires and terminals. The tube must NEVER be in such
a position where it could accidentally touch the elec-
trical power terminals.
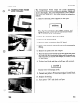
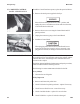
13. Carefully bend the capillary tube as shown in photo and
place into bulb brackets.
14. Pull excess capillary line from pot and tighten nut into
cookpot wall.
Be sure capillary bulb of high limit is positioned as not
to interfere with carrier or when cleaning the cookpot
wall, or damage to capillary tube could result.
15. With excess capillary line pulled out, tighten smaller nut.
16. Replace front panel.
17. Refill with shortening.