INDOOR CLEANING Dishwasher KDW Installation Manual
EN IF THE INFORMATION IN THIS MANUAL IS NOT FOLLOWED EXACTLY, A FIRE OR EXPLOSION MAY RESULT CAUSING PROPERTY DAMAGE, PERSONAL INJURY, OR DEATH. Do not store or use gasoline or other flammable vapors and liquids in the vicinity of this or any other appliance. Installation and service must be performed by a qualified installer or service agency. DO NOT REPAIR, REPLACE OR REMOVE ANY PART OF THE APPLIANCE UNLESS SPECIFICALLY RECOMMENDED IN THE MANUAL.
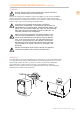
TABLE OF CONTENTS 1 2 2 2 3 12 13 14 15 SAFETY PRECAUTIONS - BEFORE YOU BEGIN MODEL NUMBERS RATING LABEL REGULATORY / CODE REQUIREMENTS LOCATION AND INSTALLATION MOUNTING THE OVERLAY DOOR PANEL ATTACHING THE SIDE GASKETS COMPLETING INSTALLATION AND TESTING ELECTRICAL CONNECTIONS, SAFETY AND CAUTION EN SAFETY PRECAUTIONS - BEFORE YOU BEGIN When properly cared for, your Hestan appliance will provide safe, reliable service for many years.
MODEL NUMBERS DISHWASHER MODELS EN Model No. Description Circuit Breaker Req’d KDW24 24” Dishwasher, Stainless Door 15 Amp KDW24-OV 24” Dishwasher, Overlay Door 15 Amp KDW24-XX 24” Dishwasher, Color Door 15 Amp NOTE: -XX indicates color model.
LOCATION AND INSTALLATION UNPACKING AND PLACEMENT Remove the outer carton and packing materials Do not remove the plastic film covering the stainless-steel surfaces. This film protects the finish from scratches until the appliance is installed in its final position. EN The unit is heavy and should be handled with care. Use proper safety equipment, such as gloves and 2 persons to move the appliance into position to avoid injury and to avoid damage to the floor or the appliance itself.
LOCATION AND INSTALLATION (continued) INSTALLATION KIT SUPPLIED WITH DISHWASHER The kit supplied with the dishwasher comprises: (KDW24-OV model also contains B, C, D, and E) • 1 steel adhesive steam guard (A) • 1 template for door panel (B) • 2 hooks for door panel (C) • 8 screws for securing the door panel hooks (D) • 2 screws for securing the door (E) • 4 screws for fixing the dishwasher to the adjacent walls (F) • 2 upper fixing screws (G) • 2 screw caps (H) EN H PRODUCT / CUT-OUT DIMENSIONS Product
LOCATION AND INSTALLATION (continued) CAUTION DURING INSTALLATION, TAKE CARE NOT TO INJURE YOURSELF ON THE SHARP EDGES OF THE APPLIANCE. EN Remove the polystyrene rack blocks. Position the appliance in the chosen installation position. The sides and rear of the appliance can lie against kitchen units or walls. If the dishwasher is installed next to a heat source, separate it with a heat insulating panel in order to prevent overheating and malfunctions.
LOCATION AND INSTALLATION (continued) ELECTRICAL AND WATER CONNECTIONS Install the dishwasher to allow ease of access to the electrical and water connections through the adjacent cabinetry. These connections must never be behind the dishwasher. The inlet and drain hoses can be pointed in all directions but make sure that they are not bent, crushed or too tight. Tighten the ring nut after pointing the hoses in the required direction.
LOCATION AND INSTALLATION (continued) CONNECTING THE WATER SUPPLY EN PREVENTING THE RISK OF CLOGGING OR DAMAGE: IF THE PLUMBING IS NEW OR HAS NOT BEEN USED FOR A LONG TIME TIME, BEFORE CONNECTING TO THE WATER SUPPLY CHECK THAT THE WATER IS CLEAR AND FREE OF IMPURITIES, TO PREVENT DAMAGE TO THE APPLIANCE. THE DISHWASHER MUST ALWAYS BE CONNECTED TO THE THE WATER SYSTEM WITH NEW HOSES. OLD OR USED HOSES MUST NEVER BE RE-USED.
LOCATION AND INSTALLATION (continued) CONNECTING TO A WATER TAP (continued) Do not cut the inlet hose. If the hose is cut, the dishwasher will not work, water will leak and you may be injured. If the hose is too long, wind it up neatly and place it behind the appliance. The cable harness and electrical components must not come into contact with the hydraulic system and the water inlet and drain hoses.
LOCATION AND INSTALLATION (continued) CONNECTING TO A WASTE DISPOSAL UNIT WITH AN AIR GAP MAKE THE CONNECTION UPLINE FROM THE SIPHON OF THE DRAIN LINE AND AT LEAST 15-3/4” (400 mm) ABOVE THE FLOOR ON WHICH THE DISHWASHER WILL BE INSTALLED. EN 1. Remove the cover of the waste disposal unit (A). 2. Connect the dishwasher drain hose (B ) to the air gap (C) using the wide spring clamp (D ); if necessary, cut the end of the dishwasher drain hose (E ) (do not cut the corrugated section).
LOCATION AND INSTALLATION (continued) CONNECTING TO A WASTE DISPOSAL WITHOUT AN AIR GAP MAKE THE CONNECTION UPLINE FROM THE SIPHON OF THE DRAIN LINE AND AT LEAST 15-3/4” (400 mm) ABOVE THE FLOOR ON WHICH THE DISHWASHER WILL BE INSTALLED. EN 1. Remove the cover of the waste disposal unit (A). 2. Connect the dishwasher drain hose (B ) to the waste disposal unit inlet (C), using the wide spring clamp (D).
LOCATION AND INSTALLATION (continued) RECOMMENDED CONDENSATION PROTECTION Clean the front 6” of the underside of the countertop directly above the door. Apply the steam guard, as shown below. The guard protects the countertop from steam and condensation when the door of the dishwasher is opened at the end of the washing cycle. EN MOVE THE DISHWASHER INTO PLACE Push the dishwasher into position, taking care not to twist or crush the power cord or hoses.
LOCATION AND INSTALLATION (continued) MOUNTING THE OVERLAY DOOR PANEL (KDW24-OV MODEL) Place the provided template on the inner surface of the overlay panel. Center the template on the panel and align it with the top edge, matching up the reference locators (A ). . Mark the position of the door hooks with a pencil. Remove the template and use a drill with a suitable bit to carefully make holes at the points marked on the panel.
LOCATION AND INSTALLATION (continued) ATTACHING THE SIDE GASKETS EN Before securing the dishwasher to the adjacent cabinetry, attach the gaskets to the sides of the dishwasher. Remove the adhesive band on the gasket. Fix the gasket to the dishwasher, inserting it in the seat on the sides towards the front , making sure that the long side of the gasket with the hole for inserting the screw, is attached to the outside of the dishwasher. The hole in the long side must match the hole in the dishwasher.
LOCATION AND INSTALLATION (continued) COMPLETING THE INSTALLATION EN It is an important step to properly secure the dishwasher to the adjacent cabinetry or the underside of the countertop. Using the supplied screws, carefully secure the dishwasher to the cabinetry or countertop then cover the holes with the plugs provided. TESTING THE DISHWASHER After installation, test the dishwasher by starting a work cycle. Check carefully for leaks and make sure the appliance does not malfunction.
ELECTRICAL CONNECTION, SAFETY AND CAUTION THIS MANUAL IS AN INTEGRAL PART OF THE APPLIANCE: IT MUST ALWAYS BE KEPT INTACT TOGETHER WITH THE DISHWASHER. BEFORE USING THE APPLIANCE, CAREFULLY READ ALL THE INSTRUCTIONS CONTAINED IN THIS MANUAL. INSTALLATION MUST BE PERFORMED BY A QUALIFIED TECHNICIAN, IN COMPLIANCE WITH THE REGULATIONS IN FORCE.
ELECTRICAL CONNECTION, SAFETY AND CAUTION DURING INSTALLATION, TAKE CARE NOT TO INJURE YOURSELF ON THE SHARP EDGES OF THE APPLIANCE; WEAR SAFETY GLOVES. EN THE APPLIANCE MUST BE PROVIDE WITH A GROUNDED CONNECTION IN ACCORDANCE WITH THE ELECTRICAL SAFETY REGULATIONS IN FORCE. IF IN DOUBT, HAVE THE SYSTEM CHECKED BY A QUALIFIED ELECTRICIAN. THE MANUFACTURER DECLINES ALL RESPONSIBILITY FOR DAMAGE TO PERSONS OR PROPERTY RESULTING FROM THE FAILURE TO GROUND THE APPLIANCE OR FROM A DEFECTIVE GROUND CONNECTION.
LE NON-RESPECT À LA LETTRE DE CES INSTRUCTIONS PEUT CAUSER UN INCENDIE OU UNE EXPLOSION, QUI POURRAIT ENTRAÎNER DES DOMMAGES MATÉRIELS, DES BLESSURES OU LA MORT. Ne pas entreposer ou utiliser d’essence ou tout autre liquide ou gaz inflammable à proximité de cet appareil ou de tout autre appareil. EN PRÉSENCE D’UNE ODEUR DE GAZ: 1. Ne tenter d’allumer aucun appareil. 2. Ne toucher à aucun commutateur électrique. 3. N’utiliser aucun téléphone dans l’immeuble. 4.
TABLE DES MATIÈRES 1 2 2 2 3 12 13 14 15 FR PRÉCAUTIONS DE SÉCURITÉ - AVANT DE COMMENCER NUMÉROS DE MODÈLE ÉTIQUETTE DE NOTATION EXIGENCES RÉGLEMENTAIRES / CODE EMPLACEMENT ET INSTALLATION MONTAGE DU PANNEAU DE PORTE DE RECOUVREMENT FIXATION DES JOINTS LATÉRAUX TERMINER L'INSTALLATION ET L'ESSAI RACCORDEMENTS ÉLECTRIQUES, SÉCURITÉ ET PRÉCAUTIONS PRÉCAUTIONS DE SÉCURITÉ - AVANT DE COMMENCER S’il est bien entretenu, cet appariel Hestan procurera un service sûr et fiable pendant de nombreuses années.
NUMÉROS DE MODÈLE MODÈLES DE LAVE-VAISSELLE Modele No. La description Disjoncteur requis KDW24 24” Lave-vaisselle, porte inoxydable 15 Amp KDW24-OV 24” Lave-vaisselle, porte superposée 15 Amp KDW24-XX 24” Lave-vaisselle, Porte couleur 15 Amp FR NOTE: -XX indique le modèle de couleur.
EMPLACEMENT ET INSTALLATION DÉBALLAGE ET PLACEMENT Retirer le carton extérieur et les matériaux d'emballage Ne pas retirer le film plastique les surfaces en acier inoxydable. Ce film protège la finition des rayures jusqu'à la l'appareil est installé dans sa position finale. FR L'unité est lourde et doit être manipulée avec soin.
EMPLACEMENT ET INSTALLATION (a continué) KIT D'INSTALLATION FOURNI AVEC LAVE-VAISSELLE Le kit fourni avec le lave-vaisselle contient: (Le modèle KDW24-OV contient B, C, D et E) • 1 pare-vapeur adhésif en acier (A) • 1 gabarit pour panneau de porte (B) • 2 crochets pour le panneau de porte (C) • 8 vis pour xer les crochets du panneau de porte (D) • 2 vis pour xer la porte (E) • 4 vis pour xer le lave-vaisselle aux murs adjacents (F) • 2 vis de xation supérieures (G) • 2 bouchons à vis (H) FR H DIMENSION
EMPLACEMENT ET INSTALLATION (a continué) MISE EN GARDE PENDANT L'INSTALLATION, PRENDRE SOIN DE NE PAS VOUS INJURER SUR LES BORDS TRANCHANTS DE L'APPAREIL. FR Retirez les blocs de support en polystyrène. Positionnez l'appareil dans l'installation choisie position. Les côtés et l'arrière de l'appareil peuvent se trouver contre les éléments de cuisine ou les murs.
EMPLACEMENT ET INSTALLATION (a continué) CONNEXIONS ÉLECTRIQUES ET HYDRAULIQUES Installez le lave-vaisselle pour faciliter l'accès aux connexions électriques et à l'eau à travers les armoires adjacentes. Ces connexions ne doivent jamais être derrière le lave-vaisselle. Les tuyaux d'entrée et de vidange peuvent être pointés dans toutes les directions, mais assurez-vous qu'ils ne sont pas plié, écrasé ou trop serré. Serrer l'écrou après avoir pointé les tuyaux dans le nécessaire direction.
EMPLACEMENT ET INSTALLATION (a continué) CONNECTING THE WATER SUPPLY PRÉVENTION DU RISQUE D'OBSTRUCTION OU DE DOMMAGE: SI LA PLOMBERIE EST NOUVELLE OU N'EST PAS UTILISÉE LONGTEMPS HEURE, AVANT DE RACCORDER AU VERIFICATION DE L'ALIMENTATION EN EAU L'EAU EST CLAIR ET LIBRE D'IMPURETÉS POUR PRÉVENIR LES DOMMAGES APPAREIL. LE LAVE-VAISSELLE DOIT TOUJOURS ÊTRE CONNECTÉ AU LE SYSTÈME D'EAU AVEC DE NOUVEAUX TUYAUX. LES TUYAUX VIEUX OU UTILISÉS DOIVENT NE JAMAIS ÊTRE RÉUTILISÉ.
EMPLACEMENT ET INSTALLATION (a continué) RACCORDEMENT À UN ROBINET D'EAU (a continué) Ne pas couper le tuyau d'arrivée. Si le tuyau est coupé, le lave-vaisselle ne fonctionnera pas, l'eau fuira et vous pourriez être blessé. Si le tuyau est trop long, enroulez-le bien et placez-le derrière l'appareil. Le faisceau de câbles et les composants électriques ne doivent pas entrer en contact avec le système hydraulique et les tuyaux d'arrivée et de vidange d'eau.
EMPLACEMENT ET INSTALLATION (a continué) CONNECTING TO A WASTE DISPOSAL UNIT WITH AN AIR GAP RENDRE LA LIGNE DE CONNEXION AU SIPHON DU DRAIN LINE ET AU MOINS 15-3 / 4 "(400 mm) AU-DESSUS DU PLANCHER SUR LEQUEL LE LAVE-VAISSELLE SERA INSTALLE. FR Retirez le couvercle de l'unité d'élimination des déchets (A). Connectez le tuyau de vidange du lave-vaisselle (B) à l'entrefer (C) pince (D); Si nécessaire, couper l'extrémité du tuyau de vidange du lave-vaisselle (E) (ne pas couper le section ondulée).
EMPLACEMENT ET INSTALLATION (a continué) RACCORDEMENT À UNE ÉLIMINATION DES DÉCHETS SANS ÉCART D'AIR RENDRE LA LIGNE DE CONNEXION AU SIPHON DU DRAIN LINE ET AU MOINS 15-3 / 4 "(400 mm) AU-DESSUS DU PLANCHER SUR LEQUEL LE LAVE-VAISSELLE SERA INSTALLE. FR 1. Retirez le couvercle de l'unité d'élimination des déchets (A). 2. Raccordez le tuyau de vidange du lave-vaisselle (B) à l'entrée de l'unité d'élimination des déchets (C), en utilisant la pince à ressort large (D).
EMPLACEMENT ET INSTALLATION (a continué) PROTECTION DE CONDENSATION RECOMMANDÉE Nettoyez l'avant 6 "du dessous du comptoir directement au-dessus de la porte. Appliquez le pare-vapeur, comme indiqué ci-dessous. La garde protège le comptoir de la vapeur et de la condensation lorsque la porte du lave-vaisselle est ouverte à la n du cycle de lavage. FR METTEZ LE LAVE-VAISSELLE EN PLACE Poussez le lave-vaisselle en position, en veillant à ne pas tordre ou écraser la puissance cordon ou tuyaux.
EMPLACEMENT ET INSTALLATION (a continué) MONTAGE DU PANNEAU DE PORTE DE RECOUVREMENT (MODÈLE KDW24-OV) Placez le gabarit fourni sur la surface interne du panneau de recouvrement. Centrer le modèle sur le panneau et l'aligner avec le bord supérieur, en faisant correspondre les localisateurs de référence (A). Marque la position des crochets de porte avec un crayon. Retirez le gabarit et utilisez une perceuse avec un mèche appropriée pour faire des trous soigneusement aux points marqués sur le panneau.
EMPLACEMENT ET INSTALLATION (a continué) FIXATION DES JOINTS LATÉRAUX Avant de xer le lave-vaisselle aux armoires adjacentes, xez les joints les côtés du lave-vaisselle. Retirez la bande adhésive sur le joint. FR Fixez le joint au lave-vaisselle, en l'insérant dans le siège sur les côtés vers l'avant, en s'assurant que le long côté du joint avec le trou pour l'insertion la vis est xée à l'extérieur du lave-vaisselle. Le trou dans le long côté doit correspondre au trou dans le lave-vaisselle.
EMPLACEMENT ET INSTALLATION (a continué) TERMINER L'INSTALLATION C'est une étape importante pour bien xer le lave-vaisselle aux armoires adjacentes ou la face inférieure du comptoir. À l'aide des vis fournies, xez soigneusement le lave-vaisselle à l'armoire ou au comptoir puis couvrir les trous avec les bouchons fournis. FR TESTER LA LAVE-VAISSELLE Après l'installation, testez le lave-vaisselle en commençant un cycle de travail.
RACCORDEMENT ÉLECTRIQUE, SÉCURITÉ ET PRÉCAUTION CE MODE D’EMPLOI EST PARTIE INTÉGRANTE DE L’APPAREIL: IL FAUT TOUJOURS LE CONSERVER INTACT PRÈS DE L’APPAREIL. AVANT L’UTILISATION, NOUS CONSEILLONS UNE LECTURE ATTENTIVE DE TOUTES LES INDICATIONS QU’IL CONTIENT. L’INSTALLATION DEVRA ÊTRE EFFECTUÉE PAR UN PERSONNEL QUALIFIÉ ET CONFORMÉMENT AUX NORMES EN VIGUEUR.
RACCORDEMENT ÉLECTRIQUE, SÉCURITÉ ET PRÉCAUTION PENDANT L’INSTALLATION, FAIRE ATTENTION AUX BORDS TRANCHANTS SUR LE LAVE-VAISSELLE ; POUR ÉVITER DE SE BLESSER, METTRE DES GANTS DE SÉCURITÉ. FR LA MISE À LA TERRE CONFORMÉMENT AUX MODALITÉS PRÉVUES PAR LES NORMES DE SÉCURITÉ DE L’INSTALLATION ÉLECTRIQUE EST OBLIGATOIRE. EN CAS DE DOUTE, FAIRE CONTRÔLER L’INSTALLATION PAR UN ÉLECTRICIEN QUALIFIÉ.
RETAIN THIS MANUAL FOR FUTURE REFERENCE CONSERVEZ CE MANUEL POUR UNE RÉFÉRENCE FUTURE Hestan Commercial Corporation 3375 E.