ELITE BRE100.2 / BRE60.4 / BRE100.4 BRE1100.1D / BRE1600.1D BRE2000.1D / BRE2500.
HIFONICS BRUTUS HIGH PERFORMANCE AMPLIFIERS The BRUTUS ELITE Series products have been designed to a very high level of performance, with features unavailable in any other product. All of the amplifiers have variable crossovers built in, with added touches such as subsonic filter, bass equalization and an HFR-3 remote control module for the monoblocks that allows overall Level control from reach of the drivers seat.
GENERAL INSTALLATION PROCEDURE System Design The success of any car stereo system relies on several factors, such as the system design, execution of the installation, and system setup. Please remember that any system is only as good as its weakest link. Please remember that higher power systems are not necessarily useful purely for high sound pressure levels, but also to establish a headroom capability, to reproduce musical peaks cleanly without distortion.
AMPLIFIER FEATURE DESCRIPTIONS BRUTUS ELITE BRE AMPLIFIERS: Each model is capable of 4 & 2-Ohms stereo per channel, or 4-Ohms mono bridged operation except the mono amps which are capable of 4, 2 and 1-Ohm loads. Tri-Mode operation with any stereo pair of amplifier channels is possible, as with all bridgeable amplifiers. The input sensitivities for rated output powers are variable from 0.2V to 6V for the multi channel amplifiers and 0.2V to 9V for the mono models.
BRE100.2 2-CHANNEL AMPLIFIER APPLICATIONS FULL RANGE STEREO This is the most basic application for the ELITE Series 2 channel amplifiers. 4. Line Level: Refer to the section “Setting up systems after installation for best performance” 1. Interconnect cable checklist: Connect the LINE INPUTS to the Radio/CD with good quality RCA cables. 2. Crossover Switch: The X-OVER switch must be in the FULL position. 3. Crossover frequency control checklist: N/A for full range operation.
BRE60.4 / BRE100.4 4-CHANNEL AMPLIFIER APPLICATIONS 4 CHANNEL FULL RANGE SYSTEM Here we show how to use the 4 channel amplifiers as straightforward discrete 4 channel full range units. - HI PASS: N/A - LOW PASS: N/A Interconnect cable checklist: - Connect the four inputs of the amplifier to a Radio/CD with quality RCA cables.
BRE60.4 / BRE100.4 4-CHANNEL AMPLIFIER APPLICATIONS Front/Rear high pass, using a 2 channel amplifier for mono sub bass The combination of a 2 and a 4 channel amplifier, utilizing their built in crossovers, makes it a snap to put together a full system with front and rear highs, with mono sub bass. Channels 1/2: - HI PASS: 100 Hz LOW PASS: N/A Interconnect cable checklist: - Using good quality RCA cables, feed the front and rear outputs of a head unit to the inputs of the 4 channel amplifier as shown.
BRE1100.1D / BRE1600.1D MONO AMPLIFIER APPLICATIONS Basic application Interconnect cable checklist: - Connect the line inputs to a Radio/CD RCA outputs or line output of the full range primary amplifier with good quality RCA cables. A “Y” adapter may be needed as shown in the diagram. Minimum final loudspeaker impedance: - 1 ohm. - Use at least 16 gauge speaker wiring. These amplifiers have dual speaker terminals, simplifying the hookup of multiple speakers.
BRE2000.1D MONO AMPLIFIER APPLICATIONS Basic application Interconnect cable checklist: - Connect the line inputs to a Radio/CD RCA outputs or line output of the full range primary amplifier with good quality RCA cables. A “Y” adapter may be needed as shown in the diagram. Minimum final loudspeaker impedance: - 1 ohm. - Use at least 16 gauge speaker wiring. These amplifiers have dual speaker terminals, simplifying the hookup of multiple speakers.
BRE2500.1D MONO AMPLIFIER APPLICATIONS Basic application SINGLE AMP INSTALLATION PROCEDURE: 1. Connect the amp LINE INPUTS to the Radio/CD player full range or mono line out puts with good quality RCA interconnect cables. 2. Plug in the HFR-3 remote module into the amp REMOTE INPUT jack. 3. Route a 0 gauge power cables directly to the vehicle battery with an in-line fuse. 4. Connect a 0 gauge ground cables directly to chassis ground with in 36” of the amp.
SETTING UP SYSTEMS AFTER INSTALLATION FOR BEST PERFORMANCE BRE100.2 / BRE60.4 / BRE100.4 General: At this point you are ready to get more specific on the settings for your amplifier. High Pass: -When in Hi Pass operation, this setting acts as a low frequency cut off for your system reproduction. The point that you set it at cuts off any frequencies from reproduction beyond this point. The 12 o’clock position is a great starting point.
TROUBLESHOOTING A SYSTEM The key to finding the problem in a misbehaving sound system is to isolate parts of that system in a logical fashion to track down the fault. Description of the Diagnostic system built into all HIFONICS amplifiers The diagnostic system will shut down the amplifier, until reset by turning the head unit off, and back on. This state of affairs will be indicated by the front panel PROTECT LED lighting up under the following conditions: 1 - A sort circuit on the loudspeaker leads.
11
BRUTUS ELITE SERIES Maxxsonics Limited Warranty As the manufacturer of Maxxsonics, MB Quart, Autotek, Crunch and Hifonics car audio products, Maxxsonics USA Inc. Warrants to the original consumer purchaser the amplifier to be free from defects in material and workmanship for one (1) Year from date of purchase. All other parts and accessories of the system are warrantied to be free from defects in material and workmanship for one (1) year from date of purchase.
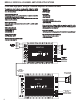
Accessories 5V SLAVE ON 3V MASTER 35Hz MODE 250Hz LOW PASS FILTER 24 dB/OCT 9V 0.
OEM Integration Accessories MX-1 Premium High To Low Level Converter * Converts High Level OEM speaker wires to Ultra Clean RCA Low Level Outputs * High Level Inputs: Accepts all types of High level Inputs including floating ground and high voltages up to 30 volts. * Audio Signal Sense / Hardwire Turn-On: Audio sense detects music signals from the OEM wires and activates the MX-1. As an option, the module also offers a remote turn-on wire.
PART#: A1210