AXON Media Server with Collage™ Software User Manual © High End Systems, Inc. 2006, All Rights Reserved Information and specifications in this document are subject to change without notice. High End Systems, Inc. assumes no responsibility or liability for any errors or inaccuracies that may appear in this manual.
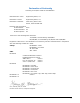
Contacting High End Systems® Sales Department High End Systems, Inc. 2105 Gracy Farms Lane Austin, TX 78758 USA voice:512.836.2242 fax:512.837.5290 Toll Free: 800.890.8989 Customer Service High End Systems, Inc. 2105 Gracy Farms Lane Austin, TX 78758 USA voice:800.890.8989 fax: 512.834.9195 toll free: 800.890.8989 email: support@highend.com World Wide Web: http://www.highend.com Patents This High End Systems product is protected by patents and pending patent applications.
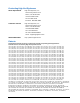
Declaration of Conformity according to ISO/IEC Guide 22 and EN45104 Manufacturer’s name: High End Systems, Inc. Distributor’s name: Distributor’s address: High End Systems, Inc.
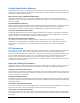
Product Modification Warning High End Systems products are designed and manufactured to meet the requirements of United States and International safety regulations. Modifications to the product could affect safety and render the product noncompliant to relevant safety standards. Mise En Garde Contre La Modification Du Produit Les produits High End Systems sont conçus et fabriqués conformément aux exigences des règlements internationaux de sécurité.
Symbols The following international caution and warning symbols appear in margins throughout this manual to highlight messages. CAUTION: This symbol appears adjacent to Caution messages. Not heeding these messages could result in personal injury and/or damage to equipment. WARNING: This symbol appears adjacent to high voltage warning messages. Not heeding these messages could result in serious personal injury.
Warranty is void if the product is misused, damaged, modified in any way, or for unauthorized repairs or parts. This warranty gives you specific legal rights, and you may also have other rights specific to your locality. What You Should Know About Copyright The following FAQ can help you understand copyright laws and how they apply to content used with the DL.3, DL.2 and Axon media servers. By Suzy Vaughan Associates for High End Systems.
This sounds really difficult and I don't know how to do it? What do I do to properly license copyrighted material? You need to consult with a Content Clearing House or with a properly licensed Intellectual Property Attorney. Content clearinghouses are typically less expensive to work with and have well established industry relations that can result in cost savings. High End Systems uses and highly recommends Suzy Vaughan Associates.
viii Axon Media Server User Manual
Table of Contents AXON Media Server with Collage™ Software User Manual Contacting High End Systems® ....................................................................... ii Patents ........................................................................................................ ii Declaration of Conformity .............................................................................. iii Product Modification Warning .........................................................................
Software Setup ........................................................................................... 11 The Axon Desktop ....................................................................................... 11 Launching the Content Management Application (CMA)..................................... 12 Verifying and Uploading Software .................................................................. 12 Configuring Axon....................................................................................
Chapter 5: Tutorials Five simple lessons get you started programming DL.3, DL.2, and Axon media servers with a Wholehog 3 or other DMX console. Fixture Set-up (DL.3 and DL.2 Media Servers) ............................................ 25 Lesson 1: Cross Fading Between Graphic Objects ....................................... 26 Define Graphic Object 1 ............................................................................ 26 Add the DL.2 logo as Graphic Object 2 ...........................................
Chapter 7: Graphic Functions: Defining Content Each Graphic Object’s content is composed of a 3-D object overlaid with a media file. This chapter outlines how to select an image’s object and media file components as well as define the video segment and its playback. Selecting Content ........................................................................................ 39 How Content is Organized............................................................................. 39 Selecting Content ............
Chapter 9: Graphic Functions: Opacity and Effects You can adjust opacity and apply a variety of color mixing and geometric effects to each individual Graphic Object. Opacity ....................................................................................................... 59 Visual Mode ................................................................................................. 60 Visual Mode Options ....................................................................................
Chapter 11: Global Functions Global Graphic controls affect the composite image created by defining two or three separate object graphics. You can adjust intensity, define masks, select a point in space to view the composite image, and control keystone correction. Global Intensity .......................................................................................... 87 Global Effect Mode 1 and Effect Mode 2 ...................................................... 88 Global Control ........................
Mapping a Collage to a Spherical Surface .................................................. 114 Spherical Mapping Setup Guide ................................................................... 114 Before You Begin.................................................................................... 114 Mapping Two Outputs to a Sphere ............................................................ 114 Spherical Mapping Tips............................................................................
RGB Add2, All Pixels ...................................................................................128 RGB Add to Non-black Pixels ........................................................................128 RGB Invert ................................................................................................128 RGB Invert and Swap to BRG .......................................................................129 RGB Invert and Swap to GBR ............................................................
Pixel Twist ................................................................................................ 148 Raindrop .................................................................................................. 148 ShakeNBake ............................................................................................. 149 Sinewave, Circular ..................................................................................... 149 Sinewave, Circular w/X-axis Wobbulation..............................
Chapter 15: Content Management Application (CMA) A Content Management Application (CMA) running on an Axon media server or a computer connected through an Ethernet network gives you remote control of content, software and configuration management functions. Launching the CMA ................................................................................... 164 Installing the CMA on Your Computer ............................................................164 Launching the CMA on Axon.......................
Upgrading Software .................................................................................. 180 Verifying Software Versions ........................................................................ 180 Upgrading the CMA Software....................................................................... 180 Upgrading Server Software ......................................................................... 180 Viewing Server Configuration ..................................................................
Appendix A: DMX Protocol DL.3 and DL.2 Digital Lights and Axon Media Servers utilize the same DMX protocol except that DL.3 and DL.2 fixtures include channels for motion and camera control. This table describes the Standard, Dual and Single Protocol. DMX Protocol Table: Software Version 1.4 ................................................. 195 Appendix B: Custom User Content 257 There are several considerations to keep in mind when creating custom content to control with the DL.3 graphics engine software.
Chapter 1: Product Overview This chapter describes features and specifications for the Axon Media Server and the Content Management Application (CMA) software. Axon is a rack mounted unit housing the same media server found in the DL.3 and DL.2 Digital Light fixtures from High End Systems. The built-in 32-bit Graphics Engine software utilizes Windows XP Embedded and DirectX application programming interface to provide extensive image control of up to three 3-D graphic objects.
CHAPTER 1 Product Overview Graphics Engine • Simultaneous playback of three discrete media streams on separate 2D/3D objects • Image Optimizing Controls let you adjust both Black Level and Contrast for each cue and for each image • 30 Object parameters give you graphic controls for each individual media stream including: — A choice of multiple play modes and play speeds — The ability to define any segment of a video loop including Scrub capability — Multiple color mixing and visual effects that can be comb
CHAPTER 1 Product Overview Related Products and Optional Accessories The following table lists related products and accessories available for the Axon Media Server. For more information, contact your High End Systems dealer/distributor (see Contacting High End Systems® on page ii).
CHAPTER 1 Product Overview 4 Axon Media Server User Manual
Chapter 2: Setup and Configuration Hardware setup includes mounting, connecting to power and Ethernet and DMX linking. Software setup includes launching the Content Management Application (CMA) and setting configuration options. Hardware Setup The following steps make up the hardware setup for Axon and are described in this section 1. Unpack Axon Media Server 2. Install power cord cap if necessary for your location 3.
CHAPTER 2 Setup and Configuration Before sending anything to the factory, call your High End Systems dealer/distributor for a Return Material Authorization (RMA) number. The factory cannot accept any goods shipped without an RMA number. Replacing a Power Cord Cap Axon ships with an IEC power cord. Different locations (even within the same country) may require a different power cord cap to connect the server to a power outlet. Because of the variety of power cord caps used worldwide, High End Systems, Inc.
CHAPTER 2 Setup and Configuration Hardware Connections The Axon back panel provides ports for: • 5-pin DMX Data In and Data Out (see Setting up a Standard DMX Link on page 8 for more information) • Ethernet to connect to other Axon and DL.2 units and your computer running the Content Management Application (CMA) software on a fixture link (see Using an Ethernet Link on page 8). • Four USB ports for connecting peripheral hard drives, flash drives, keyboard or mouse.
CHAPTER 2 Setup and Configuration Linking Axon Setting up a Standard DMX Link You can link Axon to fixtures on a standard DMX512 link using XLR cabling. The number of fixtures on a link is determined by the combined number of channels required by all the fixtures. The DMX channel range is determined by the protocol mode you choose.
CHAPTER 2 Setup and Configuration Linking Configurations The following diagrams show configuration options for linking Axon media servers and DL.2 fixtures to each other via Ethernet. The laptop shown is optional since the CMA can be accessed directly on any Axon server on the link.
CHAPTER 2 Setup and Configuration Powering On the Axon Server WARNING: This equipment is designed for connection to a branch circuit having a maximum overload protection of 20 A. CAUTION: Do not power on the fixture until verifying that the line cord cap is suitable for the power source in your location. For more information, see Replacing a Power Cord Cap on page 6. To power on Axon, connect it to an appropriately-rated power source.
CHAPTER 2 Setup and Configuration Software Setup Software setup for Axon requires the following steps described in this section: 1. After powering on the Axon media server, launch the CMA software 2. Check the software version installed and upgrade if necessary. 3. Configure the Axon server DMX source, DMX protocol, and DMX Start Channel. The Axon Desktop Upon starting, the CMA monitor will display the Axon Desktop.
CHAPTER 2 Setup and Configuration Launching the Content Management Application (CMA) After starting up the Axon unit, press the Launch CMA button on the local desktop. The application automatically finds and identifies the Local Drives including any connected USB drives, as well as other Axon and DL.2 media servers connected to the same Ethernet network. For more information on CMA operation and using the CMA, see Chapter 16: Content Management Application (CMA) on page 189.
CHAPTER 2 Setup and Configuration Configuring Axon Before programming the Axon media server from a DMX512 console, you need to: • Identify the DMX Source for the fixture • Select the Protocol type to determine the DMX channel range this fixture will utilize • If you will be synchronizing output between fixtures, verify that each server has a unique Fixture Number to identify it on the Ethernet link.
CHAPTER 2 Setup and Configuration Select a DMX Source type by clicking on the down arrow of the Source field to select DMX412 or ArtNet. Select a DMX Protocol type by choosing Standard, Dual, or Single from the drop down list in the option field. The Protocol you select is based on how many DMX channels are required for your application.
Chapter 3: Live Video Input and Control The Axon media server can receive and control live video from an external source. Live Video Sources The Axon graphics engine can enhance and manipulate live video from a source connected via the S-Video or the SDI input port. After making the appropriate hardware connection, you will need to configure the Axon graphics engine to identify a video input source through the Content Management Application.
CHAPTER 3 Live Video Input and Control S-Video Axon media servers support multiple SVideo formats including: NTSC_M PAL_B PAL_H SECAM_B SECAM_K NTSC_MJ PAL_D PAL_I SECAM_D SECAM_K1 PAL_G PAL_M SECAM_G SECAM_L PAL_N SECAM_H SECAM_L1 You will need to configure the Axon graphics engine to identify a video input source through the Content Management Application. SDI The Axon media server can accept SDI In, manipulate it, and then output it via the VGA/DVI on the video card.
Chapter 4: DMX Programming Basics and Quick Start If you are new to DMX programing, this chapter will give you a brief overview on programming DL.3, DL.2, and Axon media servers followed by a example of using a Wholehog console to patch and display output from a media server. DMX Programming Overview DMX512 Links A lighting console typically utilizes a protocol called DMX512 to communicate with automated lighting fixtures and conventional dimmers.
CHAPTER 4 DMX Programming Basics and Quick Start Determining a DMX Start Channel The DMX Start Channel is the first channel of a device’s channel range on a DMX link. There are 512 available channels on each DMX universe divided among all the devices in a particular universe. A device must have a unique DMX Start Channel number in order to respond independently to controller commands. To determine each device’s DMX Start Channel, identify the footprint of every device on the universe.
CHAPTER 4 DMX Programming Basics and Quick Start Protocol Levels DL.3 and DL.
CHAPTER 4 DMX Programming Basics and Quick Start Axon Protocol Levels Chan # Obj 1 Obj 2 Obj 3 Description 1 Global Intensity 36 74 112 Opacity 2 Global Effect 1 37 75 113 3-D Object File 3 Global Effect 1 Modifier 1 38 76 114 Media Folder 4 Global Effect 1 Modifier 2 39 77 115 Media file 5 Global Effect 1 Modifier 3 40 78 116 6 Global Effect 2 41 79 117 7 Global Effect 2 Modifier 1 42 80 118 8 Global Effect 2 Modifier 2 43 81 119 9 Global Effect 2 Modifier
CHAPTER 4 DMX Programming Basics and Quick Start Lighting Console Tips Lighting consoles differ in many aspects and it is important to understand how your console operates with DL.3, DL.2 and Axon media servers. Fixture Libraries: Many sophisticated lighting consoles utilize pre-made fixture libraries. A fixture library consists of profiles for various types of lighting fixtures and devices. Each profile corresponds to the fixture’s DMX protocol and allows for ease of programming.
CHAPTER 4 DMX Programming Basics and Quick Start Wholehog III Programming Notes Play Speed You can adjust the Play Speed using the encoder wheel on the Beam parameter of the Graphic fixture type. Additionally you can press “enable” and select “Media Speed Default On” to revert to the default speed setting (DMX 128). Then if you touch the encoder again the previous play speed will be recalled. Mask Strobe A unique function of the Wholehog 3 library system allows the creation of a special encoder type.
CHAPTER 4 DMX Programming Basics and Quick Start Quick Start with a Wholehog Console After Setting up and Configuring your media server as outlined in Chapter 2, use the following steps to get to the point of displaying output. Step 1: In the Fixture Schedule or Add Fixtures window of Wholehog software, Add 1 motion, 1 global, and 3 graphic “fixtures” for each complete DL.2 unit, or 1 global, and 3 graphic “fixtures” for each complete Axon unit. Step 2: Assign user numbers for these items.
CHAPTER 4 DMX Programming Basics and Quick Start 24 Axon Media Server User Manual
Chapter 5: Tutorials Five simple lessons get you started programming DL.3, DL.2, and Axon media servers with a Wholehog 3 or other DMX console. A DL.3 or DL.2 fixture should be patched on your console as three to five fixture types. The MOTION fixture type controls the actual moving yoke, projector, and the onboard camera. The GLOBAL fixture type controls the global graphic engine functions such as intensity, keystone correction, viewpoint, etc.
CHAPTER 5 Tutorials Lesson 1: Cross Fading Between Graphic Objects 1. On your lighting console, set MOTION fixture Dimmer parameter (for DL.3 or DL.2 fixtures), the GLOBAL fixture Intensity parameter, and GRAPHIC OBJECT 1 fixture Opacity parameter to 100% (DMX value = 255). Define Graphic Object 1 2. Set the Media Folder Parameter for the GRAPHIC OBJECT 1 fixture to DMX value = 4. This selects preloaded media folder HES Atmospheric. 3. Set the Media File Parameter to DMX = 23.
CHAPTER 5 Tutorials Lesson 2 - Working with Multiple Graphic Objects In this lesson, you will combine 2 Graphic Objects and use Chromakey Effect options to create transparencies. You will be building off of cue 3 that was created in Lesson 1. 1. Be sure that the MOTION Dimmer parameter (for DL.2 fixtures), the GLOBAL Intensity parameter, and GRAPHIC OBJECT 1 and 2 Opacity parameters are all set to 100% (DMX = 255). Apply Transparency Effects 2.
CHAPTER 5 Tutorials Lesson 3 - Girt, the Fire Breathing Lizard In this lesson you will use Rotation, X, Y, and Z positioning, and scaling parameters to control the interaction of multiple Graphic Objects. Before you begin, clear any information out of your programmer. Also, release playback of cues used in Lessons 1 and 2. You may want to start a new cuelist for this exercise. If you are using a DL.
CHAPTER 5 Tutorials Define Graphic Object 3 The following steps create and position a puff of smoke. 13. Select the GRAPHIC OBJECT 3 and set the Opacity parameter to DMX = 255 (100%). 14. Set the Media Folder parameter to DMX = 4 (HES Atmospheric). 15. Set the Media File parameter to a DMX value of 17 (17-Dust_Explosion). 16. Set Effect Mode 1 parameter for GRAPHIC OBJECT 3 to DMX = 28 to select the Chromakey Coarse effect. This will make the black background transparent. 17.
CHAPTER 5 Tutorials Lesson 4: 3-D Objects, Rotation, Wobbulation, and Glow. In this lesson you will learn how to put your chosen content on a 3D object and add rotation, glow, and wobbulation. 1. Be sure that the MOTION Dimmer parameter (for DL.2 fixtures), the GLOBAL Intensity parameter, and GRAPHIC OBJECT 1 Opacity parameter are all set to 100% (DMX = 255). Define Graphic Object 1 2. With GRAPHIC OBJECT 1 selected, set the Media Folder parameter to DMX = 1 (HES Core). 3.
CHAPTER 5 Tutorials Adjust this effect with the Modifier parameters. 17. Set the Effect Mode 1 Modifier 1 parameter to DMX = 104 (41%) to adjust wave size. 18. Set the Effect Mode 1 Modifier 2 parameter to DMX = 86 (34%) to adjust wobbulation rate. 19. Set the Effect Mode 1 Modifier 3 parameter to DMX = 114 (45%) to adjust offset. NOTE: Modifier parameters make different adjustments depending on the effect you choose.
CHAPTER 5 Tutorials Lesson 5: Viewpoint This lesson demonstrates the global parameters including viewpoint, and global effects. 1. Be sure that the MOTION Dimmer parameter, (for DL.2 fixtures) the GLOBAL Intensity parameter, and GRAPHIC OBJECT 1 Opacity parameter are all set to 100% (DMX = 255). Define Graphic Object 1 2. With GRAPHIC OBJECT 1 selected, change the Media Folder parameter to feedback video (DMX = 8). 3. Change the Media File parameter to DMX = 7 (7-SD_Cloud010) 4.
CHAPTER 5 Tutorials Apply a Global Solarize Effect 16. Select your GLOBAL fixture and change the Effect Mode 1 parameter to DMX = 10 (solarize 2) and observe how the global effect changes all three of the graphic objects at one time 17. Record this look into your console. Adjust Global Viewpoint Mode 18. To select the Perspective View with Spherical Coordinates centered on Graphic Object 2, set the Global Viewpoint Mode parameter to sphr lyr 2 (DMX = 2). 19.
CHAPTER 5 Tutorials 34 Axon Media Server User Manual
Chapter 6: Graphics Engine Overview DL.3, DL.2, and Axon Media servers all use the same graphic engine software to control content selection, playback, and 3-D Object and Global manipulation. Protocol Options DL.3, DL.2 and Axon models all provide individual and composite graphical control for up to three 3-D Objects. You can control the “footprint” of the fixture on a DMX link by choosing to implement only the number of 3-D objects you need.
CHAPTER 6 Graphics Engine Overview Graphics Control Hierarchy There is a hierarchy to the DMX control parameters. In general, object control parameters render individual graphic images. Global control parameters act upon the composite image created by combining multiple objects. Motion parameters control the fixture movement and projection as well as live video feed from the internal camera. It is especially important to keep this in mind when applying graphical effects.
CHAPTER 6 Graphics Engine Overview Graphics Engine Function Flow A 3-D object with a texture is selected Graphic O bject 1 C ontent O bject 2 C ontent O bject 3 C ontent O pacity O pacity O pacity Playback Playback Visual M ode Visual M ode Visual M ode Effect 1 Effect 1 Effect 1 Effect 2 Effect 2 Effect 2 Playbac k Functions are applied to each object. G lobal Effect 1 G lobal Effect 2 M ask Global Functions are then applied to the composite-object image.
CHAPTER 6 Graphics Engine Overview Graphics Engine Functions Object Graphic Functions For an individual object, you can control: • The media file and 3-D object selection for the layer • Media playback including — What portion of the movie plays — Playback speed — Playback mode (direction and style of playback) • The object transparency (opacity) • Visual Effects including colormixing and geometric effects • Synchronization • Image Rotation, Scale and Position Global Functions Global controls are applied
Chapter 7: Graphic Functions: Defining Content Each Graphic Object’s content is composed of a 3-D object overlaid with a media file. This chapter outlines how to select an image’s object and media file components as well as define the video segment and its playback. Selecting Content How Content is Organized Every DL.3, DL.2 and Axon media server has a file system that holds the movies, images, and 3-D objects that make up the content that Windows OS the server uses.
CHAPTER 7 Graphic Functions: Defining Content Content Selection Parameters The following sections outline parameters you will use to create an image from content and define it’s playback. You will set the parameters described in this chapter for each individual Graphic Object you define. Note: The suggested default DMX values given for each parameter are recommended to build libraries that provide the easiest and most reliable content selection, rendering and output.
CHAPTER 7 Graphic Functions: Defining Content Media Folder This parameter defines a folder (directory) containing a collection of media files. The media files within the assigned folder can then be selected using the Media File parameter. DMX values for folders are assigned as follows: • DMX values = 1-39 are used or reserved for Stock Content • DMX values = 40-240 are reserved for User Content • DMX value = 255 is reserved for live video input.
CHAPTER 7 Graphic Functions: Defining Content DMX Value Media Folder Name Content Description 24 HES_Hi_Res Variety of high resolution video backgrounds 25 NASA_Images Space images from the Hubble telescope 26 Blue_Pony Assorted video loops 27 HES_Core_02 Mixed footage 28 V-Squared-Labs Club themed footage 29 Virtual-Life-Media Club themed footage and few stills 30 Daddy-Van-Productions Digital backgrounds 31 Wet-Digital Underwater footage 32 Idyll-Hands-Imagery Aerial footage
CHAPTER 7 Graphic Functions: Defining Content Defining a Media File Segment You can define any portion of a video media file to play using the In Frame and Out Frame parameters. By default, the In Frame is the beginning of the media file and the Out Frame is the end of the file. Media files can have different lengths. In Frame and Out Frame Parameters You can select any segment of a media file for playback by assigning an In Frame value as a start point and an Out Frame as an end point.
CHAPTER 7 Graphic Functions: Defining Content Defining Playback After selecting and defining a media file segment to display on a 3-D object, you can choose from several Playback Modes and assign a Playback Speed. Playback Mode A Playback Mode parameter for each 3-D image allows several playback options.
CHAPTER 7 Graphic Functions: Defining Content Playback Speed The Playback Speed parameter controls the speed of the selected media file’s Playback Mode. The Playback Speed for a media file is used whenever the Playback Mode Parameter’s DMX value is assigned to any Play Forward option. Default DMX Value: 128 = Playback at normal speed. A DMX value of 0 or 128 (50%) plays back media files at the original recorded speed.
CHAPTER 7 Graphic Functions: Defining Content 46 Axon Media Server User Manual
Chapter 8: Graphic Functions: Rotation, Position, Scale You can independently control each Graphic Object’s rotation direction and speed; along with it’s position and scale in x, y, and z axis directions. The parameters described in this chapter are set for each Graphic Object you define. Parameters for composite image rotation, position and global scale are described in Chapter 11: Global Functions.
CHAPTER 8 Graphic Functions: Rotation, Position, Scale The Rotation parameters’ suggested default values are the midpoint of the 16-bit DMX value range, which is equal to no rotation. Increasing the DMX value from the midpoint indexes the object in a clockwise direction. Reducing the DMX value below the midpoint indexes the object in a counterclockwise direction. When the DMX value for a rotation parameter is greater than the 720° limit in either direction, the object begins rotating continuously.
CHAPTER 8 Graphic Functions: Rotation, Position, Scale Rotation Parameters X Rotation The X Rotation parameter rotates the selected Graphic Object around the x axis with 16-bit precision. You can index the rotation or set a continuous rotation creating a vertical flip at variable speeds. This parameter lets you view an object from a different angle by turning the object.
CHAPTER 8 Graphic Functions: Rotation, Position, Scale Y Rotation The Y Rotation parameter rotates or indexes the selected Graphic Object around the Y axis with 16-bit precision. You can index the rotation or set a continuous rotation creating a horizontal flip at variable speeds. This parameter lets you view an object from a different angle by turning the object.
CHAPTER 8 Graphic Functions: Rotation, Position, Scale Z Rotation The Z Rotation parameter rotates or indexes the selected Graphic Object around the Z axis with 16-bit precision. You can index the rotation or set a continuous rotation creating a circular spin at variable speeds.
CHAPTER 8 Graphic Functions: Rotation, Position, Scale Scaling the Object You can scale an Graphic Object along the X, Y and/or Z axis to adjust the object size. The Scale parameter adjusts the size of the object’s image up to approximately 10x its original size. At a DMX value of zero, the image shrinks to a dot. At the midpoint of the DMX value range, the image is normal size. When the DMX value is increased from the midpoint, the image is enlarged.
CHAPTER 8 Graphic Functions: Rotation, Position, Scale Y Scale The Y Scale parameter scales the selected 3-D object along the y axis, either expanding it or making it smaller. Use it when you want to size the object’s vertical component. A DMX value of 128 (50%) sets the object at its normal size. Values less than 50% shrink the object vertically to the smallest at 0. Values greater then 50% enlarge the object vertically to the largest at 255 (100%).
CHAPTER 8 Graphic Functions: Rotation, Position, Scale Z Scale The Z Scale parameter scales the selected 3-D object along the z axis, either expanding or shrinking it. Use it when you want to size the object’s thickness. A DMX value of 128 (50%) sets the object at its normal size. Values less than 50% shrink the the object thickness until it reaches a point at a value of 0. Values greater then 50% enlarge the object to a maximum thickness at 255 (100%).
CHAPTER 8 Graphic Functions: Rotation, Position, Scale Changing Object Position You can reposition each 3-D object’s position in 3-D space by moving it along the X, Y and Z axes. The following parameters act on an individual object. Use these parameters to position 3-D images in relation to each other. X Position The X Position parameter moves your object along the x axis with 16-bit precision. The midpoint of the 16-bit DMX value range centers the image on the X-axis.
CHAPTER 8 Graphic Functions: Rotation, Position, Scale Y Position The Y Position parameter moves your object along the y axis with 16-bit precision. The midpoint of the 16-bit DMX value range, centers the image on the Y-axis. Values below the DMX midpoint move the object down, and values above the DMX midpoint move the object up.
CHAPTER 8 Graphic Functions: Rotation, Position, Scale Z Position The Z Position parameter moves your object along the z axis with 16-bit precision. The midpoint of the 16-bit DMX value range centers the object on the z-axis. Values below the DMX midpoint move the object away from the viewer and appears to become smaller, and object above the DMX midpoint move the object toward the viewer and appears to become larger.
CHAPTER 8 Graphic Functions: Rotation, Position, Scale 58 Axon Media Server User Manual
Chapter 9: Graphic Functions: Opacity and Effects You can adjust opacity and apply a variety of color mixing and geometric effects to each individual Graphic Object. The parameters described in this chapter are set for each Graphic Object you define. Parameters for composite image intensity and effects are described in Chapter 11: Global Functions on page 87.
CHAPTER 9 Graphic Functions: Opacity and Effects Visual Mode Visual Mode options are defined using three parameters. The Visual Mode parameter has options for enhancing and adjusting the black level and contrast of a 3-D object. Once you choose a visual mode, two Modifier parameters adjust the selected mode. Note: In most cases, you won’t see a change in the content until you adjust the Modifier parameters for that mode.
CHAPTER 9 Graphic Functions: Opacity and Effects Visual Mode Option Adjustments DMX Value Name Description Modifier 1 Modifier 2 12 Texture Mixing Crossfades between the current image and another graphic object texture.
CHAPTER 9 Graphic Functions: Opacity and Effects Visual Mode Options Color to B/W Visual Mode Parameter DMX value = 7 Begins with a white screen and fades to the original image in black and white. All color is converted. Modifier 1: Transitions the image from full white at a DMX value of 0 to black and white at a value of 128 (50%). Increasing values above 50% reveals more of the image in black and white to complete at a value of 255 (100%).
CHAPTER 9 Graphic Functions: Opacity and Effects Chroma Shift Visual Mode Parameter DMX value = 21 Shifts the red, blue, and green component colors in an image. You can offset color components vertically and or horizontally. Modifier 1: The default DMX value of 128 (50%) = no adjustment. Values below the midpoint shift the color components right to a maximum at a value of 0. Values above the midpoint shift the color components left to a maximum at a value of 255 (100%).
CHAPTER 9 Graphic Functions: Opacity and Effects Drop Shadow Visual Mode Parameter DMX value = 19 You can create a drop shadow behind the media file texture on a 3D object, and vary it’s size horizontally and vertically. This option creates a black plane behind the selected media file texture on a flat rectangular object that can be positioned to form a drop shadow effect.
CHAPTER 9 Graphic Functions: Opacity and Effects Exposure Control Visual Mode Parameter DMX value = 10 Exposure Control adjusts the image Black level and Contrast to optimize the projected image for your performance environment. You can use it to easily modify the black level and contrast for a specific application. Exposure Control provides finer Contrast and Black level control than the Content Optimization option which pushes colors to saturation more quickly.
CHAPTER 9 Graphic Functions: Opacity and Effects Faux LED Visual Mode parameter DMX value = 16 This options divides the image into a grid of circles to mimic an LED wall. The color of the center pixel in each cell defines the solid color for that circle. You can control the number and spacing of LEDs, choose between a black and white grid and adjust color peaking. Modifier 1: Controls the number of LEDs. The default DMX value of 0 = a 10 x 10 grid of tiles.
CHAPTER 9 Graphic Functions: Opacity and Effects Faux Tile Visual Mode parameter DMX value = 17 This options creates divides the image into a grid of tiles with simulated lighting at the edges. The color of the center pixel in each cell defines the solid color for that tile. You can the number and spacing of tile, choose between a black and white grid and adjust color peaking. Modifier 1: Controls the number of tile. The default DMX value of 0 = a 10 x 10 grid of tiles.
CHAPTER 9 Graphic Functions: Opacity and Effects Film Roll Visual Mode parameter DMX value = 14 This option scrolls the media file texture horizontally or vertically independent from the 3-D object it overlays, and allows you to control the scrolling speed. Modifier 1: The default DMX value of 128 (50%) = no adjustment. Values below the midpoint scroll left, increasing in speed as you approach 0. Values above the midpoint scroll right, increasing in speed to 255 (100%).
CHAPTER 9 Graphic Functions: Opacity and Effects Fuzzifier Visual Mode parameter DMX value = 18 This option blurs the media file texture horizontally or vertically independent from the 3-D object it overlays, and allows you to control the scrolling speed and image scaling. Modifier 1: The default DMX value of 0 = no adjustment. Increasing DMX values blur the image horizontally to a maximum at a DMX value of 255 (100%). Modifier 2: The default DMX value of 0 = no adjustment.
CHAPTER 9 Graphic Functions: Opacity and Effects Gray maker 1 Visual Mode Parameter DMX value = 4 This effect gradually transitions the color image to a grayscale image. Use the Gray Maker effect when you want to add an undertone of grey to the colors in an image. NOTE: If content is already grayscale, there is no effect applied but Modifier 2 can still effect image contrast. Modifier 1: At a DMX value of 0, the image will be full color.
CHAPTER 9 Graphic Functions: Opacity and Effects Gray maker 2 Visual Mode Parameter DMX value = 5 This option converts a color image to grayscale and then lets you adjust black level and contrast. NOTE: If content is already grayscale, there is no effect applied but Modifier 2 can still affect image contrast.
CHAPTER 9 Graphic Functions: Opacity and Effects Invert Black and White, Keep Color Visual Mode Parameter DMX value = 11 This option allows you to invert the black and white components of an image while leaving other colors unaffected. You can vary the threshold for the “black” in a pixel required for inversion. Modifier 1: Adjusts the comparison level of black for inversion from a DMX value of 0= inverting only absolute black to 255 (100%) = converting more of the image from black to white.
CHAPTER 9 Graphic Functions: Opacity and Effects Negative Art Visual Mode Parameter DMX value = 9 This option provides a negative of the image and then lets you adjust the amount of color and the red and green color components. Modifier 1: Adjusts the color level from full at a DMX value of 0 to the lowest level at a DMX value of 255. Modifier 2: You must set a DMX value of 128 to see no black level adjustment. Red is subtracted from the image at DMX values of 128 to 0.
CHAPTER 9 Graphic Functions: Opacity and Effects Pan and Scan Visual Mode parameter DMX value = 255 This option Zooms into a still image and then, by changing position, you can pan across the image horizontally and vertically. It only functions on image sizes greater than 1024 x 1024 in at least one direction. Modifier 1: Adjusts the horizontal pan position from 0=left edge to 255 (100%) = right edge of the image. The default DMX value of 128 (50%) = no adjustment.
CHAPTER 9 Graphic Functions: Opacity and Effects Pixelate Visual Mode parameter DMX value = 15 This options divides the image into rectangles using the center pixel color of each as it’s color. You can control the number of divisions. Modifier 1: Controls the number of divisions from the fewest number of cells as Since each division is a single color, fewer, larger boxes result in reduced color variation.
CHAPTER 9 Graphic Functions: Opacity and Effects Posterizer Visual Mode Parameter DMX value = 6 This effect uses the associated Modifier 1 parameter to posterize by replacing each color in an image with the highest values of that color but expanding it only to the border of that color. There is no bleeding or blending of colors. Note: In this visual mode, you won’t see a change in the image until you adjust the Modifier 1 parameter Modifier 1: Adjusts color polarization level.
CHAPTER 9 Graphic Functions: Opacity and Effects Push to Red Visual Mode Parameter DMX value = 3 This option reduces colors in the selected image to all Red values Modifier 1: Fades from original color at a DMX value = 0 to a range of red tones at a value of 255 (100%) Modifier 2: Adjusts color saturation from no adjustment at a DMX value = 0 to full saturation at a value of 255 (100%) Original Content Visual Mode Parameter DMX value = 3 Visual Mode Parameter DMX value = 3 Visual Mode Modifier2 DMX value
CHAPTER 9 Graphic Functions: Opacity and Effects Push to Sepia Visual Mode Parameter DMX value = 2 This option converts all color in the image to sepia tones.
CHAPTER 9 Graphic Functions: Opacity and Effects ShakeNBake Visual Mode Parameter DMX value = 22 This option randomly vibrates the image. You can control the horizontal and vertical frequency. Modifier 1: Adjusts random horizontal “shake” frequency from 0= no adjustment to 255 (100%) = maximum. Modifier 2: Adjusts random vertical “shake” frequency from 0= no adjustment to 255 (100%) = maximum.
CHAPTER 9 Graphic Functions: Opacity and Effects Effect 1 Mode and Effect 2 Mode Two Effect Mode parameters are available for each individual 3-D object, each with three Modifier parameters. Both Effect parameters have an identical list of color and visual effect options. This lets you apply a dual-effect combination to the selected 3-D object. Note: Not all modes combine effectively. For example, you cannot glow a wobbulating object very well.
CHAPTER 9 Graphic Functions: Opacity and Effects Effect Mode DMX Value Name/Definition 17 RGB, Invert 18 RGB, Invert and Swap to GBR 19 RGB, Invert and Swap to BRG 20 Adjustments Modifier 1 Modifier 2 Modifier 3 Red to Cyan Green to Magenta Blue to Yellow Red to Magenta Green to Yellow Blue to Cyan Red to Yellow Green to Cyan Blue to Magenta Edge Detect Color Horizontal search size Vertical search size Comparison threshold 21 Edge Detect B/W Horizontal search size Vertical searc
CHAPTER 9 Graphic Functions: Opacity and Effects Effect Mode DMX Value 82 Name/Definition Adjustments Modifier 1 Modifier 2 Modifier 3 40 Horizontal Mirror creates a mirror effect Defines mirror center Not Used Not Used 41 RGB swap to BGR Red to Blue Green Blue to Red 42 RGB swap to RBG Red Green to Blue Blue to Green 43 RGB swap to GRB Red to Green Green to Red Blue 44 Colorize Gray Scale maps pixel intensity to color Selects Color Scheme Selects zero intensity point Control
CHAPTER 9 Graphic Functions: Opacity and Effects Effect Mode DMX Value Name/Definition Adjustments Modifier 1 Modifier 2 Modifier 3 59 Zoom Blur Zooms into a position on the image with a mult-image blurring effect 60 Chroma Shift Shifts the red, blue, and green component colors Horizontal shift Vertical shift Scale 61 ShakeNBake Introduces a random vibration effect Horizontal shake Vertical shake Scale 62 Slats, Vertical renders the image in offset vertical slats Number of Slats Vertic
CHAPTER 9 Graphic Functions: Opacity and Effects 84 Axon Media Server User Manual
Chapter 10: Graphic Functions: Synchronizing Content After designating a master fixture, you can synchronize the content of other Axon or DL.3 fixtures to any Object on the master in terms of playback time, rotation or both. Synchronization Overview Any DL.3 Axon or DL.2 media server can synchronize playback between graphic objects projected from different servers linked to the same Ethernet network. Synchronization is not “Slaving”.
CHAPTER 10 Graphic Functions: Synchronizing Content Synchronization Parameters Sync To You use the Sync To parameter to identify the Media Server you want a Graphic Object output to Synchronize with. You can synchronize any graphic object output on one server to any other graphic object output on another server. You can only synchronize output to one media server. However, you can synchronize outputs from multiple media servers to the same server.
Chapter 11: Global Functions Global Graphic controls affect the composite image created by defining two or three separate object graphics. You can adjust intensity, define masks, select a point in space to view the composite image, and control keystone correction. Global Intensity The Global Intensity parameter creates a smooth fade to video black that doesn’t affect the opacity relationship between individual objects.
CHAPTER 11 Global Functions Global Effect Mode 1 and Effect Mode 2 There are two Global Effect Mode parameters, each with three modifier parameters. Both Effect Mode parameters have an identical list of color and visual effect options. This lets you apply a dual-effect combination to the composite image. The table below describes the interaction between an Effect Mode parameter and the three associated Modifier parameters for each option.
CHAPTER 11 Global Functions Adjustments Effect Mode DMX Value Name/Description Modifier 1 Modifier 2 Modifier 3 20 Edge Detect Color Horizontal search size Vertical search size Comparison threshold 21 Edge Detect B/W Horizontal search size Vertical search size Comparison threshold 22 Texture Ripple, Horizontal Amplitude Frequency Phase 23 Texture Ripple, Vertical Amplitude Frequency Phase 24 Texture Ripple, Circular Amplitude Frequency Phase and Direction 25 Texture Ripple,
CHAPTER 11 Global Functions Adjustments Effect Mode DMX Value Name/Description Modifier 1 Modifier 2 Modifier 3 Selects zero intensity point Controls fading 44 Colorize Gray Scale maps pixel intensity to color Selects Color Scheme 45 Intensity key turns pixels of selected intensity transparent Selects Color Defines Intensity Controls Scheme bandwidth Transparency 46 Raindrop simulates raindrops falling on a liquid surface Controls size/ Seeds random # speed generator 47 RGB, Scale varies
CHAPTER 11 Global Functions Adjustments Effect Mode DMX Value Name/Description Modifier 1 Modifier 2 Modifier 3 Scales the Effect 81 Gaussian Blur Sample Distance Number of Filter Passes 82 Sharpen enhances image detail Sample Distance Number of Filter Scales the Passes Sharpen Effect 128 Mask Color applies color to mask parameter selection Red Green Blue 129 Edge Fade Color applies color to Edge Fade Parameter selection Red Green Blue 130 Mask Color and Edge Fade Color applies the
CHAPTER 11 Global Functions Global Control The Global Control parameter allows access to different global control modes. How you set the Global control parameter determines the functionality of the Global Control Modifier parameter. Setting this parameter to a DMX value of 255 brings up On-screen programming statistics. In this case, the Global Control Modifier parameter controls the text color.
CHAPTER 11 Global Functions Using this example, the following table illustrates the results for Four-in-One control values selected in the Global Control Modifier parameter: DMX Value 31 32 33 4-in-1 Display Graphic Object 1 Texture + Visual Effect Graphic Object 2 Texture + Effect 1 Graphic Object 3 Texture + Visual Effect Final Composite Image Graphic Object 1 Texture + Visual Effect + Effect 2 Graphic Object 2 Texture + Effect 1 + Effect 2 Graphic Object 3 Texture + Visual Effect + Effect 1 Fi
CHAPTER 11 Global Functions Masking Control Mask Shape Select and Strobing The Mask Select parameter lets you choose a mask to frame or overlay a composite image. You can choose to apply a mask to an image when you don't want an entire image to be seen or you want to transition from an image to black or a solid color without fading intensity. Mask Shapes The graphics engine currently provides 30 mask shapes including circular, rectangular, and oval masks that close from inside out or outside in.
CHAPTER 11 Global Functions Mask Size The Mask Size parameter defines mask size for all mask shapes. Default DMX Value: 255 (100%) = no masking effect When this parameter is set at a value of 255 (100%), the mask is sized to leave the image 100% visible. When Mask Size is set at 0, the mask totally covers the composite image. Tip: Crossfading the Mask Size parameter can create unique fades to and from video black.
CHAPTER 11 Global Functions Mask Edge Fade The Mask Edge Fade parameter diffuses the edge of your chosen mask. Default DMX Value: 0 = no edge fade applied to mask Adjust the amount of edge fade from 1 = no edge fade to 255 = maximum edge fade. When a Mask Select parameter value of Note: A Global Effect Mode parameter option lets you define a Mask Edge Fade color on page 127.
CHAPTER 11 Global Functions Image Edge Fade Four Image Edge Fade parameters let you control the Edge Fade for individual sides of your object (top, bottom, left and right). When projecting abutting images, adjusting the Edge Fade parameter lets you smooth the line between two images and also allows you to change an object’s boundary. Default DMX Value: 0 = all edges are sharp and hard. Adjust each side separately for edge fade from 0 = no fade to 255 (100%) = opaque.
CHAPTER 11 Global Functions Keystone Correction Parameters When you output an image from a Top Left X Top Right X projector at an angle, the image may appear skewed. Eight Keystone Top Left Y Right Y Bottom Left Y Right Y parameters adjust the image shape and compensate for this effect. You Top can control each of the four corners of the graphics output to reshape your image to a form that projects correctly. Bottom Default DMX Value: 0 = no keystone correction has been applied.
CHAPTER 11 Global Functions X Ratio The X Ratio Parameter shapes the output to adjust for keystone effects created in certain output situations. This parameter adjusts the output by compressing or expanding the image horizontally. Default DMX Value: 128 (50%) = no adjustment DMX value settings below the midpoint of the range compress the image horizontally from maximum compression at a value of 0 to no compression at a value of 128.
CHAPTER 11 Global Functions Global Viewpoint Mode The Global Viewpoint Mode parameter defines a 3-D space and the Viewpoint Position parameters modify your viewing location with the defined 3-D space. Each Viewpoint Mode uses three values to specify a viewpoint in space. This point in space is specified by the horizontal angle, vertical angle, and zoom.
CHAPTER 11 Global Functions Viewpoint Position X The Viewpoint Position X parameter determines the x component of the viewpoint position to the target you have specified in the Viewpoint Mode parameter. The horizontal angle is the angle around the vertical (y) axis. Heading is another name for this angle. Default DMX Value: 32768 = center DMX values above center of the range move counterclockwise to the maximum horizontal angle at a value of 65535 (100%).
CHAPTER 11 Global Functions 102 Axon Media Server User Manual
Chapter 12: Global Functions: Collage Generator™ Effect Using the Collage™ Generator effect option lets you configure multiple media server outputs to display a single image in arrays up to 8 x 8. Collage Generator™ technology allows you to create virtually seamless panoramic media projections controlled from your DMX console. You can display either stock or custom content. You can create a Collage™ effect using DL.3, DL.2 fixtures or Axon media servers outputting to DL.
CHAPTER 12 Global Functions: Collage Generator™ Effect Panorama Collage™ Configurations You can create Collage arrays in any configuration up to 8 x 8 cells. The native aspect ratio of one DL.3, DL.2 or Axon media server output is 4:3. Some of the arrays configured in conjunction with the collage generator will output a different overall aspect ratio. Computing Collage Specifications The formula to determine the correct size for your collage footage is fairly simple.
CHAPTER 12 Global Functions: Collage Generator™ Effect The following tables shows configuration specifications for selected Collage options. Array describes the number of outputs positioned horizontally by the number of outputs positioned vertically, each displaying their portion of the content. The second set of numbers is the aspect ratio for the overall panorama configuration. Image Resolution is represented as width and height in pixels. The number of DL.3 or DL.2 Units required is also noted.
CHAPTER 12 Global Functions: Collage Generator™ Effect Horizontal Panorama Collage Specifications Array Configuration 106 Array (W x H) Maximum Recommended Image Resolution (W x H) DL.3 or DL.
CHAPTER 12 Global Functions: Collage Generator™ Effect Array Configuration Array (W x H) Maximum Recommended Image Resolution (W x H) DL.3 or DL.
CHAPTER 12 Global Functions: Collage Generator™ Effect Vertical Panoramas Collage Specifications Array Configuration 108 Array (W x H) Maximum Recommended Image Resolution (W x H) DL.3 or DL.
CHAPTER 12 Global Functions: Collage Generator™ Effect Array Configuration Array (W x H) Maximum Recommended Image Resolution (W x H) DL.3 or DL.
CHAPTER 12 Global Functions: Collage Generator™ Effect Array Configuration Array (W x H) Maximum Recommended Image Resolution (W x H) DL.3 or DL.2 Units 5x8 832 W x 866 H 40 6x7 976 W x 795 H 42 6x8 912 W x 844 H 48 7x8 976 W x 976 H 56 NOTE: You can find other configurations and more information on sizing and compressing media to use with the Collage Generator at the High End Systems website (www.highend.com/digital_lighting/support).
CHAPTER 12 Global Functions: Collage Generator™ Effect Configuring the Collage Generator There are two Collage Generator options in either Global Effect Mode parameter. The original Collage Generator option (selected with a Global Effect DMX value = 134), should only be used with legacy shows. The Enhanced Collage Generator provides cleaner images and better edge blending. The Enhanced Collage Generator option eliminates heavy aliasing of objects and fuzzy images on larger grids.
CHAPTER 12 Global Functions: Collage Generator™ Effect The Modifier 2 channel selects which cell of the grid a particular DL.3 or DL.2 fixture will display. DMX values 0 up to 63 are used to step through grid pattern you selected with the Modifier 1 channel. As you dial through Modifier 2 you will see each cell in the grid highlight in a as it is selected. DMX values of 64-255 default to the upper left corner of the grid.
CHAPTER 12 Global Functions: Collage Generator™ Effect Collage Setup Example Here’s a typical scenario for setting up a 2 x 2 central panorama collage effect. NOTE: If you are going to be mapping your collage to a sphere, you will need to roughly adjust the output before you set up the collage, (see Spherical Mapping Setup Guide on page 114). Setup the collage effect: 1. Select the same content on four media servers.
CHAPTER 12 Global Functions: Collage Generator™ Effect Execute the panorama collage: 1. Create a setup cue that identifies the content media file and folder, sets the Play Mode parameter to Pause and Rewind to In Frame (DMX = 5) and the Opacity to 0 for the same graphic object on all units you are configuring for the panorama. 2.
CHAPTER 12 Global Functions: Collage Generator™ Effect Select a Global Effect and two Graphic Effects to control Spherical Mapping: 1. Set Global Effect 1 or Global Effect 2 channel to a DMX value = 142 to select the Spherical Mapping option. Set the three associated Global Effect Modifiers to their default values (Modifier 1=0, Modifier 2=0, Modifier 3 = 128). 2. Select the Spherical Mapping Control 1 option (DMX = 253) in any available Graphic Effect Mode channel.
CHAPTER 12 Global Functions: Collage Generator™ Effect 11. Use Modifier 3 to adjust the vertical size of the output, stretching and compressing it to adjust for the size of the sphere, keeping the vertical size of the grid filling the output without clipping the image. Correct for the flat to round surface distortions 12. On the Graphic Effect Mode channel set to Spherical Control 2 (DMX = 254), use the associated Modifier 3 to compress the grid edges adjusting the bend in horizontal grid lines.
CHAPTER 12 Global Functions: Collage Generator™ Effect Creating Custom Content for the Collage Generator Effect There are two main steps to process HD footage into DL.3, DL.2 and Axon compliant media for use with the collage generator. First, acquire or commission High-resolution media footage or stills. In most cases, scaling and cropping of the media is a simple process.
CHAPTER 12 Global Functions: Collage Generator™ Effect 118 Axon Media Server User Manual
Chapter 13: Effect Mode Options Descriptions Effects can be applied to the Media File content (texture) mapped onto a 3-D object. Multiple Color and Geometric options are available in Effect Mode parameters for both individual Graphic object and Global control. Most of the effect options you will find described in this chapter are available for Effects 1 and Effect 2 parameters at both the graphic control level for each Graphic Object as well as the Global control level for the composite image.
CHAPTER 13 Effect Mode Options Descriptions Effect Mode Color Options All or Nothing Object Effect Global Effect Effect Mode parameter DMX value = 15 This option reduces all color values to full saturation or no color based on comparison to a set threshold. This effect creates an image with fully saturated color. Modifier 1: Compares the red component of a pixel to the threshold value and converts it to full color if it is greater than the threshold and to black if it is below the threshold.
CHAPTER 13 Effect Mode Options Descriptions Chromakey Object Effect Global Effect A chromakey removes a color (or small color range) from one graphic image to reveal another “behind” it. The removed color becomes transparent. Modifier parameters define the color you want to select as the chromakey in terms of Red, Green and Blue values Chromakey Coarse Effect Mode parameter DMX value = 28 The Chromakey Coarse parameter selects a color range ±40% either side of the defined value.
CHAPTER 13 Effect Mode Options Descriptions Chromakey, Inverse Object Effect Global Effect A chromakey removes a color (or small color range) from one graphic image to reveal another “behind” it. The removed color becomes transparent. The modifier parameters define the color you want to select as the chromakey in terms of Red, Green and Blue values. The Inverse Chromakey Coarse parameter selects a color range either side of the defined value and then sets every other color as chromakeyed.
CHAPTER 13 Effect Mode Options Descriptions CMY Object Effect Global Effect Effect Mode parameter DMX value = 1 This parameter simulates CMY color by inverting RGB color components. Use this parameter when you want to color mix with a CMY color model instead of RGB color model. Modifier 1: Increases cyan color component from 0 = no adjustment to 255 (100%) = maximum cyan saturation. Modifier 2: Increases magenta color component from 0 = no adjustment to 255 (100%) = maximum magenta saturation.
CHAPTER 13 Effect Mode Options Descriptions Color Cycle Object Effect Global Effect Effect Mode parameter DMX value = 14 The image’s color components cycle through RGB, black, and white. When no Red Green or Blue is added, image fades from full white, to normal image, to black. When RGB/CMY is added the image fades from the RGB value, to the image with color added. Modifier 1: Increases red color component from 0 = no adjustment to 255 (100%) = maximum red saturation.
CHAPTER 13 Effect Mode Options Descriptions Color to Alpha Object Effect Global Effect Effect Mode parameter DMX value = 49 This parameter varies the transparency level of an image’s component color values. Modifier 1: Increases the red component opacity or intensity from 0 = no adjustment to 255 (100%) = full red opacity (intensity). Modifier 2: Increases the green component opacity or intensity from 0 = no adjustment to 255 (100%) = full green opacity (intensity).
CHAPTER 13 Effect Mode Options Descriptions Glow Object Effect Global Effect Effect Mode parameter DMX value = 73 Glow colorizes and creates a glow on the 3-D object separate from the media texture on it. You can apply this option to any 3-D object no matter which media file texture is applied to it. This parameter provides an option to view a 3-D object without displaying the associated texture. Modifier 1: Increases red color component from 0 = no adjustment to 255 (100%) = maximum red saturation.
CHAPTER 13 Effect Mode Options Descriptions Mask Color Object Effect Global Effect Effect Mode parameter DMX value = 128 This option applies color to a selected mask shape Modifier 1: Increases red color component from 0 = no adjustment to 255 (100%) = maximum red saturation. Modifier 2: Increases blue color component from 0 = no adjustment to 255 (100%) = maximum blue saturation. Modifier 3: Increases green color component from 0 = no adjustment to 255 (100%) = maximum green saturation.
CHAPTER 13 Effect Mode Options Descriptions RGB Add2, All Pixels Object Effect Global Effect Effect Mode parameter DMX value = 5 This option adds color to all pixels including black using the RGB color model. Modifier 1: Increases red color component from 0 = no adjustment to 255 (100%) = maximum red saturation. Modifier 2: Increases blue color component from 0 = no adjustment to 255 (100%)= maximum blue saturation.
CHAPTER 13 Effect Mode Options Descriptions RGB Invert and Swap to BRG Object Effect Global Effect Effect Mode parameter DMX value = 19 This option swaps the color values from RGB to an inverted BRG color model.
CHAPTER 13 Effect Mode Options Descriptions RGB Swap to BGR Object Effect Global Effect Effect Mode parameter DMX value = 41 This option allows you to swap colors. All red values become green and all blue values become red. Green values are unaffected.
CHAPTER 13 Effect Mode Options Descriptions RGB Swap to GRB Object Effect Global Effect Effect Mode parameter DMX value = 43 This option allows you to swap colors. All red values become green and all green values become blue. Blue values are unaffected.
CHAPTER 13 Effect Mode Options Descriptions Solarize Object Effect Global Effect Solarize 1 Effect Mode parameter DMX value = 9 Solarize 2 Effect Mode parameter DMX value = 10 Solarize 3 Effect Mode parameter DMX value = 11 Solarize 4 Effect Mode parameter DMX value = 12 Each of the Solarize options remaps colors to a narrow value range and inverts the color below a set threshold using different algorithms. Solarize options can create strong highlights.
CHAPTER 13 Effect Mode Options Descriptions Geometric Effect Options Cartoon Edge Object Effect Global Effect Effect Mode parameter DMX value = 38 Outlines the edges of image components to create a cartoon effect. Modifier 1: Adjusts Color reduction from 0= no adjustment to 255 (100%) = maximum. Modifier 2: Adjusts contrast enhancement from 0= no adjustment to 255 (100%) = maximum. Modifier 3: Adjusts edge detection sensitivity from 0= no adjustment to 255 (100%) = maximum adjustment.
CHAPTER 13 Effect Mode Options Descriptions Chroma Shift Object Effect Global Effect Visual Mode parameter DMX value = 21 This option shifts the red, blue, and green component colors in an image. You can offset color components vertically and or horizontally. Modifier 1: The default DMX value of 128 (50%) = no adjustment. Values below the midpoint shift the color components right to a maximum at a value of 0.
CHAPTER 13 Effect Mode Options Descriptions Use these adjustments in conjunction with Keystone parameters and Ratio parameters to refine the output shape on any of these surfaces.
CHAPTER 13 Effect Mode Options Descriptions Downward Vertical Streaks Object Effect Global Effect Effect Mode parameter DMX value = 80 This option lets you convert a portion of the image into vertical streaks. You can also rotate the angle of the streak and fade from the original image to the image with the streak option applied. Modifier 1: At a DMX value of 0, there is no effect.
CHAPTER 13 Effect Mode Options Descriptions Drop Shadow Object Effect Global Effect Effect Mode parameter DMX value = 58 This option creates a black plane behind the selected media file texture on a flat rectangular object. You can bring the plane from behind positioning it to form a drop shadow. You won’t see the shadow until you select a Modifier 1 or 2 DMX value above or below 128 (50%). Modifier 1: The default DMX value of 128 (50%) = no adjustment.
CHAPTER 13 Effect Mode Options Descriptions Edge Detect Color Object Effect Global Effect Effect Mode parameter DMX value = 20 This option displays only the edges of image components with their color values. Modifier 1: Adjusts horizontal edge search size from 0= no adjustment to 255 (100%) = maximum adjustment. Modifier 2: Adjusts vertical edge search size from 0= no adjustment to 255 (100%) = maximum adjustment.
CHAPTER 13 Effect Mode Options Descriptions Faux Tile Object Effect Global Effect Effect Mode parameter DMX value = 56 This options creates divides the image into a grid of tiles with simulated lighting at the edges. The color of the center pixel in each cell defines the solid color for that tile. You can control the number and spacing of tile, choose between a black and white grid and adjust color peaking. Modifier 1: Controls the tile size.
CHAPTER 13 Effect Mode Options Descriptions Framing Object Effect Global Effect Effect Mode parameter DMX value = 133 This option contains three modes that modify the appearance or the operation of the Global Image Edge Fade parameters to frame the global composite image. Modifier 2 and Modifier 3 adjustments vary depending which of the framing modes is selected with Modifier 1. NOTE: If the Global Image Edge Fade DMX values are set to Zero, the Framing output will be unseen in modes 0 and 1.
CHAPTER 13 Effect Mode Options Descriptions Modifier 1: This parameter allows you to select from three framing modes. DMX Value Action Frames the image using an Internal Frame profile to control the Global Fade Edge parameter appearance. Frames the image using an Internal Frame profile to control the Global Fade Edge parameter appearance.
CHAPTER 13 Effect Mode Options Descriptions Fuzzifier Object Effect Global Effect Effect Mode parameter DMX value = 57 This option offsets multiple images of the media file texture to blur the image, and lets you to control image scaling at the same time. Modifier 1: The default DMX value of 0 = no adjustment. Increasing DMX values blur the image horizontally to a maximum at a DMX value of 255 (100%). Modifier 2: The default DMX value of 0 = no adjustment.
CHAPTER 13 Effect Mode Options Descriptions Horizontal Mirror Object Effect Global Effect Effect Mode parameter DMX value = 40 This option duplicates the image vertically and mirrors the image alongside it’s original. Modifier 1: The default DMX value of 128 (50%) sets the center point of the edge where the duplicate images meet at the center of the screen. Values below the midpoint move the center point toward the left as you approach 0.
CHAPTER 13 Effect Mode Options Descriptions Magnifying Lens Object Effect Global Effect Effect Mode parameter DMX value = 36 This option applies spherical overlay that magnifies a portion of the texture to create a virtual convex lens effect over a portion of the image. You can adjust the size of the lens and move it over different areas of the image. Modifier 1: Controls the horizontal position of the lens’ centerpoint from 0=left edge to 255 (100%) = right edge of output.
CHAPTER 13 Effect Mode Options Descriptions Mattes Object Effect Global Effect Effect Mode parameter DMX value = 144 The Global Effect option lets you select from a variety of provided patterns to superimpose over the composite image. Modifier parameters select the pattern and effects for a matte. The images below show two examples of the Mattes option. In the image on the left, the Modifier 2 value selected the matte pattern. Modifier 1 sets black as transparent.
CHAPTER 13 Effect Mode Options Descriptions Modifier 2: The first 20 DMX values are assigned to the following Matte pattern options: Modifier 3: This parameter determines the texture for the Matte mode selected with the Modifier 1 parameter.
CHAPTER 13 Effect Mode Options Descriptions Pan and Scan Object Effect Global Effect Effect Mode parameter DMX value = 255 This option Zooms into a still image and then, by changing position, you can pan across the image horizontally and vertically. It only functions on image sizes greater than 1024 x 1024 in at least one direction. Modifier 1: Adjusts the horizontal pan position from 0=left edge to 255 (100%) = right edge of the image. The default DMX value of 128 (50%) = no adjustment.
CHAPTER 13 Effect Mode Options Descriptions Pixelate Object Effect Global Effect Effect Mode parameter DMX value = 54 This options divides the image into rectangles using the center pixel color of each “box” as it’s color. You can control the number of boxes, and adjust the vertical and horizontal dimensions. Modifier 1: Controls the number of divisions. Fewer, larger boxes will also result in reduced color variations.
CHAPTER 13 Effect Mode Options Descriptions ShakeNBake Object Effect Global Effect Effect Mode parameter DMX value = 61 This option randomly vibrates the image. You can control the horizontal and vertical frequency. Modifier 1: Adjusts random horizontal “shake” from the shortest refresh rate at a value = 0 to to a maximum at a DMX value of 255 (100%). Modifier 2: Adjusts random vertical “shake” from the shortest refresh rate at a value = 0 to a maximum at a DMX value of 255 (100%).
CHAPTER 13 Effect Mode Options Descriptions Sinewave, Horizontal Object Effect Global Effect Sinewave, Horizontal w/X-axis Wobbulation Effect Mode parameter DMX value = 67 Sinewave, Horizontal w/Y-axis Wobbulation Effect Mode parameter DMX value = 68 Sinewave, Horizontal w/Z-axis Wobbulation Effect Mode parameter DMX value = 69 These options create a horizontal sinewave pattern and then vary the boundaries of the underlying object along the designated axis without affecting the media file that is appl
CHAPTER 13 Effect Mode Options Descriptions Slats Object Effect Global Effect Vertical Slats Effect Mode parameter DMX value = 62 Horizontal Slats Effect Mode parameter DMX value = 63 These options render the image in offset slats. Modifier 1: Adjusts the number of slats from from a DMX value of 0 = no slate to 255 = the maximum number of slats. Modifier 2: Adjusts the displacement of the slats from a DMX value of 0 = no displacement to 255 = image completely removed from Original content screen.
CHAPTER 13 Effect Mode Options Descriptions Spherical Mapping Object Effect Global Effect Spherical Mapping adjusts a rectangular output to project on a portion of a sphere. It is especially useful for projecting a collage onto a sphere or a portion of a sphere. Spherical mapping utilizes a total of nine Effect Modifier parameters to adjust positioning. In addition to the three modifiers associated with the Global Effect, two Graphics Object Effects provide six additional Modifier parameters.
CHAPTER 13 Effect Mode Options Descriptions Modifier 3: Adjusts to the size of the sphere. A DMX value of 64 (25%) = no adjustment. Adjusting toward 0 compresses the grid toward the vertical center. Values above the midrange stretch the grid toward the edges of the image at a DMX value of 255 (100%).
CHAPTER 13 Effect Mode Options Descriptions Texture Mixing Object Effect Global Effect Effect Mode parameter DMX value = 51 Use Texture Mixing to mix two media file outputs on one object. With this option, you can crossfade the texture (media file content) from one active Graphic Object to the texture of another Graphic Object.
CHAPTER 13 Effect Mode Options Descriptions NOTE: This option is also available as a Visual Mode adjusted with 2 Modifier parameters, (see Texture Mixing on page 79). Texture Ripple, Asymmetrical Circular Object Effect Global Effect Effect Mode parameter DMX value = 25 This option varies the distance of reference points to the applied media file texture around the zaxis without affecting the underlying object to create an effect of wavy ripples moving out from the object’s center.
CHAPTER 13 Effect Mode Options Descriptions Texture Ripple, Horizontal Object Effect Global Effect Effect Mode parameter DMX value = 22 This option varies the distance of reference points to the applied media file texture around the x-axis without affecting the underlying object. Modifier 1: Adjusts the size (amplitude) of the ripple from 0 = no adjustment to 255 (100%) = maximum size. Modifier 2: Adjusts the rate (frequency) of the ripple from 0 = no adjustment to 255 (100%) = maximum rate.
CHAPTER 13 Effect Mode Options Descriptions Tiling Object Effect Global Effect Effect Mode parameter DMX value = 48 Tiling varies the number of times a media file is applied as a texture to an object. This effect works best on objects that have an undisrupted surface area. Modifier 1: Adjusts the size and number of tiles along the x axis. A value of 128 (50%) = no adjustment. Values below the midpoint size a single image to 0 = maximum image magnification.
CHAPTER 13 Effect Mode Options Descriptions Zoom Blur Object Effect Global Effect Effect Mode parameter DMX value = 59 Zooms into a position on the image with a mult-image blurring effect. You can control the position of the zoom center on the image. Modifier 1: The default DMX value of 128 (50%) = no adjustment. Values below the midpoint move the horizontal center of the zoom right to 0 = maximum.
Chapter 14: Maintenance and Troubleshooting This chapter includes information on maintaining filters, and some basic troubleshooting procedures. WARNING: This server must be serviced by qualified personnel. The information listed in this chapter is intended to assist qualified personnel only. Maintaining the Filtering System The Axon media server must be kept protected from excessive amounts of glycol fog, mineral oil, and smoke.
CHAPTER 14 Maintenance and Troubleshooting General Troubleshooting The following table shows general troubleshooting suggestions: Problem Solution Won’t power on • Verify fixture is plugged in to an appropriately-rated power source (power ratings are shown on page 259). • Check power cord wiring. • If the unit’s previous shutdown was done remotely, you may have to manually turn on the power switch located behind the right front cover.
CHAPTER 14 Maintenance and Troubleshooting Protocol Viewer on Axon Desktop To view the DMX settings currently selected for an Axon media server, you can access a Protocol Viewer by clicking the Launch DMX View button on the Axon Desktop. The tabs at the top of the Protocol Viewer let you switch to Global, Graphic Object 1, Graphic Object 2, or Graphic Object 3 parameter settings.
CHAPTER 14 Maintenance and Troubleshooting 162 Axon Media Server User Manual
Chapter 15: Content Management Application (CMA) A Content Management Application (CMA) running on an Axon media server or a computer connected through an Ethernet network gives you remote control of content, software and configuration management functions. The Content Management Application software that shipped on CD with your DL.3, DL.
CHAPTER 15 Content Management Application (CMA) Launching the CMA Installing the CMA on Your Computer You can download the latest version of the application for Windows XP or Mac OS 10.4 based system from the Digital Lighting support section of the High End Systems website www.highend.com/support/digital_lighting/. A download wizard simplifies installation on your personal computer. The following are the recommended software requirements for running the CMA: • Windows XP or Mac OS 10.
CHAPTER 15 Content Management Application (CMA) Launching the CMA on Axon Axon media servers can launch the CMA locally. When you start Axon, the local monitor will display a desktop that gives you access to the CMA. NOTE: An active display device must be attached to both DVI ports before booting up the system. When only one port is connected, it defaults to display the graphics engine output and will not display the CMA screen. Press the Launch CMA button on the local desktop.
CHAPTER 15 Content Management Application (CMA) display the IP Address, Fixture ID, the Media Server software version and the server model. Fixtures derive their IP addresses through a router or automatic IP assignment. Fixture Identification The Fixture ID is a unique number used in the control protocol to identify specific fixtures for sychronization functions. For more information on Sychronization content playback, see Chapter 10: Graphic Functions: Synchronizing Content on page 85.
CHAPTER 15 Content Management Application (CMA) Viewing Server Identification Information Selecting the All Server view displays all the Digital Light fixtures and Axon servers on the fixture network. In the following example, six servers have been identified on the network. The right pane contains the following details in a table format. • Server ID number defaults to 1, but can be configured in the CMA or in the DL.3 or DL.
CHAPTER 15 Content Management Application (CMA) Client Window Content Organization The media server on each fixture has a file system that holds the movies, Windows OS Mac OS images, and 3-D objects that make up the content that the server uses. These files, folders, and their DMX values are collectively known as the “Content” on the media server.
CHAPTER 15 Content Management Application (CMA) Media Files Inside User Image and Stock Image folders are Library folders containing collections of media files. Media files can be still images or video clips in one of the following formats: .jpg .gif NOTE: .png .bmp .mpv .m1v .mpg .m2v Axon and Digital Light media servers supports .jpg formatted using RGB color. CMYK color files are not currently supported.
CHAPTER 15 Content Management Application (CMA) Viewing Server Configuration Data Selecting an individual server from the list in the left pane displays all the configuration values for that server in the right pane. Selecting All Configuration displays the combined configuration values for all the servers on the network. For more information on server configuration, see Viewing Server Configuration on page 182.
CHAPTER 15 Content Management Application (CMA) Viewing Files Double clicking on a media folder in the left pane reveals its contents. • Name of the file. This value is editable for User content. See Naming and Deleting User Content Files and Folders on page 172. • Type indicates the file format extension • DMX is the currently assigned DMX value for the folder. This value can be auto-assigned and edited for User content. See Assigning DMX Values to User Content on page 172.
CHAPTER 15 Content Management Application (CMA) Managing User Content All Stock and User content can be viewed and refreshed but the CMA client gives you additional control over other aspects of your custom content. Within the CMA window, you can: • Rename user files and folders • Delete files and folders • Control DMX value assignment to files and folders • Move files and folders between your local drive and a media server.
CHAPTER 15 Content Management Application (CMA) 2. Select Autoset All DMX from either the Media Folders or 3D Objects drop down menu or the right click popup list. The CMA will assign a valid DMX value to all selected files or folders. Using the same steps, you can also Reset DMX for a single file or folder or Reset All DMX for all display files or folders displayed in the right pane to zero.
CHAPTER 15 Content Management Application (CMA) Moving User Content Files and Folders User content can be easily moved between fixtures and your local drive as well as between fixtures.
CHAPTER 15 Content Management Application (CMA) 3. Select Copy from the Media Files or 3D Objects drop down menu or the right click popup list. 4. Browse to the destination on your hard drive; then select Paste from the Media Files or 3D Objects drop down menu or the right click popup list. Mac OS X: Downloading files You can drag single or multiple files and folders from a fixture to the Finder. You can use the copy/paste (Apple-C, Apple-V) to move multiple files from a fixture to the Finder.
CHAPTER 15 Content Management Application (CMA) Archiving User Content An Archive/Image is a compressed file used to store media files, folders and object files along with valid identification DMX values. This Content Archive is used to backup User Content that can be restored to any media server. Using Local Archives to Prepare Content Offline You can create a Local Archive of files stored on your harddrive to be deployed to a server at another time.
CHAPTER 15 Content Management Application (CMA) NOTES: The Remove Media and Remove Object buttons can be used to remove media files and objects from the wizard when creating the archive. Currently, the archive will not be created unless each media folder created has at least one media file in it. All media folders, files and objects will be assigned DMX addresses in alphabetical fashion. For CMA Running Mac OS 10.
CHAPTER 15 Content Management Application (CMA) Cloning User Content Cloning is a file transfer operation where all the User Content of a single fixture is replicated across one or more other fixtures. Cloning preserves all user content naming and DMX values. This allows you, for example, to send the custom content for a specific show to all the fixtures used in that show with one operation. To clone user content: 1. In the Management Client Window select All Server in the left pane. 2.
CHAPTER 15 Content Management Application (CMA) Deleting Content To delete all User Content from a server: 1. In the Management Client Window select All Server in the left pane. 2. Select the Server with the content you want to delete in the right pane. 3. From the drop down menu or the right-click popup list, select Delete Content. A dialog box OKs/cancels the action.
CHAPTER 15 Content Management Application (CMA) Upgrading Software Upgrade Management allows the user to upgrade the media server application, Mac OS 10.4 or the XP Embedded operating system, and firmware on the system. Verifying Software Versions Running the latest version of both the CMA Client software and the media server software will ensure that you will get the best performance from the fixtures on your network. To verify the CMA version, select About from the Help drop down menu.
CHAPTER 15 Content Management Application (CMA) 3. Click on All Servers in the left pane of CMA Management window. 4. Right click anywhere in the CMA Window or use the Server’s pull down menu to select Upgrade Software. The Upgrade Wizard will prompt you to browse to the location where you saved a copy of latest version. 5. After locating the upgrade file, press Next. The Upgrade Wizard displays a list of all servers connected to the fixture network. 6.
CHAPTER 15 Content Management Application (CMA) Viewing Server Configuration The CMA lets you remotely view and modify fixture settings. Some settings like Lamp Hours, Software Versions, etc. are view only. Other settings such as Fixture ID, various Projector settings, DMX Start Channel, etc. can be modified (configured). All of these settings are also available for DL.3 and DL.2 fixtures through the Digital Light onboard menu system.
CHAPTER 15 Content Management Application (CMA) Viewing Individual Fixture Configuration Values To view configuration information for a individual server, click on All Servers in the left pane of the CMA window and select the + to view all the servers on the fixture network. Select a server in the left pane to view its configuration information in the right pane. Configuration information is grouped under tabs in the right pane. Fields are provided for all editable configuration values.
CHAPTER 15 Content Management Application (CMA) DL.3 and DL.2 Media Server Configuration Options DL.3 and DL.2 fixtures include configuration options for the internal projector, the lamp, the menu display and motion features. The four tabs are labeled Server, Fixture, Lamp, and Test/Reset.
CHAPTER 15 Content Management Application (CMA) Fixture Tab Projector Settings Configuration Item Configuration Value Options Projector Input External accepts input from an external video source Internal accepts input from the graphics engine Projector In by DMX Yes allows projector input to be switched via DMX No disables projector input switching via DMX SVideo Input Ceiling Mode On accesses the projector menu to rotate the image 180° Off reverts to original orientation Rear Display On accesses
CHAPTER 15 Content Management Application (CMA) Projector Diagnostics Configuration Item OSD Menu Focus Override Zoom Override Projector Model Configuration Value Options On accesses the projector’s menu navigation buttons Off reverts to Fixture menu On selects manual focus. Value field = 0-255 Off resets to DMX control On selects manual zoom.
CHAPTER 15 Content Management Application (CMA) Axon Media Server Configuration Options Axon media server configuration options are grouped under a Server tab and a Display Settings tab.
CHAPTER 15 Content Management Application (CMA) Display Settings Tab Graphics Output Display Settings Configuration Item Configuration Value Options Resolution Refresh Rates Options in the drop-down lists are automatically populated by the Axon software for the specific display device attached.
CHAPTER 15 Content Management Application (CMA) Configuration Example Before programming a Digital Light fixture or the Axon media server from a DMX512 console, you need to: • Identify the DMX Source for the fixture • Select the Protocol type to determine the DMX channel range this fixture will utilize • Select a Fixture Number to identify this Axon on the Ethernet link (required if you will be synchronizing output between fixtures).
CHAPTER 15 Content Management Application (CMA) 2. Select a DMX Source type by clicking on the down arrow of the Source field to select DMX412 or ArtNet. 3. Select a DMX Protocol type by choosing Standard, Dual, or Single from the drop down list in the option field. The Protocol you select is based on how many DMX channels are required for your application. For more information, see Appendix A: DMX Protocol on page 195. 4.
Chapter 16: Restoring the System You can perform a system restore on the Axon or DL.2 Server with your System Restore CD. A system restore will replace the following components: • Microsoft Windows Embedded Operating System • Application The system restore does not replace the Settings, the Stock content, or User content. Note: Because this method does not completely erase the hard drive, it also does not return the device to a factory state.
CHAPTER 16 Restoring the System 3. When the fixture boots and the High End Systems logo is seen, press F8 (Asus) or F10 (Intel) to enter the boot menu for the respective motherboard. 4. Select the appropriate boot device and when you see “Hit any key to boot from CD…”, press a key on your keyboard. NOTE: Pressing Tab on the keyboard when booting the fixture displays the mother-board information. 5. Allow the System Restore menu to load.
CHAPTER 16 Restoring the System 8. Allow the restore to run. This will take between 10-30 minutes depending on the speed of your USB drive. Status will be displayed throughout the restore.
CHAPTER 16 Restoring the System 9. When this part of the restore is completed, the media server will automatically restart. 10. After allowing a few minutes for the media server to reconfigure, the upgrade is complete, you may remove all your external USB devices. NOTE: If you encounter an error, press the Return to Main Menu button and start the recovery process again. An error on the second attempt may indicate a hard drive failure or damaged DVD.
Appendix A: DMX Protocol DL.3 and DL.2 Digital Lights and Axon Media Servers utilize the same DMX protocol except that DL.3 and DL.2 fixtures include channels for motion and camera control. This table describes the Standard, Dual and Single Protocol. Media Server Software Version 1.4 Channel # DL.3 Axon DL.2 Value Function Description dec. Default % dec. % Motion and Camera Control (Standard, Dual, Single Protocol) Movement Functions (DL.
APPENDIX A DMX Protocol Channel # DL.3 Axon DL.2 Value Function Description dec. Lamp OFF (80) 90-98 Reserved 99-119 Shutdown (80) 120-130 Reserved 131-144 Graphics System Reset (80) 145-149 Camera Reset 150-155 Home Pan/Tilt (20) 160-168 Reserved Default % dec.
APPENDIX A DMX Protocol Channel # DL.3 Axon DL.2 Value Function Description dec. Default % dec. % Internal Camera Functions (DL.2 fixtures only) 11 12 NA Camera Zoom Zoom position NA Camera Focus NA Infrared Illuminator 13 14 15 16 17 NA NA Camera Shutter Focus position.
APPENDIX A DMX Protocol Channel # DL.3 Axon DL.2 Value Function Description Default dec. % dec. % 0-255 0-100 255 100 Off, no effects selection 0 0 0 0 CMY simulates CMY by subtracting RGB. Reduces color values. Mod1 = cyan, Mod2 = magenta, Mod3 = yellow 1 CMY adds to all pixels. Increases color values. Mod1 = cyan, Mod2 = magenta, Mod3 = yellow 2 CMY adds to non-black pixels. Increases color values. Mod1 = cyan, Mod2 = magenta, Mod3 = yellow 3 RGB Add, all pixels.
APPENDIX A DMX Protocol Channel # DL.3 Axon DL.2 23 2 Value Function Global Effect 1 Description dec. RGB Invert & Swap to BRG. Mod1 = red to inverted blue, Mod2 = green to inverted red, Mod3 = blue to inverted green 19 Edge Detect Color. Mod1=horizontal size, Mod2 = vertical search size, Mod3=comparison threshold 20 Edge Detect B/W.
APPENDIX A DMX Protocol Channel # DL.3 Axon DL.2 23 200 2 Value Function Global Effect 1 Description dec.
APPENDIX A DMX Protocol Channel # DL.3 Axon DL.2 Value Function Description Slats, Horizontal. Mod1 = number, Mod2 = displacement, Mod3 = fade dec. Default % dec. % NA 0 0 63 Reserved. Defaults to effect mode = 0 64-79 Downward Vertical Streaks. Mod1 = start position, 80 Mod2 = streak angle, Mod3 = fade Gaussian Blur. Mod1 = sample distance, Mod2 = 81 filter pass number, Mod3 = scales the effect Sharpen. Mod1 = sample distance, Mod2 = filter 82 pass number, Mod3 = sharpen scale Reserved.
APPENDIX A DMX Protocol Channel # DL.3 Axon DL.2 23 2 24 3 25 4 26 5 202 Value Function Description dec. Reserved. Defaults to effect 0 Pan and Scale. Mod1 = horizontal position, Mod2 = vertical position, Mod3 = Zoom Global Effect 1 These Modifier parameters adjust the option selected in Channel 23 for DL.2 fixtures or Modifier 1 Channel 2 for Axon Media Servers. Default % dec.
APPENDIX A DMX Protocol Channel # DL.3 Axon DL.2 27 6 Value Function Global Effect 2 Description Default dec. % Off, no effects selection 0 0 CMY simulates CMY by subtracting RGB. Reduces color values. Mod1 = cyan, Mod2 = magenta, Mod3 = yellow 1 CMY adds to all pixels. Increases color values. Mod1 = cyan, Mod2 = magenta, Mod3 = yellow 2 CMY adds to non-black pixels. Increases color values. Mod1 = cyan, Mod2 = magenta, Mod3 = yellow 3 RGB Add, all pixels.
APPENDIX A DMX Protocol Channel # DL.3 Axon DL.2 27 204 6 Value Function Global Effect 2 Description dec. Edge Detect B/W.
APPENDIX A DMX Protocol Channel # DL.3 Axon DL.2 27 6 Value Function Global Effect 2 Description dec. RGB Swap to GRB Mod1 = red, Mod2 = green, Mod3 = blue 43 Colorize Gray Scale maps pixel intensity to color: Mod1 = Color Scheme selection, Mod2 = Zero intensity point in color scheme, Mod3 = Fading 44 Intensity key turns pixels of selected intensity transparent: Mod1= Color Scheme, Mod2= Intensity bandwidth, Mod3 = Transparency 45 Raindrop effect.
APPENDIX A DMX Protocol Channel # DL.3 Axon DL.2 Value Function Description dec. Downward Vertical Streaks. Mod1 = start position, Mod2 = streak angle, Mod3 = fade Gaussian Blur. Mod1 = sample distance, Mod2 = filter pass number, Mod3 = curve shape Sharpen. Mod1 = sample distance, Mod2 = filter pass number, Mod3 = sharpen scale 6 Global Effect 2 % NA 0 0 81 82 128 Edge fade color. Mod1 = red, Mod2 = green, Mod3 = blue 129 Mask color and Edge fade color.
APPENDIX A DMX Protocol Channel # DL.3 Axon DL.2 Value Function Description Pan and Scale. Mod1 = horizontal position, Mod2 = vertical position, Mod3 = Zoom 27 6 Global Effect 2 28 7 Global Effect 2 These Modifier parameters adjust the option selected in Channel 27 for DL.2 fixtures or Modifier 1 Channel 3 for Axon Media Servers. 29 8 30 9 Global Effect 2 The type of adjustment and the default value depends on the particular effect.
APPENDIX A DMX Protocol Channel # DL.3 Axon DL.2 Value Function Description Default dec. % Round iris closing from outside in 0 0 Round iris closing from inside out 1 Rectangle closing from outside in 2 Rectangle closing from inside out 3 Checkerboard, variation 1 4 Checkerboard, variation 2 5 Radial wipe, variation 1 6 Radial wipe, variation 2 7 Radial wipe, variation 3 8 dec.
APPENDIX A DMX Protocol Channel # DL.3 Axon DL.
APPENDIX A DMX Protocol Channel # DL.3 Axon DL.2 Value Function Description Default dec. % dec.
APPENDIX A DMX Protocol Channel # DL.3 Axon DL.2 Value Function Description No control selected. Safe Reserved 55 34 Global Control * dec. % 0 0 120-130 Reserved 131-144 Reset when Intensity = 0 (80) 145-149 Reserved 150-251 Spherical Control Statistics (Global Control Modifier Parameter selects text color) 252 Four-in-one displays each layers output and combined output in a 2 x 2 array. 253 Reserved 254 Reserved dec.
APPENDIX A DMX Protocol Channel # DL.3 Axon DL.2 Value Function Description Default dec. % dec.
APPENDIX A DMX Protocol Channel # DL.3 Axon DL.2 Value Function Description Normal Speed 66 45 Play Speed Slow speeds from slowest toward normal Normal Speed Faster than Normal to Fastest dec. Default % dec.
APPENDIX A DMX Protocol Channel # DL.3 Axon DL.2 69 48 Value Function Visual Mode Description dec. Posterizer. Mod1 reduces color detail. Mod2 adjusts contrast. 6 Color to Black & White. Mod1 fades color RGB @ 0 to B/W @ 50% to white @100%. Mod2= not used. 7 Fire Gradient, Mod1fades original to converted Mod2 not used, reserved. 8 Negative Art. Mod1 fades from original image to converted image, Mod2 subtracts red from 0-128, subtracts green from 129-255. 9 Exposure Control.
APPENDIX A DMX Protocol Channel # DL.3 Axon DL.2 72 51 Value Function Effect Mode 1 Description Default dec. % Off, no effects selection 0 0 CMY simulates CMY by subtracting RGB (reduces color values) Mod1 = cyan, Mod2 = magenta, Mod3 = yellow 1 CMY Add to All Pixels increases color values. Mod1 = cyan, Mod2 = magenta, Mod3 = yellow 2 CMY Add to Non-black Pixels increases color values. Mod1 = cyan, Mod2 = magenta, Mod3 = yellow 3 RGB Add All Pixels.
APPENDIX A DMX Protocol Channel # DL.3 Axon DL.2 72 216 51 Value Function Effect Mode 1 Description dec.
APPENDIX A DMX Protocol Channel # DL.3 Axon DL.2 72 51 Value Function Effect Mode 1 Description dec. RGB Swap to GRB Mod1 = red, Mod2 = green, Mod3 = blue 43 Colorize Gray Scale maps pixel intensity to color: Mod1 = Color Scheme selection, Mod2 = Zero intensity point in color scheme, Mod3 = Fading 44 Intensity key turns pixels of selected intensity transparent: Mod1= Color Scheme, Mod2= Intensity bandwidth, Mod3 = Transparency 45 Raindrop effect.
APPENDIX A DMX Protocol Channel # DL.3 Axon DL.2 72 51 Value Function Effect Mode 1 Description dec. Slats, Horizontal.
APPENDIX A DMX Protocol Channel # DL.3 Axon DL.2 Value Function 73 52 Effect Mode 1 Modifier 1 74 53 Effect Mode 1 Modifier 2 75 54 Effect Mode 1 Modifier 3 Description These Modifier parameters adjust the option selected in Channel 72 for DL.2 fixtures or Channel 51 for Axon Media Servers. The type of adjustment and the default value depends on the particular effect.
APPENDIX A DMX Protocol Channel # DL.3 Axon DL.2 76 220 55 Value Function Effect Mode 2 Description dec. Off, no effects selection 0 CMY simulates CMY by subtracting RGB (reduces color values) Mod1 = cyan, Mod2 = magenta, Mod3 = yellow 1 CMY Add to All Pixels increases color values. Mod1 = cyan, Mod2 = magenta, Mod3 = yellow 2 CMY Add to Non-black Pixels increases color values. Mod1 = cyan, Mod2 = magenta, Mod3 = yellow 3 RGB Add All Pixels.
APPENDIX A DMX Protocol Channel # DL.3 Axon DL.2 76 55 Value Function Effect Mode 2 Description dec.
APPENDIX A DMX Protocol Channel # DL.3 Axon DL.2 76 222 55 Value Function Effect Mode 2 Description dec. RGB Swap to GRB Mod1 = red, Mod2 = green, Mod3 = blue 43 Colorize Gray Scale maps pixel intensity to color: Mod1 = Color Scheme selection, Mod2 = Zero intensity point in color scheme, Mod3 = Fading 44 Intensity key turns pixels of selected intensity transparent: Mod1= Color Scheme, Mod2= Intensity bandwidth, Mod3 = Transparency level 45 Raindrop effect.
APPENDIX A DMX Protocol Channel # DL.3 Axon DL.2 76 55 Value Function Effect Mode 2 Description dec. Slats, Horizontal.
APPENDIX A DMX Protocol Channel # DL.3 Axon DL.2 77 56 Value Function Effect Mode 2 Modifier 1 78 57 Effect Mode 2 Modifier 2 79 58 Effect Mode 2 Modifier 3 224 Description These Modifier parameters adjust the option selected in Channel 76 for DL.2 fixtures or Channel 55 for Axon Media Servers. Default dec. % 0-255 0-100 0-255 0-100 0-255 0-100 dec. % NA NA The type of adjustment and the default value depends on the particular effect.
APPENDIX A DMX Protocol Channel # DL.3 Axon DL.2 Value Function Description Default dec.
APPENDIX A DMX Protocol Channel # DL.3 Axon DL.2 Value Function Description Default dec. % 0 0 1-127 1-49 128 50 dec.
APPENDIX A DMX Protocol Channel # DL.3 Axon DL.2 Value Function Description Default dec. % dec.
APPENDIX A DMX Protocol Channel # DL.3 Axon DL.2 Value Function Description dec. Normal Speed 104 83 Play Speed Slow speeds from slowest toward normal Normal Speed Faster than Normal to Fastest Default % dec.
APPENDIX A DMX Protocol Channel # DL.3 Axon DL.2 Value Function Description Color to Black & White. Mod1 fades color RGB @0 to B/W @50% to white @100%. Mod2= not used. Fire Gradient, Mod1fades original to converted Mod2 not used, reserved. Negative Art. Mod1 fades from original image to converted image, Mod2 subtracts red from 0-128, subtracts green from 129-255. 107 86 Visual Mode 109 87 88 Visual Mode Modifier 1 Visual Mode Modifier 2 % NA 1 1 NA NA 9 Invert B&W, Keep Color.
APPENDIX A DMX Protocol Channel # DL.3 Axon DL.2 110 230 89 Value Function Effect Mode 1 Description dec. Off, no effects selection 0 CMY simulates CMY by subtracting RGB (reduces color values) Mod1 = cyan, Mod2 = magenta, Mod3 = yellow 1 CMY Add to All Pixels increases color values. Mod1 = cyan, Mod2 = magenta, Mod3 = yellow 2 CMY Add to Non-black Pixels increases color values. Mod1 = cyan, Mod2 = magenta, Mod3 = yellow 3 RGB Add All Pixels.
APPENDIX A DMX Protocol Channel # DL.3 Axon DL.2 110 89 Value Function Effect Mode 1 Description dec.
APPENDIX A DMX Protocol Channel # DL.3 Axon DL.2 110 232 89 Value Function Effect Mode 1 Description dec. RGB Swap to GRB Mod1 = red, Mod2 = green, Mod3 = blue 43 Colorize Gray Scale maps pixel intensity to color: Mod1 = Color Scheme selection, Mod2 = Zero intensity point in color scheme, Mod3 = Fading 44 Intensity key turns pixels of selected intensity transparent: Mod1= Color Scheme, Mod2= Intensity bandwidth, Mod3 = Transparency level 45 Raindrop effect.
APPENDIX A DMX Protocol Channel # DL.3 Axon DL.2 110 89 Value Function Effect Mode 1 Description dec. Slats, Horizontal.
APPENDIX A DMX Protocol Channel # DL.3 Axon DL.2 Value Function 111 90 Effect Mode 1 Modifier 1 112 91 Effect Mode 1 Modifier 2 113 92 Effect Mode 1 Modifier 3 234 Description These Modifier parameters adjust the option selected in Channel 110 for DL.2 fixtures or Channel 89 for Axon Media Servers. The type of adjustment and the default value depends on the particular effect.
APPENDIX A DMX Protocol Channel # DL.3 Axon DL.2 114 93 Value Function Effect Mode 2 Description Default dec. % Off, no effects selection 0 0 CMY simulates CMY by subtracting RGB (reduces color values) Mod1 = cyan, Mod2 = magenta, Mod3 = yellow 1 CMY Add to All Pixels increases color values. Mod1 = cyan, Mod2 = magenta, Mod3 = yellow 2 CMY Add to Non-black Pixels increases color values. Mod1 = cyan, Mod2 = magenta, Mod3 = yellow 3 RGB Add All Pixels.
APPENDIX A DMX Protocol Channel # DL.3 Axon DL.2 114 236 93 Value Function Effect Mode 2 Description dec. Texture Ripple, Horizontal Mod1 = size, Mod2 = rate, Mod3 = offset 22 Texture Ripple, Vertical Mod1 = size, Mod2 = rate, Mod3 = offset 23 Texture Ripple, Circular Mod1 = size, Mod2 = rate, Mod3 = offset 24 Texture Ripple, Asymmetrical Circular Mod1 = size, Mod2 = rate, Mod3 = offset 25 Chromakey Fine. Select key color using Mod1 = red, Mod2 = green, Mod3 = blue 26 Chromakey Medium.
APPENDIX A DMX Protocol Channel # DL.3 Axon DL.2 114 93 Value Function Effect Mode 2 Description dec. Colorize Gray Scale maps pixel intensity to color: Mod1 = Color Scheme selection, Mod2 = Zero intensity point in color scheme, Mod3 = Fading 44 Intensity key turns pixels of selected intensity transparent: Mod1= Color Scheme, Mod2= Intensity bandwidth, Mod3 = Transparency level 45 Raindrop effect. Mod1 controls size/speed, Mod2 seeds the random number generator, and Mod3 controls raindrop rate.
APPENDIX A DMX Protocol Channel # DL.3 Axon DL.2 114 93 Value Function Effect Mode 2 Description dec.
APPENDIX A DMX Protocol Channel # DL.3 Axon DL.2 Value Function 115 94 Effect Mode 2 Modifier 1 116 95 Effect Mode 2 Modifier 2 117 96 Effect Mode 2 Modifier 3 Description These Modifier parameters adjust the option selected in Channel 114 for DL.2 fixtures or Channel 93 for Axon Media Servers. The type of adjustment and the default value depends on the particular effect.
APPENDIX A DMX Protocol Channel # DL.3 Axon DL.2 Value Function Description Default dec.
APPENDIX A DMX Protocol Channel # DL.3 Axon DL.2 Value Function Description Default dec. % 0 0 1-127 1-49 128 50 dec.
APPENDIX A DMX Protocol Channel # DL.3 Axon DL.2 Value Function Description Default dec. % dec.
APPENDIX A DMX Protocol Channel # DL.3 Axon DL.2 Value Function Description Normal Speed 142 121 Play Speed Slow speeds from slowest toward normal Normal Speed Faster than Normal to Fastest dec. Default % dec.
APPENDIX A DMX Protocol Channel # DL.3 Axon DL.2 145 Value Function 124 Visual Mode Description dec. Posterizer. Mod1 reduces color detail. Mod2 adjusts contrast. 6 Color to Black & White. Mod1 fades color RGB @0 to B/W @50% to white @100%. Mod2= not used. 7 Fire Gradient, Mod1fades original to converted Mod2 not used, reserved. 8 Negative Art. Mod1 fades from original image to converted image, Mod2 subtracts red from 0-128, subtracts green from 129-255. 9 Exposure Control.
APPENDIX A DMX Protocol Channel # DL.3 Axon DL.2 148 127 Value Function Effect Mode 1 Description Default dec. % Off, no effects selection 0 0 CMY simulates CMY by subtracting RGB (reduces color values) Mod1 = cyan, Mod2 = magenta, Mod3 = yellow 1 CMY Add to All Pixels increases color values. Mod1 = cyan, Mod2 = magenta, Mod3 = yellow 2 CMY Add to Non-black Pixels increases color values. Mod1 = cyan, Mod2 = magenta, Mod3 = yellow 3 RGB Add All Pixels.
APPENDIX A DMX Protocol Channel # DL.3 Axon DL.2 148 246 127 Value Function Effect Mode 1 Description dec.
APPENDIX A DMX Protocol Channel # DL.3 Axon DL.2 148 Value Function Effect 127 Mode 1 Description dec. RGB Swap to GRB Mod1 = red, Mod2 = green, Mod3 = blue 43 Colorize Gray Scale maps pixel intensity to color: Mod1 = Color Scheme selection, Mod2 = Zero intensity point in color scheme, Mod3 = Fading 44 Intensity key turns pixels of selected intensity transparent: Mod1= Color Scheme, Mod2= Intensity bandwidth, Mod3 = Transparency level 45 Raindrop effect.
APPENDIX A DMX Protocol Channel # DL.3 Axon DL.2 148 127 Value Function Effect Mode 1 Description dec. Slats, Horizontal.
APPENDIX A DMX Protocol Channel # DL.3 Axon DL.2 Value Function 149 128 Effect Mode 1 Modifier 1 150 129 Effect Mode 1 Modifier 2 151 130 Effect Mode 1 Modifier 3 Description These Modifier parameters adjust the option selected in Channel 148 for DL.2 fixtures or Channel 127 for Axon Media Servers. The type of adjustment and the default value depends on the particular effect.
APPENDIX A DMX Protocol Channel # DL.3 Axon DL.2 152 250 Value Function Effect 131 Mode 2 Description Default dec. % Off, no effects selection 0 0 CMY simulates CMY by subtracting RGB (reduces color values) Mod1 = cyan, Mod2 = magenta, Mod3 = yellow 1 CMY Add to All Pixels increases color values. Mod1 = cyan, Mod2 = magenta, Mod3 = yellow 2 CMY Add to Non-black Pixels increases color values. Mod1 = cyan, Mod2 = magenta, Mod3 = yellow 3 RGB Add All Pixels.
APPENDIX A DMX Protocol Channel # DL.3 Axon DL.2 152 131 Value Function Effect Mode 2 Description dec.
APPENDIX A DMX Protocol Channel # DL.3 Axon DL.2 152 252 Value Function Effect 131 Mode 2 Description dec. RGB Swap to GRB Mod1 = red, Mod2 = green, Mod3 = blue 43 Colorize Gray Scale maps pixel intensity to color: Mod1 = Color Scheme selection, Mod2 = Zero intensity point in color scheme, Mod3 = Fading 44 Intensity key turns pixels of selected intensity transparent: Mod1= Color Scheme, Mod2= Intensity bandwidth, Mod3 = Transparency level 45 Raindrop effect.
APPENDIX A DMX Protocol Channel # DL.3 Axon DL.2 152 Value Function 131 Effect Mode 2 Description dec. Slats, Horizontal.
APPENDIX A DMX Protocol Channel # DL.3 Axon DL.2 153 132 Value Function Effect Mode 2 Modifier 1 Description These Modifier parameters adjust the option selected in Channel 153 for DL.2 fixtures or Channel 131 for Axon Media Servers. Default dec. % 0-255 0-100 0-255 0-100 0-255 0-100 dec. % The type of adjustment and the default value depends on the particular effect.
APPENDIX A DMX Protocol Channel # DL.3 Axon DL.2 Value Function Description Default dec.
APPENDIX A DMX Protocol Channel # DL.3 Axon DL.2 Value Function Description Default dec. % 0 0 1-127 1-49 128 50 dec.
Appendix B: Custom User Content There are several considerations to keep in mind when creating custom content to control with the DL.3 graphics engine software. Preparing Custom Content For the highest quality rendering and playback on a DL.3 fixture or Axon media server, use the following steps: 1. Commission or Design High Quality (Visually Clean or Never-Compressed) Video, at least 640 x 480 in Photo jpeg 98%-100% or Animation Non Compressed (best) format.
APPENDIX B Custom User Content All the encoders have demos and will batch encode (ExpertHD need a small script and a settings file to batch encode). Note: TMPGEncoder includes filters that let you light optimize in the encoder. Creating 3-D Objects In general, any 3-D modeling program can be used to create objects. If the particular 3-D modeler does not export in DirectX .x format, a translation program will be needed to translate the object from the modeler's output format to the DirectX .x format.
Appendix C: Axon Media Server Specifications Fixture mechanical, electrical, optical and component specifications are listed. Mechanical Fixture Dimensions: 65 mm x 89 mm x 528 mm (18.3 in x 3.5 in x 20.8 in) Weight: 15 kg (33 lbs) 480mm (18.89") 465mm (18.30") AXON 88.9mm (3.5") 485mm (19.09") 528mm (20.78") 132.6mm (5.22") 425mm (16.73") Computer Processor: Intel Pentium 3.
APPENDIX C Axon Media Server Specifications Peripheral/Network Connectors: 6 USB ports, Ethernet DMX Connectors: 5-pin male and female XLR connectors Environmental Tolerances: Ambient Operating Temperature Range: 5°–35° C (40°–95° F) Humidity: 5%–95% (non-condensing) Altitude: 0–8850 ft (0–2700 m) Software Upgrades: Download software and upgrades from the High End Systems web site (www.highend.
APPENDIX C Axon Media Server Specifications • Nominal impedance: 100–140 Ohm Grounding lug (inside XLR shell) XLR shell Common (cable shield) 5 1 negative (data complement) positive (data true)* 4 2 3 positive (data true)* 5 1 4 2 Common (cable shield) 3 negative (data complement)* positive (data true) negative (data complement)* Male XLR Connector negative (data complement) positive (data true) Female XLR Connector *This data line is not used by the fixture, but allows data to pass th
APPENDIX C Axon Media Server Specifications 262 Axon Media Server User Manual
Appendix D: Safety Information WARNING! For Continued Protection Against Fire, this equipment is designed for connection to branch circuit with a maximum overload protection of 20 A. WARNING! For Continued Protection Against Electric Shock 1. 2.
APPENDIX D Safety Information Appendice E: Importantes Informations Sur La Sécurité Mise En Garde: Pour Une Protection Permanente Contre Les Incendies: Cet appareil de connection au circuit comporte une protection contre les surcharges de 20 A. Mise En Garde: Pour Une Protection Permanente Contre Les Chocs Électriques 1. Si cet équipement est livré sans prise de cable, veuillez connecter la prise de cable correcte selon le code suivant: • marron - phase • bleu - neutre • vert/jaune - terre 2.
APPENDIX D Safety Information Anhang E: Wichtige Hinweise Für Ihre Sicherheit Warnung: Zum Schutz Vor Brandgefahr: Dieses Gerät darf nur an eine Zweigleitung mit einem Überlastungsschutz von höchstens 20 A angeschlossen werden. Warnung: Zum Schutz Gegen Gefährliche Körperströme 1. Wenn dieses Gerät ohne einen Netzkabelstecker erhalten wurde, ist der entsprechende Netzkabelstecker entsprechend dem folgenden Code anzubringen: • Braun - Unter Spannung stehend • Blau - Neutral • Grün/Gelb - Erde 2.
APPENDIX D Safety Information Apéndice E: Información Importante De Seguridad Advertencia: Para Protección Continua Contra Incendios: Este equipo debe conectarse a un circuito que tenga una protección máxima contra una sobrecargas de 20 A. Advertencia: Para La Protección Continua Contra Electrocuciones 1. Si se recibió este equipo sin el conector de alimentacion, monte usted el conector correcto según ia clave siguente: • moreno - vivo • azul - neutral • verde/amarillo - tierra 2.
APPENDIX D Safety Information Appendice E: Importanti Informazioni Di Sicurezza Avvertenza: Per Prevenire Incendi: Questa apparecchiatura e' da collegarsi ad un circuito con una protezione da sovraccarico massima di 20 ampere. Avvertenza: Per Prevenire Le Scosse Elettriche 1. Da non montare sopra una superficie infiammabile. 2. Mantenere l' apparecchio a un minimo di 1.0 metri (3.28 piedi) di distanza dai materiali combustibili. 3.
APPENDIX D Safety Information 268 Axon Media Server User Manual