RocketU 114xE Host Controller Quick Installation Guide V1.00 Jul.
Table of Contents HighPoint RocketU 1144E ....................................................... 3 Kit Contents ............................................................................ 3 Board Layout ........................................................................... 4 Installing the RocketU Series Host Adapter ............................ 5 USB 3.0 Driver Installation ...................................................... 5 eSATA Driver Installation ............................................
HighPoint RocketU 1144E 2x USB 3.0 & 2x eSATA 6Gb/s PCI-Express 2.0 x4 HBA Introducing the RocketU 1144E: Versatile Connectivity - 5Gb/s USB3.0 & 6Gb/s eSATA on Single HBA! The RocketU 1144E maximizes the performance potential of USB 3.0 and 6Gb/s SATA storage devices. The revolutionary, dedicated per-port performance architecture allows each storage device to take full advantage of the PCIe 2.0 x4 host interface. The dual 5Gb/s USB 3.0 ports support all industry standard USB 3.
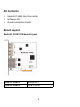
Kit Contents RocketU 1144E Host Controller Software CD Quick Installation Guide Board Layout RocketU 1144E PCB board Layout PORT1 PORT2 PORT3 PORT4 PORT1, PORT2 PORT3, PORT4 eSATA Port USB 3.
Installing the RocketU Series Host Adapter Note: Make sure the system is powered-off before installing the RocketU series host adapter. 1. 2. 3. 4. Open the system chassis. Locate an unused PCI-Express ×4 (×8, ×16) slot. Remove the PCI-Express slot cover. Gently insert the RU series host adapter into the PCI-Express slot, and secure the bracket to the system chassis. 5. After installing the adapter, attach the hard disks or disk enclosure to the RU series card using the USB 3.0 Cable or eSATA Cable. 6.
4. The following file should be displayed if installation was successful: -'system32\DRIVERS\asmtxhci.sys' eSATA Driver Installation Driver Installation: Microsoft Windows 1. Insert the HighPoint Software CD into the system’s CD/DVD drive. 2. Select 'Control Panel' 'Hardware' 'Device Manager' 'Other Device'. And Right-click on 'RAID Controller'. 3. Select 'Properties' 'Update driver software' tab. 4.
\RocketU\RU1022x_112x_114x\eSATA\Mac 3. Double-click on the “*.dmg” file to mount the disc image containing the Mac OS X software and drivers. 4. Double-click on the installer package labeled to start the installation process. 5. Follow the on-screen steps to complete the installation process. 6. After the install has completed, you will need to restart in order to use the RocketU 1144E. Connecting Storage Devices 1. Make sure the RocketU 1144E has been installed into your PC. 2.
FCC Part 15 Class B Radio Frequency Interference statement This equipment has been tested and found to comply with the limits for a Class B digital device, pursuant to part 15 of the FCC Rules. These limits are designed to provide reasonable protection against harmful interference in a residential installation. This equipment generates uses and can radiate radio frequency energy and, if not installed and used in accordance with the instructions, may cause harmful interference to radio communications.