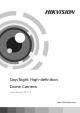
Day/Night High-definition Dome Camera User Manual V1.2.
Day/Night High-definition Dome Camera·User Manual Thank you for purchasing our product. If there are any questions, or requests, please do not hesitate to contact the dealer. This manual applies to DS-2CC5181P-VP(IR)(H), DS-2CC5191P-VP(IR)(H), DS-2CC51A1P-VP(IR)(H) dome Camera. This manual may contain several technical incorrect places or printing errors, and the content is subject to change without notice. The updates will be added to the new version of this manual.
Day/Night High-definition Dome Camera·User Manual Regulatory Information FCC Information FCC compliance: This equipment has been tested and found to comply with the limits for a digital device, pursuant to part 15 of the FCC Rules. These limits are designed to provide reasonable protection against harmful interference when the equipment is operated in a commercial environment.
Day/Night High-definition Dome Camera·User Manual 2002/96/EC (WEEE directive): Products marked with this symbol cannot be disposed of as unsorted municipal waste in the European Union. For proper recycling, return this product to your local supplier upon the purchase of equivalent new equipment, or dispose of it at designated collection points. For more information see: www.recyclethis.info.
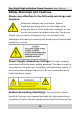
Day/Night High-definition Dome Camera·User Manual Safety Warnings and Cautions Please pay attention to the following warnings and cautions: Hazardous Voltage may be present: Special measures and precautions must be taken when using this device. Some potentials (voltages) on the device may present a hazard to the user. This device should only be used by Employees from our company with knowledge and training in working with these types of devices that contain live circuits.
Day/Night High-definition Dome Camera·User Manual attached is also connected to properly wired grounded receptacles and are approved medical devices. Power Connect and Disconnect: The AC power supply cord is the main disconnect device to mains (AC power).The socket outlet shall be installed near the equipment and shall be readily accessible. Installation and Maintenance: Do not connect/disconnect any cables to or perform installation/maintenance on this device during an electrical storm.
Day/Night High-definition Dome Camera·User Manual Perchlorate Material: Special handling may apply. See www.dtsc.ca.gov/hazardouswaste/perchlorate. This notice is required by California Code of Regulations, Title 22, Division 4.5, Chapter 33: Best Management Practices for Perchlorate Materials. This device includes a battery which contains perchlorate material. Taiwan battery recycling: Please recycle batteries.
Day/Night High-definition Dome Camera·User Manual Lead Content: Please recycle this device in a responsible manner. Refer to local environmental regulations for proper recycling; do not dispose of device in unsorted municipal waste.
Day/Night High-definition Dome Camera·User Manual Safety Instruction These instructions are intended to ensure that user can use the product correctly to avoid danger or property loss. The precaution measure is divided into “Warnings” and “Cautions” Warnings: Serious injury or death may occur if any of the warnings are neglected. Cautions: Injury or equipment damage may occur if any of the cautions are neglected.
Day/Night High-definition Dome Camera·User Manual responsibility for problems caused by unauthorized repair or maintenance.) To reduce the risk of fire or electrical shock, do not expose this product to rain or moisture. This installation should be made by a qualified service person and should conform to all local codes. Please install blackouts equipment into the power supply circuit for convenient supply interruption.
Day/Night High-definition Dome Camera·User Manual The sensor may be burned out by a laser beam, so when any laser equipment is being used, make sure that the surface of the sensor will not be exposed to the laser beam. Do not place the camera in extremely hot or cold temperatures (the operating temperature should be between -10°C ~ 60°C, dusty or damp locations, and do not expose it to high electromagnetic radiation.
Day/Night High-definition Dome Camera·User Manual Table of Contents 1 Introduction .................................................................. 1 1.1 Product Features ..................................................1 1.2 Function Summary ...............................................2 1.3 Overview .............................................................5 2 Installation ................................................................... 6 2.1 Disassembling .....................................
Day/Night High-definition Dome Camera·User Manual 3.14 LANGUAGE Setting............................................ 45 3.15 CAMERA RESET Setting ..................................... 45 Appendix ........................................................................ 46 Table 1 DS-2CC5181P(N)-VP(IR)(H) ........................... 46 Table 2 DS-2CC5191P(N)-VP(IR)(H) ........................... 50 Table 3 DS-2CC51A1P(N)-VP(IR)(H) ...........................
Day/Night High-definition Dome Camera·User Manual 1 Introduction 1.1 Product Features This camera adopts high performance CCD and advanced print circuit board design technology. It possesses of high resolution, low distortion, and low noise features, etc. It is extremely suitable for supervisory system and image process system. Adopt high performance SONY CCD, and supply high definition and clear image, up to 700TVL Low illumination, Color: 0.001Lux@F1.2, B/W: 0.0001Lux@F1.
Day/Night High-definition Dome Camera·User Manual Support Privacy mask with 8 optional colors and 8 configurable areas Advanced design technology with high reliability Advanced 3-axis design allows this dome camera to be adjusted 0-355°horizontally and 0-180°vertically to meet different mounting requirements Adopt advanced double-plate design to guarantee the heat dissipation of the CCD and image quality Impact Protection: IEC60068-2-75 test, Eh, 50J; EN50102, up to IK10 Weather proof
Day/Night High-definition Dome Camera·User Manual Figure 1-1 Privacy Mask DAY/NIGHT Auto Switch: The cameras deliver color images during the day. And as light diminishes at night, the cameras switch to night mode and deliver black and white images with high quality. AGC: AGC is a control circuit that automatically changes the gain of a receiver or other piece of equipment, so that the desired output signal remains essentially.
Day/Night High-definition Dome Camera·User Manual Internal synchronization is realized by the synchronous signal which is generated by the inside crystal oscillator. White Balance: White balance can remove the unrealistic color casts. White balance is the white rendition function of the camera to adjust the color temperature according to the environment automatically.
Day/Night High-definition Dome Camera·User Manual 1.
Day/Night High-definition Dome Camera·User Manual 2 Installation Before you start: Please make sure that the device in the package is in good condition and all the assembly parts are included. Note: Please ensure that the wall is strong enough to withstand three times the weight of the camera. If the wall is not strong enough, the camera may fall and cause serious damage. 2.1 Disassembling Steps: 1. Loosen the three screws on the edge of the lower dome with the supplied screw driver. 2.
Day/Night High-definition Dome Camera·User Manual Figure 2-1 Removing the Lower Dome 4. Loosen the three screws as shown in Figure 2-2 with the supplied screw driver. 5. Remove the camera from the back box. Set Screws Figure 2-2 Removing the Camera 2.2 Mounting 2.2.1 Ceiling Mounting Steps: 1. Attach the drill template (supplied) to the place where you want to fix the camera. 2. According to the circles on the drill template as shown in Figure 2-3, drill screws holes in the ceiling on your demand.
Day/Night High-definition Dome Camera·User Manual Ceiling Drill Template Figure 2-3 The Drill Template 3. If you want to route the cables inside the ceiling, drill a hole in the ceiling according to the circle in the centre of the template. Skip this step, if you want to route the cables on the surface of the ceiling. 4. Attach the back box to the ceiling by aligning the holes of the back box with the holes on the drill template. 5. Secure the back box with the supplied screws as shown in Figure 2-4.
Day/Night High-definition Dome Camera·User Manual Figure 2-4 Securing Back box 6. Route the cables through the hole in the center of the drill template. 7. Align the camera with the back box. 8. Tighten the set screws to secure the camera with the back box. 9. Connect the video output connector to the monitor. Connect the power connector to the power supply. 10. Adjust the image and focus. Please refer to the section 2.3 for more detailed information. 11. Install the inner black liner back to the camera.
Day/Night High-definition Dome Camera·User Manual Figure 2-5 Securing Lower Dome 2.2.2 In-ceiling Mounting with gang box Steps: 1. Install the gang junction box in the ceiling. 2. Attach the In-ceiling Mount (supplied) to the gang junction box with two screws.
Day/Night High-definition Dome Camera·User Manual Ceiling In-ceiling Mount Gang Box Figure 2-6 In-ceiling Mount 3. Route the cables through the hole in the center of the in-ceiling mount. 4. Align the camera with the gang junction box. 5. Tighten the screws to secure the camera with the gang junction box. 6. Connect the video output connector to the monitor. Connect the power connector to the power supply. 7. Adjust the image and focus. Please refer to the section 2.3 for more detailed information.
Day/Night High-definition Dome Camera·User Manual Gang Box Ceiling In-ceiling Mount Camera Figure 2-7 Securing Camera 8. Install the inner black liner back to the camera. 9. Align the lower dome with the in-ceiling mount. 10. Tighten the screws to secure the lower dome with the in-ceiling mount.
Day/Night High-definition Dome Camera·User Manual 2.2.3 In-ceiling Mounting without gang box Steps: 1. Attach the drill template (supplied) to the place where you want to fix the camera. 2. According to the circles on the drill template as shown in Figure 2-9, drill screws holes in the ceiling on your demand. Ceiling Drill Template Figure 2-9 The Drill Template 3. Rotate the three screws through the screw holes of the in-ceiling mount. 4.
Day/Night High-definition Dome Camera·User Manual 6. Tighten the screws. Then rotate the spring clips counterclockwise to tightly secure the in-ceiling mount with the ceiling. Spring Clips In-ceiling Mount Figure 2-10 The In-ceiling Mount 7. Route the cables through the hole in the center of the in-ceiling mount. 8. Align the camera with the in-ceiling mount. 9. Tighten the set screws to secure the camera with the in-ceiling mount. 10. Connect the video output connector to the monitor.
Day/Night High-definition Dome Camera·User Manual Figure 2-11 Securing Camera 12. Install the inner black liner back to the camera. 13. Align the lower dome with the in-ceiling mount. 14. Tighten the screws to secure the lower dome with the in-ceiling mount.
Day/Night High-definition Dome Camera·User Manual 2.2.4 Outdoor Wall Mounting For the wall mounting, you have to purchase a wall mount. Steps: 1. Secure the wall mount to the wall. 2. Loosen the three set screws on the edge of the front panel. Remove the front panel. Set Screws Front Panel Figure 2-13 Removing the Front Panel 3. Route the cables through the hole in the center of the wall mount. 4. Align the camera with the wall mount. 5. Tighten the set screws to secure the camera with the wall mount.
Day/Night High-definition Dome Camera·User Manual 7. Adjust the image and focus. Please refer to the section 2.3 for more detailed information. Figure 2-14 Securing Camera 8. Install the inner black liner back to the camera. 9. Align the lower dome with the camera. 10. Tighten the screws to secure the lower dome with the camera.
Day/Night High-definition Dome Camera·User Manual Figure 2-15 Securing Lower Dome 11. Tighten the set screws to secure the front panel to the mount.
Day/Night High-definition Dome Camera·User Manual Figure 2-16 Securing Front Panel The DS-1242ZJ and DS-1243ZJ mounts are shown as follows: DS-1242ZJ DS-1243ZJ 19
Day/Night High-definition Dome Camera·User Manual 2.2.5 Indoor Wall Mounting For the wall mounting, you have to purchase a wall mount. Steps: 1. Align the number 2 holes of the back box with the number 1 holes of the wall mount. 2. Secure the back box to the wall mount with four screws. Figure 2-17 Securing Back Box 3. Route the cables through the hole in the center of the wall mount. 4. Align the camera with the back box. 5. Tighten the set screws to secure the camera with the back box. 6.
Day/Night High-definition Dome Camera·User Manual 7. Adjust the image and focus. Please refer to the section 2.3 for more detailed information. Figure 2-18 Securing Camera 8. Install the inner black liner back to the camera. 9. Align the lower dome with the camera. 10. Tighten the screws to secure the lower dome with the camera.
Day/Night High-definition Dome Camera·User Manual Figure 2-19 Securing Lower Dome The DS-1229ZJ and DS-1239ZJ mounts are shown as follows: DS-1229ZJ DS-1239ZJ 2.3 Image and Focus Adjusting Steps: 1. Three-axis adjustment. 1). View the camera image using the monitor. 2). Rotate the panning table to adjust the panning position of the camera. 3). Loosen the tilting lock screw. 4). Rotate the tilting table to adjust the tilting position of the camera. 5). Tighten the tilting lock screw. 6).
Day/Night High-definition Dome Camera·User Manual Pan Rotation Tilt Tilting Lock Screw Figure 2-20 Three-axis Adjustment 2. Zoom and focus adjustment. 1). View the camera image using the monitor. 2). Loosen the zoom lock screw and move the screw between T(Tele) and W(Wide) to obtain the appropriate angle of view. 3). Tighten the zoom lock screw. 4). Loosen the focus lock screw and move the screw between F(Far) and N(Near) to obtain the optimum focus. 5). Tighten the focus lock screw.
Day/Night High-definition Dome Camera·User Manual Zoom Lock Screw Tilting Lock Screw Focus Lock Screw Menu Button Auxiliary Video Output Connector Figure 2-21 Lens Adjustment 24
Day/Night High-definition Dome Camera·User Manual 3 Menu Description 3.1 MAIN MENU Steps: 1. Press the button to access the main menu or the submenu. 2. Set the menu button up/down to position the cursor. 3. Set the menu button left/right to select the different options.
Day/Night High-definition Dome Camera·User Manual 3.2 LENS Setting After moving the cursor to LENS, set the menu button up/down to select MANUAL or AUTO. Selecting MANUAL mode, you have to adjust the LENS IRIS manually. Selecting AUTO mode, press the button to enter the AUTO IRIS submenu. TYPE MODE SPEED AUTO IRIS DC AUTO - - - | - - - 080 RETURN8 Figure 3-2 AUTO IRIS AUTO IRIS function can automatically open and closes the iris in response to changing light conditions. TYPE The type is DC.
Day/Night High-definition Dome Camera·User Manual 3.3 SHUTTER/AGC Setting SHUTTER/AGC allows you to adjust how the system balances SHUTTER and AGC settings in different light conditions. You can set the different shutter and AGC value according to the luminance level of the situation. You can choose MANUAL and AUTO mode for the shutter and AGC.
Day/Night High-definition Dome Camera·User Manual 1/100k are selectable. AGC The AGC value can be set between 6 and 44.8. AUTO SETUP HIGH LUMINANCE MODE SHUT+AUTO IRIS/AUTO IRIS BRIGHTNESS - - - | - - - 080 LOW LUMINANCE MODE AGC BRIGHTNESS *0.50 RETURN8 Figure 3-4 AUTO SETUP In the AUTO SETUP submenu (Figure 3-4), you can adjust the BRIGHTNESS value. The system will automatically adjust the SHUTTER, AGC and AUTO IRIS settings according to the BRIGHTNESS setting.
Day/Night High-definition Dome Camera·User Manual option is provided. BRIGHTNESS The value ranges from 0 to 255. In LOW LUMINANCE condition, the AGC can be adjusted automatically according to the BRIGHTNESS value. MODE Only AGC is available. BRIGHTNESS ×1.00, ×0.75, ×0.50 and ×0.25 are selectable. 3.4 WHITE BALANCE Setting This feature processes the viewed image to retain color balance over a color temperature range and remove the unrealistic color casts.
Day/Night High-definition Dome Camera·User Manual Selecting this feature, the system suppresses the color rolling under the fluorescent light when processing the color balance. USER 1 This mode is the indoor mode. It is suitable for indoor application. B-GAIN It’s used to adjust the picture output in the blue range. The B-GAIN value ranges from 0 to 255. R-GAIN It’s used to adjust the picture output in the red range. The R-GAIN value ranges from 0 to 255.
Day/Night High-definition Dome Camera·User Manual R-GAIN The R-GAIN value ranges from 0 to 255. MANUAL Selecting MANUAL and pressing the button to enter the MANUAL WB submenu. Customize the LEVEL value on your demand. MANUAL WB LEVEL - - - | - - - 064 RETURN8 Figure 3-6 MANUAL WB ATW Auto Tracking White Balance In ATW mode, white balance is continuously being adjusted in real-time according to the color temperature of the scene illumination. SPEED The SPEED can be set from 0 to 255.
Day/Night High-definition Dome Camera·User Manual DELAY CNT It’s the delay time between monitoring the light conditions changing and adjusting the white balance. ATW FRAME It’s used to adjust the image size of the ATW image. × 0.50, ×1.00, ×1.50 and × 2.00 are available. ENVIRONMENT INDOOR and OUTDOOR are selectable. ATW SPEED DELAY CNT ATW FRAME ENVIRONMENT - - - | - - - 239 - - - | - - - 016 *1.00 INDOOR RETURN8 Figure 3-7 ATW 3.5 BACKLIGHT Setting SHUTTER/AGC allows you to adjust the backlight.
Day/Night High-definition Dome Camera·User Manual If there’s a strong backlight, the object in front of the backlight appears silhouetted or dark. BLC can correct the exposure of the subject. But the backlight environment is overexposed. HLC(Highlight Compensation) HLC masks strong light sources that usually flare across a scene. This makes it possible to see the detail of the image that would normally be hidden. 3.6 PICTURE ADJUST Setting Move the cursor to PICT ADJUST.
Day/Night High-definition Dome Camera·User Manual Adjust this feature to change the color of the image. The value ranges from 0 to 255. GAIN Adjust this feature to change the depth of the color. The value ranges from 0 to 255. PICT ADJUST MIRROR BRIGHTNESS CONTRAST SHARPNESS HUE GAIN OFF ---|-----|-----|-----|-----|--- 000 128 128 128 128 RETURN8 Figure 3-8 PICT ADJUST 3.
Day/Night High-definition Dome Camera·User Manual LUMINANCE There are MID, HIGH, LOW selectable, standing for middle, high and low luminance respectively. CONTRAST There are MID, HIGH, LOW, MIDLOW and MIDHIGH selectable. ATR LUMINANCE CONTRAST LOW LOW RETURN8 Figure 3-9 ATR 3.8 MOTION DETECTION Setting There are two kinds of MOTION DET panes, BLOCKDISP and MONITOR AREA. BLOCK DISP Steps: 1. After moving the cursor to MOTION DET, select ON and press the button to enter the submenu.
Day/Night High-definition Dome Camera·User Manual 2. Position the cursor on DETECT SENSE, set the menu button left/right to adjust the sensitivity level. 3. Position the cursor on BLOCK DISP, set the menu button left/right to select ENABLE. 4. Press the button to enter the setup interface of the detection panes. 5. You can press the button once to cancel a pane. Press on the pane again to enable the pane. 6. Long press the button to back to the previous menu. 7. Select ON to enable BLOCK DISP. 8.
Day/Night High-definition Dome Camera·User Manual 4. Position the cursor on AREA SEL to select one area. There are four areas available. 5. Set the values of TOP, BOTTOM, LEFT and RIGHT. The size and position of the area is defined by these values. And after you set all this value, you can see a frame on the image. 6. Return to the MAIN MENU and click SAVE ALL. 7. You can find the MONITOR AREA frame take effect after you exit the main menu.
Day/Night High-definition Dome Camera·User Manual 3.9 PRIVACY MASK Setting This feature allows you to cover certain areas which you don’t want to be viewed or recorded. The size, color, transparency of the areas is adjustable. Steps: 1. After moving the cursor to PRIVACY, press the button to enter PRIVACY submenu. 2. Select one privacy area in AREA SEL. 3. Set the values of TOP, BOTTOM, LEFT and RIGHT. The size and position of the area is defined by these values. 4.
Day/Night High-definition Dome Camera·User Manual PRIVACY AREA SEL TOP BOTTOM LEFT RIGHT COLOR TRANSP MOSAIC 1/8 ---|-----|-----|-----|--1 0.00 OFF 000 000 000 000 RETURN8 Figure 3-11 PRIVACY 3.10 DAY/NIGHT Setting There are five DAY/NIGHT modes selectable: AUTO, COLOR, and B/W. COLOR mode is used for normal lighting conditions. B/W mode can increase the sensitivity in low light conditions. AUTO Mode Setting In AUTO mode, the day mode and the night mode can switch automatically.
Day/Night High-definition Dome Camera·User Manual 1. After moving the cursor to DAY/NIGHT, set the menu button left/right to select AUTO. 2. Press the button to enter the submenu. BURST Select ON or OFF to enable or disable this feature. DELAYCNT The value ranges from 0 to 255. This value is the delay time before the day/night mode switches. DAYNIGHT The value ranges from 0 to 255. The day mode switches to the night mode when the light condition reaches to the value you select.
Day/Night High-definition Dome Camera·User Manual B/W Mode Setting In the B/W submenu, you can enable or disable the BURST. B/W BURST OFF RETURN8 Figure 3-13 B/W 3.11 NR Setting This feature is used to reduce the noise in the video signal. After moving the cursor to NR, press the button to enter the NR submenu. Y LEVEL The value ranges from 0 to 15.
Day/Night High-definition Dome Camera·User Manual NR Y LEVEL - - - | - - - 004 RETURN8 Figure 3-14 NR 3.12 CAMERA ID Setting In Camera ID submenu, you can customize the camera ID. It also allows you to adjust the camera ID position on the monitor screen. Select OFF, if you want to disable the Camera ID. Select ON, if you want to enable the Camera ID. Customizing the camera ID Steps: 1. After selecting ON, press the button to enter the submenu. 2.
Day/Night High-definition Dome Camera·User Manual 4. Repeat the steps 1 through 3 to select other characters. Modifying the camera ID Steps: 1. Position the cursor on one of the arrows. 2. Press the button to position the cursor on the character that needs to modify. 3. Select one of the other characters to replace it. Clearing the camera ID Steps: 1. Position the cursor on CLR. 2. Press the button to clear the characters. Positioning the camera ID Steps: 1.
Day/Night High-definition Dome Camera·User Manual CAMERA ID ABCDEFGHIJKLMNOPQRSTUV WXYZ0123456789-!”#$%&’ ()_`,¥:;<=>?@\^*.x+/ CHR1 CHR2 ← → ↑ ↓ CLR POS8 RETURN8 Figure 3-15 CAMERA ID 3.13 SYNC/PIXEL CORRECT Setting Both internal and line lock synchronization are available. (Only the camera which supports DC 12 V and AC 24 V power has line lock synchronization.) If 12V DC power supply is applied, SYNC mode is internal synchronization and not adjustable.
Day/Night High-definition Dome Camera·User Manual 3.14 LANGUAGE Setting You can adjust the language of the on-screen menu. The factory default language is English. Steps: 1. Move the cursor to LANGUAGE. 2. Set left/right to select the language you need. 3.15 CAMERA RESET Setting After moving the cursor to CAMERA RESET, press the button to reset all camera settings to factory default parameters.
Day/Night High-definition Dome Camera·User Manual Appendix Table 1 DS-2CC5181P(N)-VP(IR)(H) Specification DS-2CC5181P(N)-VP(IR)(H) Model Parameter 600 TVL CCD ICR Weather-proof Vandal-proof Dome Camera Camera Image Sensor 1/3” SONY Super HAD CCD II Signal System PAL/NTSC Effective Pixels PAL: 752 (H) × 582 (V) NTSC: 768 (H) × 494 (V) Color: 0.001 Lux @ (F1.2, AGC ON ) Color: 0.0014 Lux @ (F1.4, AGC ON ) B/W: 0.0001 Lux @ (F1.2, AGC ON) Min. Illumination B/W: 0.00014 Lux @ (F1.4, AGC ON) -IR: 0.
Day/Night High-definition Dome Camera·User Manual Angle of view: 92°- 27.
Day/Night High-definition Dome Camera·User Manual SMART IR, ATR, HLC, DNR, Sharpness, Function Brightness, Contrast, Hue, Gain, Mirror, Defect Pixel Correction General -10 °C - 60 °C (14 °F - 140 °F) Operating Conditions Humidity 90% or less (non-condensing) -H: -40 °C - 60 °C (-40 °F - 140 °F) with heater and fan on Power Supply 24 V AC ± 10%, 12 V DC ± 10% -H: 24 V AC ± 10% Weather Proof Rating IP66 Heater IR Range -H: support -IR: approx 20 to 30 meters Max. 5 W Power Consumption -IR: Max.
Day/Night High-definition Dome Camera·User Manual Dimension Unit: mm Dimension with DS-1240ZJ: Unit: mm 49
Day/Night High-definition Dome Camera·User Manual Table 2 DS-2CC5191P(N)-VP(IR)(H) Specification DS-2CC5191P(N)-VP(IR)(H) Model Parameter 650 TVL CCD ICR Weather-proof Vandal-proof Dome Camera Camera Image Sensor 1/3” SONY EXView HAD CCD II Signal System PAL/NTSC Effective Pixels PAL: 976 (H) × 582 (V) NTSC: 976 (H) × 494 (V) Color: 0.001 Lux @ (F1.2, AGC ON ) Color: 0.0014 Lux @ (F1.4, AGC ON ) B/W: 0.0001 Lux @ (F1.2, AGC ON) Min. Illumination B/W: 0.00014 Lux @ (F1.4, AGC ON) -IR: 0.
Day/Night High-definition Dome Camera·User Manual Lens Mount φ14 Auto Iris Angle Adjustment Day & Night DC drive Pan: 0 - 355°, Tilt: 0 - 80°, Rotation: ± 90° IR cut filter with auto switch Horizontal Resolution 650 TVL (Color), 700 TVL (B/W) Synchronization Internal/Power synchronization 1Vp-p composite output (75 Ω/BNC); Video Output Test monitor out [1Vp-p composite output (75 Ω/BNC), device line] S/N Ratio More than 62 dB Menu Camera ID On/Off (52 letters, position adjustable) D/N Mode Au
Day/Night High-definition Dome Camera·User Manual SMART IR, ATR, HLC, DNR, Sharpness, Function Brightness, Contrast, Hue, Gain, Mirror, Defect Pixel Correction General -10 °C - 60 °C (14 °F - 140 °F) Operating Conditions Humidity 90% or less (non-condensing) -H: -40 °C - 60 °C (-40 °F - 140 °F) with heater and fan on Power Supply 24 V AC ± 10%, 12 V DC ± 10% -H: 24 V AC ± 10% Weather Proof Rating IP66 Heater IR Range -H: support -IR: approx 20 to 30 meters Max. 5 W Power Consumption -IR: Max.
Day/Night High-definition Dome Camera·User Manual Dimension Unit: mm Dimension with DS-1240ZJ: Unit: mm 53
Day/Night High-definition Dome Camera·User Manual Table 3 DS-2CC51A1P(N)-VP(IR)(H) Specification DS-2CC51A1P(N)-VP(IR)(H) Model Parameter 700 TVL CCD ICR Weather-proof Vandal-proof Dome Camera Camera Image Sensor 1/3” SONY EXView HAD CCD II Signal System PAL/NTSC Effective Pixels PAL: 976 (H) × 582 (V) NTSC: 976 (H) × 494 (V) Color: 0.001 Lux @ (F1.2, AGC ON ) Color: 0.0014 Lux @ (F1.4, AGC ON ) B/W: 0.0001 Lux @ (F1.2, AGC ON) Min. Illumination B/W: 0.00014 Lux @ (F1.4, AGC ON) -IR: 0.
Day/Night High-definition Dome Camera·User Manual Lens Mount φ14 Auto Iris Angle Adjustment Day & Night DC drive Pan: 0 - 355°, Tilt: 0 - 80°, Rotation: ± 90° IR cut filter with auto switch Horizontal Resolution Synchronization 700 TVL Internal/Power synchronization 1Vp-p composite output (75 Ω/BNC); Video Output Test monitor out [1Vp-p composite output (75 Ω/BNC), device line] S/N Ratio More than 62 dB Menu Camera ID On/Off (52 letters, position adjustable) D/N Mode Auto /Day/Night/EXT1/EXT2
Day/Night High-definition Dome Camera·User Manual SMART IR, ATR, HLC, DNR, Sharpness, Video Brightness, Contrast, Hue, Gain, Mirror, Defect Pixel Correction General -10 °C - 60 °C (14 °F - 140 °F) Operating Conditions Humidity 90% or less (non-condensing) -H: -40 °C - 60 °C (-40 °F - 140 °F) with heater and fan on Power Supply 24 V AC ± 10%, 12 V DC ± 10% -H: 24 V AC ± 10% Weather Proof Rating IP66 Heater IR Range -H: support -IR: approx 20 to 30 meters Max. 5 W Power Consumption -IR: Max.
Day/Night High-definition Dome Camera·User Manual Dimension Unit: mm Dimension with DS-1240ZJ: Unit: mm 57
Day/Night High-definition Dome Camera·User Manual 58