
User manual
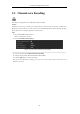
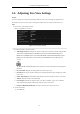
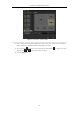
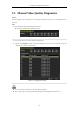
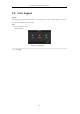
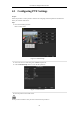
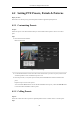
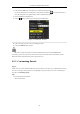
Table Of Contents
- Product Key Features
- Chapter 1 Introduction
- Chapter 2 Getting Started
- Chapter 3 Live View
- Chapter 4 PTZ Controls
- Chapter 5 Recording Settings
- 5.1 Configuring Recording Parameters
- 5.2 Configuring Record Schedule
- 5.3 Configuring Motion Detection Record
- 5.4 Configuring Alarm Triggered Record
- 5.5 Configuring VCA Record
- 5.6 Configuring Manual Record
- 5.7 Configuring Holiday Record
- 5.8 Configuring Redundant Recording
- 5.9 Configuring HDD Group for Recording
- 5.10 Files Protection
- Chapter 6 Playback
- Chapter 7 Backup
- Chapter 8 Alarm Settings
- Chapter 9 Network Settings
- Chapter 10 HDD Management
- Chapter 11 Camera Settings
- Chapter 12 DVR Management and Maintenance
- Chapter 13 Others
- Appendix

User Manual of Digital Video Recorder
63
3.5 Manual Video Quality Diagnostics
Purpose:
The video quality of the analog channels can be diagnosed manually and you can view the diagnostic results
from a list.
Steps:
1. Enter the Manual Video Quality Diagnostics interface.
Menu> Manual >Manual Video Quality Diagnostics
Figure 3. 10 Video Quality Diagnostics
2. Check the checkboxes to select the channels for diagnostics.
3. Click the button Diagnose, and the results will be displayed on a list. You can view the video status and
diagnostics time of the selected channels.
Figure 3. 11 Diagnostics Result
Connect the camera to the device for the video quality diagnostics.
Three exception types can be diagnosed: Blurred Image, Abnormal Brightness and Color Cast.