
User Manual
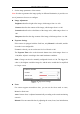
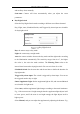
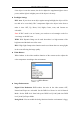
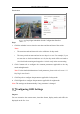
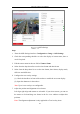
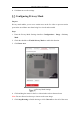

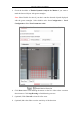
Table Of Contents
- Chapter 1 System Requirement
- Chapter 2 Network Connection
- Chapter 3 Access to the Network Camera
- Chapter 4 Wi-Fi Settings
- Chapter 5 Live View
- Chapter 6 Network Camera Configuration
- Chapter 7 Network Settings
- 7.1 Configuring Basic Settings
- 7.2 Configure Advanced Settings
- 7.2.1 Configuring SNMP Settings
- 7.2.2 Configuring FTP Settings
- 7.2.3 Configuring Email Settings
- 7.2.4 Platform Access
- 7.2.5 Wireless Dial
- 7.2.6 HTTPS Settings
- 7.2.7 Configuring QoS Settings
- 7.2.8 Configuring 802.1X Settings
- 7.2.9 Integration Protocol
- 7.2.10 Bandwidth Adaptation
- 7.2.11 Network Service
- 7.2.12 Smooth Streaming
- Chapter 8 Video/Audio Settings
- Chapter 9 Image Settings
- Chapter 10 Event Settings
- 10.1 Basic Events
- 10.2 Smart Events
- 10.2.1 Configuring Audio Exception Detection
- 10.2.2 Configuring Defocus Detection
- 10.2.3 Configuring Scene Change Detection
- 10.2.4 Configuring Face Detection
- 10.2.5 Configuring Intrusion Detection
- 10.2.6 Configuring Line Crossing Detection
- 10.2.7 Configuring Region Entrance Detection
- 10.2.8 Configuring Region Exiting Detection
- 10.2.9 Configuring Unattended Baggage Detection
- 10.2.10 Configuring Object Removal Detection
- 10.3 VCA Configuration
- Chapter 11 Storage Settings
- Chapter 12 Playback
- Chapter 13 Picture
- Chapter 14 Application
- Appendix

Network Camera User Manual
104
illumination.
Day/Night Scheduled-Switch Configuration Interface
Steps:
1. Click the calendar icon to select the start time and the end time of the switch.
Notes:
• The start time and end time refer to the valid time for day mode.
• The time period can start and end on two days in a row. For example, if you
set start time as 10:00 and end time as 1:00, the day mode will be activated at
10 o'clock in the morning and stopped at 1 o'clock early in the next morning.
2. Click Common tab to configure the common parameters applicable to the day
mode and night mode.
Note: For the detailed information of each parameter, please refer to Section 9.1.1
Day/Night Auto-Switch.
3. Click Day tab to configure the parameters applicable for day mode.
4. Click Night tab to configure the parameters applicable for night mode.
Note: The settings saved automatically if any parameter is changed.
Configuring OSD Settings
Purpose:
You can customize the camera name, time/date format, display mode, and OSD size
displayed on the live view.