
Operation Manual


User Manual of Network Camera
© Hikvision Digital Technology Co., Ltd. All Rights Reserved.
30
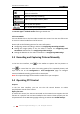
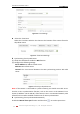
Manually capture the pictures displayed in live view and then
save it as a JPEG file.
/
Manually start/stop recording.
/
Audio on and adjust volume /Mute.
/
Turn on/off microphone.
/
Turn on/off 3D zooming function.
Note: Before using the two-way audio function or recording with audio, please set
the Stream Type to Video & Audio referring to Section 5.4.
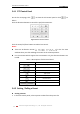
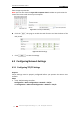
Full-screen Mode
You can double-click on the live video to switch the current live view into full-screen
or return to normal mode from the full-screen.
Please refer to the following sections for more information:
Configuring remote recording in Section 6.2 Configuring Recording Schedule.
Setting the image quality of the live video in Section 5.1 Configuring Local
Parameters and Section 5.4.1 Configuring Video Settings.
Setting the OSD text on live video in Section 5.5.2 Configuring OSD Settings.
5.3 Recording and Capturing Pictures Manually
In the live view interface, click on the toolbar to capture the live pictures or
click to record the live video. The saving paths of the captured pictures and
clips can be set on the Configuration > Local Configuration page. To configure
remote scheduled recording, please refer to Section 6.2.
Note: The captured image will be saved as a JPEG file in your computer.
5.4 Operating PTZ Control
Purpose:
In the live view interface, you can use the PTZ control buttons to realize
pan/tilt/zoom control of the camera.
Before you start:
To realize PTZ control, the camera connected to the network must support the PTZ
function or a pan/tilt unit has been installed to the camera. Please properly set the
PTZ parameters on RS-485 Settings page referring to Section 10.6 RS-485 Settings.