
User Manual
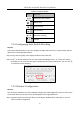
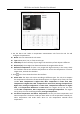
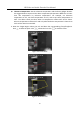
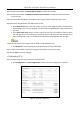
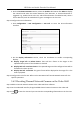
Table Of Contents
- Chapter 1 Introduction
- Chapter 2 Panels and Connections
- Chapter 3 Getting Started
- Chapter 4 Decoder Configuration and Operation by Web Browser
- 4.1 Decoder Configuration
- 4.1.1 Checking Device Information
- 4.1.2 Configuring Time Settings
- 4.1.3 Configuring RS-485/RS-232 Serial Port
- 4.1.4 Configuring Basic Network Settings
- 4.1.5 Configuring DDNS Settings
- 4.1.6 Configuring Wi-Fi Settings
- 4.1.7 Configuring Stream Settings
- 4.1.8 Configuring Transparent Channel
- 4.1.9 Configuring Synchronous Output Settings
- 4.1.10 Configuring Personalized Settings
- 4.1.11 Managing User Account
- 4.1.12 Importing/Exporting Configuration Files
- 4.1.13 Maintenance
- 4.2 Setting Video Wall Layout
- 4.3 Configuring Decoding Output
- 4.4 Decoding Operation
- 4.1 Decoder Configuration
- Chapter 5 Decoder Configuration and Operation by Client Software
- Chapter 6 Display via Wi-Fi Connection
- Chapter 7 Appendix

HD Video and Audio Decoder User Manual
DS-6900UDI Decoder User Manual
64
Playback Toolbar Table 5-2
Icon
Function
Pause/Start the playback
Delete View
Slow Forward
Fast Forward
Start/Stop Clipping
Capture
Configuring Auto-Switch Decoding 5.3.4
Purpose
Auto-switch decoding refers to you can configure multiple video streams in a video output and the
dwell time in switching video streams.
Drag a camera group to the display window of the video wall. Step 1
Click to set the dwell time for the auto-switch decoding and click to start auto-switch Step 2
decoding. You can view the auto-switch decoding on the physical video wall. You can click
to stop auto-switch decoding.
Auto-Switch Decoding Figure 5-33
Window Configuration 5.3.5
Purpose:
You can set the window as the alarm window to display the video triggered by event or alarm input
on the video wall. You can also set the decoding delay and image parameters.
Drag the camera from the left-side list to the display window of the video wall, or you can Step 1
open a window if supported.