
User Manual
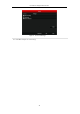
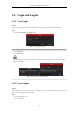
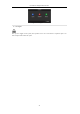
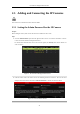
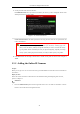
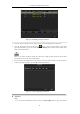
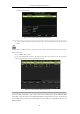
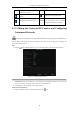
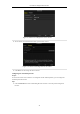
Table Of Contents
- Product Key Features
- Chapter 1 Introduction
- Chapter 2 Getting Started
- Chapter 3 Live View
- Chapter 4 PTZ Controls
- Chapter 5 Recording Settings
- 5.1 Configuring Recording Parameters
- 5.2 Configuring Record Schedule
- 5.3 Configuring Motion Detection Record
- 5.4 Configuring Alarm Triggered Record
- 5.5 Configuring VCA Record
- 5.6 Configuring Manual Record
- 5.7 Configuring Holiday Record
- 5.8 Configuring Redundant Recording
- 5.9 Configuring HDD Group for Recording
- 5.10 Files Protection
- Chapter 6 Playback
- Chapter 7 Backup
- Chapter 8 Alarm Settings
- Chapter 9 Network Settings
- Chapter 10 HDD Management
- Chapter 11 Camera Settings
- Chapter 12 DVR Management and Maintenance
- Chapter 13 Others
- Appendix

User Manual of Digital Video Recorder
49
Figure 2. 23 Network Configuration of the Camera
2. You can edit the network information and the password of the camera.
Figure 2. 24 Password Configuration of the Camera
3. Click OK to save the settings and exit the interface.
Configuring the customized protocols
Purpose:
To connect the network cameras which are not configured with the standard protocols, you can configure the
customized protocols for them.
Steps:
1. Click the Protocol button in the custom adding IP camera interface to enter the protocol management
interface.