
User Manual


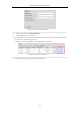
Table Of Contents
- Product Key Features
- Chapter 1 Introduction
- Chapter 2 Getting Started
- Chapter 3 Live View
- Chapter 4 PTZ Controls
- Chapter 5 Recording Settings
- 5.1 Configuring Parameters
- 5.2 Configuring Recording Schedule
- 5.3 Configuring Motion Detection Recording
- 5.4 Configuring Alarm Triggered Recording
- 5.5 Configuring VCA Event Recording
- 5.6 Manual Recording
- 5.7 Configuring Holiday Recording
- 5.8 Configuring Redundant Recording
- 5.9 Configuring HDD Group for Recording
- 5.10 Files Protection
- Chapter 6 Playback
- 6.1 Playing Back Record Files
- 6.2 Auxiliary Functions of Playback
- Chapter 7 Backup
- Chapter 8 Alarm Settings
- Chapter 9 VCA Alarm
- 9.1 Face Detection
- 9.2 Vehicle Detection
- 9.3 Line Crossing Detection
- 9.4 Intrusion Detection
- 9.5 Region Entrance Detection
- 9.6 Region Exiting Detection
- 9.7 Unattended Baggage Detection
- 9.8 Object Removal Detection
- 9.9 Audio Exception Detection
- 9.10 Sudden Scene Change Detection
- 9.11 Defocus Detection
- 9.12 PIR Alarm
- Chapter 10 VCA Search
- Chapter 11 Network Settings
- Chapter 12 HDD Management
- Chapter 13 Camera Settings
- Chapter 14 NVR Management and Maintenance
- Chapter 15 Others
- Chapter 16 Appendix

Network Video Recorder User Manual
168
Figure 11. 23 External Port Settings Dialog Box
5. Click OK to save the setting for the current port and return to the upper-level menu.
6. Click Apply button to save the settings.
7. Enter the virtual server setting page of router; fill in the blank of Internal Source Port with the internal port
value, the blank of External Source Port with the external port value, and other required contents.
Each item should be corresponding with the device port, including server port, http port, RTSP port and https port.
Figure 11. 24 Setting Virtual Server Item
The above virtual server setting interface is for reference only, it may be different due to different router
manufactures. Please contact the manufacture of router if you have any problems with setting virtual server.
11.2.9 Configuring Virtual Host
Purpose:
You can directly get access to the IP camera management interface after enabling this function.
The Virtual host function can be only configured through the web browser.
Steps:
1. Enter the Advanced settings interface, as shown in the Figure 11. 25.
Configuration > Network > Advanced Settings > Other