
User Manual


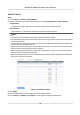
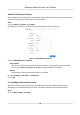

Table Of Contents
- Legal Information
- Regulatory Information
- Applicable Model
- Content Convention
- Symbol Conventions
- Chapter 1 Basic Operation
- Chapter 2 IoT
- Chapter 3 Live View
- Chapter 4 Recording and Playback
- Chapter 5 Picture Capture
- Chapter 6 Event
- 6.1 Normal Event Alarm
- 6.2 VCA Event Alarm
- 6.2.1 Facial Detection
- 6.2.2 Temperature Screening
- 6.2.3 Configure Vehicle Detection
- 6.2.4 Line Crossing Detection
- 6.2.5 Intrusion Detection
- 6.2.6 Region Entrance Detection
- 6.2.7 Region Exiting Detection
- 6.2.8 Loitering Detection
- 6.2.9 People Gathering Detection
- 6.2.10 Fast Moving Detection
- 6.2.11 Parking Detection
- 6.2.12 Unattended Baggage Detection
- 6.2.13 Object Removal Detection
- 6.2.14 Audio Exception Detection
- 6.2.15 Defocus Detection
- 6.2.16 Sudden Scene Change Detection
- 6.2.17 PIR Alarm
- 6.2.18 Thermal Camera Detection
- 6.2.19 Configure Queue Management
- 6.2.20 Target Detection
- 6.3 Configure Arming Schedule
- 6.4 Configure Linkage Actions
- Chapter 7 Smart Analysis
- Chapter 8 POS Configuration
- Chapter 9 Camera Settings
- Chapter 10 Storage
- Chapter 11 Hot Spare Recorder Backup
- Chapter 12 Network Settings
- Chapter 13 File Management
- Chapter 14 User Management and Security
- Chapter 15 System Management
- Chapter 16 Appendix
- 16.1 Glossary
- 16.2 Communication Matrix
- 16.3 Device Command
- 16.4 Frequently Asked Questions
- 16.4.1 Why is there a part of channels displaying “No Resource” or turning black screen in multi-screen of live view?
- 16.4.2 Why is the video recorder notifying not support the stream type?
- 16.4.3 Why is the video recorder notifying risky password after adding network camera?
- 16.4.4 How to improve the playback image quality?
- 16.4.5 How to confirm the video recorder is using H.265 to record video?
- 16.4.6 Why is the timeline at playback not constant?
- 16.4.7 When adding network camera, the video recorder notifies network is unreachable.
- 16.4.8 Why is the IP address of network camera being changed automatically?
- 16.4.9 Why is the video recorder notifying IP conflict?
- 16.4.10 Why is image getting stuck when the video recorder is playing back by single or multi-channel cameras?
- 16.4.11 Why does my video recorder make a beeping sound after booting?
- 16.4.12 Why is there no recorded video after setting the motion detection?
- 16.4.13 Why is the sound quality not good in recording video?

Add PoE Camera
Steps
1. Go to Camera → Camera → PoE
Sengs .
2. Enable or disable long network cable mode by
selecng Long Distance or Short Distance.
Long Distance
Long-distance (100 to 300 meters) network transmissions via PoE interface.
Short Distance
Short-distance (< 100 meters) network transmission via PoE interface.
Note
• The PoE ports are enabled with the short distance mode by default.
• The bandwidth of IP camera connected to the PoE via long network cable (100 to 300 meters)
cannot exceed 6 MP.
• The allowed max. long network cable may be less than 300 meters depending on
dierent IP
camera models and cable materials.
• When the transmission distance reaches 100 to 250 meters, you must use the CAT5E or CAT6
network cable to connect with the PoE interface.
• When the transmission distance reaches 250 to 300 meters, you must use the CAT6 network
cable to connect with the PoE interface.
• Refer to the Appendix 20.3 List of IP Cameras Connected to PoE by Long Network Cable (100 -
300 m) for the list of IP cameras.
Figure 1-12 Add PoE Camera
3. Click Apply.
4. Connect PoE cameras to device PoE ports with network cables.
5. Go to Camera → Camera → IP Camera to view camera image and
informaon.
Network Video Recorder User Manual
11