
User Manual
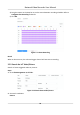


Table Of Contents
- Legal Information
- Regulatory Information
- Applicable Model
- Content Convention
- Symbol Conventions
- Chapter 1 Basic Operation
- Chapter 2 IoT
- Chapter 3 Live View
- Chapter 4 Recording and Playback
- Chapter 5 Picture Capture
- Chapter 6 Event
- 6.1 Normal Event Alarm
- 6.2 VCA Event Alarm
- 6.2.1 Facial Detection
- 6.2.2 Temperature Screening
- 6.2.3 Configure Vehicle Detection
- 6.2.4 Line Crossing Detection
- 6.2.5 Intrusion Detection
- 6.2.6 Region Entrance Detection
- 6.2.7 Region Exiting Detection
- 6.2.8 Loitering Detection
- 6.2.9 People Gathering Detection
- 6.2.10 Fast Moving Detection
- 6.2.11 Parking Detection
- 6.2.12 Unattended Baggage Detection
- 6.2.13 Object Removal Detection
- 6.2.14 Audio Exception Detection
- 6.2.15 Defocus Detection
- 6.2.16 Sudden Scene Change Detection
- 6.2.17 PIR Alarm
- 6.2.18 Thermal Camera Detection
- 6.2.19 Configure Queue Management
- 6.2.20 Target Detection
- 6.3 Configure Arming Schedule
- 6.4 Configure Linkage Actions
- Chapter 7 Smart Analysis
- Chapter 8 POS Configuration
- Chapter 9 Camera Settings
- Chapter 10 Storage
- Chapter 11 Hot Spare Recorder Backup
- Chapter 12 Network Settings
- Chapter 13 File Management
- Chapter 14 User Management and Security
- Chapter 15 System Management
- Chapter 16 Appendix
- 16.1 Glossary
- 16.2 Communication Matrix
- 16.3 Device Command
- 16.4 Frequently Asked Questions
- 16.4.1 Why is there a part of channels displaying “No Resource” or turning black screen in multi-screen of live view?
- 16.4.2 Why is the video recorder notifying not support the stream type?
- 16.4.3 Why is the video recorder notifying risky password after adding network camera?
- 16.4.4 How to improve the playback image quality?
- 16.4.5 How to confirm the video recorder is using H.265 to record video?
- 16.4.6 Why is the timeline at playback not constant?
- 16.4.7 When adding network camera, the video recorder notifies network is unreachable.
- 16.4.8 Why is the IP address of network camera being changed automatically?
- 16.4.9 Why is the video recorder notifying IP conflict?
- 16.4.10 Why is image getting stuck when the video recorder is playing back by single or multi-channel cameras?
- 16.4.11 Why does my video recorder make a beeping sound after booting?
- 16.4.12 Why is there no recorded video after setting the motion detection?
- 16.4.13 Why is the sound quality not good in recording video?

Note
All the parameters should be exactly match the PTZ camera parameters.
4. Click OK to save the
sengs.
3.6.2 Set a Preset
Presets record the PTZ posion and the status of zoom, focus, iris, etc.You can call a preset to
quickly move the camera to the
predened posion.
Steps
1. Click on the quick sengs toolbar of the PTZ camera's live view.
2. Click direconal buons to wheel the camera to a locaon.
3. Adjust the zoom, focus and iris status.
4. Click in the lower right corner of Live View to set the preset.
Figure 3-6 Set Preset
5. Select the preset No. (1 to 255) from the drop-down list.
6. Enter the preset name.
7. Click Apply to save the preset.
8.
Oponal: Click Cancel cancel the locaon informaon of the preset.
9. Oponal: Click in the lower right corner of Live View to view the congured presets.
Figure 3-7 View the Congured Presets
3.6.3 Call a Preset
A preset enables the camera to point to a specied posion such as a window when an event takes
place.
Steps
1. Click
on the quick sengs toolbar of the PTZ camera's Live View.
2. Click in the lower right corner of Live View to set the preset.
3. Select the preset No. from the drop-down list.
4. Click Call to call it, or click
in the lower right corner of Live View, and click the congured
preset to call it.
Figure 3-8 Call Preset (1)
Network Video Recorder User Manual
32