
User Manual
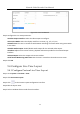
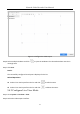
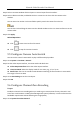
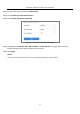
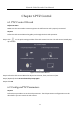
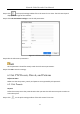
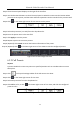
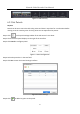
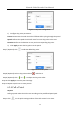
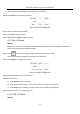
Table Of Contents
- Introduction
- Chapter 2 Getting Started
- Chapter 3 Camera Management
- Chapter 4 Camera Settings
- Chapter 5 Live View
- Chapter 6 PTZ Control
- Chapter 7 Storage
- 7.1 Storage Device Management
- 7.2 Storage Mode
- 7.3 Recording Parameters
- 7.4 Configure Recording Schedule
- 7.5 Configure Continuous Recording
- 7.6 Configure Motion Detection Triggered Recording
- 7.7 Configure Event Triggered Recording
- 7.8 Configure Alarm Triggered Recording
- 7.9 Configure POS Event Triggered Recording
- 7.10 Configure Picture Capture
- 7.11 Configure Holiday Recording and Capture
- 7.12 Configure Redundant Recording and Capture
- Chapter 8 Disk Array (RAID)
- Chapter 9 File Management
- Chapter 10 Playback
- Chapter 11 Event and Alarm Settings
- 11.1 Configure Arming Schedule
- 11.2 Configure Alarm Linkage Actions
- 11.3 Configure Motion Detection Alarms
- 11.4 Configure Video Loss Alarms
- 11.5 Configure Video Tampering Alarms
- 11.6 Configure Sensor Alarms
- 11.7 Configure Exceptions Alarms
- 11.8 Setting Alarm Linkage Actions
- 11.9 Trigger or Clear Alarm Output Manually
- Chapter 12 VCA Event Alarm
- 12.1 Face Detection
- 12.2 Vehicle Detection
- 12.3 Line Crossing Detection
- 12.4 Intrusion Detection
- 12.5 Region Entrance Detection
- 12.6 Region Exiting Detection
- 12.7 Unattended Baggage Detection
- 12.8 Object Removal Detection
- 12.9 Audio Exception Detection
- 12.10 Sudden Scene Change Detection
- 12.11 Defocus Detection
- 12.12 PIR Alarm
- 12.13 Thermal Camera Detection
- Chapter 13 Smart Analysis
- Chapter 14 POS Configuration
- Chapter 15 Network Settings
- Chapter 16 Hot Spare Device Backup
- Chapter 17 User Management and Security
- Chapter 18 System Service Maintenance
- Chapter 19 General System Settings
- Chapter 20 Appendix

Network Video Recorder User Manual
66
Step 2 The PTZ control panel displays on the right of the interface.
Step 3 Use the directional buttons on the PTZ control panel to wheel the camera to the location where
you want to set a preset, and the zoom and focus operations can be recorded in the preset as well.
Step 4 Click in the lower right corner of Live View to set the preset.
Figure 6-3 Set Preset
Step 5 Select the preset No. (1 to 255) from the drop-down list.
Step 6 Enter the preset name in the text field.
Step 7 Click Apply to save the preset.
Step 8 Repeat steps 2-6 to save more presets.
Step 9 (Optional) Click Cancel to cancel the location information of the preset.
Step 10 (Optional) Click in the lower right corner of Live View to view the configured presets.
Figure 6-4 View the Configured Presets
6.3.2 Call Presets
Purpose
A presets enables the camera to point to a specified position such as a window when an event
takes place.
Step 1 Click on the quick settings toolbar of the PTZ camera Live View.
Step 2 Click in the lower right corner of Live View.
Step 3 Select the preset No. from the drop-down list.
Step 4 Click Call to call it, or click in the lower right corner of Live View, and click the configured
preset to call it.
Figure 6-5 Call Preset (1)