
User's Manual
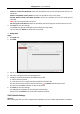


Table Of Contents
- Chapter 1 Overview
- Chapter 2 Installation
- Chapter 3 Disassembling before Maintenance
- Chapter 4 Wiring
- 4.1 Components Introduction
- 4.2 Wiring Electric Supply
- 4.3 Wiring Interconnecting Cable
- 4.4 Terminal Description
- 4.4.3 Master Control Board Terminal Description
- 4.4.4 Slave Control Board Terminal Description
- 4.4.5 Main Control Board Terminal Description
- 4.4.6 Main Control Board Serial Port ID Description
- 4.4.7 RS-485 Wiring
- 4.4.8 RS-232 Wiring
- 4.4.9 Wiegand Wiring
- 4.4.10 Barrier Control Wiring
- 4.4.11 Alarm Output Wiring
- 4.5 Wiring Lithium Battery (Optional)
- Chapter 5 Device Settings
- Chapter 6 Device Activation
- Chapter 7 Client Operation
- 7.1 Function Module
- 7.2 Access Control Management
- 7.2.1 Adding Access Control Device
- 7.2.2 Viewing Device Status
- 7.2.3 Editing Basic Information
- 7.2.4 RS-485 Settings
- 7.2.5 Authenticating M1 Card Encryption
- 7.2.6 Remote Configuration
- Checking Device Information
- Editing Device Name
- Editing Time
- Setting System Maintenance
- Setting RS-485 Parameters
- Managing Network User
- Managing Remote Control User
- Setting Security
- Configuring Passing Parameters
- Configuring Screen Parameters
- Configuring People Counting Parameters
- Configuring Network Parameters
- Configuring Advanced Network
- Configuring Relay Parameters
- Configuring Audio File
- Operating Relay
- Viewing Relay Status
- 7.3 Organization Management
- 7.4 Person Management
- 7.5 Permission Configuration
- 7.6 Advanced Functions
- 7.7 Searching Access Control Event
- 7.8 Access Control Event Configuration
- 7.9 Door Status Management
- 7.10 Arming Control
- 7.11 Time and Attendance
- Appendix A Tips for Scanning Fingerprint
- Appendix B DIP Switch Description
- Appendix C Table of Audio Index Related Content

Swing Barrier·User Manual
114
1) In the Selectable Time Period list on the left, click the added time period and click
to add it to the right.
2) (Optional) To remove the selected time period, select it and click .
7. (Optional) Check Set as Default for All Persons in Department checkbox.
All persons in the department will use this shift schedule by default.
8. (Optional) If the selected department contains sub department(s), the Set as Shift Schedule for
All Sub Departments checkbox will display. You can check it to apply the department schedule
to its sub departments.
9. Click Save to save the settings.
Person Schedule
Steps:
1. Open the Shift Schedule Management interface and select the department on the left panel.
2. Select the person(s) on the right panel.
3. Click Person Schedule to pop up Person Schedule dialog.
4. Check Time and Attendance checkbox.
The configured person will apply the attendance schedule.
5. Select the shift from the drop-down list.
6. Set the start date and end date.
7. (Optional) Set other parameters for the schedule.
You can select Check-in Not Required, Check-out Not Required, Effective for Holiday, Effective
for Overtime, Effective for Multiple Shift Schedules.
8. Click Save to save the settings.
Temporary Schedule
Steps:
1. Open the Shift Schedule Management interface and select the department on the left panel.
2. Select the person(s) on the right panel.
3. Click Temporary Schedule to pop up Temporary Schedule dialog.