DS-K3Y501SX Series Flap Barrier User Manual
DS-K3Y501SX Series Flap Barrier User Manual Legal Information ©2021 Hangzhou Hikvision Digital Technology Co., Ltd. All rights reserved. About this Manual The Manual includes instructions for using and managing the Product. Pictures, charts, images and all other information hereinafter are for description and explanation only. The information contained in the Manual is subject to change, without notice, due to firmware updates or other reasons.
DS-K3Y501SX Series Flap Barrier User Manual PRODUCTION OF CHEMICAL OR BIOLOGICAL WEAPONS, ANY ACTIVITIES IN THE CONTEXT RELATED TO ANY NUCLEAR EXPLOSIVE OR UNSAFE NUCLEAR FUEL-CYCLE, OR IN SUPPORT OF HUMAN RIGHTS ABUSES. IN THE EVENT OF ANY CONFLICTS BETWEEN THIS MANUAL AND THE APPLICABLE LAW, THE LATER PREVAILS. Data Protection During the use of device, personal data will be collected, stored and processed. To protect data, the development of Hikvision devices incorporates privacy by design principles.
DS-K3Y501SX Series Flap Barrier User Manual Regulatory Information FCC Information Please take attention that changes or modification not expressly approved by the party responsible for compliance could void the user’s authority to operate the equipment. FCC compliance: This equipment has been tested and found to comply with the limits for a Class B digital device, pursuant to part 15 of the FCC Rules.
DS-K3Y501SX Series Flap Barrier User Manual under the EMC Directive 2014/30/EU, RE Directive 2014/53/EU,the RoHS Directive 2011/65/EU 2012/19/EU (WEEE directive): Products marked with this symbol cannot be disposed of as unsorted municipal waste in the European Union. For proper recycling, return this product to your local supplier upon the purchase of equivalent new equipment, or dispose of it at designated collection points. For more information see: www.recyclethis.
DS-K3Y501SX Series Flap Barrier User Manual Safety Instruction These instructions are intended to ensure that user can use the product correctly to avoid danger or property loss. The precaution measure is divided into Dangers and Cautions: Dangers: Neglecting any of the warnings may cause serious injury or death. Cautions: Neglecting any of the cautions may cause injury or equipment damage. Dangers: Follow these safeguards to prevent serious injury or death.
DS-K3Y501SX Series Flap Barrier User Manual • If smoke, odors or noise rise from the device, turn off the power at once and unplug the power cable, and then please contact the service center. • Do not ingest battery, Chemical Burn Hazard. This product contains a coin/button cell battery. If the coin/button cell battery is swallowed, it can cause severe internal burns in just 2 hours and can lead to death. Keep new and used batteries away from children.
DS-K3Y501SX Series Flap Barrier User Manual • Please use a soft and dry cloth when clean inside and outside surfaces of the device cover, do not use alkaline detergents. • Please keep all wrappers after unpack them for future use. In case of any failure occurred, you need to return the device to the factory with the original wrapper. Transportation without the original wrapper may result in damage on the device and lead to additional costs.
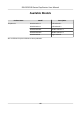
DS-K3Y501SX Series Flap Barrier User Manual Available Models Product Name Flap Barrier Model Description DS-K3Y501SX-L1 Left Pedestal 1 DS-K3Y501SX-L2 Left Pedestal 2 DS-K3Y501SX-M1 Middle Pedestal 1 DS-K3Y501SX-M2 Middle Pedestal 2 DS-K3Y501SX-R Right Pedestal You can follow the picture below to select pedestals: viii
DS-K3Y501SX Series Flap Barrier User Manual ix
DS-K3Y501SX Series Flap Barrier User Manual Contents Chapter 1 Overview .................................................................................................................... 1 1.1 Introduction ........................................................................................................................... 1 1.2 Main Features ........................................................................................................................ 1 Chapter 2 System Wiring ............
DS-K3Y501SX Series Flap Barrier User Manual 5.4 Switch Relay Output Mode (NO/NC) .................................................................................... 26 5.4.1 Barrier Control Relay Output Mode ............................................................................ 26 5.4.2 Alarm Relay Output Mode (NO/NC) ............................................................................ 27 Chapter 6 Activation ....................................................................................
DS-K3Y501SX Series Flap Barrier User Manual 7.4.12 Configure Additional Information ............................................................................. 51 7.4.13 Import and Export Person Identify Information ........................................................ 52 7.4.14 Import Person Information ....................................................................................... 52 7.4.15 Import Person Pictures ................................................................................
DS-K3Y501SX Series Flap Barrier User Manual 7.9 Door Control ........................................................................................................................ 82 7.9.1 Control Door Status ..................................................................................................... 82 7.9.2 Check Real-Time Access Records ................................................................................ 84 7.10 Event Center .........................................................
DS-K3Y501SX Series Flap Barrier User Manual Appendix F. Communication Matrix and Device Command .....................................................
DS-K3Y501SX Series Flap Barrier User Manual Chapter 1 Overview 1.1 Introduction Figure 1-1 Appearance The flap barrier designed to detect unauthorized entrance or exit. By adopting the flap barrier integratedly with the access control system, person should authenticate to pass through the lane via presenting IC or ID card, scanning QR code, etc. It is widely used in attractions, stadiums, construction sites, residences, etc. 1.
DS-K3Y501SX Series Flap Barrier User Manual • Self-detection, Self-diagnostics, and automatic alarm • Audible and visual alarm will be triggered when detecting intrusion, tailgating, reverse passing, and climbing over barrier • IP confliction detection • Remote control and management • Online/offline operation • LED indicates the entrance/exit and passing status • Barrier remains open when powered down • Fire alarm passing When the fire alarm is triggered, the barrier will be open automatically for emergenc
DS-K3Y501SX Series Flap Barrier User Manual Chapter 2 System Wiring The preparation before installation and general wiring. Steps 1. Draw a central line on the installation surface of the left or right pedestal. 2. Draw other parallel lines for installing the other pedestals. Note The distance between the nearest two line is L+300 mm. L represents the lane width. 3. Slot on the installation surface and dig installation holes according to the hole position diagram. Figure 2-1 Hole Position Diagram 4.
DS-K3Y501SX Series Flap Barrier User Manual Figure 2-2 System Wiring Diagram (General Wiring) • • • • • Note The suggested inner diameter of the low voltage conduit is larger than 30 mm. If you want to bury both of the AC power cord and the low voltage cable at the entrance, the two cables should be in separated conduits to avoid interference. If you want to bury both of the AC power cord and the low voltage cable at the entrance, the two cables should be in separated conduits to avoid interference.
DS-K3Y501SX Series Flap Barrier User Manual Figure 2-3 Wire Face Recognition Terminal • • • • • • • Note The left pedestal and the middle pedestal should bury interconnecting cables for connecting the face recognition terminal. The face recognition terminal installed on the left pedestal will gain power from the sub switch, which should connect to high voltage. The suggested inner diameter of the low voltage conduit is larger than 30 mm.
DS-K3Y501SX Series Flap Barrier User Manual Chapter 3 Installation 3.1 Disassemble Pedestals Before installation, you should use the key to open the pedestals. View the pictures below to find the lock holes. Figure 3-1 Lock Holes 3.2 Install Pedestals Before You Start Prepare for the installation tools, check the device and the accessories, and clear the installation base. Steps Note • The device should be installed on the concrete surface or other non-flammable surfaces. • The dimension is as follows.
DS-K3Y501SX Series Flap Barrier User Manual Figure 3-2 Dimension of Type I and II Figure 3-3 Dimension of Type II 1. Prepare for the installation tools, check the components, and prepare for the installation base.
DS-K3Y501SX Series Flap Barrier User Manual 2. Drill holes on the ground according to the installation holes on the pedestals and insert the expansion sleeves. 3. Seal the bottom of the turnstile to avoid water from entering. 4. According to the entrance and exit marks on the pedestals, move the pedestals to the corresponded positions. Note Make sure the installation holes on the pedestals and the base are aligned with each other. 5. Secure the pedestals with expansion bolts.
DS-K3Y501SX Series Flap Barrier User Manual Chapter 4 General Wiring 4.1 Components Introduction By default, basic components of the turnstile are connected well. The pedestals can communicate by wiring the interconnecting cables. And the turnstile supports wiring the AC electric supply for the whole system's power supply. Note The voltage fluctuation of the electric supply is between 100 VAC and 220 VAC, 50 to 60 Hz. The picture displayed below describes each component's position on the turnstile.
DS-K3Y501SX Series Flap Barrier User Manual Figure 4-2 Components 2 Note • If the turnstile contains two lanes, standing at the entrance position, the IR modules on the left pedestal are the IR sending modules. The IR modules on the right pedestal are the IR receiving modules. The IR modules on the left side of the middle pedestal are the IR receiving modules, while the IR modules on the right side of the middle pedestal are the IR sending modules.
DS-K3Y501SX Series Flap Barrier User Manual Note • The cable bare part should be no more than 8 mm. It is suggested that you can immerse the bare part into the liquid tin. If possible, wear an insulation cap at the end of the bare cable. Make sure there’s no bare copper or cable after the wiring. • The Terminal L and the Terminal N cannot be wired reversely. Do not wire the input and output terminal reversely.
DS-K3Y501SX Series Flap Barrier User Manual Figure 4-4 Connect Interconnecting Cable 4.4 Connect Interconnecting Cable Steps 1. Use the key to unlock the side lock of the pedestals and remove the side cover. Figure 4-5 Lock Position 2. Pull the interconnecting cable out from the bottom, and other wiring operations can be performed.
DS-K3Y501SX Series Flap Barrier User Manual Note Interconnecting cable includes a network cable and a power supply cable of 24 V. 4.5 Terminal Description The lane controller contains main lane controller and sub lane controller, which controls the IR beams, motor, and other components' work. 4.5.
DS-K3Y501SX Series Flap Barrier User Manual Figure 4-7 Sub Control Board 4.5.
DS-K3Y501SX Series Flap Barrier User Manual Access Control Board Terminal Description Wiegand Card Reader 2 RS-485 Interface Power Output 2 RS-232 Interface Power Input Event Input GND Grounding OK Indicator of Card Reader Control Output (Invalid Card Output) ERR Indicator of Card Reader Control Output (Valid Card Output) BZ Card Reader Buzzer Control Output W1 Wiegand Head Read Data Input Data1 W0 Wiegand Head Read Data Input Data0 GND Grounding GND Grounding RS-485 B- Connect to Card
DS-K3Y501SX Series Flap Barrier User Manual Access Control Board Terminal Description Exit Button Door Lock (Relay) GND Grounding C4 Event Alarm Input 1 B2 Door 2 Signal Input GND Grounding B1 Door 1 Signal Input D1- Door 1 Relay Output (Dry Contact) D1+ D2- Door 2 Relay Output (Dry Contact) D2+ Alarm Output NO/NC1 Alarm Output Relay 1 (Dry Contact) COM1 NO/NC2 Alarm Output Relay 2 (Dry Contact) COM2 NO/NC3 Alarm Output Relay 3 (Dry Contact) COM3 NO/NC4 Alarm Output Relay 4 (Dry Con
DS-K3Y501SX Series Flap Barrier User Manual • For any requirements, the door lock can control the door barrier status of the third party. D1 controls the barrier opening for entrance, while D2 controls the door opening for exit. For details, see Barrier Control Relay Output Mode . • C3 and C4 in the event input can also be people counting interface. C3 controls people counting for entrance, while C4 controls people counting for exit.
DS-K3Y501SX Series Flap Barrier User Manual UART5 Jumper Cap Use the jumper cap to switch the serial port communication mode with the sub lane controller. You can switch between the RS-485 communication mode and the RS-232 communication mode. By default, it is in RS-485 communication mode. UART1 Jumper Cap Use the jumper cap to switch the serial port communication mode with the main lane controller. You can switch between the RS-485 communication mode and the RS-232 communication mode.
DS-K3Y501SX Series Flap Barrier User Manual Figure 4-10 Interface and Corresponded UART No. 4.5.
DS-K3Y501SX Series Flap Barrier User Manual Note • There are four RS-485 interfaces, which are for connecting ID card reader, IC card reader, QR code scanner, fingerprint and card reader, card recycler, fingerprint reader, and face recognition terminal. Take the wiring of RS-485 card reader as an example. • When connecting the RS-485 interface with a card reader, the default entrance address is 1 and the exit address is 4.
DS-K3Y501SX Series Flap Barrier User Manual 4.5.7 Wiegand Wiring Note Connect the OK/ERR/BZ if the access controller should control the LED and buzzer of the Wiegand card reader. 4.5.8 Barrier Control Wiring By default, the barrier has connected with the access control board. The lane control board can control the barrier status. If possible, the device can connect with a third party lane control board to control the third party barriers.
DS-K3Y501SX Series Flap Barrier User Manual Entering Wiring Exiting Wiring 22
DS-K3Y501SX Series Flap Barrier User Manual 4.5.9 Alarm Output Wiring Note For details about changing the relay output status via the jumper cap, see Alarm Relay Output Mode (NO/NC) .
DS-K3Y501SX Series Flap Barrier User Manual Chapter 5 Device Settings After installation and wiring completed, the turnstile will learn the open and closed position automatically. After the learning, the turnstile is in the normal mode.
DS-K3Y501SX Series Flap Barrier User Manual 3. Power on the turnstile and it will enter the keyfob pairing mode. 4. Hold the Close button for more than 10 seconds. Or pair turnstile and keyfob in the client software, see Manage Keyfob User of the user manual for more details. The keyfob's indicator of the will flash twice if the pairing is completed. 5. Set the No.4 switch to OFF, and reboot the turnstile to take effect. Note • Only one turnstile can pair the keyfob.
DS-K3Y501SX Series Flap Barrier User Manual Caution The initialization of the device will restore all the parameters to the default setting and all the device events are deleted. Note Make sure no persons are in the lane when powering on the device. 5.3 Switch to RS-485/RS-232 Mode Take the Serial Port 4 and on the access control board as an example. If the Jumper cap's position is like the picture displayed below. (The black part is the jumper cap.) The serial port is in RS-485 communication mode.
DS-K3Y501SX Series Flap Barrier User Manual Figure 5-4 Pin Appearance The jumper cap's position of barrier opening for entrance (NO) is as below: The jumper cap's position of barrier opening for exit (NO) is as below: The jumper cap's position of barrier closing for entrance (NC) is as below: The jumper cap's position of barrier closing for exit (NC) is as below: 5.4.
DS-K3Y501SX Series Flap Barrier User Manual Chapter 6 Activation You should activate the device before the first login. After powering on the device, the system will switch to Device Activation page. Activation via the device, SADP tool and the client software are supported. The default values of the device are as follows: • The default IP address: 192.0.0.64 • The default port No.: 8000 • The default user name: admin 6.
DS-K3Y501SX Series Flap Barrier User Manual Status of the device becomes Active after successful activation. 5. Modify IP address of the device. 1) Select the device. 2) Change the device IP address to the same subnet as your computer by either modifying the IP address manually or checking Enable DHCP. 3) Input the admin password and click Modify to activate your IP address modification. 6.
DS-K3Y501SX Series Flap Barrier User Manual three kinds of following categories: upper case letters, lower case letters, numbers, and special characters) in order to increase the security of your product. And we recommend you change your password regularly, especially in the high security system, changing the password monthly or weekly can better protect your product. Proper configuration of all passwords and other security settings is the responsibility of the installer and/or end-user. 7.
DS-K3Y501SX Series Flap Barrier User Manual Chapter 7 Client Software Configuration 7.1 Configuration Flow of Client Software Follow the flow diagram below to configure on the client software. Figure 7-1 Flow Diagram of Configuration on Client Software 7.2 Device Management The client supports managing access control devices and video intercom devices.
DS-K3Y501SX Series Flap Barrier User Manual 7.2.1 Add Device The client provides three device adding modes including by IP/domain, IP segment, and ISUP protocol. The client also supports importing multiple devices in a batch when there are large amount of devices to be added. Add Online Device The active online devices in the same local subnet with the client software will be displayed on the Online Device area. You can click Refresh Every 60s to refresh the information of the online devices.
DS-K3Y501SX Series Flap Barrier User Manual Enter the device password. Caution The password strength of the device can be automatically checked. We highly recommend you change the password of your own choosing (using a minimum of 8 characters, including at least three kinds of following categories: upper case letters, lower case letters, numbers, and special characters) in order to increase the security of your product.
DS-K3Y501SX Series Flap Barrier User Manual The searched online devices are displayed in the list. 4. Select multiple devices. Note For the inactive device, you need to create the password for it before you can add the device properly. For details, refer to . 5. Click Add to open the device adding window. 6. Enter the required information. User Name By default, the user name is admin. Password Enter the device password. Caution The password strength of the device can be automatically checked.
DS-K3Y501SX Series Flap Barrier User Manual 3. Click Add to open the Add window, and then select IP/Domain as the adding mode. 4. Enter the required information. Name Create a descriptive name for the device. For example, you can use a nickname that can show the location or feature of the device. Address The IP address or domain name of the device. Port The devices to add share the same port number. The default value is 8000. User Name Enter the device user name. By default, the user name is admin.
DS-K3Y501SX Series Flap Barrier User Manual Example For access control device, its access points, alarm inputs/outputs, and encoding channels (if exist) will be imported to this group. 8. Finish adding the device. - Click Add to add the device and back to the device list page. - Click Add and New to save the settings and continue to add other device. Add Devices by IP Segment If the devices share the same port No.
DS-K3Y501SX Series Flap Barrier User Manual Proper configuration of all passwords and other security settings is the responsibility of the installer and/or end-user. 6. Optional: Check Transmission Encryption (TLS) to enable transmission encryption using TLS (Transport Layer Security) protocol for security purpose . Note • This function should be supported by the device.
DS-K3Y501SX Series Flap Barrier User Manual User Name Enter the device user name. By default, the user name is admin. Password Enter the device password. Caution The password strength of the device can be automatically checked. We highly recommend you change the password of your own choosing (using a minimum of 8 characters, including at least three kinds of following categories: upper case letters, lower case letters, numbers, and special characters) in order to increase the security of your product.
DS-K3Y501SX Series Flap Barrier User Manual Caution The password strength of the device can be automatically checked. We highly recommend you change the password of your own choosing (using a minimum of 8 characters, including at least three kinds of following categories: upper case letters, lower case letters, numbers, and special characters) in order to increase the security of your product.
DS-K3Y501SX Series Flap Barrier User Manual Before You Start Add a group for managing devices. Refer to Add Group . Steps 1. Enter the Device Management module. 2. Click Device Management → Group to enter the group management page. 3. Select a group from the group list and select the resource type as Access Point, Alarm Input, Alarm Output, etc. 4. Click Import. 5. Select the thumbnails/names of the resources in the thumbnail/list view.
DS-K3Y501SX Series Flap Barrier User Manual 4. Select the resource(s) and click Delete to remove the resource(s) from the group. 7.4 Person Management You can add person information to the system for further operations such as access control, video intercom, time and attendance, etc. You can manage the added persons such as issuing cards to them in a batch, importing and exporting person information in a batch, etc. 7.4.
DS-K3Y501SX Series Flap Barrier User Manual Steps 1. Enter Person module. 2. Select an organization in the organization list to add the person. 3. Click Add to open the adding person window. The Person ID will be generated automatically. 4. Enter the basic information including person name, gender, telephone number, email address, validity period, etc.
DS-K3Y501SX Series Flap Barrier User Manual Note Enter the person's basic information first. For details about configuring person's basic information, refer to Configure Basic Information . 3. In the Credential → Card area, click +. 4. Click Settings to enter the Settings page. 5. Select Local as the card issuing mode. Figure 7-3 Issue a Card by Local Mode 6. Set other related parameters. Card Enrollment Station Select the model of the connected card enrollment station.
DS-K3Y501SX Series Flap Barrier User Manual Buzzing Enable or disable the buzzing when the card number is read successfully. Card No. Type Select the type of the card number according to actual needs. M1 Card Encryption This field is only available when the model is DS-K1F100-D8, DS-K1F100-D8E, or DS-K1F180D8E. If the card is M1 card, then you can enable the M1 Card Encryption function and select the sector of the card to encrypt. 7. Click OK to confirm the operation. 8.
DS-K3Y501SX Series Flap Barrier User Manual 7.4.5 Take a Photo via Client When adding a person, you can take a photo of the her/him via the client and set this photo as the person's profile. Before You Start Make sure PC running the client has a camera or you have connected other USB camera to the PC. Steps 1. Enter Person module. 2. Select an organization in the organization list to add the person and click Add to enter Add Person window. Note Enter the person's basic information first.
DS-K3Y501SX Series Flap Barrier User Manual Figure 7-4 Take a Photo via Client 7. Confirm to add the person. - Click Add to add the person and close the Add Person window. - Click Add and New to add the person and continue to add other persons. 7.4.6 Collect Face via Access Control Device When adding person, you can collect the person's face via access control device added to the client which supports facial recognition function. Steps 1. Enter Person module. 2.
DS-K3Y501SX Series Flap Barrier User Manual 4. Select Remote Collection. 5. Select an added access control device or the enrollment station from the drop-down list. Note If you select the enrollment station, you should click Login to set related parameters of the device including IP address, port No., user name, and password. Also, you can check Face AntiSpoofing and select the liveness level as Low, Medium, or High.
DS-K3Y501SX Series Flap Barrier User Manual 6. Collect the fingerprint. 1) Click Start. 2) Place and lift your fingerprint on the fingerprint recorder to collect the fingerprint. 3) Click Add to save the recorded fingerprint. 7. Confirm to add the person. - Click Add to add the person and close the Add Person window. - Click Add and New to add the person and continue to add other persons. Note Once the fingerprint is added, the fingerprint type cannot be changed. 7.4.
DS-K3Y501SX Series Flap Barrier User Manual 7.4.9 Configure Access Control Information When adding a person, you can set her/his access control information, such as binding an access control group with the person, configuring PIN code, setting the person as a visitor, a blocklist person, or a super user, etc. Steps 1. Enter Person module. 2. Select an organization in the organization list to add the person and click Add. 3. In the Access Control area, click to select access group(s) for the person.
DS-K3Y501SX Series Flap Barrier User Manual For details about setting the door's open duration, refer to Configure Parameters for Door . Add to Blocklist Add the person to the blocklist and when the person tries to access doors/floors, an event will be triggered and sent to the client to notify the security personnel. Mark as Visitor If the person is a visitor, you should set the her/his valid times for visit. Note The valid times for visit is between 1 and 100.
DS-K3Y501SX Series Flap Barrier User Manual Note Enter the person's basic information first. For details about configuring person's basic information, refer to Configure Basic Information . 2) In the Custom Information panel, enter the person information. 3) Click Add to add the person and close the Add Person window, or click Add and New to add the person and continue to add other persons. 7.4.
DS-K3Y501SX Series Flap Barrier User Manual Note Enter the person's basic information first. For details about configuring person's basic information, refer to Configure Basic Information . 3. In the Additional Information panel, enter the additional information of the person, including person's ID type, ID No., job title, etc., according to actual needs. 4. Confirm to add the person. - Click Add to add the person and close the Add Person window.
DS-K3Y501SX Series Flap Barrier User Manual 7.4.15 Import Person Pictures After importing face pictures for the added persons to the client, the persons in the pictures can be identified by an added face recognition terminal. You can either import person pictures one by one, or import multiple pictures at a time according to your need. Before You Start Be sure to have imported person information to the client beforehand. Steps 1. Enter the Person module. 2.
DS-K3Y501SX Series Flap Barrier User Manual 7.4.17 Export Person Pictures You can export face picture file of the added persons and save in your PC. Before You Start Make sure you have added persons and their face pictures to an organization. Steps 1. Enter the Person module. 2. Optional: Select an organization in the list. Note All persons' face pictures will be exported if you do not select any organization. 3. Click Export to open the Export panel and check Face as the content to export. 4.
DS-K3Y501SX Series Flap Barrier User Manual Note If you select the enrollment station, you should click Login, and set IP address, port No., user name and password of the device. 5. Click Import to start importing the person information to the client. Note Up to 2,000 persons and 5,000 cards can be imported. The person information, including person details, person's fingerprint information (if configured), and the linked cards (if configured), will be imported to the selected organization. 7.4.
DS-K3Y501SX Series Flap Barrier User Manual 6. Click the Card No. column and enter the card number. - Place the card on the card enrollment station. - Swipe the card on the card reader. - Manually enter the card number and press the Enter key. The person(s) in the list will be issued with card(s). 7.4.21 Report Card Loss If the person lost his/her card, you can report the card loss so that the card's related access authorization will be inactive. Steps 1. Enter Person module. 2.
DS-K3Y501SX Series Flap Barrier User Manual Note Currently, the supported card enrollment station models include DS-K1F100-D8, DS-K1F100-M, DS-K1F100-D8E, and DS-K1F180-D8E. Card Type This field is only available when the model is DS-K1F100-D8E or DS-K1F180-D8E. Select the card type as EM card or IC card according to the actual card type. Serial Port It is only available when the model is DS-K1F100-M. Select the COM the card enrollment station connects to.
DS-K3Y501SX Series Flap Barrier User Manual Steps Note You can add up to 64 holidays in the software system. 1. 2. 3. 4. 5. Click Access Control → Schedule → Holiday to enter the Holiday page. Click Add on the left panel. Create a name for the holiday. Optional: Enter the descriptions or some notifications of this holiday in the Remark box. Add a holiday period to the holiday list and configure the holiday duration. Note Up to 16 holiday periods can be added to one holiday.
DS-K3Y501SX Series Flap Barrier User Manual 1. Click Access Control → Schedule → Template to enter the Template page. Note There are two default templates: All-Day Authorized and All-Day Denied, and they cannot be edited or deleted. All-Day Authorized The access authorization is valid in each day of the week and it has no holiday. All-Day Denied The access authorization is invalid in each day of the week and it has no holiday. 2. 3. 4. 5. Click Add on the left panel to create a new template.
DS-K3Y501SX Series Flap Barrier User Manual 7.6 Set Access Group to Assign Access Authorization to Persons After adding the person and configuring the person's credentials, you can create the access groups to define which person(s) can get access to which door(s) and then apply the access group to the access control device to take effect. Before You Start • Add person to the client. • Add access control device to the client and group access points. For details, refer to Group Management . • Add template.
DS-K3Y501SX Series Flap Barrier User Manual Figure 7-6 Display the Selected Person(s) and Access Point(s) 8. After adding the access groups, you need to apply them to the access control device to take effect. 1) Select the access group(s) to apply to the access control device. 2) Click Apply All to Devices start applying all the selected access group(s) to the access control device or door station. 3) Click Apply All to Devices or Apply Changes to Devices.
DS-K3Y501SX Series Flap Barrier User Manual You can click the prompt to apply the changed data to the device. You can select either Apply Now or Apply Later. Figure 7-8 Data Synchronization 7.7 Configure Advanced Functions You can configure the advanced functions of access control to meet some special requirements in different scene. Note • For the card related functions(the type of access control card), only the card(s) with access group applied will be listed when adding cards.
DS-K3Y501SX Series Flap Barrier User Manual 2. Select an access device to show its parameters on the right page. 3. Turn the switch to ON to enable the corresponding functions. Note The displayed parameters may vary for different access control devices. RS-485 Communication Redundancy You should enable this function if you wire the RS-485 card reader to the access control device redundantly. Enable NFC If enable the function, the device can recognize the NFC card. You can present NFC card on the device.
DS-K3Y501SX Series Flap Barrier User Manual Note s The displayed parameters may vary for different access control devices. Name Edit the card reader name as desired. Exit Button Type You can set the exit button as remaining closed or remaining open. Usually, it is remaining open. Open Duration After swiping the normal card and relay action, the time for locking the door starts working. Door Left Open Timeout Alarm The alarm can be triggered if the door has not been closed in a configured time period.
DS-K3Y501SX Series Flap Barrier User Manual Configure Parameters for Card Reader After adding the access control device, you can configure its card reader parameters. Steps 1. Click Access Control → Advanced Function → Device Parameter . 2. In the device list on the left, click to expand the door, select a card reader and you can edit the card reader's parameters on the right. 3. Edit the card reader basic parameters in the Basic Information page.
DS-K3Y501SX Series Flap Barrier User Manual Communicate with Controller Every When the access control device cannot connect with the card reader for longer than the set time, the card reader will turn offline automatically. Fingerprint Recognition Level Select the fingerprint recognition level in the drop-down list. 5. Click OK. 6. Optional: Click Copy to, and then select the card reader(s) to copy the parameters in the page to the selected card reader(s).
DS-K3Y501SX Series Flap Barrier User Manual Passing Mode Select the controller which will control the barrier status of the device. • If you select According to Lane Controller's DIP Settings, the device will follow the lane controller's DIP settings to control the barrier. The settings on the software will be invalid. • If you select According to Main Controller's Settings, the device will follow the settings of the software to control the barrier. The DIP settings of the lane controller will be invalid.
DS-K3Y501SX Series Flap Barrier User Manual Note The barrier material will affect the device working. Select a correct barrier material or the barrier may not open. Lane Length The width of the lane. You can set the lane width. Note The lane width will affect the device working. Set a correct lane width or the barrier may not open. Do Not Open Barrier in Authenticates in Lane If there is someone or something in the lane, the gate will not open even if the credential is authenticated.
DS-K3Y501SX Series Flap Barrier User Manual • Move the cursor to the time duration and drag the time duration on the timeline bar to . the desired position when the cursor turns to • Click the time duration and directly edit the start/end time in the appeared dialog. • Move the cursor to the start or the end of time duration and drag to lengthen or shorten . the time duration when the cursor turns to 4) Click Save.
DS-K3Y501SX Series Flap Barrier User Manual Before You Start Set access group and apply the access group to the access control device. For details, refer to Set Access Group to Assign Access Authorization to Persons . Perform this task when you want to set authentications for multiple cards of one access control point (door). Steps 1. Click Access Control → Advanced Function → Multi-Factor Auth . 2. Select an access control device in device list on the left panel. 3.
DS-K3Y501SX Series Flap Barrier User Manual Figure 7-9 Remotely Open Door Note You can check Offline Authentication to enable the super password authentication when the access control device is disconnected with the client. Local Authentication and Super Password Authentication by the access control device and by the super password. 4) Select the added person/card group in the left list below and it will be added to the Selected list on the right as the authentication group.
DS-K3Y501SX Series Flap Barrier User Manual Before You Start Wire the third party card readers to the device. Steps Note • By default, the device disables the custom wiegand function. If the device enables the custom Wiegand function, all wiegand interfaces in the device will use the customized wiegand protocol. • Up to 5 custom Wiegands can be set. • For details about the custom Wiegand, see Custom Wiegand Rule Descriptions. 1.
DS-K3Y501SX Series Flap Barrier User Manual Figure 7-10 Set Output Transformation Rule 2) Select rules on the left list. The selected rules will be added to the right list. 3) Optional: Drag the rules to change the rule order. 4) Click OK. 5) In the Custom Wiegand tab, set the rule's start bit, length, and the decimal digit. 7. Click Save. 7.7.
DS-K3Y501SX Series Flap Barrier User Manual Figure 7-11 Select Card Reader Authentication Mode Note PIN refers to the PIN code set to open the door. Refer to Configure Access Control Information . 2) Check the modes in the Available Mode list and they will be added to the selected modes list. 3) Click OK. After selecting the modes, the selected modes will display as icons with different color. 4.
DS-K3Y501SX Series Flap Barrier User Manual Figure 7-12 Set Authentication Modes for Card Readers 6. Optional: Select a configured day and click Copy to Week to copy the same settings to the whole week. 7. Optional: Click Copy to to copy the settings to other card readers. 8. Click Save. 7.7.6 Configure First Person In You can set multiple first persons for one access control point. After the first person is authorized, it allows multiple persons access the door or other authentication actions.
DS-K3Y501SX Series Flap Barrier User Manual Note The remain open duration should be between 0 and 1440 minutes. By default, the remain open duration is 10 minutes. Disable Remaining Open after First Person Disable the function of first person in, namely normal authentication. Authorization by First Person All authentications (except for the authentications of super card, super password, duress card, and duress code) are allowed only after the first person authorization.
DS-K3Y501SX Series Flap Barrier User Manual 4. Click of the selected first card reader in the Card Reader Afterward column to open the select card reader dialog. 5. Select the afterward card readers for the first card reader. Note Up to four afterward card readers can be added as afterward card readers for one card reader. 6. Click OK in the dialog to save the selections. 7. Click Save in the Anti-Passback Settings page to save the settings and take effect.
DS-K3Y501SX Series Flap Barrier User Manual • The configured parameters will be applied to the device automatically. • When you change the working mode or connection mode, the device will reboot automatically. Enable M1 Card Encryption M1 card encryption can improve the security level of authentication. Steps Note The function should be supported by the access control device and the card reader. 1. Enter the Access Control module. 2.
DS-K3Y501SX Series Flap Barrier User Manual sending an email. Once an event is triggered, the client will notify the security personnel, so that he/she can handle the event in time. Before You Start Add access control device to the client. Steps 1. Click Event Configuration → Access Control Event . The added access control devices will display in the device list. 2. Select a resource (including device, alarm input, door, and card reader) from the device list.
DS-K3Y501SX Series Flap Barrier User Manual Steps Note The linkage actions should be supported by the device. 1. 2. 3. 4. 5. 6. Click Access Control → Linkage Configuration . Select the access control device from the list on the left. Click Add to add a new linkage. Select Event Linkage as the event source. select the event type and detailed event to set the linkage. In the Linkage Target area, set the property target to enable this action.
DS-K3Y501SX Series Flap Barrier User Manual Edit Linkage Settings Select the configured linkage settings in the device list and you can edit its event source parameters, including event source and linkage target. Delete Linkage Settings Select the configured linkage settings in the device list and click Delete to delete it. 7.8.
DS-K3Y501SX Series Flap Barrier User Manual Note The device should support alarm input function. Access Point The door status of open, close, remain open, or remain closed will be triggered. Audio Play The audio prompt will be triggered. And the select audio index related audio content will be played according to the configured play mode. 8. Click Save. When the card (configured in Step 5) swipes on the card reader (configured in Step 6), it can trigger the linked actions (configured in step 7). 9.
DS-K3Y501SX Series Flap Barrier User Manual Steps 1. Click Monitoring to enter the status monitoring page. 2. Select an access point group on the upper-right corner. Note For managing the access point group, refer to Group Management . The doors in the selected access control group will display. 3. Click a door icon to select a door, or press Ctrl and select multiple doors. Note For Remain All Unlocked and Remain All Locked, ignore this step. 4. Click the following buttons to control the door.
DS-K3Y501SX Series Flap Barrier User Manual Result The icon of the doors will change in real-time according to the operation if the operation is succeeded. 7.9.2 Check Real-Time Access Records The access records will display in real time, including card swiping records, face recognitions records, fingerprint comparison records, etc. You can view the person information and view the picture captured during access. Steps 1. Click Monitoring and select a group from the drop-down list on the upper-right corner.
DS-K3Y501SX Series Flap Barrier User Manual Steps 1. Click → Tool → Device Arming Control to open Device Arming Control page. All the added devices appear on this page. 2. In the Auto-Arming column, turn on the switch to enable auto-arming. Figure 7-13 Arm Device After turned on, the device(s) will be armed. And notifications about the events triggered by the armed device(s) will be automatically sent to the client software in real-time. 7.10.
DS-K3Y501SX Series Flap Barrier User Manual 4. Select an event in the event list to view the event details. 5. Optional: Perform the following operations if necessary. Handle Single Event Click Handle to enter the processing suggestion, and then click OK. Note After an event is handled, the Handle button will become Add Remark. Click Add Remark to add more remarks for this handled event. Handle Events in a Batch Select events that need to be processed, and then click Handle in Batch.
DS-K3Y501SX Series Flap Barrier User Manual Before You Start Enable receiving events from devices before the client can receive event information from the device,see Enable Receiving Event from Devices for details. Steps 1. Click Event Center → Event Search to enter the event search page. 2. Set the filter conditions to display the required events only. Time The time when the event starts. Search by Device Search the events by device or the device's resource channels.
DS-K3Y501SX Series Flap Barrier User Manual Figure 7-14 Search Historical Events Note If you have selected Access Control as device type in Step 2, you can view extra information such as card No., skin-surface temperature, and abnormal temperature (if device supports) in the searched events. Figure 7-15 Search Historical Event 4. Optional: Right click the table header of the event list to customize the event related items to be displayed in the event list. 5.
DS-K3Y501SX Series Flap Barrier User Manual Handle Single Event Handle single event: Select one event that needs to be handled, and then click Handle in the event information details page, and enter the handling suggestion. Note After an event is handled, the Handle button will become Add Remark, click Add Remark to add more remarks for this handled event.
DS-K3Y501SX Series Flap Barrier User Manual 7.11.1 Check Device Information Steps 1. Click Maintenance and Management → Device Management → Device to enter the device list. 2. Click to enter the remote configuration page. 3. Click System → Device Information and view the device basic information and the device version information. 7.11.2 Edit Device Name Click Maintenance and Management → Device Management → Device to enter the device list. Click to enter the remote configuration page.
DS-K3Y501SX Series Flap Barrier User Manual Restore the device parameters to the default ones. The device should be activated after restoring. 5. Remotely upgrade the device. 1) In the Remote Upgrade part, select an upgrade type. Note • You need to set the device ID before upgrading if you select Controller Upgrade File as the remote upgrade type. • Only the card reader that connected via RS-485 protocol supports upgrading. 2) Click ... to select an upgrade file. 3) Click Upgrade to start upgrading.
DS-K3Y501SX Series Flap Barrier User Manual 8. Click OK. Note Up to 32 keyfob users can be added. 7.11.7 Set Security Steps 1. Click Maintenance and Management → Device Management → Device to enter the device list. 2. Click to enter the remote configuration page. 3. Click System → Security . 4. Select the density level in the drop-down list. 5. You can select Compatible Mode or Security Mode.
DS-K3Y501SX Series Flap Barrier User Manual If the device detects persons or things staying in the lane for more than the configured time duration, an alarm will be triggered. Max IR Obstructed Duration Set the maximum time duration for the obstruction of the IR light. If the IR light is obstructed for more than the configured time duration, the alarm will be triggered. 0 represents the function is disabled. 5. Click Save. 7.11.9 Configure Screen Parameters The device can connect to a text screen.
DS-K3Y501SX Series Flap Barrier User Manual 7.11.10 Configure Screen Parameters You can set the people counting's parameters and after the configuration. Steps 1. Click Maintenance and Management → Device Management → Device to enter the device list. 2. Click to enter the remote configuration page. 3. Click System → People Counting . 4. Set the people counting parameters. Clear Device People Counting Click Reset and the counted people number will be restored to zero.
DS-K3Y501SX Series Flap Barrier User Manual Click Save to save the settings. 7.11.12 Configure Audio File You can relate the audio file to the corresponding playing scene. You can also export the audio file from the system and import the audio file from the local. Steps 1. Click Maintenance and Management → Device Management → Device to enter the device list. 2. Click to enter the remote configuration page. 3. Click Other → Audio File . Note By default, the system contains the audio content.
DS-K3Y501SX Series Flap Barrier User Manual Appendix A. Tips for Scanning Fingerprint Recommended Finger Forefinger, middle finger or the third finger. Correct Scanning The figure displayed below is the correct way to scan your finger: You should press your finger on the scanner horizontally. The center of your scanned finger should align with the scanner center.
DS-K3Y501SX Series Flap Barrier User Manual Others If your fingerprint is shallow, or it is hard to scan your fingerprint, we recommend you to use other authentication methods. If you have injuries on the scanned finger, the scanner may not recognize. You can change another finger and try again.
DS-K3Y501SX Series Flap Barrier User Manual Appendix B. DIP Switch B.1 DIP Switch Description The DIP switch is on the main lane control board. No.1 to No 8 is from the low bit to the high bit. When the switch is towards ON, it means the switch is enabled, otherwise, the switch is off. If you set the DIP switch like the figure displayed below, its binary value is 00001100, and its decimal value is 12. B.
DS-K3Y501SX Series Flap Barrier User Manual Bit 5 to 8 Device Mode Passing Mode Function Decimal Value Disable Keyfob Paring Mode 0 Controlled Bidirection 0 Controlled Entrance and Prohibit Exit 1 2 Controlled Entrance and Free Exit Free Bi-direction 3 Free Entrance and 4 Controlled Exit Free Entrance and 5 Prohibit Exit Prohibited Bidirection 6 Prohibit Entrance 7 and Controlled Exit Prohibit Entrance 8 and Free Exit 99 Binary Value
DS-K3Y501SX Series Flap Barrier User Manual Appendix C.
DS-K3Y501SX Series Flap Barrier User Manual Appendix D. Table of Audio Index Related Content Index Content 1 Authenticated. 2 Card No. does not exist. 3 Card No. and fingerprint mismatch. 4 Climbing over the barrier. 5 Reverse passing. 6 Passing timeout. 7 Intrusion. 8 Force accessing. 9 Tailgating. 10 No permissions. 11 Authentication time out. 12 Authentication failed. 13 Expired card. 14 Staying out of time.
DS-K3Y501SX Series Flap Barrier User Manual Appendix E. Error Code Description The swing barrier will display the error code on the seven-segment display if error occurred. Refer to the table below to find the description of each number.
DS-K3Y501SX Series Flap Barrier User Manual Error Reason Code Error Reason Code The Third IR Beam on Lower IR 15 Board Triggered Lower IR Board 8 Offline 44 The Fourth IR Beam on Lower IR Board Triggered 16 Lower IR Board 9 Offline 45 The Fifth IR Beam on Lower IR Board Triggered 17 Lower IR Board 10 Offline 46 The Sixth IR Beam on Lower IR Board Triggered 18 Lower IR Board 11 Offline 47 The Seventh IR Beam on Lower 19 IR Board Triggered Lower IR Board 12 Offline 48 The Eighth IR Beam
DS-K3Y501SX Series Flap Barrier User Manual Appendix F. Communication Matrix and Device Command Communication Matrix Scan the following QR code to get the device communication matrix. Note that the matrix contains all communication ports of Hikvision access control and video intercom devices. Figure F-1 QR Code of Communication Matrix Device Command Scan the following QR code to get the device common serial port commands.
UD23011B