
Use and Care Manual

English 19
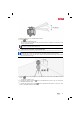
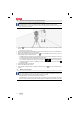
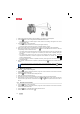
5. Bring the laser receiver into the desired position. The rotating laser automatically concentrates the beam
along a shortened line in the area of the laser receiver.
The width of the scan line can be adjusted using menu on the PRA 30G. The narrower the scan
line is set, the brighter it will appear.
6.
After selecting the scan line function in the menu, the and symbols can be used to shift the laser
line to the left or right. The laser receiver does not require to be within the path of laser beam in order to
do this.
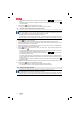
5.15 Deactivating the shock warning function
1.
Press the button on the rotating laser.
2.
Press the button.
◁ The shock warning deactivation LED lights constantly, indicating that the function has been
deactivated.
To return to standard operating mode, switch the rotating laser off and then switch it back on again.
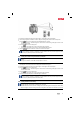
6 Operating the laser receiver
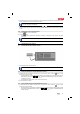
6.1 Inserting the batteries in the laser receiver
▶ Insert the batteries in the laser receiver.
Use only batteries that have been manufactured in accordance with international standards.
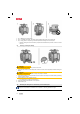
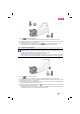
6.2 Pairing the rotating laser and the PRA 30G laser receiver
1.
Position both tools at a distance of about 0.5 m (2 ft) from each other. Press the button on both
devices for at least 3 seconds.
◁ Successful pairing is confirmed by all LEDs blinking on the rotating laser a signal tone emitted by the
PRA 30G laser receiver. The and symbols are displayed briefly on the laser receiver.
◁ The devices are paired.
◁ The rotating laser and the laser receiver switch themselves off.
2. Switch the devices on again.
6.3 Pairing the PRA 90 tripod and the PRA 30G laser receiver
1.
Position both tools at a distance of about 0.5 m (2 ft) from each other. Press the button on both
devices for at least 3 seconds.
◁ Successful pairing is confirmed by all LEDs blinking on the PRA 90 automatic tripod and by a signal
tone emitted by the PRA 30G laser receiver. The and symbols are displayed briefly on
the laser receiver.