PMC 46 Bedienungsanleitung de Mode d’emploi fr Operating instructions Istruzioni d’uso Manual de instrucciones Manual de instruções Gebruiksaanwijzing Οδηγιες χρησεως en it es pt nl el ja ko cn Kulllanma Talimatı Printed: 11.04.
1 Printed: 11.04.
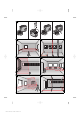
2 3 4 5 6 7 8 Printed: 11.04.
9 10 Printed: 11.04.
11 12 d1 max. 3mm b d1 d3 b 2 5 5m a c a 3 d2 4 1 13 14 max. 3mm d1 b d3 d0 5 3 10m a 6 d2 7 15 6 d1 d0 d2 7 Printed: 11.04.
16 Pos. 1 T1 2m 2,5m 90˚ Printed: 11.04.2016 | Doc-Nr: PUB / 5071418 / 000 / 03 T2 Pos.
ORIGINAL OPERATING INSTRUCTIONS PMC 46 combilaser It is essential that the operating instructions are read before the tool is operated for the first time. Always keep these operating instructions together with the tool. Ensure that the operating instructions are with the tool when it is given to other persons.
On the tool On the tool CAUTION LASER RADIATION - DO NOT STARE INTO BEAM 620-690nm/0.95mW max. CLASS II LASER PRODUCT en Do not stare into the beam. Laser warning plates for the USA in accordance with CFR 21 § 1040 (FDA). Laser Class 2 in accordance with IEC/EN 60825‑1:2007 Location of identification data on the tool The type designation and serial number can be found on the type identification plate on the tool.
2.4 Items supplied with the toolbox version 1 Combilaser 4 Batteries 1 1 1 1 1 Soft pouch Operating instructions Universal adapter en Manufacturer’s certificate Tripod 2.5 Information displayed during operation LED The LED doesn’t light. The tool is switched off. The LED doesn’t light. The batteries are exhausted. The LED doesn’t light. The batteries are inserted incorrectly. The LED lights constantly. The laser beam is switched on. The tool is in operation.
4 Technical data Right of technical changes reserved. en Range of the points 30 m (98 ft) Range of the lines and intersection point 10 m (30 ft) Accuracy1 ±2 mm at 10 m (±0.08 in at 33 ft) Self-leveling time 3s Laser class Class 2, visible, 635 nm, ±10 nm (IEC/EN 60825-1:2007); Class II (CFR 21 §1040 (FDA) Distance 5 m: < 4 mm Distance 20 m: < 16 mm Distance 5 m: < 2.
tronic instruments (e.g. binoculars, spectacles, cameras) it should be treated with care. o) Although the tool is protected to prevent entry of dampness, it should be wiped dry each time before being put away in its transport container. p) Check the accuracy of the measurements several times during use of the tool. 5.2 Proper organization of the work area Secure the area in which you are working and take care to avoid directing the beam towards other persons or towards yourself when setting up the tool.
7 Operation 7.2.6 Marking out the position of light fittings 8 7.3 Checking en NOTE To achieve maximum accuracy, project the line onto a vertical, even surface. When doing so, set up the tool at 90° to the surface. 7.1 Operation 7.1.1 Switching the laser beams on Press the on-button once. 7.1.2 Switching the tool / laser beams off Press and hold the on-button until the laser beam is no longer visible and the LED no longer lights. NOTE The tool switches itself off automatically after approx. 15 min. 7.
4. 5. 6. 7. 8. 9. Place the tool on an even, level surface approx. 20 cm from the wall (B) with the laser beam directed toward the wall (B). Mark the point of intersection of the laser lines on the wall (B) with a cross. Pivot the tool through 180° and mark the point of intersection of the laser lines on the opposite wall (A) with a cross. Measure the distances d1 between 1 and 4 and d2 between 2 and 3. Mark the mid points of d1 and d2.
4. 5. 6. en Then place the second target plate T2 at a position 2 meters below the first target plate, so that the vertical laser beam strikes the plate. Mark this position. Mark position 2 at the opposite side of the test setup (mirror image) on the laser line on the floor at a distance of 5 meters from the tool. Now place the tool on the floor on the mark for position 2 which you have just made.
Fault Possible cause Remedy Automatic leveling doesn’t function. The tool is set up on an excessively inclined surface. The tilt sensor is faulty. Set up the tool on the level. If necessary, have the power tool repaired by Hilti Service. en 10 Disposal WARNING Improper disposal of the equipment may have serious consequences: The burning of plastic components generates toxic fumes which may present a health hazard.
12 EC declaration of conformity (original) Designation: Combilaser Type: PMC 46 Year of design: en 2009 We declare, on our sole responsibility, that this product complies with the following directives and standards: until 19th April 2016: 2004/108/EC, from 20th April 2016: 2014/30/EU, 2011/65/EU, EN ISO 12100. Hilti Corporation, Feldkircherstrasse 100, FL‑9494 Schaan Paolo Luccini Head of BA Quality and Process Management Business Area Electric Tools & Accessories 06/2015 20 Printed: 11.04.
Hilti Corporation Printed: 11.04.2016 | Doc-Nr: PUB / 5071418 / 000 / 03 410556 Hilti = registered trademark of Hilti Corp., Schaan Pos. 1 | 20151223 *410556* LI-9494 Schaan Tel.: +423 / 234 21 11 Fax: +423 / 234 29 65 www.hilti.