
Operating Instruction DD-WMS 100 (01)

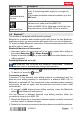
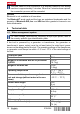
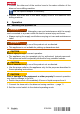
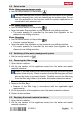
Table Of Contents
- Original operating instructions
- Mode d'emploi original
- 1 Indications relatives à la documentation
- 2 Sécurité
- 3 Description
- 3.1 Vue d'ensemble du produit
- 3.2 Utilisation conforme à l'usage prévu
- 3.3 Équipement livré
- 3.4 Touches de commande
- 3.5 États de la LED Bluetooth (en option)
- 3.6 Indicateurs de maintenance
- 3.7 Symboles d'affichage et explication sur l'écran multifonctions de la carotteuse diamant (en option avec Bluetooth)
- 3.8 Bluetooth®
- 4 Caractéristiques techniques
- 5 Mise en service
- 6 Utilisation
- 7 Nettoyage et entretien
- 8 Transport et stockage
- 9 Aide au dépannage
- 10 Recyclage
- 11 Garantie constructeur
- Manual de instrucciones original
- 1 Información sobre la documentación
- 2 Seguridad
- 3 Descripción
- 3.1 Vista general del producto
- 3.2 Uso conforme a las prescripciones
- 3.3 Suministro
- 3.4 Teclas de control
- 3.5 Estados del LED Bluetooth (opcional)
- 3.6 Indicadores de funcionamiento
- 3.7 Símbolos en el indicador y aclaraciones en la pantalla multifunción de la perforadora de diamante (opcional en caso de Bluetooth)
- 3.8 Bluetooth®
- 4 Datos técnicos
- 5 Puesta en servicio
- 6 Manejo
- 7 Cuidado y mantenimiento
- 8 Transporte y almacenamiento
- 9 Ayuda en caso de averías
- 10 Reciclaje
- 11 Garantía del fabricante
- Manual de instruções original
- 1 Indicações sobre a documentação
- 2 Segurança
- 3 Descrição
- 3.1 Vista geral do produto
- 3.2 Utilização conforme a finalidade projectada
- 3.3 Incluído no fornecimento
- 3.4 Teclas de comando
- 3.5 Estados do LED do Bluetooth (opcional)
- 3.6 Indicadores de manutenção
- 3.7 Símbolos apresentados e explicações do visor multifunções do perfurador diamantado (opcionalmente com Bluetooth)
- 3.8 Bluetooth®
- 4 Características técnicas
- 5 Antes de iniciar a utilização
- 6 Utilização
- 7 Conservação e manutenção
- 8 Transporte e armazenamento
- 9 Ajuda em caso de avarias
- 10 Reciclagem
- 11 Garantia do fabricante

14 English 2154324
*2154324*
3. Remove the filter bag. → page 13
4. Empty the waste material container.
5. Clean the water and waste material container.
6. Insert the filter bag. → page 11
7. Fit the top section of the appliance onto the waste material container.
8. Close the two catches.
7 Care and maintenance
7.1 Checking the prefilter 6
1. Remove the filter bag holder.
2. Check whether the prefilter is clogged.
3. If the prefilter is clogged, clean it with fresh water.
Alternatively, a brush or compressed air can be used to clean the
prefilter.
7.2 Checking the float level 7
CAUTION
Risk of damage to the equipment or other property! Incorrect operation
may lead to damage to the tool.
▶ Check and clean the water level monitoring system at regular intervals.
Switch the product off immediately if signs of damage are found.
1. Remove the filter bag holder.
2. Check that the float is free to move.
3. Clean the float if it does not move freely.
7.3 Checking the seal on the filter support 8
1. Check that the seal on the filter support is clean.
2. If the seal on the top section is dirty, clean it with a cloth.
3. Grease the seal.
8 Transport and storage
8.1 Stacking toolboxes for transport 9
1. Raise the toolbox retaining bar.
2. Stack the toolboxes with their grips placed over the toolbox retaining bar.
The toolbox retaining bar must project beyond topmost toolbox.
The maximum permissible additional load is 25 kg.
3. Attach the ratchet strap to the ratchet strap hook.
4. Use the ratchet strap to secure the toolboxes and prevent them slipping
out of place.