Compact Double Door Refrigerator Owner’ s manual Model:LCT43D6ASE LCT43D6AVE
COPYRIGHT STATEMENT © 2015 Hisense Company Ltd. All Rights Reserved. All material in this Owner's Manual is the property of Hisense Company Ltd.
4 6 2 2 This appliance is not intended for use by persons (including children) with reduced physical,sensory or mental capabilities, or lack of experience and knowledge, unless they have been given supervision or instruction concerning use of the appliance by a person responsible for their safety.
22. WARNING: Do not use electrical appliances inside the food storage compartments of the appliance, unless they are of the type recommended by the manufacturer. Appliances which use flammable insulation blowing gases instructions shall include information regarding disposal of the appliance Instructions shall contain the substance of the following; Do not use extension cords or ungrounded (two prong) adapters This product should not be disposed with other household wastes.
Do not use extension cords or ungrounded(two prong) adapters.
4
1.Freezer Compartment 2.Freezer Shelf 8.Freezer Door Gasket 9.Refrigerator Door Gasket 3.Light Bulb(Behind Thermostat) 4.Thermostat Control Knob 10.Upper Shelf 5.Refrigerator Shelf 6.Refrigerator Compartment 11.Middle Shelf 7.Crisper Drawer 12.Down Shelf 1.Freezer Compartment 2.Freezer Shelf 3.Light Bulb(Behind Thermostat) 4.Thermostat 5.Refrigerator Control Knob 6.Refrigerator Compartment 7.Crisper Drawer 8.Freezer Door Gasket 9.Refrigerator Door Gasket 10.Upper Shelf 11.Middle Shelf 12.
0 0 6
Warning: The LED light must not be replaced by the user! If the LED light is damaged, contact the customer helpline for assistance. To replace the LED light, the below steps can be followed: 1 .Unplug your appliance. 2. Remove light cover by pushing and prying. 3. Remove screw cover and unscrew the controller box. 4. Replace LED light and snap it correctly in place.
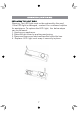
Changing the door from the right side to the left. The side at which the door opens can be changed from the right side (as supplied) to . . . . the left side, if the installation site requires. Tools you will need: 8mm socket driver phillips screwdrivers 5.Remove upper door and place it on smooth surface with panel upwards. Putty Knife or slotted srewdrivers 6. Loose screws used to fix middle hinge and remove middle hinge. Then turn middle hinge by 180. Take washer on axis and put it on another end.
10. Change lower hinge part to left and front foot fixed board to right and fix them with screws. Then install adjustable bottom feet parts. Lower hinge part (left) 11.Remove the door stop (right) and door stopper (right) with Phillips screwdrivers ,Install the door stopper(left) and door stop (left) which are from the package of user's manual 13. Replace and Install the right upper hinge cover on the left corner, Replace the screw hole cover on the right corner. 14.Stand and level the appliance.