User Manual
Content Getting Started.............................................................................................................. 3 Overview.............................................................................................................................................................................. 3 Accessories.........................................................................................................................................................................
Appendix A...................................................................................................................52 Specifications................................................................................................................................................................. 52 Trouble Shooting......................................................................................................................................................... 52 Multimedia Compatibility........
1 Getting Started Read this chapter to learn about Sero 7 features, how to use the controls, and more.
Item Function Power Button Press & hold to turn on/off; Press it to put/wake the unit in/from sleep mode. Volume Up/Down Buttons Press to adjust the volume. Headphone port Headphone connections for personal listening. Micro SD port Plug microSD card (up to 32G). Micro-USB port Connect to wall outlet with Micro-USB cable and power adapter for charging. Connect to a computer, keyboard, more other devices with USB port.
Home Screen Google Search All Apps icon App Recommendation App Icons Navigation Buttons Back Home Recent Apps Status Bar To move between Home screens, slide left or right. Status Bar At the bottom of the screen, you’ll see indicators that inform you about the status of your Sero. You can open the Notification Tray by tapping the Status bar. Notification Tray Notifications can come from the system, a game, an application such as E-mail, or the music player.
Notification & Status Icons The below table list the frequently showed up icon at Status bar: Icon What it means Alarm An alarm is alerting or snoozed. Alert Install/update/enable Google Play service. Calendar Task reminders. Message Received new message. Music Play Music application is running. Screenshots Screenshot captured. USB Sero has connected to a computer as Mass Storage. Wi-Fi Sero has a Wi-Fi Internet connection. The more bars, the stronger the connection.
Buttons Power Button Turn Sero On Press & hold the Power button until the Hisense logo displays. Turn Sero Off In waken mode, press & hold the Power button until a message displays, tap OK, then your Sero 7 will shut down. Put Sero in Sleep Mode Press the Power button to put the Sero 7 in sleep mode. If you don’t touch the screen for a several minutes, the Sero 7 will put in sleep mode automatically. Tip: You can go to Settings > Device > Display > Sleep to set the screen timeout.
Home Button Tap this button from anywhere on your Sero to return to the Home screen. If you’re viewing a left or right Home screen, this will open the central Home screen. To open Google Now, see Google Now on page 6 . Recent Apps Button Tap this button to view recently used apps. Tap an app to use it again. You can slide down to see more apps. You can also slide it away to the left or right. NOTE The slide direction will be different as the orientation of the screen.
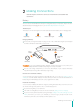
2 Making Connections Read this chapter to learn how to connect to an external device and establish data transmission . Battery The Sero 7 has an internal Lithium-ion Polymer rechargeable battery. For important safety instructions about the battery and charging the Sero 7, see Important Safety Instructions on page 54 . The Battery Icon The battery icon in the lower-right corner of the status bar shows the battery level or charging status.
Micro-USB You can use the included Micro-USB cable to connect the Sero 7’s Micro-USB port to your computer’s USB port. To change your Sero 7’s USB connection options, go to Settings > Device > Storage > Menu icon > USB computer connection, or open the Notification Tray, tap the USB icon. You can select the Sero 7 is connected as MTP, PTP, or Mass Storage. Connect to a Windows Computer You can connect your Sero 7 to a Windows computer and transfer music, pictures, and other files in both directions.
Micro SD microSD Card Insert the microSD card contacts facing down into the Sero 7’s Micro SD port. To check the storage of microSD card, go to Settings > Device > Storage. TM TM NOTES • You can use microSD card and microSDHC card. • Never remove or insert microSD card while the Sero 7 is powered on. Headphone Grounded Audio left Audio right Headphones can be connected to the Sero 7’s headphone port. For more information about headphones, see Important Safety Instructions on page 54 .
Add a Wi-Fi Network You can add a Wi-Fi network so your device will remember it, along with any security credentials, and connect to it automatically when it’s in range. You must also add a Wi-Fi network if the network does not broadcast its name (SSID ), or to add a Wi-Fi network when you are out of range. 1. Turn on Wi-Fi, if it’s not already on. 2. Tap the Plus icon at the top of the screen. 3. Enter the SSID (name) of the network. If necessary, enter security or other network configuration details. 4.
VPN Virtual private networks (VPNs) allow you to connect to the resources inside a secured local network, from outside that network. VPNs are commonly deployed by corporations, schools, and other institutions to let people access local network resources when not on campus, or when connected to a wireless network. To configure VPN access, you must first obtain the details from your network administrator.
3 Basics Read this chapter to learn about the Sero 7 basic features. Setup Guide Turning Your Sero 7 On for the First Time To start, turn on your Sero 7 by pressing and holding Power button for a few seconds. After boot animation follow the on-screen instructions to set up your Sero 7. 1. Slide up and down to select the language, then tap Start. 2. When prompted, sign in the using email address and password for your Google Account. If you don’t have one yet, go ahead and create one.
Zoom Place two fingers about an inch apart on the screen. Slide them together to “Zoom out“. Slide your fingers apart to “Zoom in“. Rotate Place two fingers about an inch apart on the screen. Rotate them in clockwise or anti-clockwise. Rearrange Home Screen From All Apps screen to Home screen: Tap All Apps button open All Apps screen, press & hold an icon or widget and slowly to drag it to the location of your choice. This makes it much easier to change your Home screen layout.
From the Download app: Tap an item to open it. Tap headings for earlier downloads to view them. Check items you want to share. Then tap the Share icon list. Check items you want to delete. Then tap the Trash icon and choose a sharing method from the . At the bottom of the screen, tap Sort by size or Sort by date to switch back and forth. Tip: Files available in the Download app can also be viewed in the Download directory that’s visible when your Sero 7 is connected to a computer.
Tap a suggestion to type it Press & hold it to type character at upper right Press & hold it to see Input languages and keyboard settings Press & hold it to choose a smiley face Tap to hide the onscreen keyboard Entering Text Enter text: Tap a text field to bring up the keyboard, then tap keys on the keyboard. The letter isn’t entered until you release your finger from the key. Delete text: Tap to delete selected text or the characters before the cursor.
Google Now Google Now gives you just the right information at just the right time - before you even ask. Just slide up from the bottom of your Sero 7 to get commute traffic before work, popular nearby places, your favorite team’s current score, and more. After you opt in to Google Now, you don’t need to do anything else. If you like, you can adjust settings for different types of Now cards as they appear, but Google Now doesn’t need any elaborate setup. The information you need is always at your fingertips.
Dismiss Cards When you’re finished with a card, just slide it left or right to dismiss it from the Google Now screen. NOTE The card appears again when a new update is available. Adjust Notifications When a card has a new update, you’ll receive a notification at the bottom of your screen. You can tap the icon in the Notification Tray to open the card or dismiss the notification. Most notifications for Now cards can be turned off or set to low priority or standard priority.
What you want What to type or say Examples Movie showtimes Movie Movie [location] [movie name] Movie Movie Chicago The Horse’s Mouth Word definition Define [word] Define campanile Weather forecast Weather Weather [location] Weather Weather Detroit Identify an area code Area code [###] Area code 215 Identify zip code Zip code [#####] Zip code 46202 Time Time Time [location] Time Time in London Flight information [Airline] [flight number] American airlines flight 390 Translation Trans
When you’re viewing the Google Now screen, you don’t have to touch anything. Just say “Google.” NOTE To detect when you say “Google” to launch Voice Search or Voice Actions, Google analyzes sound picked up by your Sero 7’s microphone in intervals of a few seconds or less. The sound is immediately discarded after analysis and is not stored on the device or sent to Google servers. Using Voice Actions Speak the Voice Action you want to use. Here are some typical examples: “Set alarm for 8:30 a.m.
Say Followed by Examples “Set alarm” “Time” or “for” & time, such as “10:45 a.m.” or “20 minutes from now,” “Label” & name of alarm “Set alarm for 7:45 p.m., label, switch the laundry” “Listen to” Words to search YouTube for, such as the name of a song, artist, or album.
Slide - The slide provides no protection, but lets you get to the Home screen quickly, or open the Camera and take pictures immediately. Face Unlock - Lets you unlock your Sero 7 by using facial recognition. This is the least secure lock option. Tip: After you set Face Unlock up, look under Settings > Personal > Security > Screen Security for two additional settings: Improve face matching and Liveness check. Use these to make Face Unlock more reliable and secure.
Apps You’ll see four tabs at the top of the screen, each displaying a list of apps or their components: Downloaded - Displays apps you’ve downloaded on Google Play or other sources. On SD card - Displays apps you’ve installed on SD card. Running - Displays all apps, processes, and services that are currently running or that have cached processes, and how much RAM they are using. All - Displays all apps that came with the Sero 7 and all apps you downloaded from Google Play or other sources.
Google Account Why Use a Google Account? A Google Account lets you organize and access your personal information from any computer or mobile device: Google Play - Google Play brings together all your favorite content in one place: movies, books, music, magazines, apps, and more. When you sign in with your Google Account, you can reach any of this content from any of your devices – as long as you have a network connection. You can also shop for more in the Google Play Store.
Syncing Configure Sync Options You can configure synchronization options for any of your apps. You can also decide what kinds of data to synchronize for each account. For some accounts, syncing is two-way; changes that you make to the information on your Sero 7 are made to the copy of that information on the web. Your Google Account works this way. Other accounts support only one-way sync: the information on your mobile device is read-only.
4 Featured Apps Introducing the featured apps of Sero 7. Walmart The Walmart app helps you find and buy quality products at unbeatable prices whether you’re at home, in their stores or anywhere in between. You’ll also be able to stay up-to-date on app-only exclusive shopping events. Home Page Title Function Search bar Search products in Walmart. Scanner Scan barcodes and QR codes for additional information. Shop by Dept Browse, search and buy Walmart.com products by departments.
Home Page You can browse the products, view your messages, access the instant savings, use scanner and search tool from Home page. Tips: These options can be found in menu. You can also tap Cart icon browse-all shipping list. from Home page to make purchases, view prices, edit cart or simply Menu Tap the icon from any screen to display menu options. Title Function Home Return to the Home page. Search Search products in Sam’s Club. Shop by Category Browse, search and buy SamsClub.
Title Function My VUDU You can browse the movies and TV that you have bought or rented, you can also view your wishlist. Search Search movies in VUDU. Subpage from any subpage to return to Home page. Tap the logo Title Function Overview The overview of current movie. Cast & Crew The cast and crew of current movies and find their related movies. Reviews The reviews of current movie. Similar The similar types of movies. More Info The detail information of current movie.
5 Apps Introducing the common Apps of Sero 7. Gallery Gallery is used to view pictures and play videos that you’ve taken, downloaded, or copied. You can perform basic editing tasks on pictures and set them as your wallpaper or contact photo. You can also share your pictures and videos with friends. Tip: You can view pictures in a Picasa web album. Turn Gallery On Tap the Gallery icon on the All Apps screen or the Home screen.
Tap Menu icon > Edit show all the editing tools summarized in the table: Icon Mode Description Contrast Increase or decrease the contrast to adjust the white and areas of the image. Special Effects Apply artistic filters, including Lomo, Vignette, Film Grain, and many more. Colors Adjust the color in the image. Geometry Straighten, crop, rotate, or flip the image. Working With Videos Open a Gallery album and tap a video.
Camera Settings Tap the Settings icon to open camera menu: Tap the White Balance icon fluorescent and incandescent. to select the White Balance mode from cloudy, daylight, auto, Tap SCN to select the Scene mode. Tap the Time lapse interval icon to select the timer. Play Music When you’re online, you can play the music you added to Music by Google Play. Your Google Play music library is accessible from any computer and up to ten mobile devices.
1. Tap the icon to the right of an album, artist, song or genre, and tap Add to playlist. You can also add the currently playing song from the Now Playing screen by tapping the list icon to the right of the song title and tapping the icon > Add to playlist. 2. Tap the name of the playlist to add the song to it. Or tap New playlist to create a playlist. Rearrange songs in a playlist - Open a playlist and press icon on the left of song’s name, then drag it into the order you want.
Flowing Text & Original Pages Books are available in two viewing modes. In Flowing text mode, the text of the book is wrapped according to Sero 7’s screen size, which allows you to read most books clearly even on a screen that is smaller than the original physical book. In original pages mode, the original scanned image of the book is displayed, which is useful when viewing on a larger screen, or when the contents of the book do not render well in Flowing text mode.
• To remove a highlight you’ve made - Tap on the highlight and tap the icon. • To add a note to text in your book - Select the text and tap the icon, enter your note, then tap the icon to go back. Your annotated text will appear highlighted in the color last used, with a note icon on the far right side of the page. • To edit the note you created - Tap the note icon to bring up the editable text field again.
TV Shows - Under the TV Shows tab you’ll see sections for the shows you’ve purchased, as well as suggested shows that may be of interest. Personal Videos - This section will display the videos you create using the camera on Sero 7, as well as any videos that you copy over to your tablet via a Micro-USB cable. Searching for movies & TV shows - You can search for movies and TV shows by typing your query into the Search bar in the Google Play Store on the tablet.
Gmail When you set up your Sero 7 with a Gmail account, the Gmail app is ready to go. If you haven’t set up a Gmail account yet, or to set up another Gmail account, add accounts in Settings > Accounts > Add account. For more information, see Google Account on page 25 . Your messages are stored on Google servers, but you can read, write, and organize messages with the Gmail app on your Sero 7. Open and Read Email Use the Gmail app to read and write email from your Sero 7.
Working With Attachments When a message has an attachment, Gmail displays information about that attachment at the top of the message. Depending on the kind of attachment, the applications you have installed, and your settings, Gmail may also display a thumbnail image and one or more of the buttons to preview, view or play, view the information, or save the attachment. NOTE Downloaded items are available from the Downloads app or, when your Sero 7’s connected to a computer via USB, the Download directory.
Reply to or Forward a Message You can continue a conversation by replying to or forwarding one of its messages. 1. When reading a message, you can reply to or forward it from the message header. Tap the Reply , or the Forward icon . icon , the Reply All icon 2. The new message opens in a new screen where you can add or remove addresses, edit the subject, and add or remove text or attachments.
Account Settings Each account has independent settings. Priority Inbox - Check to make Priority Inbox your default inbox, so it opens when you start Gmail with new messages (instead of Inbox), and you only receive notifications for new messages that are part of important conversations. This setting is not visible unless you have configured Gmail on the web to show Priority Inbox. Notifications - When checked, you will receive a notification when you have new email.
• If you already have a Google account but you don’t see your account in this list, tap Add account, then tap Existing. Fill out your information and tap Sign in. • If you’d like to create a new Google+ account, tap Add account, then tap New to sign up for a new Google account. 2. Set up your Google+ Profile. NOTE You won’t see this step if you’ve already set up your profile on your computer or at an earlier time. 3.
Reshare a Post , then add comments and choose which circles or Open a post and tap the Share arrow icon people to share with. Tap icon to share the post. Post Comments Join the conversation by commenting on a post. Just tap the Add a comment box at the bottom of the post you’d like to comment on. +1, Edit or Delete Comments Open a post and tap on the comment you’d like to +1, edit or delete, then select +1 comment, Edit comment or Delete comment. Circles Circles are an essential part of Google+.
Once enabled, photos taken with Sero 7’s camera will be uploaded to your private album on Google+. Instant upload won’t work when you’re signed out of Google+. View Photos To view your photos, including your Instant Upload album, visit your profile: 1. From the Google+ menu, go to Photos. 2. Tap the photo album you want to view. Share Instant Upload Photos 1. From the Google+ menu, go to Photos > Instant Upload. 2. Tap Menu icon and choose Select items (or long-press on a photo). 3.
To add a comment or photo: to share a comment to other Event guests. • Tap the add comment icon • Tap the add photo icon to upload a photo from Sero 7, or take a new photo with your Camera. The Menu icon will allow you to: • Edit this event (Event owners only): change details of the event. • Delete this event (Event owners only): delete the event entirely. • Invite more (if Event owner enables this feature): allows invitees to invite other guests.
4. If you’d like to turn off ringing notifications, tap the bell icon 5. To browse a list of your Circles and contacts, tap the . icon. When you’re ready to video chat, tap the START HONGOUT at the bottom of the screen. The Hangout will start immediately, all you have to do is wait for people to accept the invitation and join. When you start a Hangout, the people you invited will receive a notification. You can also start a Hangout in a Messenger conversation.
Message Receipts Message receipts appear next to messages in a conversation to show if a message has been received, read, or sent. The following message receipts appear for one-on-one conversations: Icon Description The message is being sent. The message has been delivered. The message has been read. Conversation Settings If you don’t want to receive message notifications for your conversations, you can tap Menu icon > Mute.
To enable Location Services, go to Settings > Personal > Location services from Home screen. Select the location options that you want to use: Enable Google Location Services. Enable Google use your location to improve search results and other services. View the Map Navigate the Map In Google Maps, you can pan, rotate, zoom, and tilt the map with the following gestures on your touchscreen. To move the map Drag the map with your finger. Repeat if you wish to move the map farther.
My Places My Places gives you easy access to your important locations and personal Maps history. In My Places you’ll find your: Offline Maps, Starred places (including Home and Work locations), Recently viewed Maps items, Directions, My Maps, Rated Places, and Maps searches. To access My Places, you can tap the Menu icon > My places, and slide right and left or tap on the tabs to see the other options.
4. Tap Clear map to clear the map of all layers. Traffic Layer Google Maps will either show current color-coded traffic conditions on highways and roads where data is available.
1. Open the Map and zoom in to an available indoor map. 2. Nearby Latitude friends will appear overlaid on the map. NOTE Accuracy of your indoor location may vary depending on the data available. Offline Maps Offline maps lets you select and download certain areas in your Google Maps, so that you can view that area even when you aren’t connected to the Internet or wireless network. Downloading an Area There are two ways to select an area: Go to Menu icon > Make available offline.
Navigate Within Street View Use your finger to pan the map. Drag the Pegman icon to that point. in the lower-left corner to a point in the image in order to zoom directly Double tap a point in Street View with one finger to zoom in; tap once with two fingers to zoom out. Tap Compass mode in the Google Maps menu to use Sero 7 itself to navigate Street View. Tilt, pan, or turn the Sero 7 to change the view. Tap Compass mode again to end it.
A Appendix A Specifications Product Name Sero 7 Lite Model E270BSA Dimension (L × W × T) 7.87 inches × 4.80 inches × 0.41 inches (200 mm × 122 mm × 10.5 mm) Weight 0.73 lbs (330 g) Display Hardware Diagonal 7 inches Resolution 1024 × 600 Platform RK3066 Storage RAM 1GB ROM 4GB1 Extendable Memory Micro SD (up to 32G, support hot plug) Antenna Wi-Fi 802.11 b/g/n (2.4 G) Camera Front Camera 0.
Make sure that the Sero 7’s software has been upgraded to the latest version. Sero 7 is frozen or a serious error appears If the Sero 7 is frozen or suspended, you may need to close the app program or reset the tablet. If the Sero 7 is frozen or slow to respond, press & hole the power button for 8 seconds to the reset the tablet. If the problem persists, restore the factory data. Sero 7 gets warm When using for a long time, the Sero 7 may be warm to the touch.
B Appendix B Important Safety Instructions WARNING RISK OF ELECTRIC SHOCK DO NOT OPEN WARNING: TO REDUCE THE RISK OF ELECTRIC SHOCK, DO NOT REMOVE COVER OR BACK. NO USER-SERVICEABLE PARTS INSIDE. REFER SERVICING TO QUALIFIED SERVICE PERSONNEL. The lightning flash with arrow head symbol, within an equilateral triangle is intended to alert the user that parts inside the product constitute a risk of electric shock to persons.
If a small part is coming out of the Sero 7, do not try to remove it. Keep it away from small children. Never force a connector into a port of Sero 7. If a connector and a port do not join with reasonable force, make sure that the connector matches the port and that you have positioned the connector correctly in relation to the port. To clean the screen, simply use a soft damp cloth. Do not use alcohol, solvent, aerosol spray or abrasive cleaners to clean your Sero 7.
set by the FCC is 1.6 watts per kilogram (W/kg). Tests for SAR are conducted using standard operating positions specified by these agencies, with Sero 7 transmitting at its highest certified power level in all tested frequency bands.
C Appendix C Legal Terms The product/device you have purchased from Hisense USA Corp., or it’s Parent Company, affiliates and/ or Subsidiary Company, its successors and/or assigns (hereinafter referred to as “Hisense”) provides direct access to the internet through one or more internet provider services (hereinafter referred “Web Service”). All content and services accessible through this device belong to Hisense USA Corp.
period of time. Content and services are transmitted by means of networks and transmission facilities over which Hisense has no control. Without limiting the generality of this Disclaimer, and to the extent permitted by law, Hisense expressly disclaims any responsibility or liability for any change, interruption, disabling, removal or suspension of any content or service made available through this device.
our Privacy Policy. Your personal information must be complete, accurate, and must be YOURS. You shall not use any third party personal information to create an account in connection with the use of HISMART@ Services, and you are not allowed to access others’ accounts. HISENSE RESERVES THE RIGHT TO BLOCK ANY USER ACCOUNT IN THE EVENT HISENSE REASONABLY DETERMINES THAT THE USE OF HISMART@ SERVICES IS IN VIOLATIONS OF THESE TERMS AND CONDITIONS, INCLUDING CREATING ACCOUNTS WITH FALSE INFORMATION.
Conditions will result in an immediate revocation of the rights granted herein and Hisense may engage in further legal action to protect any of its rights hereunder including but not limited to the recovery of monetary damages. MATERIALS PROVIDED BY YOU Any Content submitted, uploaded or posted by you or on behalf of you on or through your Hisense device or HISMART@ Services (“Submitted Content”) will be considered non-confidential and nonproprietary.
various capabilities of Hisense devices featuring the HISMART@ Services, as well as limitations in the available Content and Services offered via HISMART@ Services, certain features, Applications, Content and Services may not be available on all devices or in all territories. Some features on the HISMART@ Services may also require additional peripheral devices that are sold separately. Hisense does not endorse any of the ideas, products, persons, or opinions expressed in the Content or Service.
LIMITATION OF LIABILITY SHALL APPLY IN ANY ACTION, WHETHER IN CONTRACT, TORT OR ANY OTHER CLAIM, EVEN IF AN AUTHORIZED REPRESENTATIVE OF HISENSE HAS BEEN ADVISED OF OR SHOULD HAVE KNOWLEDGE OF THE POSSIBILITY OF SUCH DAMAGES. User hereby acknowledges that this limitation of liability shall apply to all Hisense content, merchandise and services available through the Web Service.
Your use of the Web Services provided through the use of the Hisense product is at your own risk. Hisense, its suppliers, distributors and the other parties involved in creating and delivering the content contained in the Web Services, are not liable for any damages arising from the use of such Web Services. Through the use of the Hisense product/device and the Web Services, you will have access to various websites that may also contain links to other websites, not owned or maintained by authorized Hisense.
To obtain Warranty Service and troubleshooting information: To receive Warranty service, the CONSUMER must contact HISENSE to troubleshoot and set up the service. Proof of purchase in the form of an original bill of sale, receipt, or evidence that the Product is within the applicable Warranty period(s) MUST be presented to HISENSE, or a HISENSE SERVICE CENTER.
Ver. 13.