37LD8500 37LD8550 Instructions for use GB Bedienungsanleitung D Notice d'utilisation F Istruzioni per l'uso I
Contents Remote Control Buttons ......................... 2 Teletext .................................................. 18 LCD TV ..................................................... 3 To Operate Teletext ............................. 18 To Select A Page Of Teletext ...............18 To Select Index Page ..........................18 To Select Teletext With A TV Programme ........................................18 To Select Double Height Text .............18 To Reveal “Concealed” Information ...
Remote Control Buttons = Stand by On/Offf = Picture Mode = Equalizer Sound Mode = Surround Mode = Input Source = Program Information = Sound Mode = Sleep Timer RED / = PAT (Picture and Text) GREEN / YELLOW / = Subtitle page in TV mode = Select active window in PIP mode BLUE = Only used in Teletext mode = Menu On/Off = Go back to previous menu *** P+ = Programme Up / Cursor Up = Volume Down / Cursor Leftt OK = Enter = Volume Up / Cursor Right P- = Programme Down / Cursor Down = Mute On/Off =
LCD TV FRONT VIEW SPEAKER LED SPEAKER REAR VIEW Power Cord Input Power On/Off button -301-ENG-3730W-CLE967 UK-HITACHI 37 INCH3TFT-TRIDENT-(LG)-50090848.p65 19.03.
TV /AV MENU P /C H TV/AV button Audio Line Outss MENU button Subwoofer Out Prog. Up, Prog. Down buttons Volume Up, Volume Down buttons PC Audio Input On/Off switch Scart 2 (EXT-2) Power cord input Scart 1 (EXT-1) Power On/Off button EXT-4S S-VHS Input Video Input Audio Inputs s Headphone Aerial HDMI Input (EXT-5) Component Audio Inputs s EXT-4 Component Video (YPbPr) Inputs VGA Input -401-ENG-3730W-CLE967 UK-HITACHI 37 INCH4TFT-TRIDENT-(LG)-50090848.p65 19.03.
Preparation For ventilation, leave a space of at least 10 cm free all around the set. To prevent any fault and unsafe situations, please do not place any objects on top of the set. Use this apparatus in tropical and/or moderate climates. Features • Remote controlled colour television. • 100 programmes from VHF, UHF bands or cable channels can be preset. • It can tune cable channels. • Controlling the TV is very easy by its menu driven system.
are easily identifiable by either the 1. Power Source or symbols. If you are in any doubt about the installation of an extension lead, please consult a competent electrician. DON’Ts 2. Power Cord DON’T continue to operate the equipment if you are in any doubt about it working normally, or if it is damaged in any way switch off, withdraw the mains plug and consult your dealer. DON’T place water filled vessels on top of T.V. cabinets. DON’T remove any fixed cover as this may expose dangerous voltages.
6.Heat and Flames The set should not be placed near to naked flames and sources of intense heat,such as an electric heater. Ensure that no naked flame sources, such as lighted candles, are placed on top of the set. • The mains plug is used to disconnect the TV from the mains and therefore it shall remain readily operable. Warning: To prevent injury, this device must be securely attached to the floor/wall in accordance with the installation instrutions. 7.
Before Switching On Your TV Power Connection IMPORTANT: The TV set is designed to operate on 220-240V AC, 50 Hz. • After unpacking, allow the TV set to reach the ambient room temperature before you connect the set to the mains. Connections To The Aerial Input Socket NOTE: Remove the batteries from remote control handset when it is not to be used for a long period.Otherwise it can be damaged due to any leakage of batteries.
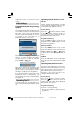
Unplug the power cord from the mains socket. Initial Settings Volume setting and programme selection can be made by using the buttons on the control panel at the right side of the TV. Initial APS (Automatic Programming System) The following menu will be displayed on the screen when you turn your TV on for the first time. APS, searches and sorts all channels and stores them automatically on your TV, according to the transmission of programme systems in your area.
• Press the “P+” button to select the next programme. Programme Selecting (direct access): Press digit buttons on the remote control handset to select programmes between 0 and 9. The TV will switch to the selected programme after a short delay. • For a two digit programme number enter the second digit after pressing the first digit within 2 seconds. Menu System Your TV has been designed with a menu system to provide easy manipulation of a multifunction system. Press the button to enter the menu.
Film Mode Films are recorded at a different number of frames per second to normal television programmes. By pressing / button, select Film Mode. Press / button to set this feature On or Off. Turn this feature on when you are watching films to see the fast motion scenes clearly. 3D Comb 3D Comb is used to improve colour transitions and colour quality of pictures. By pressing / button, select 3D Comb. Press / button to set this feature On or Off. Reset By pressing / button, select Reset.
Sound Mode SubWoofer By pressing / button, select Sound Mode. Press / button to change the mode. It is possible to connect an external, active subwoofer to the set to give a much deeper bass effect. By pressing / button, select Subwoofer. Subwoofer can be set to On or Off. You can select Mono, Stereo, Dual A or Dual B mode, only if the selected channel supports that mode. In case of bilingual broadcast (Dual Sound), you can select original or dubbed language using mode option.
Language Install menu By pressing / button, select Language. By pressing / button, you can select the language. By pressing / button, select the fourth icon. Install menu appears on the screen. Ext-2 Out INSTALL Program Band Channel Colour System Sound System Fine Tune Search VCR Store Program By pressing / button, select Ext-2 Out. You can set Ext-2 Out to TV, EXT-1, EXT-3, EXT-4, EXT-5 or PC by pressing / button. Note: Only audio output is available for EXT3, EXT-5 and PC.
Search Name: By pressing / button, select Search. Press / button to start program searching. The searching will stop when a signal is found. You can also enter a frequency value directly by pressing the digit buttons. To change the name of a decided programme, select the programme and press the RED button. The first letter of the selected name starts to blink. Press / button to change that letter and / button to select the other letters. By pressing the RED button, you can store the name.
Menu System in PC mode APS is running... UK - I 055,25 Mhz Press the button. The menu will be displayed in the middle of the screen. Cancel After APS is finalized, the programme table will appear on the screen. Source menu By pressing / button, select the sixth icon. Source menu appears on the screen. PC Picture Position Menu By pressing / button, select the first icon. PC Picture Position menu appears on the screen.
Dot Clock Sound Menu Dot Clock adjustments correct interference that appear as vertical banding in dot intensive presentations like spreadsheets or paragraphs or text in smaller fonts. By pressing / button, select the third icon. Sound menu appears on the screen. • Use / button to adjust the value. The items in this menu are described at Sound menu starting page 11.
PIP and PAP modes Auto: Press the button to switch to PIP mode. At PIP Mode, a small picture (PIP picture) is displayed on the main picture. There are 1 size and 4 positions (upper left, upper right, bottom left and bottom right) available for the PIP window. You can use button to change the PIP position. Aspect Ratio of the PIP window is fixed and 4:3. When PIP Mode is entered, the default active window is PIP window and the active window is indicated by a green frame around it.
To Select A Page Of Teletext • Press the appropriate digit buttons for the required Teletext page number. 14:9 Zoom: This zooms up the wide picture (14:9 aspect ratio) to the upper and lower limits of the screen. The selected page number is displayed in the top left corner of the screen. The Teletext page counter searches until the selected page number is located, the desired page is then displayed on the screen. • Press the button to move the Teletext screen forward one page at a time.
To Stop Automatic Page Change The teletext page you have selected may contain more information than what is on the screen; the rest of the information will be displayed after a period of time. • Press the button to stop the automatic page change. button again to allow the next • Press the page to be displayed. To Select A Subcode Page Subcode pages are subsections of long Teletext pages that can only be displayed on the screen one section at a time. • Select the required Teletext page. • Press the button.
Connect Peripheral Equipment For further information ask your dealer. See also the booklet supplied with your decoder. There is a wide range of audio and video equipment that can be connected to your TV. The following connection diagrams show you where the different (Optional) equipment should be connected at the rear side of the TV. High Definition Connect a decoder with an aerial socket to the TV • Connect the aerial cable.
– Replace the aerial cable in the aerial socket of your video recorder once you have stored the test signal. Camera And Camcorder To Connect To AV Input Connect your camera or camcorder to AV (EXT-4) input at the rear side of the TV. • Connect your equipment to the TV via VIDEO (yellow), AUDIO R (red) and AUDIO L (white) inputs. You must connect the jacks to the input using the same colour. To Connect To S-VHS Input Connect your camera or camcorder S-VHS input at the rear side of the TV.
Aerial Connection Outdoor Aerial Connection Round 75 ohm coaxial cable 75 VHF/UHF Rear of TV Connect Peripheral Equipment ...or connect the aerial through a VCR... either connect the aerial straight to your TV... TFT-LCD TV (RF) connector lead VCR to TV Aerial (RF) Lead wall socket Aerial (RF) Socket Aerial (RF) Lead Aerial (RF) Socket Aerial (RF) Socket VCR wall socket ANT.
Sound Tips You can not hear any sound. Did you per- Care Of The Screen Clean the screen with a slightly damp, soft cloth. Do not use abrasive solvents as they may damage the TV screen coating layer. Poor Picture Have you selected the correct TV system? Is your TV set or house aerial located too close to non-earthed audio equipment or neon lights, etc.? Mountains or high buildings can cause double pictures or ghost images.
AUDIO OUTPUT POWER (WRMS.) (%10 THD) 2x8 Specifications TV BROADCASTING PAL/SECAM B/G D/K K' I/I' L/L' RECEIVING CHANNELS VHF (BAND I/III) UHF (BAND U) HYPERBAND CABLE TV (S1-S20/ S21-S41) NUMBER OF PRESET CHANNELS 100 POWER CONSUMPTION (W) (max.) 180 W < 3 W (Stand-by) PANEL 16:9 display, 37” Screen Size DIMENSIONS (mm) DIMENSIONS (mm) CHANNEL INDICATOR On Screen Display D 106 RF AERIAL INPUT 75 Ohm (unbalanced) L 934 H Weight (kg) (without stand) 647 27 OPERATING VOLTAGE 220-240V AC, 50 Hz.
Appendix A: PC Input Typical Display Modes The display has a maximum resolution of 1366x 768, vertical sync. frequency range of 56-85 Hz and a horizontal sync. frequency range of 30-69 KHz. The following table is an illustration of some of the typical video display modes. M ode 1 2 3* 4 5 6 7 8 9 10 11 12 13 14 15 16 17 18* 19* 20 Resolution Horizontal Vertical 640 640 848 640 640 640 800 800 800 800 800 1024 1024 1024 1024 1152 1280 1280 1280 1366 Frequency Hor. (kHz) Ver.
Appendix B: DVD Player Selection You can use this remote control to operate the selected brand of DVD player by pressing the following buttons on the remote control simultaneously.
Appendix C: Main and PIP-PAP Picture Combinations - 27 01-ENG-3730W-CLE967 UK-HITACHI 37 INCH27 TFT-TRIDENT-(LG)-50090848.p65 19.03.
UK Guarantee Your Guarantee of Excellence Thank you for purchasing this Hitachi Television.
QUICK GUIDE GB 37LD8500 IMPORTANT - If placing TV into cabinet or alcove, ensure there is at least a 100mm (10cm) gap to the sides, rear and top of the TV. This is to allow for adequate ventilation during operation. Please read the main Users Guide for more safety information before installation. insert the batteries into your handset Rear view either connect the aerial straight to your TV... Scart 1 Aerial (RF) Lead Scart 2 wall socket Aerial (RF) Socket ...or connect the aerial through a VCR...
...or through a satellite decoder... GB TFT-LCD TV Aerial RF Lead from Satellite to TV • Scart Lead to EXT-1 on TV. TV VCR ANT.IN RF Lead to Aerial Satellite LNB lead ...or through a VCR and satellite decoder. TFT-LCD TV RF Lead from VCR to TV RF Lead from VCR to Satellite Aerial • Scart Lead to EXT-1 on TV. VCR TV ANT.IN RF Lead to Aerial Satellite LNB lead ANT.
connect the TV plug to the mains socket UK plug European plug Power Cord Power on/off Input button Plug the mains lead into the TV... insert plug... GB ...and switch on insert plug... switch your TV on by pressing the On/Off button TV/AV MENU P/CH Front View NB: When the set is first switched on, the set will be in standby and the indicator on the front of the set will illuminate red. Press the channel up down (P- , P+) or numeric buttons (1, 2, 3, ...) to operate.
GB important note before starting Auto Setup If you have a Video Cassette Recorder or a Satellite receiver connected to your TV please ensure that they are switched on before automatic tuning begins. In the case of a VCR, insert a pre-recorded tape and begin playback of your equipment. These measures ensure that all your external equipment is tuned in during the Auto Setup procedure. start A.P.S.
Hitachi, Ltd. Consumer Business Group Shin-Otemachi Bldg 5f, 2-1, Otemachi 2-Chome, Chiyoda-Ku, Tokyo 100-0004 Japan HITACHI EUROPE LTD. Consumer Affairs Department PO Box 3007 Maidenhead Berkshire SL6 8ZE UNITED KINGDOM Tel: 0870 405 4405 Email: consumer.mail@hitachi-eu.com HITACHI EUROPE S.A. 364, Kifissias Ave. & 1, Delfon Str. 152 33 Chalandri Athens GREECE Tel: 1-6837200 Fax: 1-6835694 Email: dmgservice.gr@hitachi-eu.