IMPORTANT HITACHI PROJECTION COLOR TV OPERATING GUIDE TABLE OF CONTENTS IMPORTANT .............................................................................................................................................................. SAFETY TIPS ............................................................................................................................................................. PICTURE CAUTIONS .................................................................................
IMPORTANT IMPORTANT SAFEGUARDS Follow all warnings and instructions marked on this projection television. WARNING CAUTION: TO REDUCE THE RISK OF I_LECTRIC SHOCK. DO NOT REMOVE COVER (OR BACK). NO USER SERVICEABLE PARTS INSIDE. REFER SERVICING TO QUALIFIED SERVICE PERSONNEL.
paragraph!5,!!9 0ftheFCCru!es. CAUTION: Never remove the back cover of the television as this can expose you to Very high Voltages and other hazards.
IMPORTANT SAFEGUARDS SAFETY POINTS YOU SHOULD KNOW ABOUT YOUR HITACHI PROJECTION TELEVISION CAUTION: • Read all of these instructions. • Save these instructions for later use. • Follow all warnings and instructions marked on the television. Our reputation has been built on the quality, performance, and ease of service of HITACHI televisions. Safety is also foremost in our minds in the design of these units.
_ 4 7 If the television has been dropped or the cabinet has been damaged, unplug this television from the wall outlet and refer servicing to qualified service personnel. 8 If liquid has been spilled into this television set. unplug it from the wall outlet and refer service to qualified service personnel. 9 Do not subject your television to impact of any kind. Be careful not to damage the picture tube surface i L. 10 Unplug this television from the wall outlet before cleaning.
the receiver and protect the television from overheating. These openings must not be blocked or covered. Never cover the slots or openings with cloth or other material. • Never block the bottom ventilation slots of the set by placing it on a bed. sofa. rug, etc. • Never place the set near or over a radiator or heat register. • Never place the television in a built-in enclosure unless proper ventilation provided.
televisions designedtooperatefrombatterypower,refertotheoperatinginstructions. 20 Ifthetelevision doesnotoperatenormallybyfollowingtheoperatinginstructions, unplugthetelevision from thewalloutletandreferservicingtoqualifiedservicepersonnel. Adjustonlythosecontrolsthatarecoveredinthe instructions as improperadjustment ofothercontrolsmayresultindamageandwilloftenrequtreextensivework bya qualifiedservicetechnician torestorethetelevision to normaloperation.
PICTURE CAUTIONS Picture Burn Prevention • Continuous on-screen displays such as video games, stock market quotations, computer generated graphics and other fixed (non-moving) patterns can cause permanent damage to projection television receivers. Such "PATTERN BURNS" constitute misuse and are NOT COVERED by your HITACHI Factory, Warranty.
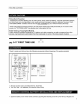
pullingthecoveroff. 2. Inserttwonew"AA"sizebatteries fortheremotecontrol.Whenreplacingoldbatteries,pushthemtowardsthe springsandliftthemout. 3. Matchthebatteriestothe (+)and(-)marksinthebatterycompartment. 4. Replace thecover. BOTTOM VIEW Slide out to remove back cover.
:_HOW TO SET UP YOUR NEW HITACHI PROJECTION TV :- ANTENNA Unless your TV is connected to a cable TV system or to a centralized antenna system, a good outdoor color TV antenna is recommended for the best performance. However, if you are located in an exceptionally good signal area that is free from interference and multiple image ghosts, an indoor antenna may be sufficient. LOCATION Select an area where sunlight Also, be sure that the location the set.
HOW TO SETUP YOUR NEW HITACH/PROJECTION TV I are placed too close to the television • Move the magnetic field source away from the television until there is no Lpicture distortion.
i HOOK-UP CABLES ANDCONNECTORS Most video/audio connections between components can be made with shielded video and audio cables that have phono connectors. For best performance, video cables should use 75-Ohm coaxial shielded wire. Cables can be purchased from most stores that sell audio!video products. Below are illustrations and names of common connectors. Before purchasing any cables, be sure of the output and input connector types required by the various components and the length of each cable.
i HOOK-UP CABLES ANDCONNECTORS Consult your dealer or service store for the antenna mixer.
i FRONT PANEL CONTROLS FRONT VIEW MENU Button This button allows you to enter the MENU, making it possible to set TV features to your preference without using the remote. INPUT/EXIT button Press this button to select the current antenna source, VIDEO: 1,2, or alternate antenna source. Your selection is shown in the top right corner of the screen. This button also serves as the EXIT button when in MENU mode.
FRONT PANEL CONTROLS To see an auto-demonstration of the on-screen displays with HELP text displayed, press and hold the POWER button on the TV set for approximately five seconds. Press the POWER button on the TV again to end the autodemonstration. POWER light You will see a red light when the TV is turned on. AI (Artificial Intelligence) sensor The artificial Intelligence sensor will make automatic picture adjustments depending on the amount of light in the room to give the best picture. (See page 48.
FIRST TIME USE T_ L0_ Antenna Input/Output The remote control allows you to switch between two separate 75-Ohm RF antenna inputs, ANT A and ANT B. ANT A input can be displayed as a main picture or sub-picture. ANT B can only be displayed as a main picture. (ANT B cannot be displayed as a sub-picture.) The antenna output labeled 'qO CONVERTER" allows the ANT A connection to pass directly to a different source such as a cable box, when ANT B is displayed as a main picture.
FIRST TIME USE It may be necessary to adjust TINT or turn AUTO COLOR-ON to obtain optimum picture quality when using the YCB-CR inputs. (See pages 47 and 48.) To ensure no copyright infringement, the MONITOR OUT output wilt be abnormal, when using the Y-CB-CR jacks. When using the Y-CB-CR jacks, INPUT 2 will be viewed as a blank PIP sub-picture. (see page 22) (7) Speaker Matrix Surround Switch Use this switch to choose between the surround and external speaker features.
:_REAR SPEAKER TERMINAL CONNECTIONS CONNECT AFTER TURNING :- THE POWER TO THE TV OFF. Press the Right Speaker red button and insert the positive (+) lead wire into the hole next to the button. Once the wire is in place, pull the red button back to original position and the wire is locked into place. In the same manner, press the Right Speaker black button and insert the negative (-) lead wire. Repeat this procedure for the Left Speaker.
:_EXTERNAL CONNECTIONS Connect only 1 component to each input jack. COMPONENT: Y-CB-CR connections are provided for high performance components, such as DVD players. Use these connections in place of the standard video connection if your device has this feature. When using the Y-CB-CR input jacks, connect your components audio output to the TV's INPUT 2 Left and Right Audio input jacks. Your component outputs may be labeled Y, B-Y, and R-Y.
:_CONNECTING EXTERNAL VIDEO SOURCES The exact arrangement you use to connect the VCR, camcorder, laserdisc player, DVD player to your TV set is dependent on the model and features of each component. Check the owner's manual of each component for the location of video and audio inputs and outputs. The following connection diagrams are offered as suggestions. However, you may need to modify them to accommodate your particular assortment of components and features.
:_CONNECTING EXTERNAL VIDEO SOURCES CONNECTING A STEREO VCR OR STEREO LASERDISC PLAYER 1. Connect the cable from the AUDIO OUT of the VCR or the laserdisc player to the INPUT (VIDEO) jack on the TV set below. 2. Connect the cable from the AUDIO OUT R of the VCR or the laserdisc player to the INPUT (AUDIO/R) jack. 3. Connect the cable from the AUDIO OUT L of the VCR or the laserdisc player to the INPUT (AUDIO/L) jack. 4. Press the INPUT button to view the program from the VCR or laserdisc player.
:_CONNECTING EXTERNAL VIDEO SOURCES NOTE: Completely insert the connection cord plugs when connecting to rear panel jacks. The picture that is played back will be abnormal if the connection is loose. If you have an S-VHS VCR, use the S-INPUT cable in place of the standard video cable. A single VCR can be used for VCR #1 and VCR #2, but note that a VCR cannot record its own video or line output.
:_CONNECTING EXTERNAL VIDEO SOURCES CONNECTING A LASERDISC PLAYER OR DVD PLAYER TO INPUT 2. 1. Connect the cable from the Y OUT of the Laserdisc or the DVD player to the INPUT 2 (Y) jack as shown on the TV set below. 2. Connect the cable from the CB OUT or B-Y OUT of the Laserdisc or the DVD player to the INPUT 2 (CB) jack, as shown on the TV set below. 3. Connect the cable from the CR or R-Y OUT or B-Y OUT of the Laserdisc or the DVD player to the INPUT 2 (CR) jack, as shown on the TV set below. 4.
i AUDIO SYSTEM SET-UP Match the numbers below to the diagram for speaker placement and refer to the table for the different surround sound requirements. The television's internal speakers. These speakers are connected to a separate audio amplifier. Use the "AUDIO TO HI-FI" output on the TV. (3) These speakers are connected to the rear speaker 8 Ohm output on the TV. SURROUND FEATURE OFF MATRIX EXTERNAL ;PEAKERS SURROUND SWITCH* REQUIRED CONNECTION OPTIONAL CONNECTION EFFECT Sp.
:_AUDIO SYSTEM SET-UP * See page 10 for location of Surround Switch.
:_THE GENIUS REMOTE CONTROL (CLU-436UI) In addition to controlling all the functions on your HITACHI Projection TV, the new remote is designed to operate different types of VCRs, CATV (Cable TV) satellite converters with one touch. Basic operation keys are grouped together in one area. To operate your TV, point the remote control at the remote sensor of the TV and press the TV button. The remote will now control your television.
:_HOWTOUSE THEGENIUS REMOTE TO CONTROL YOUR TV 01 (1) POWER Button Press this button to turn the TV set on or off when the remote is in TV mode. If a Special Event Reminder is set, it will be displayed when the TV is first turned on. (See page 52). (2) PICTURE-IN-PICTURE buttons See separate section on pages 22 for a description. (3) PIP CH Button Use the PIP CH button to select between main picture and sub-picture tuning.
:]HOW TO USE THE GENIUS REMOTE TO CONTROL YOUR TV Press this button when a menu is displayed to view HELP text, which gives a description of the displayed menu. The HELP text will be displayed every time a MENU is displayed, until htis button is pressed again. E (5) LAST CHANNEL (LST-CH) Button Use this button to select between the last two channels viewed. (Good for watching two sporting evens, etc.).
:_HOW TO USE THE GENIUS REMOTE TO CONTROL YOUR TV :- When an S-VIDEO Input is connected to VIDEO: 1. When an COMPONENT: YCB-CR Input is connected to VIDEO: 2. (9) MENU, CURSOR Buttons All the On-Screen Display features can be set or adjusted by using these buttons. The MENU button will start the On-Screen Display. The CURSOR buttons will highlight functions or adjust and set different features. (10) SLEEP Button Press this button to display the sleep timer in the lower left corner of the screen.
HOW TO USE THE GENIUS REMOTE TO CONTROL YOUR TV 30
:_PICTURE-IN-PICTURE (PIP) Your HITACHI Projection TV incorporates Dual Tuner technology designed for improved viewing enjoyment. This Dual Tuner feature allows you to view antenna input on both the main picture and sub-picture simultaneously, with separate tuning control for each. The Dual Tuner can operate with only one (ANT A only) or two inputs (ANT A and ANT B). ANT A input can be viewed as both the main picture and the sub-picture simultaneously.
:_PICTURE-IN-PICTURE (PIP) as the main channel. When the COMPONENT: Y-CB-CR Input 2 is selected as PIP, it will appear as a blank sub-picture. PICTURE-IN-PICTURE CONT. SURF MODE PIP This feature will automatically scan all active channel numbers (those set in memory) and display them as PIP sub-pictures, along the right edge of the screen. Press the PIP button a second time to remoe the sub-pictures from the screen. NOTE: 1.
:_PICTURE-IN-PICTURE (PIP) :: (4) FREEZE (FRZ) button (With PIP ON) If you wish to freeze the Sub-Picture, press the FRZ button. This is convenient when trying to write down the address for a mail order company, recording statistics for a sporting event, etc. To return the picture to motion, press the FRZ button again. NOTE: The FREEZE function will only operate when SINGLE PIP mode is chosen.
:_USING THE REMOTE TO CONTROL VCR FUNCTIONS /111=11 Operating il:ll] the precoded function for your VCR. This remote is designed to operate different types of VCRs. You must first program the remote system of your VCR. (Refer to page 27.) 1. Turn ON your VCR. 2. Aim the remote control at the front of your VCR. 3. Press the VCR button to switch to the VCR pre-coded mode. 4. Hold down the VCR button on the remote, enter the two digit preset code that matches your VCR as shown on page 27.
:]USING THE REMOTE TO CONTROL CABLE HITA_H_ %= j (1) VCR Button This button allows the remote to control your VCR by setting it to VCR mode. (2) PRECODED VCR Buttons These buttons transmit the chosen precoded VCR codes. twice to record a program. For some VCRs, you must press the RECORD button (3) EXCLUSIVE TV Buttons These buttons are for operating the TV. I NOTE: Refer to instruction manual of the VCR for operation of the buttons exclusively for the VCR.
:_BOX/SATELLITE FUNCTIONS 3. Press the CABLE button on the remote to switch to cable mode. 4. Hold down the CABLE button on the remote, enter the two digit preset code that matched your cable box as shown on page 27. The remote will turn off your cable box when the correct two digit preset code is entered. When this occurs, the remote control is programmed for your cable box. If the cable box does not turn off after five seconds, try another two digit preset code. 5.
:_CABLE/SATELLITE, VCR, AUDIO AND DVD CODES (CLU-436UI) :- (1) CABLE Button This button allows the remote to control your cable box by setting it to cable. (2)PRECODED CABLE Box Buttons These buttons transmit the chosen precoded cable codes. (3) EXCLUSIVE TV Buttons These buttons are for operating the TV.
:_CABLE/SATELLITE, Scientific Atlanta Signal Sprucer Stargate Sylvania Teleview TFC Toshiba TV 86 United Artists Universal Zenith Adventura Aiwa VCR, AUDIO AND DVD CODES (CLU-436UI) 03,04,11,34,63 10,18 13 10,18 O0 18 28 09 20 44 23,24,25,42,43 09,47,50 Seam SL Marx Starcom Starquest Tandy Texscan Tocum Tusa Unika United Cable Videoway Zentek Aiko Akai Asha Beaumark Broksonic Canon Carver Citizen Cybernex Daytron Electrohome Emerex O0 O0 07 09 38 09 03 33,66 33 20,51 03 09 04 Fisher Funai 17,22
:_CABLE/SATELLITE, Gerrard Goldstar Grundig Harman/Kardon Headquarter Hitachi JVC Kenwood Kodak Lloyd's LXI Magnin Marta MEI MGA Minolta Motorola Multitech NEC Noblex Optimus Orion Penney Philco Pilot Portland Pulsar Quartz Radio Shack Randex Realistic Runco Samsung Sansui Scott Sharp Shogun Sony Sunpack VCR, AUDIO AND DVD CODES (CLU-436UI) 00,55 09,10 68 10,34 16 00,13,28,61,62,63 02,13,31 10,13,31 07,09 45 09 47 09 07 Go Video Gradiente Olympus Optonic 67 O0 O0 32,33 17 13 09,66 33 00 33 07,11,36,64
i ULTRATEC OSD Symphonic Teac Teknika Torvision Unitech Vector Research Videosonic 00,55 00,13 00,07,09 09,51 51 10,12 51 Tatung Technics TMK Toshiba Vector XR-1000 XR-1002 Zenith 00 33 05,06,11 XR-1001 Yamaha 13 07,41 08,45,51 14,15,29,47,49,57 15 12,15,26 00,07,17,18,24,27 33,49,51,61,64 07 10 General Instrument Jerrold RCA 30 Hitachi 54,55 30 37,56,57 Primestar 30 40 I Jerrold 151 Hitachi 77 72 76 73 75 69 Magnavox Panasonic Pioneer RCA Toshiba Video Concepts Wards Sony i Scientific
i ULTRATEC OSD 4. Press HELP on the remote control when a menu is displayed, and text will appear giving a description of that menu. This part of the screen shows what selections are available. This part of the screen shows which remote control buttons to use. MENU LANGUAGE PLUG & PLAY SIGNAL SOURCE AUTO CHANNEL SET CHANNEL MEMORY CHANNEL LIST CLOCK SET DIGITAL ARRAY Choose English, French, or Spanish text. Optimum hook up for your system. Select Antenna or Cable TV.
i ULTRATEC OSD AUTO LINK CLOSED CAPTION MENU BACKGROUND FIRST TIME TOUR Automatically turn TV on with any VIDEO input. Feature to display dialogue/text. Select from three types of backgrounds. Introduces you to basic TV functions. CONTRAST BRIGHTNESS COLOR TINT SHARPNESS RESET ADVANCED SETTINGS Adjust contrast. Adjust brightness. Adjust color. Adjust tint. Adjust sharpness. Set VIDEO settings to factory preset. Improve picture performance. BASS TREBLE BALANCE RESET ADVANCE SETTINGS Adjust bass.
SelectINITIALSETUPwhensettingyourTVupforthefirsttime.UsetheCURSOR_ or V onthe remotetohighlightthefunctiondesired. AUTO CH_NIN_L SET C*_A_@_ L MEMORY GLOCK SET I NOTE: To see an auto-demonstration of the on-screen displays with HELP text displayed, press and hold the POWER button on the TV set for approximately five seconds. Press the POWER button on the TV again to end the autodemonstration.
OURSOR ME_ L#/_N_L_A_ F_ il1 pRL,_ _ _TO _T,_RT .L 3 U_I lO_ Z CURSOH PR£95 _ TO ENTE = Press CURSOR _1_or "_ to highlight the correct answers to all three questions. Press CURSOR I_ to display the graphic guide. Press EXIT to quit menu or CURSOR _ to begin AUTO CHANNEL SET. (See page 33). I SIGNAL SOURCE ] Select ANTENNA if you are using an indoor or outdoor antenna. Select CATV if you have cable TV.
i SETUP Press CURSOR A or V to highlight and select the correct SIGNAL SOURCE mode. Press EXIT to quit MENU or CURSOR _ to return to previous menu. RECEPTION BAND Reception channels for each mode are shown at the left. Refer to your cable or TV guide for channel identification standards. _,5 UHF+".4 +mm A1 _- g9 If certain CATV channels are poor or not possible in CATV1 mode, set SIGNAL SOURCE to CATV2.
: SET UP CUR_¢OR If the EXIT button is pressed while the AUTO CHANNEL SET function is engaged, programming will stop. If two antennas are connected, switch antenna inputs with the INPUT button and repeat AUTO CHANNEL SET for the second antenna input. Remember to select the correct SIGNAL SOURCE mode before using AUTO CHANNEL SET for the second antenna input. See CHANNEL MEMORY to add or to erase additional channels.
_.E_U LANG_.I_.G E Add or erase additional channels while in CHANNEL MEMORY using CHANNEL _ or Y to change the channel. or the number buttons Press EXIT to quit menu or CURSOR _ to return to previous menu. ICHANNEL LIST Use this function allows you to review which channels are labeled in CHANNEL ID (ID.), which have been added to CHANNEL MEMORY (SCAN), and which are protected by PARENTAL CONTROL (LOCK).
_AL_H_L _lJ Ft,_= CUYlSOR Add CURSOR ,Ilk or V to review more channels. Press EXIT to quit menu or CURSOR 4[ to return to previous menu. NOTE: Each touch of CURSOR ICLOCK A or v will display the next eight channels. SET The time must be set before you can use the CALENDAR, 4 EVENT PROGRAM, SPECIAL EVENT REMINDER or TV TIME OUT.
_l_ T,'_L _RA_t _ _JRSO£ 49
UseCURSOR A or V to setthetime,date,andyear. PressCURSOR_ or _ tochangeposition. PressEXITtoquitmenuor CURSOR_ toreturntopreviousmenuwhentheCURSORis inthefirstposition. I DIGITAL ARRAY ] Your HITACHI Projection TV has three color projection tubes: one for red, one for green, one for blue. When mixed together in the proper proportion, the output of these three colors tubes can produce any color.
Four lines surrounding a crosshatch indicate the point being adjusted. indicates the color being adjusted. The color of these surrounding lines To save your adjustment data into memory, press the front panel DIGITAL ARRAY button or the remote control MOVE Button. If you do NOT wish to save your adjustment data into memory, turn the TV OFF or press the remote control PIP button. When the TV is turned ON again, your old convergence data will be stored.
i CUSTOM This selection contains advanced features which will make TV viewing easier and more enjoyable. I CHANNEL ID Use this feature to give up to 20 channels a name when ANTENNA signal source is selected and up to 60 channels a name when CATV1 signal source is selected. GURSOR _, j'P3 L t_K _]_U _9A0_f_tl_lJ _1_:_ ¸_IME Tc_J_ CURSOR _OM OH. AB_ b@b Press CURSOR _ to select CHANNEL LIST. Press CURSOR _ to select preset CHANNEL LIST. Press CURSOR _ to scroll through the preset CHANNEL LIST.
:_CUSTOM :_ inputs will be the same. CHANNEL ID will be displayed only when channel is displayed as main picture. VIDEO ID. Use this feature to give a name to any of the two video inputs. Press CURSOR V to select VIDEO LIST. Press CURSOR _ to select preset VIDEO LIST. Press CURSOR A or Y to scroll through the preset VIDEO LIST. Press CURSOR _ to select desired VIDEO ID. To customize VIDEO ID, select CUSTOM. Press CURSOR A or Y to select letters. Press CURSOR _ or _ to change position.
i CUSTOM OURSOR sKI _7 To rename the categories, use the CURSOR buttons to highlight the category you would like to rename. Use THUMB STICK _ or _ to change a letter and CURSOR _ to select the next character to change. To enter a channel into a category, highlight the channel location to be stored. Press CHANNEL _ or "_ or the number buttons to enter the desired channel. Repeat until category has been set with your favorite channels.
i CUSTOM Select a category using CURSOR 4 or 11"buttons. Press MENU and the category will be displayed as sub-pictures at the right edge of the screen. previewing a category. This is useful for Use CURSOR 4 _, _ or V to highlight a favorite channel and the TV will automatically tune to that channel. Press EXIT to remove FAMILY FAVORITES OSD from the screen. NOTE: 1. If a category has some blank channel entries, these channels will appear as black sub-pictures. 2.
i CUSTOM function) and then press cursor _ to select your choice. MOVIE/TV RATINGS are explained in detail in the Parental Control Movie/TV Ratings Reference Guide. To change the secret code number, select CHANGE SECRET CODE. Enter a new four digit key number you prefer. If you forget your secret code, use the factory code 7777 to erase your key number. This will reset the key number back to the factory preset 00O0. Press EXIT to quit menu or cursor _ to return to the previous menu. NOTE: 1.
i CUSTOM Press EXIT to quit menu or THUMB STICK _ to return to previous menu. If the clock is not set, you can not use this function and the screen below will appear. NOTE: 1. The OFF Timer will only activate if the TV was turned on or tuned with the ON Timer and no channel selection was made after this time. If you change the channel after the ON Timer has been activated, the OFF Timer will deactivate. 2.
:_ CUSTOM:- NOTES: 1. Once the TV has been turned on using the AUTO LINK feature, it must be reset before AUTO LINK is used again. To do this, turn your VCR, laserdisc or DVD player OFF. This feature is now reset and will turn on your TV as described above. 2. When using REMOTE mode, any remote control button will substitute for your video input device play button. However, intended operation is for use with your VCR, laserdisc or DVD play button.
:_CUSTOM :- seen behind menu screen), select SHADED and a light background is visible. [FIRST TIME TOUR ] This function introduces you to the First Time Tour Setup Feature, showing you basic TV functions as well as helping you set up your TV or Home Theater System. This feature wilt be displayed every time your TV is turned on, unless you set FIRST TIME TOUR to OFF. H HL _IR'_T T_ _ETUP FEATU_IE _.N_$i J_ UN After 10 seconds Auto Demo will start automatically.
settingsandimprovepicturequality. UsetheCURSORA or Y buttonsto highlightthefunctionto beadjusted. PresstheCURSOR_ or _ buttonstoadjustthefunction. PressEXITtoquitmenu. NOTE: • If CONTRAST is selected,youareadjustingCONTRAST. Theadditional menuitemsBRIGHTNESS, COLOR, TINT,andSHARPNESS canbeselectedandadjustedinthesamemanner. • ContrastandBrightness adjustments willaffectonlythemainpicture.Theseadjustments willnotaffectthe sub-picture. [CON,.
YourHITACHIProjection TVhasanUltraAI (ArtificialIntelligence) functionwhichwillautomatically adjustpicture settingsto producethehighestqualitypicturepossible. WhenAI is highlighted, useCURSOR_ toturntheAI onoroff. CURSOR ) CURSOR Use CURSOR _ or _ to select function. Use CURSOR } to select the function setting. When the function has an "X" in the box, it is ON. Press EXIT to quit menu or CURSOR _ to return to previous menu.
Turn on SUPER CONTRAST to improve picture detail in areas of high brightness. COLOR TEMPERATURE Set this to WARM for hotter colors with more red, or set to COOL for less intense colors with more blue. Select AUDIO SETTINGS to adjust the TV to your preference and to improve the sound quality. CURSOR Use CURSOR A or _1_ to highlight the function to be adjusted. Press CURSOR _i or _ to adjust the function. Press EXIT to quit menu. NOTE: If BASS is selected you are adjusting BASS.
Press CURSOR A or v to highlight the function. When the function has an "X" in the box, it is ON. Press CURSOR 1_ to change the function setting. MTS MODE Multi-Channel Television Sound will allow you to select STEREO (a stereo broadcast), MONO (monaural sound) used when receiving a weak stereo broadcast or SAP (second audio program) which may be a secondary language, weather report, etc. The sources received will be displayed at the top center edge of the TV.
7 <7! Use this function to choose picture and audio settings for a true home THEATER experience. THEATER MODES Use this function to choose from automatic picture and audio settings to optimize your TV's performance. Use CURSOR ill or V to change THEATER MODES settings. When TV mode is chosen, the following are automatically set: Contrast almost maximum, Super Contrast -OFF, Color Temp. - Cool, Loudness -ON, Perfect Volume -ON.
This function allows your TV to assist you with your busy day-to-day schedule. I SPECIAL EVENT RENINDER Use this function to set up to six special events into memory. These events can then be viewed in CALENDAR mode. Press CURSOR _ to select EVENT 1 to 6. Press CURSOR A or "_IFto select a letter. Press CURSOR _ to change position. Set Special Day of reminder using cursor buttons. Highlight the day of Start Reminder using CURSOR, then press CURSOR _ to select.
indicatesa SPECIALEVENTREMINDER message.PresstheRECALLbuttonagainto displaytheSPECIAL I 1 EVENT REMINDER message. [CA'ENOA. 1 Use this function to check the day, month, and year. Dates programmed in SPECIAL EVENT REMINDER will appear blinking and special event message will be displayed. Press CURSOR A or V to change the month. Press EXIT to quit menu or CURSOR _ to return to previous menu. If the clock is not set, you can not use this function and the next screen will appear. NOTES: 1.
:_ CAREOFYOURHITACHIPROJECTION TVAND YOURREMOTECONTROL DO Dustthescreenandcabinetwitha softcloth. Cleanthescreenwitha softclothmoistened withwarmwateranddrywitha softcloth.A mildsoapmaybeused if thescreenisextremely dirty. Placeyourtelevision awayfromextremeheat,humidityandextremely dustyplaces. Removetheplugfromthewalloutletifyourtelevision willnotbeusedfora longperiodoftime,for instance, when yougoonvacation DONOT Denotcleanyourscreenor cabinetwithstrongcleaners,polishesor a chemically treatedcloth.
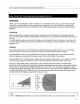
RECEPTION PROBLEMS:- , IGNITIONNOISE: Blackspotsor horizontal streaksmayappear,picturemayflutterordrift. Usuallycausedbyinterference from automobile ignitionsystems,neonlamps,electricaldrillsandotherelectricalappliances. GHOSTS: Ghostsarecausedbythetelevisionsignalfollowingtwopaths.Oneisthedirectpathandtheotheris reflected fromtallbuildings,hillsor someotherobjects.Changing thedirectionorpositionoftheantennamayimprove reception.
i USEFUL INFO SYMPTOMS Check these items and try Be sure Be sure _xternai 3ower cord :onnection is s plugged :orrect n these adiustments Be sure Try FV is _nother _witched :hannel ON" station Check antenna :onnections back of TV) Check antenna for 3roken ead-in wire Check )utside mtenna Check br local ntererence Adjust contrast control Adjust brightness control Adjust ;olor ;ontrol Adjust tint control Adjust ,olume ;ontrol "ouble) No picture, no _ound Sound OK, picture poor Picture OK, sound
i USEFUL INFO 46GX01 B 50GX01 B 153W 153W • Power Consumption (maximum) 46GX01 B .......................................... 50GX01 B .......................................... 182W 182W • Antenna input impedance ............... 75 Ohm • Channel coverage ............................ 181 ch. VHF-Band .............................................. 2 ~ 13 UHF-Band ............................................ 14 ~ 69 CATV Mid Band ........................... A-5 ~ A-1 .......................................
i USEFUL INFO To locate an authorized HITACHI service facility in the continental U.S.A. only. DIAL TOLL FREE 7 days a week, 24 hours a day 800 HITACHI (1-800-448-2244) Hitachi America, LTD Home Electronics Division Hitachi has made every effort to assure you hours of trouble free operation from your unit. However, should you require service, a network of Hitachi Authorized Service Facilities has been established in at150 states and Puerto Rico.
(blank page for consumer notes) 72