INSTRUCTION MANUAL Soundbar AXS014BTU 418/1310 Important - Please read these instructions fully before installing or operating and keep for future reference. These instructions contain important information which will help you get the best from your Sound Bar and ensure safe and correct installation and operation.
Contents Some Dos and Don’ts on the Safe Use of Equipment ........................................................4 Safety Warnings ....................................................................................................................6 Support ... .............................................................................................................................8 Unpacking .................................................................................................................
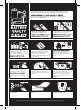
SOME DOS AND DON’TS ON THE SAFE USE OF EQUIPMENT This equipment has been designed and manufactured to meet international safety standards but, like any electrical equipment, care must be taken if you are to obtain the best results and safety is to be assured. DO read the operating instructions before you attempt to use the equipment.
Used correctly, domestic batteries are a safe and dependable source of portable power. Problems can occur if they are misused or abused Here are some simple guidelines to safe battery use designed to eliminate any such problems. Store unused batteries in their packaging and away from metal objects which may cause a short-circuit resulting in leakage or, in explosion. Never attempt to recharge ordinary batteries, either in a charger or by applying heat to them.
Safety Warnings • Read all the instructions carefully before using the unit and keep them for future reference. • Retain the manual. If you pass the unit onto a third party make sure to include this manual. • Check that the voltage marked on the rating label matches your mains voltage. Damage • Please inspect the unit for damage after unpacking. • Do not continue to operate the unit if you are in any doubt about it working normally, withdraw the mains plug and consult your dealer.
Supervision • Children should be supervised to ensure that they do not play with the unit and the remote control. • Never let anyone especially children push anything into the holes, slots or any other openings in the case - this could result in a fatal electric shock. CAUTION RISK OF ELECTRIC SHOCK DO NOT OPEN symbol, within an equilateral triangle, is intended to alert the user to the presence of uninsulated “dangerous voltage” within the unit’s enclosure constitute a risk of electric shock.
Support Technical experts are available 7 days a week Simple help and advice on setting up your digital equipment (image). Guidance on connecting other devices to your television such as a DVD player, Sky, home cinema system or a games console. Order spare parts, including that lost remote control. Any other technical issues you may need assistance with. Call us today: 0345 604 0105 Local call rates applies* Lines open 9am-8pm Monday to Saturday and 10am-4pm Sunday.
Thank you for purchasing your new HITACHI Soundbar. We recommend that you spend some time reading this instruction manual Read all the safety instructions carefully before use and keep this instruction manual for future reference. Unpacking Remove all items from the packaging. Retain the packaging. If you dispose of it please do so according to local regulations. The following items are included: Main Unit Remote Control 3.5mm to RCA Stereo Audio Cable 3.5mm to 3.
Product Overview Front View 1 2 1. Speakers 2. LED Indicator • Unlit when the unit is in STANDBY mode. • Lights up green in AUX IN or AUDIO IN modes. • Lights up red in OPTICAL mode. 3 3. Remote Control Sensor Receives signal from the remote control. • Lights up blue in BLUETOOTH modes. Top View 1 2 3 4 1. Button Switches the unit between ON and STANDBY modes. 2. MODE Button Selects the input source. 3. VOL – Button Decreases the volume. 4. VOL + Button Increases the volume.
Remote Control 1. 2. GB Button Switches the unit between ON and STANDBY modes. MODE Button Selects the input source. 3. Button Mutes the unit or resumes the sound. 4. VOL + Button Increases the volume. 5. VOL – Button Decreases the volume. 6. 1 3 5 4 2 Bluetooth Connection Remove the Plastic Strip from the Remote Control Remove the plastic strip from the battery if the battery is of the remote control.
Handling the Battery • Improper or incorrect use of batteries may cause corrosion or battery leakage, which • Install the battery correctly in the battery compartment. Normally the battery’s positive polarity (+) will face up. • Use only the battery type indicated in this manual. • Do not dispose of the used battery as domestic waste. Dispose of it in accordance with local regulations.
Connections Using the OPTICAL Connection Use an optical cable (not included) to connect the TV’s OPTICAL OUT socket to the soundbar’s D1 OPTICAL socket. Bottom view of the unit OPTICAL cable (not included) TV Using the AUX Connection Use a 3.5mm to RCA stereo audio cable (included) to connect the TV’s audio output sockets to the soundbar’s AUX IN socket. Bottom view of the unit 3.5mm to RCA stereo audio cable (included) TV Use a 3.5mm to 3.
Using the Audio Connection Use an RCA stereo audio cable (not included) to connect the TV’s audio output sockets to the soundbar’s AUDIO IN (L/R) sockets. Bottom view of the unit RCA stereo audio cable (not included) TV To listen with AUDIO IN (L/R) sockets in AUX mode, make sure AUX IN socket is unplugged. Using the Bluetooth Connection • • • • • • 14 Keep the distance of the Soundbar and your mobile phone, PC, tablet or other Bluetooth enabled device within 1 meter. The closer, the better.
Connecting to the Mains Supply • This unit is designed to operate with the provided mains adapter. • Connecting the unit to any other power source may damage the unit. Unwind the mains adapter cable to its full length. Connect the end of the cable to the DC IN Socket at the bottom of the unit and then connect the mains adapter to the mains socket. connected and ready to use. • Ensure all audio connections of the unit are connected before connecting to the mains power socket.
General Operation STANDBY mode. The LED indicator will not light up. • Press on the unit or the remote control to switch the unit to ON mode. The LED indicator will light up blue. • Press • to switch the unit back to STANDBY mode. The LED indicator will not light up. completely. When the unit volume is close to mute or is idle for approximately 15 minutes, it will automatically switch to Standby.
Hints and Tips If a problem occurs, it may often be due to something very minor. The following table contains various tips: Problem Solution No power. • Ensure the mains adapter is connected securely at both ends. • Make sure that the ON mode is selected. The remote control is not functioning. • • • • Loud hum or noise is heard. • The plugs and sockets are dirty. Wipe them with a cloth slightly moistened with an appropriate non-abrasive cleaning solution. Use the remote control near the unit.
Notes for battery disposal The batteries used with this product contain chemicals that are harmful to the environment. To preserve our environment, dispose of used batteries according to your local laws or regulations. Do not dispose of batteries with normal household waste. For more information, please contact the local authority or your retailer where you purchased the product. The above mark is in compliance with the Waste Electrical and Electronic Equipment Directive 2002/96/EC (WEEE).
Guarantee Product Guarantee This product is guaranteed against manufacturing defects for a period of Year This product is guaranteed for twelve months from the date of original purchase. refunded or repaired free of charge where possible during this period by the dealer from whom you purchased the unit. or consumable items. instructions contained in this manual. damaged by inexpert repair. Customer Helpline: 0345 604 0105.
Manufacturer: Hitachi Europe Ltd., Whitebrook Park, Lower Cookham Road, Maidenhead, Berkshire SL6 8YA U.K. Importer: Argos Ltd., 489 - 499 Avebury Boulevard, Central Milton Keynes, Buckinghamshire MK9 2NW U.K. www.hitachidigitalmedia.