Projector CP-X268AWF User's Manual – Operating Guide Thank you for purchasing this projector. WARNING ŹBefore using this product, please read the "User's Manual Safety Guide" and related manuals to ensure the proper use of this product. After reading them, store them in a safe place for future reference. About this manual Various symbols are used in this manual. The meanings of these symbols are described below.
Read this Safety Guide first. Projector User's Manual - Safety Guide Thank you for purchasing this projector. WARNING • Before using, read these user's manuals of this projector to ensure correct usage through understanding. After reading, store them in a safe place for future reference. Incorrect handling of this product could possibly result in personal injury or physical damage.
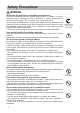
Safety Precautions WARNING Never use the projector if a problem should occur. Abnormal operations such as smoke, strange odor, no image, no sound, excessive sound, damaged casing or elements or cables, penetration of liquids or foreign matter, etc. can cause a fire or electrical shock. In such case, immediately turn off the power switch and then disconnect the power plug from the power outlet. After making sure that the smoke or odor has stopped, contact your dealer.
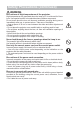
Safety Precautions (continued) WARNING Be cautious of High temperatures of the projector. High temperatures are generated when the lamp is lit. It could result in fire or burn. Use special caution in households where children are present. Do not touch about the lens, air fans and ventilation openings during use or immediately after use, to prevent a burn. Take care of ventilation. • Keep a space of 30 cm or more between the sides and other objects such as walls.
Safety Precautions (continued) WARNING Be careful in handling the light source lamp. The projector uses a high-pressure mercury glass lamp made of glass. The lamp can break with a loud bang, or burn out. When the bulb bursts, it is possible for shards of glass to fly into the lamp housing, and for gas containing mercury to escape from the projector’s vent holes. Please carefully read the section “Lamp”. Be careful in handling the power cord and external connection cables.
Safety Precautions (continued) CAUTION Be careful in moving the projector. Neglect could result in an injury or damage. • Do not move the projector during use. Before moving, disconnect the power cord and all external connections, and close the slide lens door or attach the lens cap. • Avoid any impact or shock to the projector. • Do not drag the projector. • For moving the projector, use the enclosed case or bag if provided. Do not put anything on top of the projector.
Safety Precautions (continued) CAUTION Remove the power cord for complete separation. • For safety purposes, disconnect the power cord if the projector is not to be used for prolonged periods of time. • Before cleaning, turn off and unplug the projector. Neglect could result in fire or electrical shock. Disconnect the plug from the power outlet. Ask your dealer to cleaning inside of the projector about every year. Accumulations of dust inside the projector cause result in fire or malfunction.
Safety Precautions (continued) NOTE About consumables. Lamp, LCD panels, polarizors and other optical components, and air filter and cooling fans have a different lifetime in each. These parts may need to be replaced after a long usage time. • This product isn’t designed for continuous use of long time.
Lamp WARNING HIGH VOLTAGE HIGH TEMPERATURE HIGH PRESSURE The projector uses a high-pressure mercury glass lamp. The lamp can break with a loud bang, or burn out, if jolted or scratched, handled while hot, or worn over time. Note that each lamp has a different lifetime, and some may burst or burn out soon after you start using them. In addition, when the bulb bursts, it is possible for shards of glass to fly into the lamp housing, and for gas containing mercury to escape from the projector’s vent holes.
Regulatory Notices FCC Statement Warning WARNING: This equipment has been tested and found to comply with the limits for a Class B digital device, pursuant to Part 15 of the FCC Rules. These limits are designed to provide reasonable protection against harmful interference in a residential installation. This equipment generates, uses, and can radiate radio frequency energy and, if not installed and used in accordance with the instructions, may cause harmful interference to radio communications.
Content Content About this manual. . . . . . . . . . 1 EASY Menu . . . . . . . . . . . . . . . . . . .27 Aspect, Auto keystone Execute, Content . . . . . . . . . . . . . . . . . . 2 Keystone, Picture mode, Brightness, Contents of package . . . . . . . 3 Contrast, Color, Tint, Sharpness, How to use the Slot cover lock . . . . .3 Whisper, Mirror, Reset, Filter time, Language, Go to advanced menu Projector features. . . . . . . . . . 4 Preparations . . . . . . . . . . . . . . 4 PICTURE Menu . . . . . . . . .
Contents of package Contents of package VIDEO RGB ASPECT MAGNIFY (1) Projector (2) Remote control with two AA batteries (3) Power cord (4) RGB cable (5) Audio/Video cable (6) Soft case (7) User’s manuals (8) Lens cover, Rivet and Strap (9) Wireless Network Card (10) Slot cover lock (11) Application CD ON OFF FREEZE SEARCH BLANK AUTO HOME PAGE UP END PAGE DOWN MY BUTTON 1 VOLUME MUTE KEYSTONE 2 MENU POSITION ENTER RESET ESC (1) (2) (4) (6) (9) (3) (5) (7) (10) (8) (11) NOT
Projector features / Preparations Projector features This projector is used to project various computer signals as well as NTSC/PAL/ SECAM, Component (SD, HD) video signals onto a screen. It requires just a little space for installation and gets a large image from short distance. High Brightness Newly developed 200W UHB (Ultra High Brightness) lamp gives you a higher brightness image on a screen. The image can be still kept as bright and clean enough for use in bright rooms.
Part names Part names Projector Ì Control buttons ( Lamp cover ( 58) (Lamp unit is inside.) Zoom ring ( 21) Focus ring ( 21) Remote sensor ( Security bar ( 11) (Use for attaching a commercial anti-theft chain or wire.) Elevator button ( 19) Front-Right side Lens cover ( 18) Speaker Vent Lens ( 7) Elevator foot ( 10) 10) 4) Filter cover ( 59) $LU ¿OWHU DQG LQWDNH YHQW are inside.
Part names Power switch ( AC inlet ( CB/P SD B 19) 15) CA RD CR/P R RG B AU DIO IN1 DIO IN1 IN2 VID AU X DC I/O AU EO S-V IDE 5V 0.5A RG B IN2 O LAN RG CO Ports (See below.) B OU NT AC T RO L Elevator button ( IN AU DIO OU T 10) US B Elevator foot ( Rear-Left side 10) Vent AUDIO IN1 port ( 13) (In the default setting, the AUDIO IN1 port is the audio port for the RGB IN1 port, however, it is possible to AUDIO IN3 L/R port ( 14) change the settings.
Part names Control buttons Cursor buttons 26) Ÿ ź Ż Ź STANDBY/ON button ( 19) LAMP indicator ( 64, 65) TEMP indicator ( 64, 65) POWER indicator ( 19) INPUT button ( 20) NOTE • INPUT button is function as ENTER key when the projector is in the PC-LESS presentation mode. Use the RGB button or VIDEO button on remote control to change the input port. When the projector menu is displayed, you can change the input port by INPUT button.
Setting up Setting up WARNING ŹPlace the projector in a stable position horizontally. A fall or a turnover could cause an injury and/or damage to the projector. Then using GDPDJHG SURMHFWRU FRXOG UHVXOW LQ D ¿UH DQG RU DQ HOHFWULF VKRFN • Do not place the projector on an unstable, slant or vibrant surface such as a wobbly or inclined stand.
Setting up Arrangement Refer to the illustrations and tables below to determine the screen size and projection distance. The values shown in the table are calculated for a full size screen: 1024×768 (a) The screen size (diagonal) (b) Distance from the projector to the screen (±10%) (c) The height of the screen (±10%) (b) 4:3 (a) (c) up 16:9 (a) (c) down (a) Screen size [inch (m)] 4 : 3 screen (b) Projection distance (c) Screen height [m (inch)] [cm (inch)] min. max.
Setting up Adjusting the projector's elevator CAUTION Ź,I \RX SUHVV WKH HOHYDWRU EXWWRQ ZLWKRXW KROGLQJ WKH SURMHFWRU WKH SURMHFWRU PLJKW FUDVK GRZQ RYHUWXUQ VPDVK \RXU ¿QJHUV DQG SRVVLEO\ result in malfunction. To prevent damaging the projector and injuring yourself, always hold the projector whenever using the elevator buttons to adjust the elevator feet. ŹDo not incline the projector rightward or leftward. Also do not incline it backward or forward exceeding 30 degrees.
Setting up Using the Security Bar WARNING Ź'R QRW XVH WKH VHFXULW\ EDU WR SUHYHQW WKH SURMHFWRU IURP falling. Dropping or knocking over the projector may cause damage or injury. CAUTION Ź7KH VHFXULW\ EDU LV QRW D FRPSUHKHQVLYH WKHIW SUHYHQWLRQ measure. It is intended to be used as an extra theft prevention measure. A commercial anti-theft chain or wire can be attached to the security bar on the projector. to attach 1. How An anti-theft chain or wire can be attached as shown in the illustration.
Setting up Connecting your devices CAUTION Ź7XUQ RII DOO GHYLFHV SULRU WR FRQQHFWLQJ WKHP WR WKH SURMHFWRU Attempting to connect a live device to the projector may generate extremely loud noises or other abnormalities that may result in malfunction and/or damage to the device and/or projector. Ź8VH WKH DFFHVVRU\ FDEOH RU D GHVLJQDWHG W\SH FDEOH IRU WKH FRQQHFWLRQ Some cables have to be used with core set. A too long cable may cause a certain picture degradation.
Setting up Examples of connection with a computer * In the default setting, the AUDIO IN1 port is the audio port for the RGB IN1, and the AUDIO IN2 port is the audio port for the RGB IN2 ports. To change the settings, refer to the AUDIO item in the SETUP menu.
Setting up Examples of connection with a VCR/DVD player * In the default setting, the AUDIO IN3 L/R port is the audio port for the VIDEO, S-VIDEO and COMPONENT VIDEO ports. To change the settings, refer to the AUDIO item in the SETUP menu.
Setting up Connecting power supply WARNING ŹPlease use extra caution when connecting the power cord, as LQFRUUHFW RU IDXOW\ FRQQHFWLRQV PD\ UHVXOW LQ ¿UH DQG RU HOHFWULFDO VKRFN • Only use the power cord that came with the projector. If it is damaged, contact your dealer to newly get correct one. • Only plug the power cord into an outlet rated for use with the power cord's VSHFL¿HG YROWDJH UDQJH • Never modify the power cord. Never attempt to defeat the ground connection of the three-pronged plug.
Setting up Inserting an SD Card and USB Memory When using the projector with a wireless LAN please insert the included Wireless Network Card. When using a commercial SD Memory card in order to view images insert the SD Memory card in the same manner. And when using a commercial USB MEMORY in order to view images insert the USB MEMORY to the AUX I/O port. ( 13) See User's Manual - Network Function for information on using either type of card. 1. Make sure the projector’s power switch is OFF.
Remote control Remote control Putting batteries WARNING ŹAlways handle the batteries with care and use them only as directed. Battery may explode if mistreated. Do not recharge, disassemble or GLVSRVH RI LQ ¿UH And also improper use may result in cracking or leakage, which could result in ¿UH LQMXU\ DQG RU SROOXWLRQ RI WKH VXUURXQGLQJ HQYLURQPHQW • %H VXUH WR XVH RQO\ WKH EDWWHULHV VSHFL¿HG 'R QRW XVH EDWWHULHV RI GLIIHUHQW types at the same time. Do not mix a new battery with used one.
Remote control Using the remote control CAUTION ŹBe careful in handling the remote control. • Do not drop or expose the remote control to physical impact. • Do not get the remote control wet or place it on wet objects. It may result in malfunction. • Remove the batteries from the remote control and store them in a safe place if you won’t be using the remote control for an extended period. • Replace the batteries whenever the remote control starts malfunctioning.
Power on/off Power on/off WARNING ŹWhen the power is on, a strong light is emitted. Do not look into the lens of projector. Also do not peep at the inside of projector through a hole. NOTE • Turn the power on/off in right order. Please power on the projector prior to the connected devices. Power off the projector later than the connected devices. Turning on the power 1. 0DNH VXUH WKDW WKH SRZHU FRUG LV ¿UPO\ DQG correctly connected to the projector and the outlet.
Operating Operating Adjusting the volume the VOLUME button on the remote control. 1. Press A dialog will appear on the screen to aid you in adjusting the volume. 2. 8VH WKH FXUVRU EXWWRQV Ÿ ź WR DGMXVW WKH YROXPH To close the dialog and complete the operation, press the VIDEO MAGNIFY AUTO BLANK ON HOME PAGE UP VOLUME END PAGE DOWN MUTE AUTO BLANK HOME PAGE UP VOLUME END PAGE DOWN MUTE VOLUME button again.
Operating Selecting an input signal (continued) the VIDEO button on the remote control to select an 1. Press input for video signal. Each time you press the button, the projector switches its video input port as below.
Operating Using the automatic adjustment feature 1. Press the AUTO button on the remote control. VIDEO RGB SEARCH For an RGB signal The vertical position, the horizontal position, the horizontal phase and the horizontal size will be automatically adjusted. And the aspect ratio will be automatically set to default. Make sure that the application window is set to its maximum size prior to attempting to use this feature. A dark picture may still be incorrectly adjusted.
Operating Correcting the keystone distortions the KEYSTONE button on the 1. Press remote control. A dialog will appear on the MAGNIFY ON -';5610' #761 ':'%76' /#07#. OFF HOME PAGE UP END PAGE DOWN VOLUME MUTE screen to aid you in correcting the distortion. 8VH WKH FXUVRU EXWWRQV Ÿ ź WR VHOHFW $872 RU 0$18$/ RSHUDWLRQ DQG SUHVV WKH EXWWRQ Ź WR perform the following. 1) AUTO executes automatic vertical keystone correction.
Operating Freezing the screen the FREEZE button on the remote control. 1. Press The “FREEZE” indication will appear on the screen, and the MAGNIFY ON OFF HOME PAGE UP VOLUME END PAGE DOWN MUTE projector will enter the FREEZE mode. To exit the FREEZE mode and restore the screen to normal, press the FREEZE button again.
Operating Operating the computer screen CAUTION Ź0LVWDNHQ XVH RI WKH PRXVH NH\ERDUG FRQWURO FRXOG GDPDJH your equipment. • While using this function, please connect only with a computer. • Before connecting, read the manuals of the computer you will connect. NOTE • It may not be possible to control notebook PC, and other computers with built-in pointing device (e.g. track ball), using this remote control.
Multifunctional settings Multifunctional settings Using the menu function This projector has the following menus: PICTURE, IMAGE, INPUT, SETUP, SCREEN, OPTION, MIU, and EASY MENU. EASY MENU consists of functions often used, and WKH RWKHU PHQXV DUH FODVVL¿HG LQWR HDFK SXUSRVH (DFK RI WKHVH PHQXV LV RSHUDWHG using the same methods. The basic operations of these menus are as follows.
EASY Menu '#5; /'07 =4)$ ? EASY Menu With the EASY MENU, items shown in the table below can be performed. 6HOHFW DQ LWHP XVLQJ WKH FXUVRU EXWWRQV Ÿ ź RQ WKH projector or remote control. Then perform it referring to the following table. Item ASPECT #52'%6 #761 -';5610' ':'%76' -';5610' 014/#. 2+%674' /1&' $4+)*60'55 %1064#56 %1.14 6+06 5*#420'55 014/#. 9*+52'4 014/#. /+4414 4'5'6 J (+.6'4 6+/' '0).+5* .
EASY Menu EASY Menu (continued) Item CONTRAST COLOR TINT SHARPNESS WHISPER MIRROR RESET Description 8VLQJ WKH EXWWRQV Ż Ź DGMXVWV WKH FRQWUDVW See the CONTRAST item in the PICTURE menu ( 29). 8VLQJ WKH EXWWRQV Ż Ź DGMXVWV WKH VWUHQJWK RI ZKROH FRORU See the COLOR item in the PICTURE menu ( 30). 8VLQJ WKH EXWWRQV Ż Ź DGMXVWV WKH WLQW See the TINT item in the PICTURE menu ( 30). 8VLQJ WKH EXWWRQV Ż Ź DGMXVWV WKH VKDUSQHVV See the SHARPNESS item in the PICTURE menu ( 30).
PICTURE Menu PICTURE Menu With the PICTURE menu, the items shown in the table below can be performed. 6HOHFW DQ LWHP XVLQJ WKH FXUVRU EXWWRQV Ÿ ź RQ WKH SURMHFWRU RU UHPRWH FRQWURO DQG SUHVV WKH FXUVRU EXWWRQ Ź on the projector or remote control, or the ENTER button on the remote control to execute the item. Then perform it referring to the following table. Item BRIGHTNESS CONTRAST /'07 =4)$ ? 2+%674' +/#)' +0276 5'672 5%4''0 126+10 /+7 '#5; /'07 5'.
PICTURE Menu PICTURE Menu (continued) Item Description 8VLQJ WKH EXWWRQV Ÿ ź VZLWFKHV WKH PRGH RI FRORU WHPSHUDWXUH HIGH DEFAULT HIGH CUSTOM MID DEFAULT MID CUSTOM LOW DEFAULT LOW CUSTOM Hi-BRIGHT-1 DEFAULT Hi-BRIGHT-1 CUSTOM Hi-BRIGHT-2 DEFAULT Hi-BRIGHT-2 CUSTOM To adjust CUSTOM COLOR TEMP Selecting the CUSTOM and then pressing the ENTER : EXWWRQ Ź RU WKH (17(5 EXWWRQ displays a dialog OFFSET GAIN R G B R G B to aid you in adjusting the OFFSET and/or GAIN of the CUSTOM mode.
PICTURE Menu PICTURE Menu (continued) Item Description 6HOHFWLQJ D PRGH RI 0< 0(025< XVLQJ WKH EXWWRQV Ÿ ź DQG WKHQ SUHVVLQJ WKH EXWWRQ Ź RU WKH (17(5 EXWWRQ SHUIRUPV HDFK IXQFWLRQ LOAD1 Ù LOAD2 Ù LOAD3 Ù LOAD4 MY MEMORY SAVE4 ÙSAVE3 Ù SAVE2 Ù SAVE1 This projector has 4 numbered memories for adjustment data. Performing the LOAD1, LOAD2, LOAD3 or LOAD4 loads the data on the memory whose number corresponds to the command’s number, and adjusts the picture automatically depending on the data.
IMAGE Menu IMAGE Menu With the IMAGE menu, items shown in the table below can be performed. 6HOHFW DQ LWHP XVLQJ WKH FXUVRU EXWWRQV Ÿ ź RQ WKH SURMHFWRU RU UHPRWH FRQWURO DQG SUHVV WKH FXUVRU EXWWRQ Ź on the projector or remote control, or the ENTER button on the remote control to execute the item. Then perform it referring to the following table. Item /'07 =4)$ ? 2+%674' +/#)' +0276 5'672 5%4''0 126+10 /+7 '#5; /'07 5'.
IMAGE Menu IMAGE Menu (continued) Item H SIZE AUTO ADJUST EXECUTE Description 8VLQJ WKH EXWWRQV Ÿ ź DGMXVWV WKH KRUL]RQWDO VL]H Large Ù Small • This item can be selected only for an RGB signal. • When this adjustment is excessive, the picture may not be displayed correctly. In such a case, please reset the adjustment by pressing the RESET button on the remote control during this operation. Selecting this item performs the automatic adjustment feature.
INPUT Menu INPUT Menu With the INPUT menu, the items shown in the table below can be performed. 6HOHFW DQ LWHP XVLQJ WKH FXUVRU EXWWRQV Ÿ ź RQ WKH SURMHFWRU RU UHPRWH FRQWURO DQG SUHVV WKH FXUVRU EXWWRQ Ź on the projector or remote control, or the ENTER button on the remote control to execute the item. Then perform it referring to the following table. /'07 =4)$ ? 2+%674' +/#)' +0276 5'672 5%4''0 126+10 /+7 '#5; /'07 5'.'%6 241)4'55+8' 68 8+&'1 04 /+& %1.
INPUT Menu INPUT Menu (continued) Item Description COMPONENT 8VLQJ WKH EXWWRQV Ÿ ź VZLWFKHV WKH IXQFWLRQ RI &20321(17 VIDEO port. COMPONENT Ù SCART RGB When the SCART RGB is selected, the COMPONENT VIDEO port function as a port for a SCART RGB signal input and VIDEO port function as a port for SCART RGB sync input. A SCART adapter and SCART cable realize a SCART RGB input to the projector. For details, contact your dealer. VIDEO FORMAT Set the video format for the s-video port and video port.
INPUT Menu INPUT Menu (continued) Item Description The resolution for the RGB1 and RGB2 input signals can be set on this projector. ,Q WKH ,1387 PHQX VHOHFW 5(62/87,21 XVLQJ WKH Ÿ ź EXWWRQV DQG SUHVV WKH Ź EXWWRQ The RESOLUTION menu will be displayed. 4'51.76+10 (2) In the RESOLUTION menu select the UHVROXWLRQ \RX ZLVK WR GLVSOD\ XVLQJ WKH Ÿ ź buttons. Selecting AUTO will set a resolution appropriate to the input signal.
SETUP Menu SETUP Menu With the SETUP menu, the items shown in the table below can be performed. 6HOHFW DQ LWHP XVLQJ WKH FXUVRU EXWWRQV Ÿ ź RQ WKH SURMHFWRU RU UHPRWH FRQWURO DQG SUHVV WKH FXUVRU EXWWRQ Ź on the projector or remote control, or the ENTER button on the remote control to execute the item. Then perform it referring to the following table. /'07 =4)$ ? 2+%674' +/#)' +0276 5'672 5%4''0 126+10 /+7 '#5; /'07 5'.
SETUP Menu SETUP Menu (continued) Item Description 8VLQJ WKH EXWWRQV Ÿ ź VZLWFKHV WKH PRGH IRU PLUURU VWDWXV MIRROR NORMAL Ù H:INVERT Ù V:INVERT Ù + 9 ,19(57 If Transition Detector is TURN ON and MIRROR status is changed, Transition Detector Alarm ( 50) will be displayed when projector is restarted after the power switch is turned off. VOLUME AUDIO 38 8VLQJ WKH EXWWRQV Ÿ ź DGMXVWV WKH YROXPH High Ù Low #7&+1 Allocates the audio ports.
SCREEN Menu SCREEN Menu With the SCREEN menu, the items shown in the table below can be performed. 6HOHFW DQ LWHP XVLQJ WKH FXUVRU EXWWRQV Ÿ ź RQ WKH SURMHFWRU RU UHPRWH FRQWURO DQG SUHVV WKH FXUVRU EXWWRQ Ź on the projector or remote control, or the ENTER button on the remote control to execute the item. Then perform it referring to the following table. Item /'07 =4)$ ? 2+%674' +/#)' +0276 5'672 5%4''0 126+10 /+7 '#5; /'07 5'.'%6 .#0)7#)' '0).
SCREEN Menu SCREEN Menu (continued) Item Description 8VLQJ WKH EXWWRQV Ÿ ź VZLWFKHV WKH PRGH IRU WKH VWDUW XS VFUHHQ The start-up screen is a screen displayed when no signal or an unsuitable signal is detected. MyScreen Ù ORIGINAL Ù TURN OFF START UP MyScreen is a screen you can register as a desired screen.The ORIGINAL screen is the existing standard screen. When TURN OFF is selected, the BLACK screen is used.
SCREEN Menu SCREEN Menu (continued) Item Description MESSAGE 8VLQJ WKH EXWWRQV Ÿ ź WXUQV RQ RII WKH PHVVDJH IXQFWLRQ TURN ON Ù TURN OFF When the TURN ON is selected, the following message function works. “AUTO IN PROGRESS” while automatically adjusting ”NO INPUT IS DETECTED” ”SYNC IS OUT OF RANGE” "Searching….” while searching for the input ”Detecting….
OPTION Menu OPTION Menu With the OPTION menu, the items shown in the table below can be performed. 6HOHFW DQ LWHP XVLQJ WKH FXUVRU EXWWRQV Ÿ ź RQ WKH SURMHFWRU RU UHPRWH FRQWURO DQG SUHVV WKH FXUVRU EXWWRQ Ź RQ WKH SURMHFWRU or remote control, or the ENTER button on the remote control to execute the item, except for the items LAMP TIME and FILTER TIME. Then perform it referring to the following table.
OPTION Menu OPTION Menu (continued) Item Description 8VLQJ WKH EXWWRQV Ÿ ź DGMXVWV WKH WLPH WR FRXQW GRZQ WR automatically turn the projector off. Long (max. 99 minutes) Ù Short (min. 0 minute = DISABLE) AUTO OFF AUTO OFF ENABLE AUTO OFF DISABLE 1 0 When the time is set to 0, the projector is not turned off automatically. When the time is set to 1 to 99, and when the passed time with nosignal or an unsuitable signal reaches at the set time, the projector lamp will be turned off.
OPTION Menu OPTION Menu (continued) Item Description Selecting this item displays the SERVICE menu. 6HOHFW DQ LWHP XVLQJ WKH EXWWRQV Ÿ ź DQG SUHVV WKH EXWWRQ Ź RU the ENTER button on the remote control to execute the item. FAN SPEED Ù AUTO ADJUST Ù GHOST Ù FILTER MESSAGE Ù KEY LOCK FACTORY RESET Ù INFORMATION Ù REMOTE FREQ. FAN SPEED 8VLQJ WKH EXWWRQV Ÿ ź VZLWFKHV WKH URWDWLRQ VSHHG RI WKH FRROLQJ fans. The HIGH is the mode for use at highlands etc.
OPTION Menu OPTION Menu (continued) Item Description REMOTE FREQ. 8VH WKH Ÿ ź EXWWRQ WR FKDQJH WKH 3URMHFWRU V UHPRWH VHQVRU setting ( 18). 1:NORMAL Ù 2:HIGH Items with a checkmark are on. The factory default setting is for both 1:NORMAL and 2:HIGH to be on. If the remote control does not function correctly set the this to either only 1 or only 2 as described in Remote Control Settings ( 18). Neither can be turned off at the same time.
OPTION Menu OPTION Menu (continued) Item Description This projector is equipped with security functions. User registration is required before using the security functions. Please contact your local dealer. 1. Using Security Features 1.1 Inputting the PASSWORD 8VH WKH Ÿ ź EXWWRQV RQ WKH 237,21 PHQX WR VHOHFW 6(&85,7< DQG SUHVV WKH Ź button. The ENTER PASSWORD box will be displayed. The factory default PASSWORD is 3046. This PASSWORD can be changed (1.2 Changing the PASSWORD).
OPTION Menu OPTION Menu (continued) Item Description 1.3 If you have forgotten your PASSWORD 1.3-1 Follow the procedure in 1.1-1 to display the ENTER PASSWORD BOX. 1.3-2 While the ENTER PASSWORD BOX is displayed, press and hold the RESET button on the remote control for about 3 seconds or SUHVV DQG KROG WKH ,1387 DQG Ź EXWWRQV RQ the projector for about 3 seconds. The 10 digit Inquiring Code will be displayed.
OPTION Menu OPTION Menu (continued) Item Description 2.2-4 Move the cursor to the right side of the CHECK 3$66:25' %2; DQG SUHVV WKH Ź EXWWRQ WR /[5ETGGP display the PASSWORD for about 20 seconds, %1/2.'6' please make note of the PASSWORD during this time. After the PASSWORD has displayed '06'4 ':+6 for about 20 seconds the screen will return to PASSWORD BOX the MyScreen PASSWORD on/off menu.
OPTION Menu OPTION Menu (continued) Item Description ,QSXW D SDUW 3,1 &RGH XVLQJ WKH Ÿ ź Ż Ź /RGB and INPUT buttons. 2+0 $1: +PRWV 2+0 %QFG A CONFIRMATION BOX will appear. Reenter the same PIN Code. This will complete the PIN Code 4)$ registration. PIN BOX NOTE: If there is no key input for about 55 seconds while the PIN BOX or the CONFIRMATION BOX are displayed the menu will close. If necessary repeat 2+0 $1: the process from 3.1-1.
OPTION Menu OPTION Menu (continued) Item Description 4. Using the Transition Detector Function While the Transition Detector function is ON, when power switch is started to supply to the projector, it might react as below. • Transition Detector alarm shown below might appear on screen, if the projector has been moved or re-installed. • Transition Detector alarm might appear on screen, if the MIRROR setting has been changed.
OPTION Menu OPTION Menu (continued) Item Description 4.3 Setting the Transition Detector off 4.3-1 Follow the procedure in 4.1-1 to display the Transition Detector on/off menu. 4.3-2 Select TURN OFF to display the ENTER PASSWORD BOX (large). Enter the registered PASSWORD and the screen will return to the Transition Detector on/off menu. If an incorrect PASSWORD is input the menu will close. If necessary repeat the process from 4.3-1. SECURITY 4.4 If you have forgotten your PASSWORD 4.
MIU Menu MIU Menu Select [MIU] from the main menu to access the following functions. /'07 =4)$ ? 2+%674' +/#)' +0276 5'672 5%4''0 126+10 /+7 '#5; /'07 5'.'%6 .+8' /1&' 2% .'55 24'5'06#6+10 5'672 G 5*16 +0(14/#6+10 5'48+%' NOTE • The factory default setting for DHCP is “TURN OFF”. If your network has DHCP enabled , and need to set [IP ADDRESS], [SUBNET MASK] and [DEFAULT GATEWAY] automatically, please set [DHCP] to “TURN ON”.
MIU Menu MIU Menu (continued) Item Operation e-SHOT e-SHOT display : 8VH WKH Ÿ ź EXWWRQV WR VHOHFW DQ LWHP DQG WKH Ź or ENTER buttons to display the image. Image1 G 5*16 +/#)' &'/10564#6+10 Image2 +/#)' 24'5'06#6+10(+.' +/#)' &'/10564#6+10 Image3 +/#)' 6#$.' Image4 File names of registered images are displayed by 16 characters or less.
MIU Menu MIU Menu (continued) Item Description IP ADDRESS Input the IP ADDRESS : Use the Ÿ ź Ż Ź EXWWRQV WR HQWHU WKH ,3 ADDRESS. This function is available as long +2 #&&4'55 as DHCP is set to “TURN OFF”. ~Note~ ,3 $''5(66 LV D QXPEHU ZKLFK LGHQWL¿HV WKLV SURMHFWRU RQ WKH network. You cannot have two devices with the same IP ADDRESS on the same network. SUBNET MASK Input the SUBNET MASK : Use the buttons Ÿ ź Ż Ź WR HQWHU WKH VDPH SUBNET MASK of your PC.
MIU Menu MIU Menu (continued) Item Description MODE Select the communication connection control method to use between the PC and projector. Match to your PC’s settings. 8VH WKH Ÿ ź EXWWRQV WR VHOHFW WKH 02'( WR EH used. /1&' #&*1% +0(4#5647%674' ADHOC Ù INFRASTRUCTURE CH Select the channel when using a wireless LAN connection. (Channels 1 to 11 are available) *The available channels would be various depending on a country. In addition, wireless LAN card might be required due to the standard.
MIU Menu MIU Menu (continued) Item INFORMATION Description INFORMATION display : 8VH WKH Ź RU (17(5 EXWWRQV WR YLHZ QHWZRUN LQIRUPDWLRQ DQG FRQ¿UP VHWWLQJV See [INFORMATION] in [User’s Manual] – Network Functions] for more information. ~Note~ • 2QO\ WKH ¿UVW FKDUDFWHUV RI WKH SURMHFWRU QDPH DUH GLVSOD\HG • 2QO\ WKH ¿UVW FKDUDFWHUV RI WKH 66,' DUH GLVSOD\HG • When the voltage level of battery for built in clock decreases, set time may become incorrect even though accurate date and time are input.
Maintenance Maintenance Lamp WARNING HIGH VOLTAGE HIGH TEMPERATURE HIGH PRESSURE ŹThe projector uses a high-pressure mercury glass lamp. The lamp can break with a loud bang, or burn out, if jolted or scratched, handled while hot, or worn over time. Note that each lamp has a different lifetime, and some may burst or burn out soon after you start using them.
Maintenance Lamp (continued) $ ODPS KDV D ¿QLWH SURGXFW OLIH 8VLQJ WKH ODPS IRU ORQJ SHULRGV RI WLPH FRXOG cause the pictures darker or the color tone poor. Note that each lamp has a different lifetime, and some may burst or burn out soon after you start using them. Preparation of a new lamp and early replacement are recommended. To prepare a new lamp, contact your dealer and tell the lamp type number. Type number = DT00751. the projector off, and unplug the power cord. Allow the lamp to cool for 1.
Maintenance $LU ÀOWHU WARNING ŹBefore caring, make sure the power switch is off and the SRZHU FDEOH LV QRW SOXJJHG LQ WKHQ DOORZ WKH SURMHFWRU WR FRRO VXI¿FLHQWO\ 7KH care in a high temperature state of the projector could cause an electric shock, a burn and/or malfunction to the projector. Ź8VH RQO\ WKH DLU ¿OWHU RI WKH VSHFL¿HG W\SH 'R QRW XVH WKH SURMHFWRU ZLWK WKH DLU ¿OWHU DQG WKH ¿OWHU FRYHU UHPRYHG ,W FRXOG UHVXOW LQ D ¿UH DQG RU PDOIXQFWLRQ to the projector.
Maintenance $LU ¿OWHU FRQWLQXHG 4. $SSO\ D YDFXXP FOHDQHU WR WKH DLU ¿OWHU DQG WKH ¿OWHU FRYHU 3OHDVH UHSODFH WKH DLU ¿OWHU ZKHQ LW LV GDPDJHG RU WRR VRLOHG 5HSODFH WKH DLU ¿OWHU LQ LWV RULJLQDO SRVLWLRQ 6HFXUH WKH DLU ¿OWHU LQ SODFH E\ pressing each of the six locations. Make sure there is no dust or dirt remaining after the cover is in place.
Maintenance Replacing Internal Clock battery Consumption of the battery makes the clock not to work correctly. When the clock is wrong or it has stopped, please replace the battery according to the following procedures. WARNING ŹAlways handle the batteries with care and use them only as directed.
Maintenance Other care WARNING Ź%HIRUH FDULQJ PDNH VXUH WKH SRZHU VZLWFK LV RII DQG WKH SRZHU FDEOH LV QRW SOXJJHG LQ DQG WKHQ DOORZ WKH SURMHFWRU WR FRRO VXI¿FLHQWO\ The care in a high temperature state of the projector could cause a burn and/or malfunction to the projector. Ź1HYHU WU\ WR FDUH IRU WKH LQVLGH RI WKH SURMHFWRU SHUVRQDOO\ 'RLQJ LV VR dangerous.
Troubleshooting Troubleshooting Related messages When the unit's power is on, messages such as those shown below may be displayed. When any such message is displayed on the screen, please follow the instructions described below. If the same message is displayed after the remedy, or if a message other than the following appears, please contact your dealer or service company.
Troubleshooting Regarding the indicator lamps /LJKWLQJ DQG ÀDVKLQJ RI WKH 32:(5 LQGLFDWRU WKH /$03 LQGLFDWRU DQG WKH 7(03 indicator have the meanings as described in the table below. Please follow the instructions within the table. If the same indication is displayed after the remedy, or if an indication other than the following is displayed, please contact your dealer or service company. POWER LAMP TEMP Description indicator indicator indicator Turned Turned The projector is in a standby state.
Troubleshooting Regarding the indicator lamps (continued) POWER LAMP TEMP indicator indicator indicator Description The cooling fan is not operating. Blinking In Red or Lighting In Red Turned off Blinking In Red Please turn the power off, and allow the projector to cool down at least 20 minutes. After the projector has VXI¿FLHQWO\ FRROHG GRZQ SOHDVH PDNH FRQ¿UPDWLRQ that no foreign matter has become caught in the fan, etc., and then turn the power on again.
Troubleshooting Phenomena that may be easy to be mistaken for machine defects WARNING ŹNever use the projector if abnormal operations such as smoke, strange odor, excessive sound, damaged casing or elements or cables, penetration of liquids or foreign matter, etc. should occur. In such cases, immediately turn off the power switch and then disconnect the power plug from the power outlet. After making sure that the smoke or odor has stopped, contact your dealer or service company.
Troubleshooting Phenomena that may be easy to be mistaken for machine defects (continued) Phenomenon Cases not involving a machine defect The signal cables are not correctly connected. Correctly connect the audio cables. Reference page 13, 14 The MUTE function is working. Sound does not come out. Restore the sound pressing the MUTE or VOLUME button on the remote control. 20 The volume is adjusted to an extremely low level.
Troubleshooting Phenomena that may be easy to be mistaken for machine defects (continued) Phenomenon Cases not involving a machine defect The brightness and/or contrast are adjusted to an extremely low level. Adjust BRIGHTNESS and/or CONTRAST settings to a higher level using the menu function. Pictures appear dark. Reference page 27, 28 The WHISPER function is working. Select NORMAL for the WHISPER item in the SETUP menu. The lamp is approaching the end of its product lifetime.
Warranty And After-Service Warranty and after-service ,I D SUREOHP RFFXUV ZLWK WKH HTXLSPHQW ¿UVW UHIHU WR WKH ³7URXEOHVKRRWLQJ´ DQG UXQ through the suggested checks. If this does not resolve the problem, please contact your dealer or service company. They will tell you what warranty condition is applied. 6SHFLÀFDWLRQV 6SHFL¿FDWLRQV NOTE 7KHVH VSHFL¿FDWLRQV DUH VXEMHFW WR FKDQJH ZLWKRXW QRWLFH 6SHFL¿FDWLRQ Item Product name Liquid Crystal panel Liquid crystal projector Panel size 1.6 cm (0.
70 120 mm 106 mm AC IN 306 mm 249 mm 6' &$5' /$1 $8; , 2 '& 9 $ < $8',2 ,1 5 5*% ,1 &% 3% / 5*% ,1 5*% 287 $8',2 287 $8',2 ,1 $8',2 ,1 &5 35 &21752/ 86% 9,'(2 6 9,'(2 6SHFL¿FDWLRQV FRQWLQXHG 6SHFLÀFDWLRQV
Projector CP-X268AWF User’s Manual – Network Functions This manual is only intended to explain Network Functions. For safety, operations or any other issues, refer to the User’s Manual for projector or Safety Guide. WARNING • Before using the network functions, read the User’s Manual carefully to ensure your projector is set up correctly. • After reading, keep the manuals in a safe place for future reference. NOTE • The information in this manual is subject to change without notice.
Contents Contents Caution ………………………………………………………………………… 1. Main Functions …………………………………………………………… 1.1 Project images from PC ……………………………………………… 1.2 Display the images stored in SD card/USB memory …………… 2. Equipment connection and network setting ………………… 2.1 Required equipment preparation …………………………………… 2.2 Network connection using “One-Click-Communication” function ………………………………………………………………… 2.3 Manual network setting – Wired LAN - …………………………… 2.3.1 Equipments connection ………………………………………… 2.3.
Caution Caution [Restriction in terms of inserts or pulls memory card and wireless LAN card] Do not pull out memory card and wireless card while power is on. Memory card can be pulled out only while card access LED (Red) is off. CAUTION The accompanying 802.11g wireless LAN card uses the 2.4GHz radio frequency band.
Caution 0560 ! The manufacturer (Gemtek) hereby declare that this equipment (SD wireless LAN card), model SD-Link11g is in compliance with the essential requirements and other relevant provisions of Directive 1999/5/EC.
1. Main functions 1. Main functions 1.1 Project images from PC (“Live Mode”) Main function of MIU (Multi Image Unit) is “MIU Live Viewer”. (Fig. 1.1.a) &DSWXULQJ 3& VFUHHQ LPDJH XVLQJ GHGLFDWHG ¿UPZDUH ³0,8 /LYH 9LHZHU´ DQG VHQG it to projector through wired LAN or wireless LAN connection. (Refer to section 3.4 in detail.) CB/P SD B CR/P R VIDE O S-VID EO AUDI CAR D RGB AUDI IN1 O O IN2 IN1 AUX DC I/O 5V 0.5A RGB LAN IN2 RGB OUT CON TRO L AC IN AUDI O OUT USB Fig. 1.1.
1. Main functions 1.2 Display the images stored in SD card/USB memory. (“PC-LESS Presentation”) Other main function is “PC-LESS Presentation”. (Fig. 1.2.a) “PC-LESS Presentation” has 4 kinds of display modes. 1) Thumbnail display: Display many stored images in SD card and USB memory at once. (From now on, it is called “memory card” as SD card and USB memory combined.) 2) Display in full screen: Display 1 picture or moving picture in full screen. 3) Slide show: Switch images with set intervals.
1. Main functions 1.2 Display the images stored in SD card/USB memory. (“PC-LESS Presentation”) (Continued) Fig. 1.2.b Remote Control NOTE 7KHUH DUH IROORZLQJ OLPLWDWLRQV IRU ¿OH QDPH DQG GLUHFWRU\ QDPH LQ PC-LESS Presentation. (1) The projector's language setting is Japanese. Only alpha-numeric characters and Japanese are supported. (2) The projector's language setting is not Japanese. Only alpha-numeric characters and Latin-1 characters are supported.
2. Equipment connection and network setting 2. Equipment connection and network setting 2.1 Required equipment preparation Followings are required for 1 projector and 1 PC connection. Multiple PC connection is described in section 4.1. Projector: 1 unit PC: 1 set (“MIU Live Viewer” installation is required for “MIU Live Viewer” usage.) IEEE802.g wireless LAN equipment is required.
2. Equipment connection and network setting 2.2 Network connection using “One-Click-Communication” function (Continued) 5'.'%6 /'07 =4)$ ? 2+%674' +/#)' +0276 5'672 5%4''0 126+10 /+7 '#5; /'07 .+8' /1&' 2% .'55 24'5'06#6+10 5'672 G 5*16 +0(14/#6+10 5'48+%' $Press the Reset key on remote control. Then Reset Menu will be displayed. /+7 4'5'6 %#0%'. /3UHVV WKH Ÿ EXWWRQ WR UHVHW WKH 1HWZRUN VHWWLQJV NOTE • SSID, WEP KEY will be set to factory default settings.
2. Equipment connection and network setting 2.2 Network connection using “One-Click-Communication” function (Continued) &OLFN ³2QH &OLFN´ EXWWRQ LQ ¿J D 3URMHFWRU LV IRXQG 7KHQ FDSWXUH VWDUW button is pushed and real time display is started automatically. [Wireless LAN connection] 1) When projector network settings such as IP address and subnet mask are changed, need to return to the projector factory default settings. ( 9) 2) In case 802.
2. Equipment connection and network setting 2.3 Manual network connection setting – In case of wired LAN - (Continued) 2.3.2. Network settings This is the explanation of network connection settings for Windows XP and Internet Explorer. 1) Log on to Windows XP as administrator authority. (*) 2) Open “Control Panel” from “Start” menu. 3) Open “Network and Internet Connections” in “Control Panel”. (Fig. 2.3.2.a) * Administrator authority is the account, which can access to all functions. Fig. 2.3.2.
2. Equipment connection and network setting 2.3 Manual network connection setting – In case of wired LAN - (Continued) 5) When more than 2 usable network devices exist, make only one device “valid” that you want to use and the rest of devices “invalid”. (In this case, “Local Area Connection” is selected.) 6) Open “local Area Connection Properties” window you use for network device. (Fig. 2.3.2.c) Fig. 2.3.2.
2. Equipment connection and network setting 2.3 Manual network connection setting – In case of wired LAN - (Continued) [About IP address] Network address portion of PC IP address should be common with projector’s one but the PC total IP address should not be overlapped with other networked equipments. For example, projector initial settings are as follows. IP address: 192.168.1.10 Subnet mask: 255.255.255.0 Therefore, specify PC IP address as follows. IP address: 192.168.1.xxx (xxx shows decimal number.
2. Equipment connection and network setting 2.3 Manual network connection setting – In case of wired LAN - (Continued) 2.3.3 “Internet Option” setting 1) Click “Internet Options” in “Network and Internet Connections” window (Fig. 2.3.3.a) to open “Internet Properties” window. (Fig. 2.3.3.b) Click Fig. 2.3.3.a “Network and Internet Connections” window Click Fig. 2.3.3.
2. Equipment connection and network setting 2.3 Manual network connection setting – In case of wired LAN - (Continued) Fig. 2.3.3.c “Local Area Network (LAN) Settings” window 3) Uncheck all boxes in “Local Area Network (LAN) Settings” window. (Fig. 2.3.3.c) 2.3.4 Check connection Check PC and projector are connected properly here. If it is not connected, check cable connections and settings are properly or not. 1) Start browser in PC and specify following URL, then click “Go” button.
2. Equipment connection and network setting 2.4 Manual network connection setting – For wireless LAN By installing SD-Link11g card, PC and wireless LAN are able to communicate in both Adhoc and Infrastructure modes. How to set up wireless LAN connection manually. 2.4.1 Preparation for wireless LAN connection CB/P SD B R VIDE S-VI CAR D CR/P O DEO AUD RGB AUD IN1 IO IN1 IO IN2 AUX DC I/O 5V 0.5A RGB LAN IN2 RGB CON OUT TRO AC AUD L IO IN OUT USB Fig. 2.4.1.
2. Equipment connection and network setting 2.4 Manual network connection setting – In case of wireless LAN - (Continued) 2.4.2 Wireless LAN connection set up Using wireless LAN utility for Windows XP standard. Wireless LAN initial settings for the projector is as follows. Connection Control : Ad-Hoc SSID : wireless Channel : 1ch Encryption rating : None Communication speed : AUTO IP address : 192.168.1.10
2. Equipment connection and network setting 2.4 Manual network connection setting – In case of wireless LAN - (Continued) 4) Set used protocol as “TCP/IP” and open TCP/IP property. Set IP address and other settings as same as wired LAN connection set up. ( 12) 5) Open “Wireless Networks” tab. (Fig. 2.4.2.c) Fig. 2.4.2.c “Wireless Network Connection Properties” window (2) $GG FKHFN PDUN IRU ³8VH :LQGRZV WR FRQ¿JXUH P\ ZLUHOHVV QHWZRUN VHWWLQJV´ in “Wireless Network Connection Properties” window.
2. Equipment connection and network setting 2.4 Manual network connection setting – In case of wireless LAN - (Continued) 8) Set each item as follows. Network name (SSID): wireless Data encryption: Invalid (Default setting is invalid.) * This explanation meets the projector default setting. If access point is used or data encryption is used, if needs to change settings properly. Refer to PC or wireless LAN device user guide for detailed information.
2. Equipment connection and network setting &RQ¿JXULQJ DQG FRQWUROOLQJ WKH SURMHFWRU YLD D ZHE EURZVHU &RQWLQXHG :KHQ FRQ¿JXULQJ RU FRQWUROOLQJ WKH SURMHFWRU YLD D ZHE EURZVHU DQ ,' DQG password are required. There are two types of IDs, Administrator IDs and User IDs. The following chart describes the differences between user and administrator IDs.
2. Equipment connection and network setting 5HIHU WR WKH IROORZLQJ IRU FRQ¿JXULQJ RU FRQWUROOLQJ WKH SURMHFWRU YLD D ZHE EURZVHU Example: If the IP address of the projector is set to 192.168.1.10: 1) Enter [http://192.168.1.10] into the address bar of the web browser and the screen in Fig. 2.5.a will be displayed. 2) Enter your ID and password and click [Logon]. Fig. 2.5.a "Logon Menu" If the logon is successful either the Fig.2.5.b or Fig.2.5.c screen will be displayed. Fig. 2.5.
2. Equipment connection and network setting Network Information All screen images displayed in this manual are screens of a logon using an administrator ID. Any administrator only functions will not be displayed when using a user ID. Refer to the descriptions in each table. 'LVSOD\V WKH SURMHFWRU¶V FXUUHQW QHWZRUN FRQ¿JXUDWLRQ VHWWLQJV Item Description DHCP 'LVSOD\V WKH '+&3 FRQ¿JXUDWLRQ VHWWLQJV IP Address Displays the current IP address. Subnet Mask Displays the Subnet Mask.
2. Equipment connection and network setting Network Settings 'LVSOD\V DQG FRQ¿JXUHV QHWZRUN VHWWLQJV Item Description NETWORK MODE Select Network mode "wired" or "wireless". ,3 &RQ¿JXUDWLRQ &RQ¿JXUHV QHWZRUN VHWWLQJV DHCP ON Enables DHCP. DHCP OFF Disables DHCP.
2. Equipment connection and network setting Network Settings (Continued) Item Wireless LAN Mode Description &RQ¿JXUHV ZLUHOHVV VHWWLQJV Select "AD-HOC" or "Infrastructure". Select using channel between "1" and "11". CH (Communication channel) NOTE • Depending on the country where you are the channels may vary. In addition, depending on the country or region where you are may be required to use D ZLUHOHVV /$1 FDUG WKDW FRQ¿UP WR WKH VWDQGDUGV LQ WKH respective country or region.
2. Equipment connection and network setting Port Settings 'LVSOD\V DQG FRQ¿JXUHV FRPPXQLFDWLRQ SRUW VHWWLQJV Item Network Control Port1 (Port:23) Description &RQ¿JXUHV FRPPDQG FRQWURO SRUW 3RUW Port open Click the [Enable] check box to use port 23. Authentication Click the [Enable] check box when authentication is required for this port. Network Control Port2 (Port:9715) &RQ¿JXUHV FRPPDQG FRQWURO SRUW 3RUW Port open Click the [Enable] check box to use port 9715.
2. Equipment connection and network setting Mail Settings 'LVSOD\V DQG FRQ¿JXUHV H PDLO DGGUHVVLQJ VHWWLQJV Item Description Send Mail Click the [Enable] check box to use the e-mail function. &RQ¿JXUH WKH FRQGLWLRQV IRU VHQGLQJ HPDLO XQGHU [Alert Settings]. SMTP Server IP Address &RQ¿JXUHV WKH DGGUHVV RI WKH PDLO VHUYHU LQ ,3 IRUPDW Sender E-mail address &RQ¿JXUHV WKH VHQGHU H PDLO DGGUHVV The length of the sender e-mail address can be up to 255 alphanumeric characters.
2. Equipment connection and network setting Alert Settings 'LVSOD\V DQG FRQ¿JXUHV IDLOXUH ZDUQLQJ DOHUWV Item Cover Error Description &RQ¿JXUHV &RYHU (UURU DOHUW VHWWLQJV SNMP Trap Click the [Enable] check box to enable SNMP Trap alerts for this item. Send Mail Click the [Enable] check box to enable e-mail alerts for this item. Mail Subject &RQ¿JXUHV WKH VXEMHFW OLQH RI WKH H PDLO WR EH VHQW The length of the subject line can be up to 255 alphanumeric characters.
2. Equipment connection and network setting Alert Settings (Continued) Item Lamp Error &RQ¿JXUHV /DPS (UURU DOHUW VHWWLQJV SNMP Trap Click the [Enable] check box to enable SNMP Trap alerts for this item. Send Mail Click the [Enable] check box to enable e-mail alerts for this item. Mail Subject &RQ¿JXUHV WKH VXEMHFW OLQH RI WKH H PDLO WR EH VHQW The length of the subject line can be up to 255 alphanumeric characters.
2. Equipment connection and network setting Alert Settings (Continued) Item Lamp Time Error Description &RQ¿JXUHV /DPS 7LPH (UURU DOHUW VHWWLQJV SNMP Trap Click the [Enable] check box to enable SNMP Trap alerts for this item. Send Mail Click the [Enable] check box to enable e-mail alerts for this item. Mail Subject &RQ¿JXUHV WKH VXEMHFW OLQH RI WKH H PDLO WR EH VHQW The length of the subject line can be up to 255 alphanumeric characters.
2. Equipment connection and network setting Alert Settings (Continued) Item Other Error Description &RQ¿JXUHV 2WKHU (UURU DOHUW VHWWLQJV SNMP Trap Click the [Enable] check box to enable SNMP Trap alerts for this item. Send Mail Click the [Enable] check box to enable e-mail alerts for this item. Mail Subject &RQ¿JXUHV WKH VXEMHFW OLQH RI WKH H PDLO WR EH VHQW The length of the subject line can be up to 255 alphanumeric characters.
2. Equipment connection and network setting Alert Settings (Continued) Item Filter Time Alarm Description &RQ¿JXUHV )LOWHU 7LPH $ODUP DOHUW VHWWLQJV Alarm Time &RQ¿JXUHV WKH ¿OWHU WLPH WR DOHUW SNMP Trap Click the [Enable] check box to enable SNMP Trap alerts for this item. Send Mail Click the [Enable] check box to enable e-mail alerts for this item. Mail Subject &RQ¿JXUHV WKH VXEMHFW OLQH RI WKH H PDLO WR EH VHQW The length of the subject line can be up to 255 alphanumeric characters.
2. Equipment connection and network setting Schedule Settings 'LVSOD\V DQG FRQ¿JXUHV VFKHGXOH VHWWLQJV Item Daily Schedule Schedule List Sunday Schedule Schedule List Monday Schedule Schedule List Tuesday Schedule Schedule List Wednesday Schedule Schedule List Thursday Schedule Schedule List Friday Schedule Schedule List Saturday 32 Description &RQ¿JXUHV WKH GDLO\ VFKHGXOH Click the [Enable] check box to enable daily scheduling. Displays the current daily schedule.
2. Equipment connection and network setting Schedule Setting (Continued) Item 6SHFL¿F GDWH 1R Description &RQ¿JXUHV WKH VSHFL¿F GDWH 1R VFKHGXOH Schedule Click the [Enable] FKHFN ER[ WR HQDEOH VSHFL¿F GDWH 1R scheduling. Month/Day &RQ¿JXUHV WKH 0RQWK DQG GDWH Schedule List 'LVSOD\V WKH FXUUHQW VSHFL¿F GDWH 1R VFKHGXOH 6SHFL¿F GDWH 1R &RQ¿JXUHV WKH VSHFL¿F GDWH 1R VFKHGXOH Schedule Click the [Enable] FKHFN ER[ WR HQDEOH VSHFL¿F GDWH 1R scheduling.
2. Equipment connection and network setting Schedule Setting (Continued) To add additional functions and events click the [Add] button and set the following items.
2. Equipment connection and network setting Date/Time Settings (Continued) Item Daylight Savings Time Start Description Click the [ON] check box to enable daylight savings time and set the following items. &RQ¿JXUHV WKH GDWH DQG WLPH GD\OLJKW VDYLQJV WLPH EHJLQV Month &RQ¿JXUHV WKH PRQWK GD\OLJKW VDYLQJV WLPH EHJLQV a Week &RQ¿JXUHV WKH ZHHN RI WKH PRQWK GD\OLJKW VDYLQJV WLPH begins (First, 2, 3, 4, Last).
2. Equipment connection and network setting Security Settings 'LVSOD\V DQG FRQ¿JXUHV SDVVZRUGV DQG RWKHU VHFXULW\ VHWWLQJV Item Administrator authority Description &RQ¿JXUHV WKH $GPLQLVWUDWRU ,' DQG 3DVVZRUG Administrator ID &RQ¿JXUHV WKH $GPLQLVWUDWRU ,' The length of the text can be up to 32 alphanumeric characters. Administrator Password &RQ¿JXUHV WKH $GPLQLVWUDWRU 3DVVZRUG The length of the text can be up to 255 alphanumeric characters.
2. Equipment connection and network setting Security Settings (Continued) Item Network Control Authentication Password Description &RQ¿JXUHV WKH $XWKHQWLFDWLRQ 3DVVZRUG IRU WKH FRPPDQG control. &RQ¿JXUHV WKH $XWKHQWLFDWLRQ 3DVVZRUG The length of the text can be up to 16 alphanumeric characters.
2. Equipment connection and network setting Projector Control The items shown in the table below can be performed using the [Projector Control] menu. Select an item using the up and down arrow keys on the PC. Most of the items have a submenu. Refer to the table below for details. Controls the projector. Item Description Main Power Turns the power On/Off. Input Source Selects the input source. Picture Mode Selects the Picture Mode setting. Blank On/Off Turns Blank On/Off. Mute Turns Mute On/Off.
2. Equipment connection and network setting 3URMHFWRU &RQWURO &RQWLQXHG Item Description Image Aspect Selects the Aspect setting. Over Scan Selects the Over Scan setting. V Position Adjusts the V Position. H Position Adjusts the H Position. H Phase Adjusts the H Phase. H Size Adjusts the H Size. Auto Adjust Performs Auto Adjustment. Input Progressive Selects the progressive setting. Video NR Selects the Video NR setting. Color Space Selects the Color Space.
2. Equipment connection and network setting 3URMHFWRU &RQWURO &RQWLQXHG Item Description Screen Language Selects the Language for the OSD. Menu Position V Adjusts the vertical Menu Position. Menu Position H Adjusts the horizontal Menu Position. Blank Selects the Blank mode. Startup Selects the Startup screen mode. MyScreen Lock Turns MyScreen Lock On/Off. Message Turns the Message function On/Off. Option Auto Search Turns the Automatic signal search function On/Off.
2. Equipment connection and network setting Projector Status 'LVSOD\V DQG FRQ¿JXUHV WKH FXUUHQW SURMHFWRU VWDWXV Item Description Error Status Displays the current error status Lamp Time Displays the usage time for the current lamp. Filter Time 'LVSOD\V WKH XVDJH WLPH IRU WKH FXUUHQW ¿OWHU Power Status Displays the current power status. Input Status Displays the current input signal source. Blank On/Off Displays the Blank On/Off status. Mute Displays the current Mute On/Off status.
2. Equipment connection and network setting 2.6 Utilize Web Remote Control You can use your Web browser to remote control the projector once the projector LV SURSHUO\ FRQ¿JXUHG DQG FRQQHFWHG WR \RXU 3& YLD WKH ZLUHOHVV /$1 FDUG RU YLD wired LAN. NOTE • Do not attempt to control the projector with the projector's remote control and via your Web browser at the same time. Attempt to do so may causes a projector operational error. Open browser when it is possible to communicate with projector.
2. Equipment connection and network setting 8WLOL]H :HE 5HPRWH &RQWURO &RQWLQXHG Click “Remote Control” in this window to display Web Remote Control as shown in ¿J E The same operation as the bundled remote control will done. UP/LEFT/RIGHT/DOWN FRUUHVSRQGV WR Ÿ Ż Ź ź respectively. Each mode will be activated by clicking these buttons. • LIVE MODE • THUMBNAIL • SLIDE SHOW • DIRECTORY Fig. 2.6.
3. How to use Projector software – Basics - 3. How to use Projector software – Basics 3.1 How to use “MIU Live Viewer” This section explains how to use the “MIU Live Viewer”. 3.1.1. Install “MIU Live Viewer” ,Q RUGHU WR XVH WKH SURMHFWRU ZLWK D 3& IRU /LYH 0RGH \RX ZLOO ¿UVW QHHG WR LQVWDOO the accompanying software on all the PCs you will be using.
3. How to use Projector software – Basics - +RZ WR XVH ³0,8 /LYH 9LHZHU´ &RQWLQXHG 3.1.2. Software Installation Procedure 1) Turn on the PC. 2) Shut down all applications. 3) Insert the accompanying CD-ROM into the PC's CD-ROM drive. 4) After a moment, the Welcome to MIU Utilities Setup dialog will appear as shown on the right. Press Next. NOTE If the Welcome to MIU Utilities Setup dialog doesn't appear, proceed as follows: (1) Click on the Start button on the toolbar and select Run.
3. How to use Projector software – Basics - +RZ WR XVH ³0,8 /LYH 9LHZHU´ &RQWLQXHG 7) After a moment, installation will complete and the Setup Complete dialog will appear as shown on the right. Click Finish. This completes the software installation. 7R FRQ¿UP WKDW WKH VRIWZDUH DV EHHQ properly installed, press the Start button on the toolbar, select All Programs and then select the MIU Utility folder. (2) MIU LiveViewer will appear in that folder if the installation was successful. 3.1.
3. How to use Projector software – Basics - +RZ WR XVH ³0,8 0,8 /LYH 9LHZHU´ &RQWLQXHG [“MIU Live Viewer” window: Fig. 3.1.3.a] 1) “File” button 'LVSOD\ ¿OH PHQX 2) “Help” button Display “MIU Live Viewer” information. 3) Stop button Disconnect projector connection. 4) Capture start button Start real time display. ~NOTE~ Pictures are not displayed correctly when the start/stop buttons are clicked repeatedly.
3. How to use Projector software – Basics - +RZ WR XVH ³0,8 /LYH 9LHZHU´ &RQWLQXHG [“Options” window] [“General” tab, Fig. 3.1.3.b] Fig.3.1.3.b “Options”, “General” tab 1) CPU Share Set up any capturing performance on the PC screen by using control bar Low (At the far left): Set this position when many CPU resources are required by applications other than “MIU Live Viewer”.
3. How to use Projector software – Basics - +RZ WR XVH ³0,8 /LYH 9LHZHU´ &RQWLQXHG [JPEG tab] Fig. 3.1.3.c “Options”, “JPEG” tab 1) JPEG Quality When “MIU Live Viewer” is used, it captures PC screen image. Then that is compressed as JPEG and sent to projector. By control bar in this tab, you can set compression rate. Low (At the far left, Low picture quality): Make JEPG compression rate high. Screen refresh interval becomes shorter due to low volume transferred data, but picture quality decreases.
3. How to use Projector software – Basics - 3.1.4 Utilize “MIU Live Viewer” – Basic This section explains basic of how to use “MIU Live Viewer” functions. • Before start up the MIU Live Viewer, you have to set the projector into LIVE MODE by either of following way. 1) from Web Remote Control (1) Select LIVE MODE 2) from OSD Menu (1) Set the port into MIU menu by remote control or Keypad. 2SHQ WKH 26' 0HQX E\ SUHVVLQJ Ÿ Ż Ź ź .H\SDG EXWWRQ RQ WKH SURMHFWRU or Menu button on remote control.
3. How to use Projector software – Basics - +RZ WR XVH ³0,8 /LYH 9LHZHU´ &RQWLQXHG 2) Start Web Remote Control (refer to 2.6 Utilize Web Remote Control), and click “LIVE MODE” button on Web Remote Control to change projector mode to “MIU Live Viewer”. After changing, screen of the output monitor connected with projector turn all blue. 3) Perform following operations on “MIU Live Viewer” 1) Click “Find” button to search communication available projector.
3. How to use Projector software – Basics - +RZ WR XVH ³0,8 /LYH 9LHZHU´ &RQWLQXHG 3) Click Capture start button. Fig. 3.1.4.d Start capturing Based on the above operation, if captured picture of PC screen is displayed real time on monitor connected with projector, it is succeeded. Much easier to connect if you utilize “One-Click-Communication” function. (Refer to section 2.2.) This is basic usage. Refer to section 4.1 for further explanation of advanced MIU Live Viewer usage. 3.
3. How to use Projector software – Basics - 3.2 Utilize “PC-LESS Presentation” –Basic - (Continued) If thumbnail appears by above operation, it is succeeded. (Fig.3.2.a) This is basic usage. There are varieties of usage for “PC-LESS Presentation”. Refer to section 4.2 for further detailed explanation. Fig. 3.2.a Thumbnail display You can also activate “PC-LESS Presentation” from the OSD Menu. 2SHQ WKH 26' 0HQX IURP WKH 0HQX EXWWRQ RQ WKH UHPRWH FRQWURO RU Ÿ Ż Ź ź button on Keypad.
4. Utilize projector – Advanced - 4. Utilize projector – Advanced 4.1. Utilize “MIU Live Viewer” – Advanced This section explains how to connect multiple PCs. 4.1.1. Connect multiple PCs with one projector (Multiple PCs connection) A projector can be connected with up to 4 PCs to display multiple windows. 1 2 CB/P B CR/P 2 3 4 CAR D R VIDEO S-VID EO 3 SD 1 RGB AUDIO IN1 AUDIO IN1 IN2 AUX DC I/O 5V 0.5A RGB LAN IN2 RGB OUT CONT ROL AC IN AUDIO OUT USB 4 Fig. 4.1.1.
4. Utilize projector – Advanced - 8WLOL]H ³0,8 /LYH 9LHZHU´ ± $GYDQFHG &RQWLQXHG [Connection] &RQQHFW DOO 3&V DQG SURMHFWRU XVLQJ /$1 FDEOHV DQG KXE DV VKRZQ LQ ¿J 4.1.1.a. Connect projector and output monitor with RGB cable. 2) Start up “MIU Live Viewer” in each PC. Check the IP address in PCs and FRQ¿UP [[[ RI > [[[@ LQ ,3 DGGUHVV LV VHW GLIIHUHQW YDOXH LQ HDFK 3& 3) Click “Find” button in “MIU Live Viewer” and search projector.
4. Utilize projector – Advanced - 4.2 Utilize “PC-LESS Presentation” – Advanced “PC-LESS Presentation” reads image data from memory cards inserted into SD or USB slot and perform followings. SD Memory and SD Wireless card can not be inserted at the same time. - Thumbnail display (Section 4.2.1) - Display in full screen (Section 4.2.2) - Slide show (Section 4.2.3) - Directory display (Section 4.2.4) 56 Fig. 4.2.a Thumbnail display Fig. 4.2.b Display in full screen Fig. 4.2.c Slide show Fig. 4.2.
4. Utilize projector – Advanced - 8WLOL]H ³3& /(66 3UHVHQWDWLRQ´ ± $GYDQFHG &RQWLQXHG )ROORZLQJ SLFWXUH DQG PRYLH ¿OHV FDQ EH GLVSOD\HG • JPEG (.jpeg, .jpg) * Progressive is not corresponded. • BMP (.bmp) • PNG (.png) • MPEG4 (.mp4) * Supported bit resolution rate is less than 1Mbps in Simple 3UR¿OH Supported resolution is less than VGA. Supported Audio format is only AAC. 4.2.1 Thumbnail display Fig.4.2.1 shows thumbnail display.
4. Utilize projector – Advanced - 8WLOL]H ³3& /(66 3UHVHQWDWLRQ´ ± $GYDQFHG &RQWLQXHG Following operations can be accessible while thumbnail is displayed. Ÿ Ż Ź ź Remote control/Keypad PAGE UP PAGE DOWN Remote control ENTER Remote control INPUT Keypad MENU Remote control Move cursor. Switch pages. Display selected image in full screen. Displays PC-LESS PRESENTATION Menu. * These operations are not accessible while projector OSD menu is displayed.
4. Utilize projector – Advanced - 8WLOL]H ³3& /(66 3UHVHQWDWLRQ´ ± $GYDQFHG &RQWLQXHG 4.2.2 Display in full screen )XOO VFUHHQ GLVSOD\ ¿J VKRZV D IXOO GLVSOD\ LPDJH RQ WKH 3& 7R PDNH )XOO screen display, click [MENU] button in the Web Remote Control menu on the screen. When select [PC-LESS Presentation], then [Full Screen] from the menu or thumbnail, click [ENTER] so that moves to be full-screen display. Full-screen Display Fig.4.2.
4. Utilize projector – Advanced - 8WLOL]H ³3& /(66 3UHVHQWDWLRQ´ ± $GYDQFHG &RQWLQXHG
4. Utilize projector – Advanced - 8WLOL]H ³3& /(66 3UHVHQWDWLRQ´ ± $GYDQFHG &RQWLQXHG 4.2.3. Slide show 6OLGH VKRZ ¿J GLVSOD\V D IXOO VFUHHQ LPDJH DQG PRYH WR WKH QH[W LQWHUYDO Click the “SLIDE SHOW” button in Web Remote Control, then Slide show will be played. Display time can be set by the playlist (refer to section 4.3) and menu. Full-screen Display Fig. 4.2.3 Slide show Following operations are accessible while slide show is displayed.
4. Utilize projector – Advanced - 8WLOL]H ³3& /(66 3UHVHQWDWLRQ´ ± $GYDQFHG &RQWLQXHG You can also play the Slide show with the projector Menu. Select “SLIDE SHOW” on PC-LESS PRESENTATION Menu. And press the Enter EXWWRQ RQ WKH UHPRWH FRQWURO RU Ź EXWWRQ RQ .H\SDG 7KHQ 6OLGH VKRZ ZLOO VWDUW 2% .'55 24'5'06#6+10 6*7/$0#+. 5.+&' 5*19 &+4'%64; &+52.
4. Utilize projector – Advanced - 8WLOL]H ³3& /(66 3UHVHQWDWLRQ´ ± $GYDQFHG &RQWLQXHG 4.2.
4. Utilize projector – Advanced - 8WLOL]H ³3& /(66 3UHVHQWDWLRQ´ ± $GYDQFHG &RQWLQXHG Following operations can be accessible while directory is displayed. Ÿ ź PAGE UP Moving selected item upward or downward. Ź Open the closed folder. Ż Close the folder. PAGE DOWN Show undisplayed portion if the tree display is not fit inside the screen. Remote control INPUT Keypad Play displayable file. While directory is selected, thumbnail is displayed. It is not possible to play undisplayable file.
4. Utilize projector – Advanced - 8WLOL]H ³3& /(66 3UHVHQWDWLRQ´ ± $GYDQFHG &RQWLQXHG You can also display the directory with the projector Menu. Select “DIRECTORY” in PC-LESS PRESENTATION Menu. And press the Enter EXWWRQ RQ UHPRWH FRQWURO RU Ź EXWWRQ RQ .H\SDG 7KHQ GLUHFWRU\ ZLOO EH GLVSOD\HG 2% .'55 24'5'06#6+10 6*7/$0#+. 5.+&' 5*19 &+4'%64; &+52.#; 5+<' -'; %10(+) [File information display] File information display shows following information.
4. Utilize projector – Advanced - 8WLOL]H ³3& /(66 3UHVHQWDWLRQ´ ± $GYDQFHG &RQWLQXHG 4.2.5 “PC-LESS Presentation” error message (UURU PHVVDJH LV GLVSOD\HG DW D VSHFL¿F FRQGLWLRQ ZKLOH ³3& /(66 3UHVHQWDWLRQ´ mode. It appears at the bottom and the blue area of screen. Fig. 4.2.5 “PC-LESS Presentation” error message “PC-LESS Presentation” error message list Error message Error content Display mode File not found Displayable file does not exist.
4. Utilize projector – Advanced - 4.3 Playlist 3OD\OLVW LV D '26 IRUPDW WH[W ¿OH ZKLFK GHFLGHV WKH RUGHU RI GLVSOD\HG VWLOO LPDJH ¿OHV RU PRYLQJ LPDJH ¿OHV LQ WKH WKXPEQDLO RU WKH VOLGH VKRZ 3OD\OLVW ¿OH QDPH LV >LPDJHOLVWGLU W[W@ ,W LV FUHDWHG LQ HDFK IROGHU ZKHQ ³3& /(66 Presentation” is displayed. The timing of playlist creation is when “PC-LESS 3UHVHQWDWLRQ´ LV GLVSOD\HG LQ WKH GLUHFWRU\ ZKLFK DQ\ SOD\OLVW ¿OH GRHV QRW H[LVW The playlist is created in the displayed directory.
4. Utilize projector – Advanced - 4.4 Failure & Warning Alerts via E-mail 7KH SURMHFWRU FDQ DXWRPDWLFDOO\ VHQG DQ DOHUW WR VSHFL¿HG H PDLO DGGUHVVHV ZKHQ the projector requires maintenance or has encountered an error. NOTE 8S WR ¿YH H PDLO DGGUHVVHV FDQ EH VSHFL¿HG • The projector may be not able to send e-mail if the projector suddenly loses power. Mail Settings ( 26) 7R XVH WKH SURMHFWRU¶V H PDLO IXQFWLRQ SOHDVH FRQ¿JXUH WKH IROORZLQJ LWHPV YLD D web browser.
4. Utilize projector – Advanced - Mail Settings (Continued) &RQ¿JXUH WKH )DLOXUH :DUQLQJ $OHUWV YLD ( PDLO VHWWLQJV &OLFN [Alert Settings] on the main menu. 6HOHFW DQG FRQ¿JXUH HDFK DOHUW LWHP 5HIHU WR [Alert Settings] in >&RQ¿JXULQJ and Controlling the Projector via a Web Browser] for further information. 10) Click the [Apply] button to save the settings.
4. Utilize projector – Advanced - 4.5 Projector management via SNMP When SNMP is enabled, the projector is able to send Failure/Warning Alerts to a VSHFL¿HG 3& NOTE • It is recommended that SNMP functions be carried out by a network administrator. • SNMP management software must be installed on the computer to monitor the projector via SNMP. SNMP settings ( 25) &RQ¿JXUH WKH IROORZLQJ LWHPV YLD D ZHE EURZVHU WR XVH 6103 Example: If the IP address of the projector is set to 192.168.1.
4. Utilize projector – Advanced - 4.6 Controlling the Projector via Scheduling The projector can be automatically controlled via scheduling. NOTE • You can schedule the following control events: Power ON/OFF, Input Source and Transferred Image Display. 7KHUH DUH W\SHV RI 6FKHGXOLQJ GDLO\ GD\ RI WKH ZHHN VSHFL¿F GDWH 7KH SULRULW\ IRU VFKHGXOHG HYHQWV LV DV IROORZV VSHFL¿F GDWH GD\ RI WKH week 3) daily.
4. Utilize projector – Advanced - Date/Time Settings ( 34) The Date/Time setting can be adjusted via a web browser. Example: If the IP address of the projector is set to 192.168.1.10: 1) Enter [http://192.168.1.10] into the address bar of the web browser. Enter the Administrator ID and Password and click [Logon].
4. Utilize projector – Advanced - Schedule Settings ( 32) 6FKHGXOH VHWWLQJV FDQ EH FRQ¿JXUHG IURP D ZHE EURZVHU Example: If the IP address of the projector is set to 192.168.1.10: 1) Enter [http://192.168.1.10] into the address bar of the web browser. 2) Enter the Administrator ID and Password and click [Logon]. 3) Click [Schedule Settings] on the main menu and select the required schedule item. 4) Click the [Enable] check box to enable scheduling.
4. Utilize projector – Advanced - 4.7 e-Shot (Still Image Transfer) Display The projector can display a still image that is transferred via the network. e-Shot transmission requires an exclusive application for your PC. You can download it from the Hitachi web site. Refer to the manual for the application for instructions.
4. Utilize projector – Advanced - 4.8 Command Control via the Network
4. Utilize projector – Advanced - Command Control Settings (Continued) When the authentication setting is enabled, the following settings are required. ( 36) 7) Click [Security Settings] on the main menu. 8) Click [Network Control] and enter the desired authentication password. * See Note1. 9) Click the [Apply] button to save the settings. * See Note2.
4. Utilize projector – Advanced - Command format Command formats differ among the different communication ports. TCP #23 You can use the RS-232C commands without any changes. The reply data format is the same as the RS-232C commands. However, the following reply will be sent back in the event of authentication failure when authentication is enabled.
4. Utilize projector – Advanced - Reply Data format The connection ID (the data is same as the connection ID data on the sending data format) is attached to the RS-232C commands reply data.
4. Utilize projector – Advanced - Automatic Connection Break The TCP connection will be automatically disconnected after there is no communication for 30 seconds after being established. Authentication The projector does not accept commands without authentication success when authentication is enabled. The projector uses a challenge response type authentication with an MD5 (Message Digest 5) algorithm. When the projector is using a LAN, a random eight bytes will be returned if authentication is enabled.
5. Troubleshooting 5. Troubleshooting Problem The projector is not turned on.
5. Troubleshooting Problem Likely Cause Live Mode Wireless / Wired The projector isn't capable of relaying dynamic images The projected such as PowerPoint® animation at full speed. image is rather slow compared to The compression rate that of the PC being used for transferring the images is too low. Lots of The compression rate interference in being used for transferring the images the images is too high. Things to Check Reference Page Number Try increasing the Capture Performance priority level.
6SHFLÀFDWLRQV 6SHFL¿FDWLRQV Item Specifications Product name Liquid crystal projector File format JPEG, PNG, BMP and MPEG4 Control software Dedicated PC application and Web browser Corresponding protocol TCP/IP, DHCP client and HTTP server Firmware OS ȝ,7251 FRPSOLDQFH Network Wireless LAN (IEEE802.
7. Warranty and After-sales service 7. Warranty and After-sales service ,I D SUREOHP RFFXUV ZLWK WKH HTXLSPHQW ¿UVW UHIHU WR WKH ³7URXEOHVKRRWLQJ´ 80) section and run through the suggested checks. If this does not resolve the problem, contact your dealer or service company. They will tell you what warranty condition is applied.
Hitachi, Ltd. Japan 292 Yoshida-cho Totsuka-ku, Yokohama-city Kanagawa 244-0817 HITACHI EUROPE LTD. Consumer Affairs Department PO Box 3007 Maidenhead SL6 8ZE UNITED KINGDOM Tel: 0870 405 4405 Email: consumer.mail@Hitachi-eu.com HITACHI EUROPE S.A. 364, Kifissias Ave. & 1, Delfon Str. 152 33 Chalandri Athens GREECE Tel: 1-6837200 Fax: 1-6835694 Email: service.hellas@hitachi-eu.