
User manual


English - 69
Recording
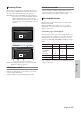
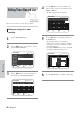
This function allows you to watch the recently recorded
10-second images on the P in P screen while a recording is
in progress.
During recording, press the TIME SLIP button on
remote control.
• The recently recorded 10-second images are played
back on the P in P screen.
• This function starts to operate 10 seconds from the
time you press the REC button.
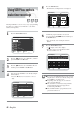
• On the TIME SLIP screen, you can play back, scan,
or perform other operations for the recorded
program.
Press the 6 button to scan the recording in the
reverse order, from the end to the start.
Press the 5 button to scan to the recently
recorded 10- second images.
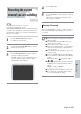
Press the STOP button once to cancel the TIME SLIP
function.
• To stop a recording while a TIME SLIP function is
in progress, press the STOP button twice.
■ The Time Slip function does not operate during a
timer recording.
■ The Time Slip feature only works with DVD-RAM
discs.
■ Pressing the P in P button will switch the images
between the P in P and normal screens.
Note
2
1
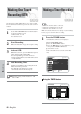
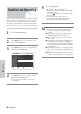
Follow these directions to record onto a disc or a tape from
External Devices.
Connect the Line out jack of your External Devices to
the Line IN jack on the front or rear of your DVD
Recorder-VCR using Audio/Video Cable.
Power on your DVD Recorder-VCR and switch to
Line In mode by pressing the INPUT button on the
remote.
The front panel display changes on the following
sequence
. Channel Number . L1 . L2. DV B
{-=============
When your DVD Recorder-VCR is in the stop state,
set the operation mode of your External Devices to
play mode.
Press the REC button on your DVD Recorder-VCR
when the image from which you want to start
recording is displayed.
Press the STOP button on your DVD Recorder-VCR
when the recording is finished.
■ Also refer to the user manual for your External
Devices when recording through Line In mode
using Audio/Video cable.
Note
5
4
3
2
1
Watching the Images
Being Recorded (Time Slip)
DVD-RAM
Recording From
External Devices