
Instruction Manual

108
Editing
If you have recorded numerous short
scenes, combining them can be
convenient.
Be sure to select consecutive multiple
scenes. When using the HDD,
combining scenes is possible only if
“Category: All” is specified (p.95).
Stills cannot be combined.
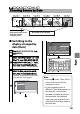
5
Select “Yes”, then press the
confirmation button.
The selected scene will be divided,
then the display will return to the
disc navigation screen.
• Select “No” to quit division. The
playback pause screen will
appear. Press
to quit.
Hints
• Search and frame advance (p.62)
are useful when designating
division points.
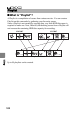
• If a fade has been added to the
original scene, the “IN” effect
will be added to the first half of
the scene, and the “OUT” effect,
to the latter half (p.109).
• Combining scenes that were
divided will restore the original
scene.
Notes
• Frame by frame and slow
forward/reverse playback while
dividing scenes will forward or
reverse a movie in increments of
0.5 seconds.
• If the division point is at the start
or end of a scene, a message
indicating this appears and
division cannot be made.
• A movie scene of 0.5 seconds or
less cannot be divided.
• If free space available on the
HDD/BD/DVD is insufficient,
division will not be possible.
Delete unnecessary scenes.
• If you divide a scene with the dub
mark “ ”, the dub marks will
appear on both divided scenes.
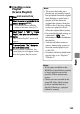
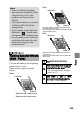
Combining Multiple
Scenes
(Edit - Combine)
1
Press
DISC NAVIGATION
.
2
Select the scenes you want to combine,
then press
MENU
.
• Choose more than one scene
(p.57).
• You cannot proceed to next step
if you have chosen only one
scene.
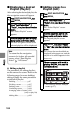
3
Select “Scene” “Edit”
“Combine”, then press the confirmation
button.
The confirmation screen appears.
4
Select “Yes”, then press the
confirmation button.
The scenes are combined.
The display returns to the disc
navigation screen.
HDD RAM
-RW (VR)
BD-RE
Hint
With fade effects, the “IN” effect
of the first scene in the selected
range and the “OUT” effect of the
last scene will be attached to the
combined scene.