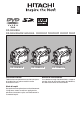
English DZ-GX5080A DZ-GX5020A/DZ-GX5000A DVD-RAM DZ-GX5080A DZ-GX5020A DVD-RW DVD-R +RW DZ-GX5000A Instruction manual Manual de instrucciones Toobtain the best performance and ensure years of trouble-free use, please read this entire instruction manual. Para obtener el mejor funcionamiento y asegurar muchos años de utilización exenta de problemas, lea todo este manual de instrucciones.
English Important Information For Your Safety The power switch turns the DVD video camera/recorder on and off, leaving the date/time feature unaffected. If the camera/recorder is to be left unattended for a long period of time, turn it off. WARNING: TO PREVENT FIRE OR SHOCK HAZARD, DO NOT EXPOSE THIS UNIT TO RAIN OR MOISTURE. WARNING: TO PREVENT FIRE OR SHOCK HAZARD, USE THE RECOMMENDED ACCESSORIES ONLY.
Note: This equipment has been tested and found to comply with the limits for a Class B digital device, pursuant to Part 15 of the FCC Rules. These limits are designed to provide reasonable protection against harmful interference in a residential installation. This equipment generates, uses, and can radiate radio frequency energy and, if not installed and used in accordance with the instructions, may cause harmful interference to radio communications.
English IMPORTANT SAFETY INSTRUCTIONS In addition to the careful attention devoted to quality standards in the manufacture of your video product, safety is a major factor in the design of every instrument. But, safety is your responsibility too. This page lists important information that will help to assure your enjoyment and proper use of DVD video camera/ recorder and accessory equipment. 1 Read these instructions. 2 Keep these instructions. 3 Heed all warnings. 4 Follow all instructions.
English Cautions When Using Handle the liquid crystal display (LCD) with care: • The LCD is a very delicate display device: Do not press its surface with force, hit it or prick it with a sharp object. • If you push the LCD surface, unevenness in display may occur. If unevenness does not disappear soon, turn the DVD video camera/recorder off, wait for a few moments, and then turn it on again. • Do not place the DVD video camera/recorder with the open LCD screen down.
Do not point directly at the sun: English • If direct sunlight strikes the lens or viewfinder, the DVD video camera/recorder could malfunction or a fire could occur. • Do not leave the DVD video camera/recorder with the LCD screen exposed to direct sunlight: This could cause malfunctions. Do not use the DVD video camera/recorder near TV or radio: • This could cause noise to appear on the TV screen or in radio broadcasts.
• The ACCESS/PC or CARD ACCESS indicator is lit or blinking to show that data is being written to disc or card, or being read from it. At this time, do not do any of the following, so as not to damage the data: − Remove battery − Disconnect AC adapter/charger − Plug or unplug PC connection cable − Remove disc or card − Subject DVD video camera/recorder to severe vibrations or impact − Violently open or close the LCD monitor The ACCESS/PC indicator will light for a while after recording is finished.
English Cautions When Storing Do not leave the DVD video camera/recorder in a place where the temperature is very high for a long period of time: • The temperature inside a closed vehicle or trunk can become very high in a hot season. If you leave the DVD video camera/recorder in such a place, it could malfunction or the case could be damaged. Also, do not expose the DVD video camera/recorder to direct sunlight or place it near a heater.
Be sure to set the power switch to “OFF” before cleaning this DVD video camera/recorder. ●Cleaning LCD screen and camera lens Use dry, soft cloth to wipe dirt off. When cleaning the LCD screen, be careful not to use force, scratch it, or subject it to impact: Doing such could cause a defect in the screen, result in display unevenness, or damage the LCD monitor. ●If dust adheres to the viewfinder lens, remove it using a cotton swab, etc.
English DISC CLEANING Use the disc cleaning cloth provided to lightly wipe off any dirt adhering to the disc as shown in the figure. Do not wipe the disc with force: Doing so could cause scratches. Never use solvent (thinner, water, antistat or detergent) for cleaning. Lightly wash the dirty cleaning cloth with detergent: The dirt removal capacity of the cloth will improve (rinse the cloth well with water so that no detergent remains).
English About This Manual ●Displays in this manual Understand that the displays are different from those you will actually see in the viewfinder or on the LCD screen. ●Notation of cancel button Press the STOP/EXIT button to stop your operation midway, or return the menu screen to the preceding one. The expression “press the C button” will be used in this text. ● 1, <, >, 2, / and 3 marks beside headings Some functions of this DVD video camera/recorder are unavailable with disc or card used.
English Table of Contents Important Information......................................... 2 For Your Safety.................................................. 2 Precautions........................................................ 2 IMPORTANT SAFETY INSTRUCTIONS........... 4 Cautions When Using ........................................ 5 Cautions When Storing...................................... 8 Suggestions and Restrictions ............................ 8 CLEANING .............................................
Setting Up Record Functions ...........................60 SWITCHING MOVIE QUALITY (VIDEO MODE) ................................................ 60 SETTING TO WIDE TV SCREEN MODE (16:9 MODE)..................................................... 61 SWITCHING QUALITY OF STILL IMAGE (QUALITY) ........................................................ 63 SELF-TIMER ....................................................... 63 SETTING ON-SCREEN DISPLAY OUTPUT ON OR OFF (OSD OUTPUT)...........................
TOC Recording (Dubbing) Images......................... 107 English RECORDING (DUBBING) IMAGES ON OTHER VIDEO DEVICES............................................ 107 Connecting to PC (DZ-GX5080A) Software Provided ......................................... 108 Requirements of available PC ....................... 109 Installing Software ......................................... 110 Connecting to PC via PC Connection Cable...........................................................
English Checking Provided Accessories Make sure that you have all the following accessories in package: Battery (model DZ-BP07PW): Portable power supply for this DVD video camera/recorder. Charge it before use. AC adapter/charger (model DZ-ACS3): Used to power the DVD video camera/ recorder from AC outlet, or charge battery. DC power cord: When powering the DVD video camera/ recorder from household AC outlet, use this cord to connect the DVD video camera/recorder and AC adapter/charger.
English Names of Parts 6 5 1 2 3 7 4 8 (Inside the cover) 1 LED light (for DZ-GX5080A only) (p. 42) 9 6 Zoom lever (p. 50, 52, 67) To adjust the zoom or volume. 2 Lens cap string attachment hole (p. 20) 3 Stereo microphone Take care that the microphone is not blocked by a hand, etc., during recording. 4 Recording indicator (p. 33) The red indicator will light during recording. 5 Optical 25× zoom lens (for DZ-GX5000A only) Optical 30× zoom lens (for DZ-GX5080A /GX5020A only) (p.
11 18 12 19 13 14 20 21 10 Viewfinder (p. 30) 11 Diopter control (p. 30) To adjust the focus of image appearing in the viewfinder. (Pull out the viewfinder.) 15 16 English 10 22 17 BATTERY EJECT button (p. 26) Press this button when removing the battery. 18 Battery attachment platform (p. 26) 19 Record button (REC) (p. 39) 12 SLEEP/RESTART button (p. 41) To switch the sleep/restart status between ON and OFF.
English 23 30 31 24 25 26 27 28 29 32 33 34 35 36 37 38 39 23 FULL AUTO (p. 55) To switch the DVD video camera/recorder to full automatic. 24 FOCUS button (p. 52) To switch between manual focus and autofocus. 25 MENU button (p. 48, 78) Press this button to display the menu for setting camera functions and Disc Navigation. 26 SELECT button (p. 73) 27 DISC NAVIGATION button (p. 65) 28 STOP/EXIT button (p. 11, 48, 68) To end playback or cancel setting of menu. 29 EXPOSURE button (p.
This section explains preparations for recording – setting up the DVD video camera/recorder and battery. Demonstration Function This DVD video camera/recorder is equipped with a demonstration function. The default at purchase time is “Auto”, which will automatically start the demonstration approx. three minutes after the DVD video camera/recorder is turned on. Refer to “CHANGING SETTING OF DEMONSTRATION” on page 33 if you wish to view the demonstration immediately or change the setting to “Off”.
English ATTACHING LENS CAP 1 Attach the shorter end of lens cap string to the lens cap. 2 Attach the longer end of lens cap string to the attachment hole of DVD video camera/ recorder. Shorter end Longer end 3 Push the both sides of cap inward and attach it over the lens. Push and fit Note: • Always keep the lens cap on when not using the DVD video camera/recorder, to protect the lens.
English Discs and Cards The following table lists the storage media (discs and cards) that can be used on this DVD video camera/recorder and the functions which are available with them: Media Function DVD-RAM DVD-RW DVD-RW (VR mode) (VF mode) DVD-R +RW SD memory card To record video (p. 39) ● ● ● ● ● — To record photo (p. 40) ● — — — — ● To delete image just recorded (p. 68) ● ● — — ● ● To select image and delete it (p. 77) ● ● — — — ● To edit image (p.
English AVAILABLE DISCS Usable discs and logos Function DVD-RAM Ver. 2.1 (8 cm) Allows you to delete unnecessary scenes or edit scenes. Also allows you to record photos. DVD-RW [Ver1.1 (8 cm) 2x speed (2x/1x)] Allows you to choose the VR mode for deleting unnecessary scenes or editing scenes, or the VF mode in which deletion or editing is not possible, but high compatibility with DVD players is provided *1. DVD-R [for General Ver. 2.0 (8 cm)] +RW Ver. 1.
• • • • • • • CD CD-R CD-RW CD-ROM DVD-ROM DVD-Video DVD-R (4.7 GB) for Authoring Ver. 2.0 AVAILABLE CARDS SD memory card can be used on this DVD video camera/recorder (incompatible with 2GB). When using an exclusive adapter, a miniSD memory card can be used in the same way as an SD memory card. No SDHC card or multimedia card can be used. ●Handling card • Do not use cards other than the designated ones. • Be sure to perform trial recording before recording vital images.
English Preparations for Power Supply USING DVD VIDEO CAMERA/RECORDER WITH AC ADAPTER/CHARGER It is recommended that you use the AC adapter/charger to power the DVD video camera/recorder from household AC outlet when you perform settings on it, play back or edit images, or use it indoors. Note: Be sure to use the specified AC adapter/charger (DZ-ACS3) to power the DVD video camera/recorder. Using other AC adapter/chargers could cause electric shock or result in fire.
The DZ-BP07PW battery provided with DZ-GX5080A/GX5020A/GX5000A has not been charged at purchase time: Charge it before using the DVD video camera/recorder. Note: • Be sure to use the DZ-BP07PW, DZ-BP14SW (optional) or DZ-BP7SW (optional) battery for the DVD video camera/recorder: Using other batteries could cause the DVD video camera/recorder to malfunction, or result in fire. • Be sure to use the DZ-ACS3 AC adapter/charger to charge the battery: Using other chargers could cause electric shock or fire.
English ●Battery charged status You can find out the charged status of battery by checking the CHARGE indicator on AC adapter/ charger: Charge status CHARGE indicator During charge Lit Charge complete Goes out Note: See “Troubleshooting” on page 135 when the CHARGE indicator blinks. ●Reference for time required to charge battery (at approx. 77ºF (25ºC)) DZ-BP07PW (provided)/DZ-BP7SW (optional): Approx. 90 minutes DZ-BP14SW (optional): Approx.
See the following table as a reference for how long the DVD video camera/recorder can continuously be used with a fully charged battery: With DZ-BP07PW (provided)/DZ-BP7SW (optional) Video mode XTRA* Continuous use time When using viewfinder approx. 85 min When using LCD monitor approx. 75 min When using viewfinder approx. 85 min FINE When using LCD monitor approx. 75 min When using viewfinder approx. 100 min When using LCD monitor approx.
English BATTERY REMAINING LEVEL INDICATOR When the battery is used to power the DVD video camera/recorder, the battery remaining level appears in the viewfinder or on the LCD screen as follows: Fully charged Nearly empty White portion shows remaining level (Blinks) EFFICIENT USE OF BATTERY • The battery will slightly discharge even if it is detached from the DVD video camera/ recorder. • If the battery is left attached to DVD video camera/recorder, it will consume a slight amount of power.
While holding down the gray button at the right of power switch, set the switch according to each recording function: Set to “OFF”: The DVD video camera/ recorder will turn off Set to “P”: To record still on SD memory card Set to “O”: To record movie on DVDRAM/DVD-RW/DVD-R/ +RW disc English Turning DVD Video Camera/Recorder On and Off Note: • Once you turn the DVD video camera/recorder on to let it recognize the disc, you can immediately record or play back by turning the DVD video camera/ recorder on
English VIEWING IMAGE ON LCD MONITOR SCREEN If you open the LCD monitor, you can monitor subject image on the LCD screen. 1 Open the LCD monitor. VIEWING SUBJECT THROUGH VIEWFINDER 1 Pull out the viewfinder. 2 Turn the diopter control knob to adjust the focus to suit your eyesight. The LCD monitor has a portion where you can hook your finger. Hook the finger there to open the monitor. ●Range where the LCD monitor can be moved The LCD monitor can be opened up to approximately 90º.
English 1<>2/3 Setting Date and Time Set the current date and time so that the date and time you make a recording can be recorded correctly. The following procedure can also be used to correct the date and time you have already set. Use f / e / d / c buttons to select, and then press A to designate. 1 Press the MENU button, use the f/e/ d/c buttons to choose “Date Setup” and then “Date Set”. 2 Press the c button.
1<>2/3 English Initial Settings Press the MENU button, and then use f/e/d/c/A to display the “Initial Setup” menu screen. See page 48 for detailed operation procedure. Press the MENU button again to exit setting. SWITCHING OPERATING SOUND ON OR OFF (BEEP) Select “On” or “Off”, and I n i t i a l Setup On Be e p then press the A button.
You can restore menu settings to defaults (initial settings at the factory (p. 142)). (Note, however, that the date/time will not be reset.) 1 Choose “Reset” on the “Initial Setup” menu screen, and then press the A button. I n i t i a l Setup Be e p Powe r S a v e R e c o r d LED Language Demo Mode Re s e t ENTER RETURN 2 If you are sure that you On Off On English Auto wish to reset, use the d button to choose “YES”, and then press the A button.
1<>2/3 English LCD/EVF Setup ADJUSTING BRIGHTNESS OF LCD SCREEN (LCD BRIGHTNESS) AND VIEWFINDER (EVF BRIGHTNESS) 1 Press the MENU button, use the f/e/ d/c/A buttons to choose “LCD/EVF Adjust” on the “LCD/EVF Setup” menu screen, and then choose “LCD Brightness”or “EVF Brightness”. The brightness adjustment bar will appear on the screen. 2 Use the d/c buttons for adjustment. LCD / EVF A d j u s t LCD B r i g h t n e s s EVF B r i g h t n e s s Press d : The screen becomes dimmer.
English ADJUSTING COLOR DENSITY (COLOR LEVEL) You can adjust the color density of the LCD monitor screen and viewfinder. 1 Press the MENU LCD / EVF Se t u p LCD/ EVF Ad j u s t button, use the f/ Au t o EVF D i s p l a y e/d/c/A buttons to choose RETURN ENTER “LCD/EVF Adjust” on the “LCD/EVF Setup” menu screen, and then choose “Color Level”. Note: • The color setting will be stored in memory even after the DVD video camera/recorder is turned off.
English Inserting and Removing Disc 1 Press down the DISC EJECT button once and release it. A few moments after the ACCESS/PC indicator blinks, the cover of disc insertion block will open. Pickup lens 2 Gently open the cover by hand fully until it stops. • Note that the recording surface of disc must face the inside of DVD video camera/recorder. When using a single-sided disc, the recording surface is the side without label. • Never touch the disc recording surface or pickup lens.
●When using brand-new DVD-RW/+RW disc When a disc is first loaded in the DVD video camera/recorder, the “Format Disc” screen will appear. When recording on this DVD video camera/recorder: Choose “Yes” on the “Format Disc” screen, and then press A. When using DVD-RW, choose the recording format (VR or VF mode), and then press the A button. The disc will be formatted. F o r ma t D i s c F o r ma t D i s c Disc is not formatted. Format the disc now? YES ENTER NO Disc Format.
English Inserting and Removing Card 1 Open the LCD monitor. 2 Turn the DVD video camera/recorder off. 3 Open the cover of card insertion block. 4 Inserting Card: Insert card with its terminal inward until it locks. Removing Card: Push the center of card edge. The card will come out so that it can be held by fingers. 5 Close the cover of card insertion block. Note: • Always close the cover of card insertion block: Placing the DVD video camera/recorder on a desk, etc. with cover open could damage the cover.
This section explains about recording of movies and still images, and also basic settings on DVD video camera/recorder. 1<>2/ Recording Movie Before You Begin Pressing REC once will start recording; pressing it once again will temporarily stop recording. • Insert a recordable disc into this DVD video camera/recorder. ACCESS/PC indicator 1 Remove the lens cap, and then point the DVD video camera/recorder at subject. 2 Turn the DVD camera/recorder on.
13 English Recording Stills Note: Recording of still images is possible on DVD-RAM disc and card. ACCESS/PC indicator PHOTO button CARD ACCESS indicator 1 Remove the lens cap, and then point the DVD video camera/recorder at subject. 2 Turn the DVD camera/recorder on. When using DVD-RAM disc: Set the power switch to “N”. When using card: Set the power switch to “P”. After the ACCESS indicator goes out, perform the subsequent operation: 3 Check the subject on the screen (viewfinder or LCD).
English 1<>2/3 Swift Restart of Recording (SLEEP/RESTART button) If you press the SLEEP/RESTART button while in the recording pause status instead of turning the DVD video camera/recorder off, the status that recording is possible will be restored in approx. 1.5 seconds. Setting to the sleep/restart standby status: Press the SLEEP/RESTART button in the recording pause status. The SLEEP/RESTART button will light, and the DVD video camera/recorder will enter the sleep/restart standby status.
1<>2/3 English Recording using LED Light (for DZ-GX5080A only) You can use the LED light to illuminate a subject to be recorded in a dark place. 1 Press the e button during recording pause or recording. An icon will appear on the screen, and the LED light will glow. LED light 0 : 0 0 : 0 0 REM 3 0 MIN LED light icon FINE 8 :0 0AM 2 / 1 0 / 2 00 7 2 Press the e button again. The LED light will go out. Note: • Pressing e will turn the LED light on and off alternately.
English 1<>2/3 On-Screen Information Various types of information will appear in the viewfinder or on the LCD screen during recording. INFORMATION DISPLAY DURING RECORDING See the next page for details. e m n j p 8. Microphone filter 2. 16:9 mode 3. Program AE 4. Backlight compensation 5. EIS 6. White balance 7. LED light 9. Self-timer 10. Recording status 1. Recording mode j 1 0 REC 0 : 0 0 : 0 0 REM 3 0 MIN FULL AUTO DISC ACCESS 11. Zoom 12.
1. Recording mode (p. 39, 40) English A B E : Movie : Still (Disc) : Still (Card) 2. 16:9 mode (only in movie recording mode) (p. 61) No display : 16:9 mode OFF : 16:9 mode ON 3. Program AE (only in movie recording mode) (p. 56) No display : Auto : Sports b : Portrait c : Spotlight d : Sand & Snow e : Low Light f 7. LED light*1 (p. 42) No display : LED light OFF : LED light ON 8. Microphone filter (only in movie recording mode) (p. 59) No display : Microphone filter OFF : Microphone filter ON p 9.
: I : J : : $ : " ? : # K ! : : : N* : DVD-RAM DVD-RAM (write-protected) DVD-RW (VR-mode/VF-mode) Protected DVD-RW (VR-mode) DVD-RW (VR-mode) finalized on this video camera/recorder DVD-RW (VR-mode) finalized on a device other than this DVD video camera/recorder Finalized DVD-RW (VF-mode) DVD-R DVD-R already finalized on this DVD video camera/recorder DVD-R finalized on a device other than this DVD video camera/ recorder * Includes DVD-R recorded on a Hitachi DVD video camera/recorder model other
English ●Switching the information display mode You can switch the display mode of on-screen information: Press the DISPLAY button. The full and minimum display modes will alternate. • Full display mode: All types of information will appear. • Minimum display mode: The recording mode (see 1 on page 43) and recording status (see 10 on page 43) will appear. If the DVD video camera/ recorder has warning information, a warning message will appear.
Screen display symbol English ●Interpreting symbols on LCD screen when recording with the screen facing the same direction as the lens Description X • A write-protected disc is loaded. • A locked card is loaded. R • An unusable card is loaded. N • An attempt to record a still is being made with a DVD-RW/DVDR/+RW disc used. • An unusable disc is loaded. k • During recording (lights in red). • The remaining capacity on disc is approaching the limit 0 (blinks in red).
English Checking Flow of Menu The following two on-screen menu modes are available with this DVD video camera/recorder: • Full Menu: To display all menu items for experts • Quick Menu: To display only the fundamental menu items for first timers ●Operating Menu The Full Menu will appear if you press the MENU button. You can use the f/e/d/c buttons on DVD video camera/recorder to select various setting options in Full Menu and designate them. The cursor to be chosen will move to the right.
English ●Flow of Full Menu ■ The shaded menu item can also be set using the Quick Menu. Refer to page indicated for details of each function. Camera Functions Setup Came r a F u n c t i o n s Se t up AAu t o P r o g r am AE AAu t o Wh i t e Ba l . On EIS D i g . Zo om 120x Of f M IC. F i l t e r ENTER LCD/EVF Setup LCD / EVF Se t u p L CD / EVF Ad j u s t EVF D i s p l a y ENTER RETURN Program AE (p. 56) White balance (p. 57) Au t o RETURN Adjust (p. 34) EVF Display (p. 35) EIS (p.
1<>2/3 English Zooming If you continue to hold the zoom lever on the “T” control side with Dig. Zoom specified, the digital zoom will be activated midway (when optical 25-power is exceeded on DZ-GX5000A or optical 30-power is exceeded on DZ-GX5080A/ GX5020A). You can zoom up to 1200-power on DZGX5000A; up to 1500-power on DZ-GX5080A/ GX5020A. W: recording wide area (wide-angle) T: recording enlarged image (telephoto) 1 Press the MENU button, choose “Dig.
Use the tele-conversion lens or wide-conversion lens with the following filter diameter and thread pitch to record subjects for stronger telephoto or wide-angle effect: Filter diameter: 34 mm Thread pitch: 0.5 mm When attaching the optional DZ-TL1 tele-conversion lens or DZ-WL1 wide-conversion lens, use the optional step-up ring: DZ-SR3437 (see page 128). 1 Attach the step-up ring over the lens. 2 Remove the cap of conversion lens, and screw the lens into the thread of step-up ring.
1<>2/3 English Manually Focusing Subject The DVD video camera/recorder usually focuses on a subject automatically (autofocus). You can also manually focus a subject depending on the recording conditions. FOCUSING DURING RECORDING Normally, the DVD video camera/recorder automatically focuses the subject (autofocus), but you can also manually focus a subject, depending on the recording conditions (manual focus).
Objects not in the center of screen Objects with little variation in brightness, such as white wall Objects that are far and near at the same time Objects moving rapidly Objects lit by neon sign, spotlight, etc.
1<>2/3 English Adjusting Brightness of Image to be recorded (Exposure) The DVD video camera/recorder usually adjusts the exposure automatically. You can also manually adjust the exposure depending on the recording conditions. 1 Press the EXPOSURE button during recording. The exposure adjustment bar will appear on the screen.
English 1<>2/3 Using Full Auto Function Pressing the FULL AUTO button will fully automate the camera functions. 1 Press the FULL AUTO button. “FULL AUTO” will be displayed on the screen of DVD video camera/recorder for several seconds. The following settings will reset to defaults: Function When setting full auto Reference page Focus Auto 52 Backlight compensation Off 54 Exposure Auto 54 Program AE Auto 56 White balance Auto 57 EIS On 59 MIC.
1<>2/3 English Setting Up Camera Functions Before You Begin • See page 48 for how to set. SELECTING SHOOTING MODE TO MATCH THE SUBJECT (SWITCHING PROGRAM AE MODE) This DVD video camera/recorder automatically detects the status of subject and surrounding situation and records the optimum image: If you choose the shooting mode to match the recording conditions, clearer images will be recorded.
When Program AE is set to Low Light, you can use the light from LCD monitor to record a subject. 1 Press the MENU button, and choose “Program AE” from the “Camera Functions Setup” menu. 2 Choose “Low Light”, and designate it. 3 Press the MENU button to end the setting. Note: • Use the viewfinder to check the image to be recorded. • The LCD monitor light allows you to record a subject up to 3.2 feet (1 m) even in a dark place.
English 1 Press the MENU button, choose “White Bal.” on the “Camera Functions Setup” menu screen, and then press the A button. 2 Choose the desired option, and then press the A button. Note: • The white balance mode can be confirmed using the on-screen information. • The white balance setting will be stored in memory even when the DVD video camera/recorder is turned off. • Do not block the infrared sensor with hand, etc. 3 Press the MENU button to end the setting.
When you use zoom (see page 50) to record a magnified subject image, it will correct fuzziness in the recorded image. 1 Press the MENU button, choose “EIS” on the “Camera Functions Setup” menu screen, and then press the A button. 2 Choose the “On” or “Off”, and then press the A button. 3 Press the MENU button to end the setting. Note: • You can check EIS On or Off by the on-screen information display. • The EIS setting will be stored in memory even when the DVD video camera/recorder is turned off.
English Setting Up Record Functions 1<>2/ SWITCHING MOVIE QUALITY (VIDEO MODE) Choose the movie quality from “XTRA”, “FINE”, “STD”. It is recommended that you record critical subjects in the “XTRA” or “FINE” mode. 1 Press the MENU button, use the f/e/ d/c/A buttons to choose “VIDEO Mode” on the “Record Functions Setup” menu screen, and then press the A button. 2 Choose the desired quality mode, and then press the A button. 3 Press the MENU button to end the setting.
When viewing recorded images later on a wide-screen TV (aspect ratio 16:9), specify wide-screen (16:9) mode “On”: You can also record images with the aspect ratio changed (the aspect ratio with “Off” is 4:3). The following figures compare the images displayed on LCD monitor and in viewfinder when the wide-screen mode is “on” and “off”. “16:9 On” specified (aspect ratio 16:9) “16:9 Off” specified (aspect ratio 4:3) 1 Press the MENU button, choose “16:9” on the 2 Choose “On”, and then press the A button.
English Note: • The 16:9 setting will be kept even after the DVD video camera/recorder is turned off. • When using a DVD-RW (VF-mode)/DVD-R/+RW: You cannot specify the combination of “VIDEO Mode: STD” and “16:9 On”. If you specify “16:9 On” and try to switch the VIDEO Mode to STD from XTRA or FINE, the screen will automatically switch to the 4:3-aspect ratio display. • When using DVD-RW (VF-mode)/DVD-R, switching between wide mode (16:9) and normal mode (4:3) will not be possible while using the same disc.
English 3 SWITCHING QUALITY OF STILL IMAGE (QUALITY) You can switch the still recording quality only when using card. It is recommended that you use “FINE” when recording vital images (p. 145 “SIZE AND QUALITY OF PHOTOS”). 1 Press the MENU button, use the f/e/ d/c/A buttons to choose “Quality” on the “Record Functions Setup” menu screen, and then press the A button. 2 Choose the option you want, and then press the A button. 3 Press the MENU button to end the setting.
1<>2/3 English SETTING ON-SCREEN DISPLAY OUTPUT ON OR OFF (OSD OUTPUT) If you connect this DVD video camera/recorder to a TV to view images on TV screen, you can switch off the on-screen information (displayed in the viewfinder or on the LCD screen) from the TV screen. 1 Press the MENU button, use the f/e/ d/c/A buttons to choose “OSD Output” on the “Record Functions Setup” menu screen, and then press the A button. 2 Choose “On” or “Off”, and press the A button.
1<>2/3 Using Disc Navigation STARTING OR TERMINATING DISC NAVIGATION Disc Navigation is a tool for editing scenes recorded on this DVD video camera/recorder. Here is an explanation on “scene” and “program”, so that you will be able to make most use of Disc Navigation function. The screens in this instruction manual are basically those that will appear when DVD-RAM disc is used: Some items will not appear when DVD-RW/DVD-R/+RW disc or card is used, but the operation is the same.
Disc Navigation screen English Thumbnail A l l P r og r ams 0 01 / 014 Selected scene*1 number/ Number of all scenes Cursor Current page position*4 Still image icon*2 Operation guide*3 Bar graph PLAY Disc type icon*5 *1 Scene: Video (movie) .......... “One scene” refers to images recorded from one press of REC button until recording is stopped by pressing the REC button again. Photo (still) .............. “One scene” refers to a single photo recording by pressing the PHOTO button.
1 Press the DISC NAVIGATION button. 2 Use the f/e/d/c buttons to select English PLAYING BACK FROM DISC NAVIGATION SCREEN 3 Press the A button. Playback will start from the selected scene. the desired scene. The selected scene will be framed: This is called a “cursor”. Note: Pressing the d or c button will move the cursor to the preceding or following scene. Pressing the f or e button will move to preceding or following page.
English Before You Begin • Insert a disc or card recorded on this DVD video camera/recorder (p. 39, 40). • Turn the DVD video camera/recorder on (p. 29). 1<>2/3 PLAYING BACK LATEST RECORDED SCENE Playing Back 2 Press the C button. Playback will stop, and recording pause status will be restored. 1 Press the A button in the recording pause status. The DVD video camera/recorder will enter the playback mode, and the scene you have recorded last will be played back.
English 1<>2/3 CAPTURING PHOTO You can record an image displayed during playback of video as a photo on a card. 1 Press the MENU button at a scene you wish to capture during playback. 2 Choose “Edit”, “PHOTO Capture”, and then press A. The screen for verifying capture will appear. 3 Choose “YES”, and then press A. The captured scene will be recorded on a card. Note: • You can also press PHOTO button for the scene you wish to capture in step 1: The screen for verifying capture will appear.
1<>2/ English SKIP PLAYBACK OF MOVIE During playback, press the f or e button to locate the start of desired scene. Press e once: To skip to the first image of the scene following the one being played back, and start playback. Press f once: To return to the first image of the scene being played back, and start playback. Hold down e : To continuously locate the beginnings of scenes, starting from the scene following the scene being played back.
1 Press the MENU button Go T o To p En d Spec i f y during playback. 2 Choose the option ENTER RETURN (point you want to go to), and then press the A button. Top: To go to the start, and enter playback pause. End: To go to the end of last scene, and enter playback pause. Specify: To go to a specified point and enter playback pause. See the following for details. ●Specifying the point to view 1 Choose “Specify” in step 2 above, and then 3 Press the A button to enter the selection.
1<>2/3 English INFORMATION DISPLAY DURING PLAYBACK Various types of information on recording will be superimposed on playback image you are viewing. 9:27AM 2/10/2007 No display Playback information display ●Switching the information display mode Press the DISPLAY button: You can switch the display mode of on-screen information. When using disc: *1 *2 *3 *4 Recording mode*1 *5 Repeat play*5 Scene No. *6 06 0 : 00 : 1 6 006 Playback operation*6 Counter Disc type*4 Program No. or Play List No.
1 Press the DISC NAVIGATION button. 2 Use the f/e/d/c buttons to select English SELECTING MULTIPLE SCENES Repeat steps 2 and 3 to randomly select multiple scenes. the desired scene. 3 Press the SELECT button once: The selected scene will be framed in red and yellow. SELECTING CONSECUTIVE SCENES TOGETHER 1 Press the DISC NAVIGATION button. 2 Use the f/e/d/ c buttons to point the cursor at the first scene in the range of scenes you want to select.
The Disc Navigation mode will allow a variety of further operations. ● ● Copy from disc to card ● 3 Setting special effects to scenes / ● Editing of scenes 2 ● Available function > < Functions Available with Disc Navigation 1 English FUNCTIONS AVAILABLE WITH DISC NAVIGATION 1 You can delete unnecessary scenes, E* Reference page 77 – 79 combine scenes, or divide one scene. You can attach fade and skip to a scene, and change existing thumbnails.
Press the MENU button on the Disc Navigation screen: The menu screens for Disc Navigation and menu screens for disc and card will appear. Shaded items will also appear in Quick Menu display mode (see page 48). Refer to pages indicated for details of settings. ●When using DVD-RAM/DVD-RW (VR-mode) disc Scene Play list Edit (p. 77) Effect (p. 80) 1 Copy* (p. 83) Select (p. 85) Detail (p. 86) *1 DVD-RAM only Select Play Create Edit Title Delete (p. 91) (p. 91) (p. 90) (p. 92 – 95) (p. 96) (p.
English ●When using DVD-RW (VF-mode)/DVD-R/+RW disc Scene Select Detail (p. 85) (p. 86) Start → Current Current → End All (p. 85) (p. 85) (p. 85) Program Select Play (p. 87) (p. 88) Disc Go To Top End (p. 97) (p. 97) Finalize Disc (p. 100) Unfinalize Disc*5 (p. 101) Format Disc*5 (p. 97) Capacity (p. 98) 5 * DVD-RW (VF-mode)/+RW only Others Repeat Play (p. 102) TV type (p. 103) On Off 16:9 4:3 (p. 102) (p. 102) (p. 103) (p. 103) ●When using card Scene Delete Lock Select Detail (p.
1<3 DELETING SCENES (EDIT – DELETE) You may want to delete unwanted scenes. Scenes on DVD-RW (VF-mode)/DVD-R disc cannot be deleted, and menu item “Delete” will not appear with DVD-RW (VF-mode)/DVD-R disc. When using +RW, no scene can be deleted from the Disc Navigation menu (see page 68). 1 Press the DISC NAVIGATION button. 2 Select the scene to be deleted. 3 Press the MENU button. 4 Choose “Scene”, “Edit”, “Delete”, and then press the A button.
English ●Editing using submenu Press the MENU button before pressing the A button in step 5 (see page 77): The submenu will appear. Edit Select Go To Delete .......................To delete selected scenes Exit............................To restore the Disc Navigation screen Start → Current.......To select scenes from the start to the one that the cursor is on at the moment Current → End........To select scenes from the scene the cursor is on to the end All .............................
If you have recorded numerous short scenes, combining them will be facilitated by the use of Disc Navigation. Be sure to select consecutive multiple scenes. Combining scenes is possible only when “Category: All” is specified (p. 102). Stills cannot be combined. 1 Press the DISC NAVIGATION button. 2 Press the MENU button, choose “Scene”, 6 The screen for verifying combination will appear: Choose “YES”, and then press the A button. “Edit”, “Combine”, and then press A.
1< English DIRECTING SCENES EFFECTIVELY (EFFECT – FADE) You can add fading to the beginning and/or end of scene. There are three types of special effects: Fade Out Fade Out Fade In White: Fades in from white screen Fades out to white screen Fade Out Fade In Wipe: Fades in from black screen to vertical direction of screen Fades out from vertical direction of screen to black screen 1 Press the DISC NAVIGATION button. 2 Select the scene for adding special effects. 3 Press the MENU button.
You can specify “Skip” for scenes you do not want to play back: The selected scenes will be skipped. 1 Press the DISC NAVIGATION button. 2 Select the scene to be skipped. 3 Press the MENU button. 4 Choose “Scene”, “Effect”, “Skip”, and then press the A button. 6 Press the C button to quit. A skip icon “ ” will appear in the thumbnail of any scene for which skipping has been set.
1< English CHANGING IMAGES FOR THUMBNAILS (EFFECT – THUMBNAIL) Normally, the first image of the recorded scene is displayed as a thumbnail: You can choose another image of the scene for thumbnail. If you set a vivid image to thumbnail, you can know what you recorded from a glance at the Disc Navigation screen. 1 Press the DISC NAVIGATION button. 2 Select the thumbnail of the scene to be changed. 3 Press the MENU button. 4 Choose “Scene”, “Effect”, “Thumbnail”, and then press the A button.
1 Set the power switch to “O” or “N“. 2 Press the DISC NAVIGATION button. 3 Select the still to be copied. 4 Press the MENU button. 5 Choose “Copy” on the “Scene” menu screen, and then press the A button. 6 The “Copy to card” screen will appear: If you are sure you want to copy the selected still, press the A button. Note: • No movie can be copied. • If you press the MENU button before pressing the A button in step 6, the submenu screen will appear (p. 78). • See “Category” (p.
3 English LOCKING SCENES ON CARD (LOCK) You can lock each photo recorded on card so that it will not be deleted or edited by mistake. 1 Set the power switch to “P”. 2 Press the DISC NAVIGATION button. 3 Select the scene to be locked. 4 Press the MENU button. 5 Choose “Lock” on the “Scene” menu screen, and then press the A button. 6 The “Lock Set” screen will appear: If you are sure you want to lock the selected scene, press the A button.
English 1<>2/3 SELECTING SCENES USING MENU SCREEN (SELECT) You can use this “Select” function to select consecutive scenes at one time. This function is useful when there are numerous scenes. 1 Press the DISC NAVIGATION button. 2 Point the cursor at the first or last scene to be selected: When selecting all scenes, simply proceed with step 3. 3 Press the MENU button. 4 Choose “Select” on the “Scene” menu screen. 5 Choose “Start → Current”, “Current → End” or “All” and then press the A button.
1<>2/3 English DISPLAYING INFORMATION USING MENU SCREEN (DETAIL) You can display various information for a scene: the recording mode, recording date/time and length, special effects and movie quality mode. 1 Press the DISC NAVIGATION button. 2 Select the scene whose information you wish to know. Note: • If multiple scenes have been selected, the total recording time of the selected scenes (total number in case of stills) will appear. (When using disc) 3 Press the MENU button.
English Program WHAT IS “PROGRAM”? Program refers to an assembly of scenes recorded on the same date regardless of whether they are movie or still. Scene No. 1 Movie Scene No. 2 9:00AM Movie Scene No. 3 Scene No. 4 11:45AM Still 10:20AM Still Scene No. 5 1:30PM Movie Scene No. 6 5:20PM Still 8:00PM Program No.
1<>2/ English PLAYING BACK PROGRAM (PLAY) You can play back only the selected program. 1 Press the DISC NAVIGATION button. 2 Press the MENU button. 3 Use the f/e/d/c/A buttons to choose “Play” on the “Program” menu screen, and then press the A button. 4 Select the program to be played back, and then press the A button. Playback will start from the first scene of the selected program.
●Characters available for entering title You can use the SELECT button to select characters from the “capital letter”, “small letter” and “symbol” input modes. With step 5, select the input mode and then press the A button, or press the DISPLAY button.
1< English Play List WHAT IS “PLAY LIST”? You can create a play list on this DVD video camera/recorder by gathering your favorites from the recorded scenes. Since the play list is not created by copying data, you will consume little of the disc capacity by making a play list. On the other hand, deleting scenes on play list will not increase the remaining disc capacity for recording. Example: Program 1 Program 2 Play list 1 created Play list of up to No.
Select the desired one of multiple play lists: The Disc Navigation screen of the selected play list will appear. 1 Press the DISC NAVIGATION button. 2 Press the MENU button. 3 Use the f/e/d/c/A buttons to choose “Select” on the “PlayList” menu screen, and then press the A button. 4 Use the “Select Playlist” screen to select the play list you wish to display, and then press the A button. The Disc Navigation screen of the selected play list will be displayed.
1< English ADDING SCENES TO PLAY LIST (EDITING PLAY LIST) 1 Press the DISC NAVIGATION button. 2 Press the MENU button. 3 Use the f/e/d/ c/A buttons to choose “Edit” on the “PlayList” menu screen, and then press the A button. 4 Use the play list select screen to select the play list to which you wish to add scenes, and then press the A button. The scenes of the program that was displayed in step 1 will appear in the upper row, and the scenes of selected play list will appear in the lower row.
English 1< DELETING SCENES FROM PLAY LIST (EDITING PLAY LIST) 1 Press the DISC NAVIGATION button. 2 Display the editing screen of the play list to be edited. 4 Press the A button. Repeat steps 3 and 4 to delete other scenes. 5 Press the C button: The screen for verifying Perform steps 2 – 4 on page 92. 3 Move the cursor to the play list in lower row, and place the cursor on the scene to be deleted. exit will appear. Note: • You can also select multiple scenes (p. 73).
1< English DELETING SCENES USING SUBMENU FOR EDITING (EDITING PLAY LIST) You can delete scenes from play list on the editing screen. 1 Press the DISC NAVIGATION button. 2 Display the editing screen of the play list to be edited. Perform steps 2 – 4 on page 92. 3 Move the cursor to the play list in lower row. 4 Select the scene to be deleted, and then press the MENU button. 5 Choose “Delete” on the “Edit” menu screen, and then press the A button. Repeat steps 3 – 5 other scenes can be deleted.
English 1< ARRANGING ORDER OF SCENES (MOVE) 1 Press the DISC NAVIGATION button. 2 Press the MENU button. 3 Use the f/e/d/c/A buttons to choose “Select” on the “PlayList” menu screen, and then press the A button. Select the play list to be edited, and then press the A button. 4 Select the scene to be moved. You can also select multiple scenes (see pages 73 and 85). 5 Press the MENU button. 6 Choose “Scene”, “Edit”, “Move”, and then press the A button.
1< English CHANGING TITLE OF PLAY LIST (TITLE) The play lists have serial numbers in the order you have created them, along with the created dates/ times: You can change this title at any time. 1 Press the DISC NAVIGATION button. 2 Press the MENU button. 3 Use the f/e/d/c/A buttons to choose “Title” on the “PlayList” menu screen, and then press the A button. 4 Use the “Playlist Title” screen to select the play list whose title you wish to change, and then press the A button.
English 1<>2/3 Go To From the Disc Navigation screen, you can jump to the first scene or last scene, and playback will start from that point. TOP (END) 1 Press the DISC NAVIGATION button. 2 Press the MENU button. 3 Use the f/e/d/c/A buttons to choose “Top” or “End” on the “Go To” menu screen, and then press the A button. 4 Press A to start playback. Disc or Card Management 1<>/3 INITIALIZING DISC OR CARD (FORMAT DISC.
1< English PROTECTING DISC FROM WRITING (PROTECT DISC) You can protect a DVD-RAM/DVD-RW (VR-mode) disc in order to prevent recorded images from being erased or edited by mistake. Further recording will not be possible on protected disc until the protection is released. 1 Press the DISC NAVIGATION button. 2 Press the MENU button. 3 Use the f/e/d/c/A buttons to Note: • To release disc protection, perform the same procedure as above: The screen for verifying the release of protection will appear.
English 1< UPDATING CONTROL INFORMATION OF DVD-RAM/DVD-RW (VR-MODE) DISC (UPDATE CONTROL INFO.) Disc Navigation in this DVD video camera/recorder handles information on scenes, such as thumbnail, skip, fade, in a particular manner. If you use another device to edit a disc recorded on this DVD video camera/recorder, and then use the data again with Disc Navigation in this DVD video camera/recorder, the Disc Navigation may not appear normally.
<>2/ English FINALIZING DVD-RW/DVD-R/+RW DISC (FINALIZE DISC) Before You Begin • Be sure to use the AC adapter/charger to power the DVD video camera/ recorder when finalizing a DVD-RW/DVD-R disc. Finalization cannot be executed using a battery. If the DVD video camera/recorder is turned off during finalization and the finalization is interrupted, incorrect finalization will result, and at worst, the disc may be damaged.
You can unfinalize the DVD-RW (VF-mode)/+RW finalized on this DVD video camera/recorder so that additional recording can be done on it. 1 Press the DISC NAVIGATION button. 2 Press the MENU button. 3 Use the f/e/d/c/A buttons to choose “Unfinalize Disc” on the “Disc” menu screen, and then press the A button. The screen for verifying unfinalization will appear. 4 Choose “YES”, and then press the A button.
1 English Others DISPLAYING MOVIES OR STILLS INDEPENDENTLY (CATEGORY) Scenes recorded on this DVD video camera/recorder will be displayed in the order of recording regardless of whether they are movies or stills. You can use the Disc Navigation screen to switch this display to stills only or movies only. 1 Press the DISC NAVIGATION button. 2 Press the MENU button. 3 Use the f/e/d/ c/A buttons to choose “Category” on the “Others” menu screen, and then press the A button.
If you connect the DVD video camera/recorder with a disc recorded in wide mode to a TV with 4:3 display only and play it back, vertically long images will appear. You can specify “TV type: 4:3” to display 4:3 images on the TV. 1 Press the DISC NAVIGATION button. 2 Press the MENU button. 3 Use the f/e/d/c/A buttons to choose “TV type” on the “Others” menu screen, and then press the A button. 4 Choose “4:3”, and then press the A button.
1<>2/3 English Viewing on TV Screen Connecting to a TV CONNECTING TO A TV Use the provided AV/S output cable to connect the DVD video camera/recorder to a TV as follows: To S-VIDEO input jack* To AV output jack To video/audio input jacks Red AV/S output cable (provided) White Yellow * If your TV has an S-VIDEO input jack, you can connect the S-VIDEO plug to it. Note: • Using S-VIDEO will deliver clearer playback status.
1 Turn the TV on and set the input selector to “VCR” whichever applicable Video input. Refer to the TV instruction manual for how to switch the TV input. 2 Turn the DVD video camera/recorder on. The image that the DVD video camera/ recorder is seeing will appear on the TV screen. You can also monitor the image on the LCD screen or viewfinder of the DVD video camera/recorder. 3 Perform playback, recording or editing. Note: • Adjust the volume of sound on TV.
1<>2/ English Playback on DVD Recorder/Player PLAYING BACK DVD-RAM/DVD-RW (VR-MODE) DISC You can use a DVD recorder or DVD player that conforms to DVD-RAM/DVD-RW (VR-mode) to play back 8 cm DVD-RAM/DVD-RW (VR-mode) discs recorded on this DVD video camera/recorder. 1 Insert the disc into the DVD recorder/player and play it back. See the instruction manual for DVD recorder/player.
English 1<>2/3 Recording (Dubbing) Images Before You Begin • Before connecting this DVD video camera/recorder to another device, be sure to turn both devices off. • Insert a recordable disc*1 or card*2 into this DVD video camera/recorder (see pages 22 and 23). *1 No photo can be recorded on DVD-RW/DVD-R/+RW. *2 Only photos can be recorded: No video can be recorded.
1<>2/3 English Connecting to PC (DZ-GX5080A) Connecting to PC Software Provided You can utilize on PC the videos and photos recorded on this DVD video camera/recorder, using the PC connection cable and software CD-ROM provided, or generally available software. The provided CD-ROM contains the following software for Windows and Macintosh: Windows ImageMixer 3 This allows you to import the images recorded on the DVD video camera/recorder into PC.
English Before unpacking the provided software CD-ROM, read the License Agreement on page 149. Requirements of available PC [When using Windows] Windows® 2000 Professional SP3 or higher Windows® XP Home Edition or higher Windows® XP Professional Edition or higher See the following Websites to fine out whether the provided software can be used on Windows Vista: URL:http://www.pixela.co.jp/oem/hitachi/e/index.html URL: http://dvdcam-pc.support.hitachi.
English Installing Software [When using Windows] 1 Turn the PC on. 5 Checking license agreement: If you have been using the PC, terminate all running software programs. 2 Insert the provided CD-ROM into the CD- Carefully read the license agreement: If you accept the contents, choose “I accept the terms of the license agreement”, and then click “Next”. ROM drive of PC. The installer will automatically start, and the “Choose setting language” screen will automatically appear.
9 After installation is finished, the screen for The screen for setting the video system will appear, and then click “Next”. prompting restart will appear: Click “Finish” to restart the PC. After restart, remove the CD-ROM from the PC. Installing the software is now complete. Click 8 Executing installation: The setups for installation are now complete. Click “Install” to execute installation.
English [When using Macintosh] 1 Turn the Macintosh on, and insert the 5 Choose the installation destination and type provided CD-ROM into the CD-ROM drive of Macintosh. 2 Double-click the DVDCAM5000 icon displayed on desktop. 3 Double-click the icon of “ImageMixer 3 for DVDCAM.pkg” displayed on screen. The installer will start: Click “Continue”. The “Read Me” screen will appear: Click “Continue”. 4 Checking license agreement: The license agreement screen will appear.
Use the provided PC connection cable to connect the DVD video camera/recorder to PC as shown below. To USB connection terminal To PC connection terminal PC connection cable (provided) Note: • The PC connection cable does not supply power to the DVD video camera/recorder: Use the AC adapter/charger to power the DVD video camera/recorder. • Before connecting the DVD video camera/recorder to PC, disconnect any cables or camera accessories (external video flash, external microphone, etc.
English When connecting the DVD video camera/recorder to PC, the DVD video camera/recorder will be recognized as a drive. The drive will appear on screen as follows: [When using Windows] If the DVD video camera/recorder is connected to PC with its power switch set to “O” or “N”, it will be recognized as an optical disc drive, and a disc set in the DVD video camera/recorder can be accessed. (The shape of icon and drive name, such as G:, will depend on the software environment used.
Camera operation using operation buttons on DVD video camera/recorder Ejection of disc using DISC EJECT button on DVD video camera/recorder Power off using power switch Do not use Explorer to operate any video files recorded on disc: Use the provided software. Do not use the PC to delete any photos recorded on a DVD-RAM. • Disc and card cannot simultaneously be accessed. • • • • A disc loaded in the DVD video camera/recorder can be ejected by operating the PC.
English ●When removing SD memory card [When using Windows] Make sure that the SD memory card is not being accessed by the PC software on PC, and that the CARD ACCESS indicator on DVD video camera/recorder (see page 7) is not lit or blinking, and then remove the SD memory card from DVD video camera/recorder. The CARD ACCESS indicator may be lit or blinking for a while after a file in PC is written to the SD memory card: Wait until the CARD ACCESS indicator goes out.
[When using Windows] 1 Before unplugging the PC connection cable from PC, terminate the application and then click the “Hardware Removal” icon on task tray at the bottom right of Windows screen. English BEFORE TERMINATING PC CONNECTION (UNPLUGGING PC CONNECTION CABLE)/CHANGING OVER POWER SWITCH 2 Choose “USB mass storage device”. The drive name (E:, etc.) will depend on the PC used. 3 A message showing that “hardware removal” is possible will appear. Unplug the PC connection cable.
English Using ImageMixer 3 for Windows ImageMixer 3 allows you to capture the images recorded on the DVD video camera/recorder into PC, edit the video file, and create a DVD-Video or DVD-VR using the video file. The following shows the basic operation of ImageMixer 3. Refer to the electronic instruction manual that can be read on PC for detailed instructions about ImageMixer 3: While ImageMixer 3 is being activated, click “Help” - “ImageMixer Help (F1)” to display this manual.
You can use the images recorded on the DVD video camera/recorder to create a disc that can be viewed on DVD recorders/players. * A DVD-RW/DVD-R/+RW recorded on this DVD video camera/recorder must be finalized on this DVD video camera/recorder (see page 100). 1 Insert a disc with the recorded images to be saved into the DVD video camera/recorder, and connect the DVD video camera/recorder to a USB port of PC. 2 Start ImageMixer 3.
English 6 Select the images from which you wish to create a DVD-Video, and then click “Import”. The image recorded on disc will appear. Select the chapter to be imported into PC, and then click “Import”: Importing into PC will start. Eject button Photo button • To import multiple chapters, click the desired chapters while holding down the Ctrl key. 7 Click “Authoring” and create a DVD-Video menu. Clicking “Authoring” will display the editing screen of DVD-Video menu.
English 8 Click “Write” to create a DVD-Video. Clicking “Write” will display the screen for writing. Check “Create disc”, perform setting for write, such as choosing DVD write drive, and then set a blank DVD-RW/DVD-R into the drive. Clicking “Preview” will allow you to check any image of DVD to be created. Click Click Click Click the “Write” button: The screen for setting write will appear. After checking the settings, click “OK”: Writing will start.
English Using ImageMixer 3 Mac Edition for DVDCAM ImageMixer 3 Mac Edition for DVDCAM allows you to import the images recorded on this DVD video camera/recorder into Macintosh as a video file, play back the video file, edit it and create a DVD-Video. The following shows the basic operations of ImageMixer 3 Mac Edition for DVDCAM.
ImageMixer 3 allows you to import movie files recorded on disc into Macintosh as MPEG files. Using ImageMixer 3, you can play back the imported video file, combine images, cut-edit them; and also create a DVD-Video. 1 Load a disc with the images you wish to import into the DVD video camera/recorder, and connect it to the USB port of Macintosh. 2 Start ImageMixer 3 for DVDCAM. 3 Choose Hitachi DVDCAM.
English CREATING DVD-VIDEO USING IMAGES RECORDED ON DISC You can use the images recorded on the DVD video camera/recorder to create a disc that can be played on other DVD recorders/players. * A DVD-RW/DVD-R/+RW recorded on this DVD video camera/recorder must be finalized on this DVD video camera/recorder (see page 100) before importing the images on it. 1 Load a disc with the images you wish to import into the DVD video camera/recorder, and connect it to the USB port of Macintosh.
You can check the video files in a DVD list. Select the video file you wish to check and click the Playback icon at the bottom of screen. When checking the video files in list, click “Write” at the bottom of screen: Note: • If you load a written DVD-RW in the write drive, a dialog “Are you sure you want to delete the contents of disc?” will appear. Deleting the content of disc will erase all data on the disc: Carefully check the content of disc.
English Uninstalling Software [When using Windows] Use “Control Panel” to open “Add or Remove Applications”, choose the application to be uninstalled from the displayed list of applications, and then click the “Change/Remove” button. Note: • After uninstalling software, be sure to restart the PC. • Administrator authority is required for uninstallation.
Use the AC adapter/charger to power the DVD video camera/recorder when connecting it to PC: The DVD video camera/recorder can also use a battery, but if the DVD video camera/recorder cuts off during data transfer, important recordings will be lost: If data is being written to disc, the disc will then be unusable.
English Subsidiary Information Introduction to Optional Accessories CAMERA ACCESSORIES Wide conversion lens (DZ-WL1)*1 (p. 51) Tele-conversion lens (DZ-TL1)*1 (p. 51) Step-up ring (DZ-SR3437) (p. 51) • When using camera accessories, be sure to read the instruction manuals for each accessory. *1 You will need the optional step-up ring when attaching these lenses. Be sure to remove the lens hood at the front of lens before attaching the lens.
English Trouble Messages A message may appear while you are operating the DVD video camera/recorder. If a message appears, refer to the following table and take appropriate corrective action. Messages are arranged in alphabetical order. Message Cause & Troubleshooting Reference page (1) Data error in a part of image file. Repair data now? (2) Found error in image file. Repair data now? (3) Data error in all image file.
English Message Cannot combine. Deselect PHOTO scenes. Cause & Troubleshooting Select only movies and combine them. 79 Cannot combine. Select Select a range of at least 2 scenes to be combined, and then multiple scenes. combine them. Cannot delete scenes. Reference page This may occur when scene that was edited for division, etc. is to be deleted. Combine the divided scenes, and then delete them. 79 77, 79 Cannot divide scene.
Cause & Troubleshooting Reference page Card error has occurred. Formatting is not complete. The card may be damaged: Use another card. Card error has occurred. Keep card inside & restart. Card error could have occurred during editing of scenes. Turn off the DVD video camera/recorder with the card being used inside, connect the AC adapter/charger, and then power the DVD video camera/recorder again. 24, 29 Card full. Delete unnecessary stills and try the card, or use another card.
English Message Cause & Troubleshooting Disc error has occurred. • Use another disc. • See *3 and *4 on page 135. Reference page 10, 22 • Mismatch in recording information may be caused by editing done on some device other than this DVD video camera/ recorder. Initialize the disc or use another disc. • Initializing the disc will erase all data on it. 97 Disc full. Cannot execute. Delete unnecessary scenes before using this disc, or use another disc. 77 Disc has no data.
Reference page Error occurred. Please replace disc or format disc. • Abnormality has occurred with the DVD-RAM/DVD-RW/+RW disc to be repaired. Initialize the disc before using it, or use the another disc. Initializing the disc will erase all data on it. • See *2 on page 134. 97 Error occurred. Please replace disc. An abnormality occurred with a DVD-R disc to be repaired. Replace the disc. — Finalize may not be This message will appear when power is supplied again and the complete.
English Message Cause & Troubleshooting This disc cannot be used. Please replace disc. A disc that cannot be used on this DVD video camera/recorder has been loaded. Check the type of disc. This disc is finalized. Finalize is not required. This message will appear if you press the FINALIZE button with a finalized DVD-RW/DVD-R/+RW loaded in this DVD video camera/ recorder. Finalizing the disc is not necessary.
Troubleshooting Check to see the following before asking for a repair. If the suggested solution still cannot restore the DVD video camera/recorder to normal, do not attempt to repair it yourself, but consult your dealer. Power supplies Symptom Battery cannot be charged. Cause and Correction Reference page Is the ambient temperature too low or too high? Charge the battery at 50 – 86ºF (10 – 30ºC). Is the battery abnormally hot? Remove the battery, leave it for a while to cool down, then charge it.
English Symptom Power turns off immediately after being turned on. Cause and Correction Reference page Is battery charged? Charge it. When power is turned on, the LCD screen will turn on and off. 25 The ACCESS/PC indicator is blinking, even though nothing is displayed on LCD monitor screen. Power goes off unexpectedly.
Symptom Cause and Correction Is a finalized disc in the DVD video camera/recorder? Is proper type of disc inserted? Is power switch set to match the recording medium? Is the disc protected? Does disc have remaining recording space? Reference page Pressing the REC button will not start recording. • • • • • Recording starts but stops immediately. Is disc scratched or does dirt or fingerprint adhere to it? Clean the disc. If there is still no improvement, replace the disc. No photo can be recorded.
During playback English Symptom Cause and Correction Recognition of disc is not complete. Is disc dirty? Use the provided disc cleaning cloth to clean it. Pressing the playback button will not start playback. Has the image been recorded by devices other than this DVD video camera/recorder? Playback of image recorded on devices other than this DVD video camera/recorder may be impossible on this DVD video camera/ recorder.
Symptom No drive icon appears on PC. Cause and Correction Reference page The DVD video camera/recorder is not turned on. Check the power supply. 29 Turn PC off and then disconnect the PC connection cable. Turn PC on again, and then use the PC connection cable to connect the DVD video camera/recorder to PC. — Make sure the PC connection cable is completely plugged into this DVD video camera/recorder.
English Symptom Cause and Correction Reference page When the time stamp of file in DVD-RAM is viewed on PC, it is different from the actual recording time. The file system of this DVD video camera/recorder is operated on Greenwich Mean Time (GMT), and time lag information has not been set. With Windows® as of January, 2006, the time stamp of file viewed on Explorer looks different from the actual recording time. The actual recording time will appear for date/time indication on playback screen.
Disc cannot be removed. (Cover will not open.) Disc cover cannot be closed. Operating sound is heard cyclically. Cause and Correction Reference page • Did you detach the battery or AC adapter/charger before setting the power switch to “OFF”? Is the battery charged? Connect a charged battery or the AC adapter/charger, and then press the DISC EJECT button to remove the disc.
English System Reset If the DVD video camera/recorder does not operate normally, perform “System Reset”: The DVD video camera/recorder may recover to normal. “System Reset” will reset all settings to factory defaults. The date and time will also be reset: Set the date and time again before using the DVD video camera/recorder. 1 Set the power switch to “OFF” to turn the DVD video camera/reorder off. Detach the battery or AC adapter/charger.
Initial Setup Default Setting method Beep On p. 32 Power Save Off p. 32 Record LED On p. 33 Language English p. 32 Demo Mode Auto p. 33 *1 "100x" will appear on DZ-GX5000A. • Some items will not appear depending on the disc or card inserted. Major Specifications CCD 1/6-inch interlaced Total number of pixels approx. 680,000 Number of effective pixels Movie: approx. 340,000 Still: Lens approx. 340,000 DZ-GX5080A/ : DZ-GX5020A F2.0 – 4.1 f = 1/16" – 2-11/16" (2.
English Maximum number of recordable stills Recording format DVD-RAM disc (per side) approx. 999 SD memory card (when using 32 MB card) approx. 180 (in FINE mode) DVD-RAM/DVD-RW (VR-mode) disc Movie: If movies and stills are mixed on one disc, the recordable number will decrease. Varies depending on the recording quality and the type of card. (p.
English STORAGE CAPACITY OF DISC Movie recordable time on one disc (on single side) (when recording only movies) Recording quality Movie recordable time Application XTRA Approx. 18 min *1 Best quality FINE Approx. 30 min *2 High quality STD Approx. 60 min *3 Standard quality *1: Variable bit recording (recording of more than 18 minutes on disc may be possible because the transfer rate varies automatically between approx. 3 - 10 Mbps) *2: Fixed bit rate: Approx.
English To Order in the United States BY PHONE Service Hotline: 1-800-HITACHI (1-800-448-2244) To Order in Canada FOR AUTHORIZED HITACHI SERVICE FACILITY IN CANADA Please consult the following telephone number Service Direct: 1-800-HITACHI (1-800-448-2244) Choisissez les articles qui vous conviennent et passez commande. Service Direct: 1-800-HITACHI (1-800-448-2244) TO ORDER ACCESSORIES (Canada only) BY PHONE POUR COMMANDER DES ACCESSOIRES (Canada seulement) PAR TÉLÉPHONE HITACHI CANADA LTD.
Numerics 16:9 ................................................................ 61 8 cm bare disc .................................................. 22 A AC adapter/charger ........................................... 24 ACCESS/PC indicator ................................. 39, 40 Add (edit) ......................................................... 93 All programs ..................................................... 87 Auto (program AE) ............................................ 56 Autofocus .............
English O Optical 25× zoom lens ........................................50 Optical 30x zoom lens ........................................50 OSD Output ......................................................64 P PHOTO capture ................................................69 Play (play list) ...................................................91 Play (program) ..................................................88 Play list ............................................................90 Add scenes ............
This Agreement will take effect at the moment you open the package of the storage device (CD-ROM) provided with this product, if you agree to the terms herein. If you do not accept the terms of this Agreement, immediately return the unopened package of storage medium and enclosed materials (printed matter, external package, and all others) to your dealer, or return only the package of storage medium to your dealer. Consult your dealer for any refund on the unused product.
Warranty Limitations Important Notice: The Limited Warranty provided by Hitachi does not cover: A. Cabinet (exterior finish items), Battery packs, Accessories, Lens Cleanings, Head Cleanings, DVD Disc Damage, Video Tape Damage, or Software Modifications. B.
HITACHI LIMITED WARRANTY Hitachi America, Ltd., Ubiquitous Platform Systems Division (“Hitachi,”) warrants this component in duration as stated below: Hitachi America, Ltd.
REGISTER YOUR PRODUCT ON-LINE AT HITACHI.US/TV OR MAIL IN TO ADDRESS ON THIS CARD. HITACHI “In order to allow Hitachi to better serve customer needs, please complete this card and return it to Hitachi America, Ltd., Ubiquitous Platform Systems Division. Completion of this card is not required in order to validate your Hitachi limited warranty, but would assist us in developing better services and programs for our customers.” (Please print or type) Model No. Serial No.
Register your product on-line at hitachi.US/tv or mail this portion to the following address Attn:Warranty Department Hitachi America, Ltd.
VIDEO PRODUCT PRODUIT VIDÉO YOUR VOTRE WARRANTY GARANTIE HITACHI CANADA LTD DIGITAL MEDIA DIVISION 1-2495 Meadowpine Blvd.
IMPORTANT REGISTER YOUR PRODUCT ON-LINE AT: WWW.HITACHI.CA IMPORTANT ENREGISTREZ VOTRE PRODUIT EN-LIGNE À: WWW. HITACHI.CA “In order to allow Hitachi to better serve our customers’ needs, please complete this card and return it to Hitachi Canada Ltd. Completion of this card is not required in order to validate your Hitachi limited warranty, but would assist us in developing better services and programs for our customers.
Register your product on-line at Hitachi.ca or mail to the address on this card. Enregistrez votre produit en ligne à Hitachi.ca ou par la poste à l’adresse indiquée sur cette carte. ATT:WARRANTY DEPARTMENT HITACHI CANADA LTD. 1-2495 MEADOWPINE Blvd.
DVDCAM PC Software Support Center URL http://dvdcam-pc.support.hitachi.ca/ Support Center phone numbers for software provided: Números de teléfono del Centro de soporte para el software suministrado: Numéros de téléphone de l’Assistance Clientèle pour le logiciel fourni : PIXELA CORPORATION +1-800-458-4029 (Toll-free) +1-213-341-0163 URL:http://www.pixela.co.jp/oem/hitachi/e/index.html HITACHI AMERICA, LTD. HITACHI CANADA LTD.