
Safety Instructions


9
English
12. About the protection function
This tool has a built-in protection circuit for preventing
damage to the unit in the event of an abnormality.
Depending on the nature of the abnormality, the display
lamp will fl ash as shown in Table 2 and the unit will
cease to operate. In such cases, verify the problem
indicated by the fl ashing and take whatever steps are
necessary to correct the problem.
Table 2
Display
lamp
fl ashing
Cause Solution
Flash
The tool has
shut down
due to internal
temperatures
which exceed the
unit’s specifi ed
temperature.
(Temperature
increase protection
function)
Turn off the tool and
allow it to cool down
for about 15 to 30
minutes.
Once the temperature
is down, the unit will
recover when the
impact rate selector
switch is pressed.
Flash
The tool has
shut down due
to an overload
resulting from
the application of
excessive pressure
to the unit.
(Overload
protection function)
Press the impact rate
selector switch to
recover. Try to avoid
tasks that will apply
excess pressure to
the unit.
Flash
1
Tool fails to
startup or has
shut down due
to the unit being
connected to a
power source
whose voltage
is either too high
or too low.
2
Tool has shut
down due to a
voltage signal
read error that
occurred from
the unit’s power
cord being
plugged in and
out at short
intervals.
(Circuit protection
function)
1
Connect the unit
to a power supply
matching the input
voltage specifi ed
on the nameplate.
Press the impact
rate selector switch
to recover.
2
Allow for an interval
of 3 seconds
or more when
plugging the power
cord in and out.
Press the impact
rate selector switch
to recover.
Flash
Tool fails to startup
or has shut down
due to a sensor
signal read error.
(Control monitoring
function)
Press the impact rate
selector switch to
recover. Repair may
be required if this error
continuously occurs.
NOTE
Repair may be required if the display lamp continues
to fl ash after taking all necessary steps to correct the
problem. If the problem persists, please arrange for
repairs.
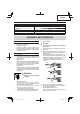
HOW TO USE THE DEMOLITION HAMMER
1. After placing the tip of the tool on concrete surface,
switch ON.
The switch can be turned ON if the trigger is pulled and
OFF when it is released.
If the ON-Lock switch is pressed while the trigger for
the switch is pulled, even if your fi nger is released from
the trigger, the switch remains ON - convenient for
continuous operation.
To turn the switch OFF, pull the trigger again, and then
the ON-Lock switch comes off .
2. By utilizing the empty weight of the machine and by
fi rmly holding the hammer by both hands, you can
eff ectively control the subsequent recoil motion.
Proceed at a moderate work-rate, the use of too much
pushing force will impair effi ciency.
3. Even when the switch is on, the motor is running and
the tool head is pressed to the demolition surface,
the hammer sometimes does not start operating. In
these instances, turn the switch off , press the tool
head against the demolition surface again, and turn
the switch on and off . This should start the hammer
operating. Repeat this procedure for several minutes,
and the hammer will heat, after which it will operate
when switched to ON-LOCK.
Fig. 10
000BookH45MEYNA.indb9000BookH45MEYNA.indb9 2016/06/0917:38:432016/06/0917:38:43