
user manual


2.3 Graphical User Interface (GUI)
2 - 52
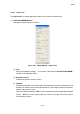
(1) Type I manual stage
It is for image shift operation. Move the mouse pointer
to a position and press down
left or right button. The pointer will be changed to mark. Move mouse to target
position while holding down the button and then release the button.
If the above target position is near the center of the image area, the mouse trace line is
changed and the target position is moved to the center of image.
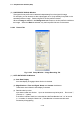
(2) Type II motorized stage
All 5 axes are controlled with stage control tools.
Refer to <3.5.7.4 Operation Methods Used to Move the Specimen Stage> for operation
procedure.
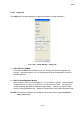
2.3.9 Setup Dialog Window
The Setup dialog window has four tabs. To open the dialog window, use the following
operation.
(1) Click the Setup
button on the Tool button area of the Operation panel.
(2) Select following commands from the Setup menu.
Setup - Optics Setup: Opens Optics tab
Setup - Condition Load: Opens Op. Cond tab
Setup - Condition Save: Opens Op. Cond tab
Setup - Image Display: Opens Image tab
Setup - Photo Condition: Opens Record tab
Setup - Data Display: Opens Record tab
(3) Click the Detail button on the Cond tab of the Operation panel.
(4) Click the Load/Save button on the Cond tab of the Operation panel.
(5) Clicking Accelerating voltage on the Control Panel and the Emission display area:
Optics tab