Instruction and safety manual Manuel d'instructions et de securite Instrucciones y manual de seguridad Model Modèle Modelo Stapler Agrafeuse Grapadora N 5024A DANGER Improper use of this Stapler can result in death or serious injury! This Manual contains important information about product safety. Read and understand this Manual before operating the Stapler. Keep this Manual available for others before they use the Stapler. Never allow anyone who has not reviewed this manual.
English CONTENTS Page IMPORTANT INFORMATION .................................................. 3 DEFINITIONS OF SIGNAL WORDS ....................................... 3 SAFETY IMPORTANT SAFETY INSTRUCTIONS FOR USING STAPLERS .................................................... 4 EMPLOYER’S RESPONSIBILITIES .......................................... 6 OPERATION NAME OF PARTS .................................................................... 7 SPECIFICATIONS .................................................
English IMPORTANT INFORMATION Read and understand tool labels and all of the operating instructions, safety precautions and warnings in this manual before operating or maintaining this stapler. Failure to follow warnings could result in DEATH or SERIOUS INJURY. Most accidents that result from the operation and maintenance of Staplers are caused by the failure to observe basic safety rules or precautions.
English SAFETY IMPORTANT SAFETY INSTRUCTIONS FOR USING STAPLERS READ ALL INSTRUCTIONS DANGER 1. OPERATORS AND OTHERS IN WORK AREA MUST WEAR SAFETY GLASSES WITH SIDE SHIELDS. When operating the Stapler, always wear safety glasses with side shields, and make sure others in work area wear safety glasses, too. Safety glasses must conform to the requirements of American National Standards Institute, ANSI Z87.1 and provide protection against flying particles both from the front and side.
English SAFETY — Continued WARNING 8. STORE STAPLER PROPERLY. When not in use, the Stapler should be stored in a dry place. Keep out of reach of children. Lock the storage area. 16. DO NOT LOAD FASTENERS WITH TRIGGER PULLED OR PUSH LEVER DEPRESSED. When loading fasteners into the Stapler or when connecting the air hose, 1) do not pull the trigger; 2) do not depress the push lever; and 3) keep the Stapler pointed downward. 9. KEEP WORK AREA CLEAN. Cluttered areas invite injuries.
English SAFETY — Continued WARNING 24. DO NOT OVERREACH. 29. HANDLE STAPLER CORRECTLY. Keep proper footing and balance at all times Operate the Stapler according to this Manual. Never allow the Stapler to be operated by children, individuals unfamiliar with its operation or unauthorized personnel. 25. NEVER USE STAPLER WHICH IS DEFECTIVE OR OPERATING ABNORMALLY.
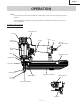
English OPERATION NOTE: The information contained in this Manual is designed to assist you in the safe operation of the Stapler. Some illustrations in this Manual may show details or attachments that differ from those on your own Stapler.
English SPECIFICATIONS 70 – 120 psi (4.9 – 8.3 bar 5 – 8.5 kgf/cm2) Operating pressure 14-3/8" × 9-13/16" × 3-11/32" (365 mm × 250 mm × 85 mm) Dimensions Length × Height × Width Weight 4.7 lbs. (2.1 kg) Nail capacity 150 Staples .037 ft3/cycle at 100 psi (1.05 ltr/cycle at 6.9 bar) (1.05 ltr/cycle at 7 kgf/cm2) Air consumption Air inlet 3/8" NPT Thread OPTIONAL ACCESSORIES STAPLE SELECTION Only staples shown in the Table below can be driven with this Stapler.
English WARNING Dust Cap 䢇 Never connect Stapler to pressure which potentially exceeds 200 psi (13.7 bar 14 kgf/cm2). 䢇 Never use non relieving coupler on Stapler. 1. Power source 䡬 Use only clean, dry, regulated compressed air as a power source for this Stapler. 䡬 Air compressors used to supply compressed air to this Stapler must comply with the requirements of the latest version of ANSI Standard B 19.3 “Safety Standard For Compressors For Process Industries.
English 䡺 COLD WEATHER CARE 䡬 Do not store the Stapler in a cold weather environment. Keep the Stapler in a warm area until beginning the work. 䡬 If the Stapler is already cold, bring it in a warm area and allow the Stapler to warm up before use. 1 Reduce the air pressure to 40 psi (2.8 bar 2.8 kgf/ cm2). 2 Remove all staples from the Stapler. 3 Connect the air hose and free-fire (blank-fire) the Stapler. The lowered air pressure will be enough to freefire the Stapler.
English 䡺 THE STAPLER MUST OPERATE. (5) With the Stapler off the workpiece, pull the trigger. Depress the push lever against the workpiece. 䡺 THE STAPLER MUST OPERATE. (6) If no abnormal operation is observed, you may load staples in the Stapler. Drive staples into the workpiece that is the same type to be used in the actual application. 䡺 THE STAPLER MUST OPERATE PROPERLY. Staple ADJUSTING AIR PRESSURE Magazine (3) Pull the staple feeder backward.
English 䢇 Choice of triggering method is important. Please read and understand “METHODS OF OPERATION” found below. 䢇 Never place your hands or feet closer than 8 inches (200 mm) from firing head when using. 䢇 Do not drive staples on top of other staples or with Stapler at too steep of an angle; staples can ricochet and hurt someone. 䢇 In order to avoid double fire or unwanted ejection of a staple due to bouncing of the Stapler.
English THE OPTIONAL SEQUENTIAL TRIP MECHANISM (SINGLE SHOT PARTS) is for use where precision fastener placement is desired and must be operated in accordance with the following “Method of Operation”. You must first depress the push lever (upward position) where you want to drive a staple and then pull the trigger. After the each staple is driven, completely release the trigger and lift the tool off the work surface.
English MAINTENANCE NOTE: The information contained in this Manual is designed to assist you in the safe maintenance of the Stapler. Some illustrations in this Manual may show details or attachments that differ from those on your own Stapler. MAINTENANCE AND INSPECTION 2. Maintenance chart (See page 15) 3. Operator troubleshooting (See page 15) Read section titled “SAFETY” (pages 4 – 6). 4.
English Maintenance chart ACTION WHY HOW Drain air line filter daily. Prevent accumulation of moisture and dirt. Open manual petcock. Keep lubricator filled. Keep the Stapler lubricated. Fill with Hitachi pneumatic tool lubricant. Clean filter element — then blow air through filter in direction opposite to normal flow. Prevent clogging of filter with dirt. Follow manufacturer’s instructions. Clean magazine and feeder mechanism. Prevent a jam. Blow clean daily.
Français INFORMATION IMPORTANTE Lire et bien assimiler toutes les étiquettes de l’outil ainsi que toutes les instructions de fonctionnement, les consignes de sécurité et les avertissements de ce mode d’emploi avant d’utiliser ou d’entretenir cette agrafeuse. Le non respect des avertissements pourrait entraîner la MORT ou des BLESSURES GRAVES.
Français SECURITE CONSIGNES DE SECURITE IMPORTANTES POUR L’UTILISATION DE L’AGRAFEUSE LIRE TOUTES CES INSTRUCTIONS DANGER 1. LES OPÉRATEURS ET LES AUTRES PERSONNES DANS L’AIRE DE TRAVAIL DOIVENT PORTER DES LUNETTES DE PROTECTION AVEC VISIÈRES LATÉRALES. Quand on utilise l’agrafeuse, toujours porter des lunettes de protection avec visières latérales, et veiller à ce que les autres personnes dans la zone de travail en portent également.
Français SECURITE — suite AVERTISSEMENT 8. RANGER LE CLOUEUR CORRECTEMENT. Quand on ne s’en sert pas, ranger l’agrafeuse dans un endroit sec. La ranger hors de portée des enfants. Verrouiller la zone de rangement. 16. NE PAS CHARGER DE AGRAFES SI LA GACHETTE OU LE LEVIER-POUSSOIR SONT ENFONCES. Quand on charge des agrafes dans l’agrafeuse ou qu’on raccorde le tuyau d’air, 1) ne pas tirer sur la gâchette ; 2) ne pas actionner le levier-poussoir ; et 3) diriger l’agrafeuse vers le bas. 9.
Français SECURITE — suite AVERTISSEMENT 24. NE PAS TROP SE PENCHER. Conserver une bonne assise et un bon équilibre à tout moment. l’influence de médicaments, d’alcool ou de toute autre substance soporifique. 29. MANIPULER L’AGRAFEUSE CORRECTEMENT. Utiliser l’agrafeuse en suivant les instructions du manuel. Ne jamais permettre que l’agrafeuse soit utilisée par des enfants, des personnes non familiarisées avec son fonctionnement ou des personnes non autorisées. 25.
Français UTILISATION REMARQUE : Les informations contenues dans ce manuel ont pour but d’aider l’opérateur à utiliser l’agrafeuse en toute sécurité. Certaines des illustrations du manuel peuvent montrer des détails ou des accessoires qui diffèrent de ceux de votre agrafeuse.
Français SPECIFICATIONS 70 – 120 psi (4,9 – 8,3 bars 5 – 8,5 kgf/cm2) Pression d’utilisation 14-3/8" × 9-13/16" × 3-11/32" (365 mm × 250 mm × 85 mm) Dimensions Longueur × Hauteur × Largeur Poids 4,7 lbs.
Français 3. Tuyau d’air ALIMENTATION D’AIR Le tuyau d’air doit avoir une pression de travail minimum de 150 psi (10,4 bars 10,6 kgf/cm2) ou 150% de la pression maximum produite par le système, à savoir la plus élevée. DANGER 䢇 NE JAMAIS utiliser d’oxygène ni aucun autre gaz en bouteille. Il pourrait se produire une explosion. 4. Couplage de tuyau 䡬 L’agrafeuse s’installe comme suit : Retirer le joins à poussière situé sur l’arrivée d’air. Installer un bouchon mâle 3/8 NPT sur l’arrivée d’air.
Français 䡺 䡬 Si l’on ne possède pas de lubrificateur, mettre 5 à 10 gouttes d’huile de machine pneumatique Hitachi dans le bouchon d’air de l’agrafeuse deux fois par jour. LE LEVIER-POUSSOIR ET LA GACHETTE DOIVENT FONCTIONNER AVEC SOUPLESSE. Gâchette ENTRETIEN PAR TEMPS FROID 䡬 Ne pas ranger l’agrafeuse dans un environnement froid. La laisser dans un endroit chaud jusqu’à ce que l’on soit prêt à travailler.
Français 䡺 L’AGRAFEUSE DOIT FONCTIONNER. (5) L’agrafeuse ne touchant plus la pièce, tirer sur la gâchette. Actionner le levier-poussoir contre la pièce. (2) Placer la bande d’agrafes sur le magasin. Vérifier que la bande d’agrafes glisse en douceur sur le magasin. 䡺 L’AGRAFEUSE DOIT FONCTIONNER. (6) Si l’on ne remarque aucun fonctionnement anormal, on pourra mettre des agrafes dans l’agrafeuse. Enfoncer les agrafes dans un matériau du même type que celui du travail proprement dit.
Français AVERTISSEMENT 䢇 NE JAMAIS diriger l’outil vers soi ni vers quelqu’un d’autre dans l’aire de travail. 䢇 TOUJOURS éloigner le doigt de la gâchette quand on n’effectue pas d’agrafage afin d’éviter tout risque de déclenchement accidentel. 䢇 Le choix de la méthode d’utilisation de la gâchette est important. Lire et bien assimiler la “METHODES D’UTILISATION” ci-dessous. 䢇 Ne jamais approcher les mains ni les pieds à moins de 8 pouces (200 mm) de la tête d’agrafage.
Français Si les agrafes sont enfoncées trop loin ou pas assez dans la pièce, régler le clouage dans l’ordre suivant. 1 DEBRANCHER LE TUYAU D’AIR DE L'AGRAFEUSE. AVERTISSEMENT 䢇 Ne pas mettre le doigt sur la gâchette sauf pendant une opération de clouage, car un contact accidentel du levier-poussoir sur l’opérateur ou sur les personnes alentour pourrait entraîner des blessures graves. 䢇 Ne pas approcher les mains ni le corps de la section de sortie des clous.
Français ENTRETIEN REMARQUE : Les informations contenues dans ce manuel ont pour but d’aider l’opérateur à utiliser l’agrafeuse en toute sécurité. Certaines des illustrations du manuel peuvent montrer des détails ou des accessoires qui diffèrent de ceux de votre agrafeuse. 2. Tableau d’entretien (voir page 28) ENTRETIEN ET INSPECTION 3. Guide de dépannage de l’opérateur (voir page 28) Lire la section intitulée “SECURITE” (pages 17 – 19). 4.
Français Tableau d’entretien ACTION Purger le filtre de la ligne d’air tous les jours. Veiller à ce que le lubrificateur soit toujours plein. Nettoyer l’élément du filtre — puis souffler de l’air dans le filtre dans le sens inverse du débit normal. Nettoyer le magasin et le mécanisme de l’alimenteur. Veiller à ce que le levier- poussoir fonctionne toujours correctement. Graisser l’agrafeuse après l’utilisation. Purger le compresseur d’air. POURQUOI Eviter l’accumulation d’humidité et de poussière.
Español INFORMACIÓN IMPORTANTE Lea y comprenda el significado de las etiquetas de la herramienta y todas las instrucciones de funcionamiento, las precauciones de seguridad y las advertencias de este manual antes de realizar la operación o el mantenimiento de esta grapadora. La negligencia en la observación de las advertencias puede producir la MUERTE o LESIONES DE GRAVEDAD.
Español SEGURIDAD INSTRUCCIONES IMPORTANTES DE SEGURIDAD PARA LA UTILIZACIÓN DE LA GRAPADORA LEA TODAS LAS INSTRUCCIONES PELIGRO 1. LOS OPERADORES Y DEMÁS PERSONAS QUE SE ENCUENTREN EN EL ÁREA DE TRABAJO DEBEN USAR GAFAS PROTECTORAS CON BLINDAJES LATERALES. Antes de utilizar la grapadora, utilice siempre gafas protectoras con blindajes laterales, y asegúrese de que también sea utilizada por todas las personas que se encuentren en el área de trabajo.
Español SEGURIDAD — Continuación ADVERTENCIA 7. UTILICE SIEMPRE PROTECTORES PARA LOS OÍDOS Y LA CABEZA. 16. NO CARGUE GRAPAS CON EL GATILLO ACCIONADO NI CON LA PALANCA DE EMPUJE PRESIONADA. Utilice siempre protectores para los oídos contra el ruido fuerte. Utilice siempre un protector para la cabeza con objetos que puedan salir disparados.
Español SEGURIDAD — Continuación ADVERTENCIA 25. NO UTILICE NUNCA UNA GRAPADORA DEFECTUOSA O QUE FUNCIONE INCORRECTAMENTE. 29. MANEJE CORRECTAMENTE LA GRAPADORA. Maneje la grapadora de acuerdo con las instrucciones de este manual. No permita nunca que los niños, personas no familiarizadas o no autorizadas, toquen la grapadora. Si la grapadora parece funcionar anormalmente, si produce ruidos extraños, etc.
Español OPERACIÓN NOTA: La información contenida en este manual ha sido diseñada para ayudarle a utilizar con seguridad esta grapadora. Algunas de las ilustraciones de este manual pueden mostrar detalles o accesorios diferentes a los de su propia grapadora.
Español ESPECIFICACIONES 70 – 120 psi (4,9 – 8,3 barias 5 – 8,5 kgf/cm2) Presión de operación 14-3/8" × 9-13/16" × 3-11/32" (365 mm × 250 mm × 85 mm) Dimensiones Longitud × Altura × Anchura Peso 4,7 libras (2,1 kg) Capacidad de grapas 150 grapas ,037 pies3/ciclo a 100 psi (1,05 litros/ciclo a 6,9 barias) (1,05 litros/ciclo a 7kgf/cm2) Consumo de aire Entrada de aire Rosca NPT de 3/8" ACCESORIOS OPCIONALES SELECCIÓN DE GRAPAS ...
Español SUMINISTRO DE AIRE Regulador PELIGRO 䢇 Lado del compresor Lado de la grapadora No utilice NUNCA oxígeno ni otros gases embotellados. Podría producirse una explosión. Filtro Lubricador 3. Manguera de aire La manguera de aire deberá poder resistir una presión mínima de 150 psi (10,4 barias 10,6 kgf/cm2) o el 150% de la presión máxima producida en el sistema, el valor más alto que sea.
Español Cantidad de aire requerida = 3 × 30 × ,037 (1,05)× 1,2 = 4,0 CFM (pies3/min) (113 litros/min) Después de haber realizado los cálculos indicados arriba, tendrá que buscar un compresor que proporcione 4,0 CFM de aire, que es el valor requerido. LUBRICACIÓN Es muy importante que la grapadora esté adecuadamente lubricada. Sin la lubricación apropiada, la grapadora no trabajará correctamente y las piezas se desgastarán prematuramente. 䡬 Utilice lubricante para herramientas neumáticas Hitachi.
Español Apriete el gatillo Ajuste la presión del aire al valor recomendado, 70 – 120 psi (4,9 – 8,3 barias 5 – 8,5 kgf/cm2) de acuerdo con la longitud de las grapas y la dureza de la pieza de trabajo. La presión de aire correcta es la más baja con la que pueda realizarse el trabajo. La utilización de la grapadora con una presión de aire más alta de la requerida lo forzará innecesariamente.
Español 䢇 䢇 Alimentador de grapas 䢇 䢇 䢇 La grapadora habrá quedado lista ahora para poder utilizarse. PRECAUCIÓN Si libera repentinamente el alimentador de grapas, podrá retornar con brusquedad, provocando deformación y/o dispersión, y eventualmente, el bloqueo de las grapas. Asegúrese de regresar el alimentador de grapas con suavidad, evitando cualquier posible impacto.
Español (2) Operación continua (Disparo con la palanca de empuje) 1 Apriete el gatillo con la grapadora fuera de la pieza de trabajo. 2 Presione la palanca de empuje contra la pieza de trabajo para clavar una grapa. 3 Desplace la grapadora por la pieza de trabajo con un movimiento de rebote. Con cada presión de la palanca de empuje se clavará una grapa. Después de haber clavado las grapas necesarias, separe el dedo del gatillo.
Español 3 Si las grapas se insertan demasiado poco, gire el ajustador hacia el lado de mayor profundidad. Deje de girar el ajustador cuando se alcance la posición apropiada realizando una prueba de engrapado. 3 Poca profundidad Gire el ajustador A ras 4 Conecte la manguera de aire. UTILICE SIEMPRE GAFAS PROTECTORAS. Realice una prueba de engrapado. 5 DESCONECTE LA MANGUERA DE AIRE DE LA GRAPADORA. 6 Elija una posición adecuada para el ajustador.
Español MANTENIMIENTO NOTA: La información contenida en este manual ha sido diseñada para ayudarle a mantener con seguridad esta grapadora. Algunas ilustraciones de este manual pueden mostrar detalles o dispositivos diferentes a los de su propia grapadora. MANTENIMIENTO E INSPECCIÓN 2. Tabla de mantenimiento (Consulte la página 42) Lea la sección titulada “SEGURIDAD” (páginas 30 – 32). 3. Solución de problemas por parte del operador (Consulte la página 42) ADVERTENCIA 4.
Español Tabla de mantenimiento ACCIÓN Drenaje diario del filtro de la línea de aire. Mantenimiento del lubricador lleno. PARA Evitar la acumulación de humedad y suciedad. Mantener la grapadora lubricada. Limpieza del elemento del filtro y soplado de aire a través del mismo en sentido opuesto al normal de flujo del aire. Limpie el cargador y el mecanismo del alimentador. Mantenimiento de la palanca de empuje en perfectas condiciones. Lubricación de la grapadora después de haberla utilizada.
— 43 —
Issued by Hitachi Koki Co., Ltd. Shinagawa Intercity Tower A, 15-1, Konan 2-chome, Minato-ku, Tokyo 108-6020, Japan Distributed by Hitachi Koki U.S.A., Ltd. 3950 Steve Reynolds Blvd. Norcross, GA 30093 Hitachi Koki Canada Co. 6395 Kestrel Road Mississauga ON L5T 1Z5 306 Code No.