
User's Manual


71
4. My Image Function
4. My Image Function (Continued)
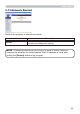
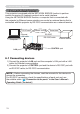
Congure the following items from a web browser when MY IMAGE function is
used.
Example: If the IP address of the projector is set to 192.168.1.10:
1) Enter "http://192.168.1.10/" into the address bar of the web browser.
2) Enter your user name and password, and then
click the [OK].
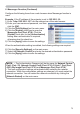
3) Click the [Port Settings] on the main menu.
4) Click the [Enable] check box to open the My
Image Port (Port: 9716). Click the [Enable]
check box for the [Authentication] setting
when authentication is required, otherwise
clear the check box.
5) Click the [Apply] button to save the settings.
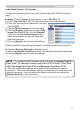
When the authentication setting is enabled, the following settings are required.
6) Click the [Security Settings] on the main menu.
7) Select the [Network Control] and enter the desired authentication password.
8) Click the [Apply] button to save the settings.
• The Authentication Password will be the same for Network Control
Port1 (Port: 23), Network Control Port2 (Port: 9715), PJLink™ Port (Port:
4352), My Image Port (Port: 9716) and Messenger Port (Port: 9719).
• The new conguration settings are activated after restarting the network
connection. When the conguration settings are changed, you must restart the
network connection. You can restart the network connection by clicking the
[Network Restart] on the main menu.
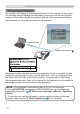
NOTE