™ UltraVision HDTV Monitors 1.5" UltraThin Liquid Crystal Display Anthracite Pearl Crystal Frame 1920 x 1080p 120Hz PictureMaster™ VI with Reel 120™ (1) HDMI™ (V.1.3 with CEC) Input; (1) RGB D-sub15 Input with Audio Operating Guide Model Name UT37V702 UT42V702 READ THE ENCLOSED INSTRUCTIONS CAREFULLY. KEEP THIS OPERATING GUIDE FOR FUTURE REFERENCE. Record the serial number of your monitor for future reference. SERIAL NO. This serial number is located on the back and right side of the monitor.
CONTENTS IMPORTANT SAFETY INSTRUCTIONS............02 INTRODUCTION..............................................04 About This Manual..................................................... 04 Trademark Credits..................................................... 04 Software.................................................................... 04 Features.................................................................... 04 SAFETY PRECAUTIONS..................................05 Explanation of the Symbols.........
IMPORTANT SAFETY INSTRUCTIONS Our reputation has been built on the quality, performance, and ease of service of Hitachi LCD Monitors. Safety is also foremost in our minds in the design of these units. To help you operate these products properly, this section illustrates safety tips which will be of benefit to you. Please read it carefully and apply the knowledge you obtain from it to the proper operation of your Hitachi LCD Monitor. Please fill out your warranty card and mail it to Hitachi.
IMPORTANT SAFETY INSTRUCTIONS (continued) Warning • To reduce the risk of fire or electric shock, do not expose this apparatus to rain or moisture. • The LCD Monitor should not be exposed to dripping or splashing and objects filled with liquids, such as vases, should not be placed on the Monitor. • This apparatus shall be connected to a mains socket outlet with a protective earthing connection. • The mains plug is used as the disconnect device and shall remain readily operable.
Thank you for purchasing the Hitachi 1.5 LCD Monitor. We hope that you will enjoy the outstanding performance of this product. This LCD Monitor has been designed to comply with international standards. However, it could cause personal injury and property damage if improperly handled.
SAFETY PRECAUTIONS For your safety, please read the following precautions carefully before using this product. Improper use would cause serious personal injury and/or damage to your property or the product. Explanation of the Symbols The following are the symbols used in this manual and affixed to the unit itself. Please fully understand the meanings of the symbols before reading the instructions in this section. WARNING Never ignore the instruction.
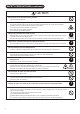
SAFETY PRECAUTIONS (continued) ENGLISH WARNING There is a risk of fire, electric shock or serious injury. ■ Install the unit in a proper location where it does not expose anyone to danger. If you bump against the edges of the unit, you could be injured. ■ Do not rest weight on top of the unit. Objects such as Liquid containers (vase, fish tank, flowerpot, cosmetics or liquid medicine). If water or any liquid spills onto the unit, it may cause short-circuiting and result in fire or electric shock.
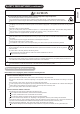
SAFETY PRECAUTIONS (continued) CAUTION ■ Do not place or use the unit in a dusty location. This could cause a malfunction. ■ Do not cover or block any ventilation holes on the product. The unit would overheat and this could cause fire or damage to the product which may shorten its service lifetime. Install the product in accordance with the instructions in this manual. Do not place the unit with the ventilation side downward. Do not install the unit on carpeting or bedding.
SAFETY PRECAUTIONS (continued) ENGLISH CAUTION ■ Do not install the unit in locations where it will be subjected to high temperature. This could damage the cabinet or components of the product. Do not install near any heat sources such as radiators, heating grilles, stoves, or other apparatus that produce heat. Keep the unit out of direct sunlight. Otherwise the resulting increase in temperature of the unit may cause a malfunction.
SAFETY PRECAUTIONS (continued) Main Unit Installation When installing the main unit, be sure to use the specified mounting units in order to obtain maximum performance and maintain safety. Hitachi assumes no responsibility nor liability for personal injuries or property damage caused by use of other mounting units or improper installation.
SAFETY PRECAUTIONS (continued) ENGLISH Child Safety Notice Congratulations on your purchase! As you enjoy your new product, please keep these safety tips in mind: THE ISSUE • The home theater entertainment experience is a growing trend and larger flat displays are popular purchases. However, flat panel displays are not always supported on the proper stands or installed according to the manufacturer’s recommendations.
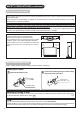
SAFETY PRECAUTIONS (continued) Wall Mount Setup 1 Remove the Stand Base from the Monitor About the Installation This product is heavy and should be carried by at least 2 people. Please make sure screws are tightened properly. WARNING The torque should be 1.8~3.0 N.m (18~30 kgf.cm). CAUTION 2 Keep the screws. They may be used for the Wall Mount installation. Remove the 4 screws and raise straight up from tabletop stand.
SAFETY PRECAUTIONS (continued) 1 ENGLISH Floor Stand Setup Remove the Stand Base from the Monitor CAUTION Keep the screws. They will be used for the Floor stand installation. Remove the 4 screws and raise straight up from tabletop stand. 2 Install the Monitor on the Floor Stand Monitor About the Installation This product is heavy and should be carried by at least 2 people. For Stand Assembly; please refer to the Installation Manual of the Floor Stand.
QUICK START GUIDE For more information on connecting and using your monitor, please be sure to read all instructions in this user manual.
3 Insert the Batteries into the Remote Control... 17 4 Power On... ENGLISH QUICK START GUIDE (continued) 22 Monitor Rear Panel q Connect the plug into the wall socket after all other connections are completed. AC Wall Socket CAUTION Ensure that both ends of the power cord are easily accessible. The Main Power Switch is factory set to On (activated), therefore after you connect the plug into the wall socket, the color of the indicating lamp must turn Green and the Illumination Lamp turns Blue.
COMPONENT NAMES Main Unit Front Panel q w q w e r t y u y e r t u Cabinet Panel Remote Control Receiver Indicating Lamp Speaker Illumination Lamp Tabletop Stand Control panel (located on the bottom) S-VIDEO VIDEO L/MONO R AUDIO INPUT (AV4) MENU/EXIT INPUT/OK VOL ;lk jhgf i o a s d f Main Power switch Service use only RS232C PC (RGB)/DVI Analog Audio Input Terminal PC Connection Terminal (D-sub 15 Pin) Reset button (See 44 .
Remote Control In addition to controlling all of the functions on your Hitachi UT LCD Monitor, the new remote control is designed to operate different types of devices, such as, DVD players, Cable Boxes, Set-Top-Boxes, Satellite Receivers, VCR's, PVR's and AVR's. The remote control must be programmed to control the chosen device. Please refer to pages 25 ~ 28 for external device programming setup.
PREPARATION Remote Control Battery Installation The remote control operates on 2 “AAA” batteries. 1. Open the battery compartment cover Push and pull open the battery compartment cover on the backside in the direction of the arrow, and remove the cover. Handling the Remote Control Use the remote control within a distance of about 5m (16’) from the front of the unit’s remote control sensor and within an angle of about 30 degrees on both sides. 2.
CONNECTION ENGLISH The unit is suitable for various kinds of connections. Make a connection in the following steps. Be sure to turn off the main power first when connecting external equipment. 1. Connect power cord to the rear panel. 2. Connect your external equipment (if any) to the unit. 3. Attach cushion, secure with clamps and fit terminal cover. 4. Connect the power plug to the wall socket. 1. Connect Power Cord to the Rear Panel Connect the power cord to the unit.
CONNECTION (continued) 2. Connect your Equipment to the Monitor (continued) Connecting to Equipment Having a HDMI Output Terminal HDMI-Interfaced System With “HDMI Control” function, you can interface the connected equipment through the HDMI terminal automatically if the connected equipment meets an industry standard “HDMI CEC (Consumer Electronics Control)”. Please check if the connected equipment supports HDMI CEC before using this function. Function 1.
CONNECTION (continued) ENGLISH 2. Connect your Equipment to the Monitor (continued) Connecting to a PC The PC connection terminal (D-sub 15 pin) + the PC (RGB)/DVI Analog Audio Input terminal are connected to the PC, allowing an analog RGB signal. IN OUT AUDIO [Example] or (Audio) (D-sub 15 Pin) NOTE About the connection of D-sub 15 pin, see 13 for details. 3. Attach Cushion, Secure with Clamps and Fit Terminal Cover 1 Attach the supplied cushion around the HDMI cable.
CONNECTION (continued) 3. Attach Cushion, Secure with Clamps and Fit Terminal Cover (continued) 3 Secure the HDMI cable and power cord with clamps. 4 Fit the terminal cover onto the monitor. Clamp Insert the tabs into the slots as shown and fold downward to fit the terminal cover. How to remove the cover. Tabs Terminal Cover *This drawing shows UT37V702 Using your fingers, pull backwards to lift the cover. 4.
BASIC OPERATION Turn On the power of the unit. Illumination Lamp ENGLISH Power On/Off Indicating Lamp To turn On the power to the unit: 1. Press the Main Power switch on the unit. The Indicating Lamp illuminates in Green, and the Illumination Lamp turns Blue. The image will display on screen. Main Power Switch (on the underside) 2. Once the Main Power switch is on, you can turn On/Off by pressing the Power (On/Off) button on the remote control. Front To turn Off the power to the unit: 1.
BASIC OPERATION (continued) Volume Up/Down 1. To increase the sound volume, press the Volume Up button on the remote control or control panel. The Volume Indicator value on the screen will shift to the right. 2. To decrease the sound volume, press the Volume Down button on the remote control or control panel. The Volume Indicator value on the screen will shift to the left. Volume Up/Down button Mute button Mute 1. To mute sounds, press the button on the remote control.
Input Switching to HDMI and RGB By pressing the Input Select button , you can switch the input to display the image outputting from the external equipment connected to each terminal (HDMI and RGB (/Composite)). Press the button on the remote control. Each time this button is pressed, the screen displays the corresponding mode in the following sequence.
SETUP OPERATION How to Use the Remote to Control your External Devices OPERATING THE PRECODED FUNCTIONS FOR YOUR EXTERNAL DEVICES. The new remote control is designed to operate different types of VCRs, cable boxes, set-top-boxes, satellite receivers, DVD players, and other audio/video equipment. You must first program the remote to match the remote system of your external equipment (refer to pages 29 ~ 30 for precodes). EXTERNAL DEVICE CONTROL SETUP PROCEDURE Power button Device buttons 1.
SETUP OPERATION (continued) Set-Top-Box/ Satellite Receiver Device Button Cable Device Button MY CABLE BOX CODE IS:____________________ NOTE Refer to the operating guide of the Cable Box for operation of the buttons exclusively for the Cable Box.
SETUP OPERATION (continued) How to Use the Remote to Control your External Devices DVD Device Button VCR/PVR Device Button MY DVD PLAYER CODE IS:___________________ NOTE Refer to the operating guide of the DVD Player for operation of the buttons exclusively for the DVD Player.
SETUP OPERATION (continued) AVR Device Button ENGLISH How to Use the Remote to Control your External Devices MY AUDIO/VIDEO RECEIVER (AVR) CODE IS:____________________ NOTE Refer to the operating guide of the AVR for operation of the buttons exclusively for the AVR.
SETUP OPERATION (continued) Remote Control Codes CABLE Brand A-MARK ABC ACCUPHASE ACORN ACTION CODES 0008,0144 0237,0003,0008 0003 0237 0237 ACTIVE ADB ARCHER BCC BRITISH TELECOM CENTURY DIGEO DIGI DIRECTOR DUMONT FOSGATE GE GENERAL INSTRUMENT GIBRALTER GOLDSTAR HITACHI INSIGHT JERROLD 0237 2092,2586 0237 0276 0003 0008 1187,2187 0637 0476 0637 0276 0144 0476,0810,0276 0003 0003 0144 0003,0008 0476,0810 0476,0810,0276 0003 MEMOREX 0000 MITSUBISHI 0003 MOTOROLA 1376,0476,0810 0276,1187,1254 1106 NOVA VIS
SETUP OPERATION (continued) WARDS 0060,0035,0037 0048,0047,0081 0033,0240,0045 0000,0042,0043 0041,0072,0038 0479,0065,0046 WHITE 0000,0209,0072 WESTINGHOUSE 0278,0479 WORLD 0209,0002,0479 XR-100 0035,0240,0000 0072 YAMAHA 0041,0038 ZENITH 0037,0039,0033 0000,0209,0041 0278,0479,1139 ZT GROUP 1972 PVR Brand ABS ALIENWARE CYBERPOWER DELL DIRECTV GATEWAY GO VIDEO HEWLETT PACKARD HOWARD COMPUTERS HP HUGHES NETWORK SYSTEMS HUMAX HUSH IBUYPOWER LINKSYS MEDIA CENTER PC MICROSOFT MIND NIVEUS MEDIA NORTHGATE PANA
SETUP OPERATION How to Use the On-Screen Display (OSD) System You can use the On-Screen Display system to access the various kinds of the features and functions. Basic Operation Picture Audio Function Setup Language Select OK Set ◄► 1. Press the button on the remote control or the Menu button on the control panel of the unit. The Main Menu is displayed on the screen as shown on the right. 2. To select the item, press the button. The selected item will be highlighted in Yellow. 4.
SETUP OPERATION (continued) Menu Picture (HDMI/Composite) Picture(RGB) Audio Function Select between 3 picture modes according to the lighting condition. 33 Contrast Adjust to increase or decrease the picture contrast. 33 Brightness Adjust to brighten or darken the picture. 33 Color Adjust to increase or decrease the color density. 33 Sharpness Adjust to sharpen or soften the picture. 33 Tint Adjust to obtain natural skin color.
SETUP OPERATION (continued) Watching Images from HDMI/Composite Input 1. Connect to external equipment. (See 18 and 19 for details.) 2. Press the or button to switch to HDMI mode. Press the or button to switch to Composite mode. 3. Press the button. Setting Picture Adjustment You can adjust the display condition such as color settings. Select "Picture" from Menu list.
SETUP OPERATION (continued) ENGLISH Watching Images from HDMI/Composite Input (continued) Setting Picture Adjustment (continued) Selected Items Setup hint Off Deep Color On Dynamic Contrast Mode Normal Linear Off 3D Color Management On Off Low Black Enhancement Middle High Off Low 3D Comb Filter Middle High Enhance the color depth of picture during HDMI input. It allows you to choose from 3 modes. Dynamic: Sharpen the gradation to improve the contrast feeling.
SETUP OPERATION (continued) Watching Images from HDMI/Composite Input (continued) Picture Reducing Noise Deep color Contrast Mode 3D Color Management Black Enhancement DNR MPEG NR Cross Color NR Game Mode Film Mode 3D Comb Filter Reset Select OK Set You can reduce the unwanted picture noise. Select "Picture" from the Menu list. Selected Items Dynamic Off Normal Off Off Off Off Off Off Off Off Reset Return Setup hint Off DNR Low Middle This is a noise reduction system for picture signals.
SETUP OPERATION (continued) Picture Making the Moving Image Smooth Using this function helps to make the moving image smooth. Select "Picture" from the Menu list.
SETUP OPERATION (continued) Watching Images from HDMI/Composite Input (continued) Advanced Setting Setup Video Power Save Off RGB Input Composite Color System Auto VCXXX-XXX XX-X Select "Setup" from the Menu list. Select Selected Items On/Off Return Setup hint Off Video Power Save On See 42 for details. RGB RGB Input Select the effective signal. Composite Auto PAL SECAM NTSC 4.43 Color System NTSC 3.
SETUP OPERATION (continued) 1. Connect to the PC. (See 20 ENGLISH Viewing Images from a PC for details of connection to PCs.) 2. Switch to RGB input by pressing the or button. 3. If necessary select "RGB" option under "Setup/RGB Input" menu. 4. Press the button. Setting Picture Adjustment You can adjust the display condition such as position adjustment and color settings. q Picture Menu Select “Picture” from the Menu list.
SETUP OPERATION (continued) Viewing Images from a PC (continued) Setup Auto Adjust Adjust Horizontal Position 0 Vertical Position +31 Horizontal Clock –20 Clock Phase +10 Reset Reset Setting Picture Adjustment (continued) w Setup Menu Select “Setup” from the Menu list. Select Selected Items Return Exit Setup hint Adjusts Horizontal Position, Vertical Position, Horizontal Clock, and Clock Phase automatically. Select "Adjust" then press the OK button to start automatic adjustment as necessary.
FUNCTION ENGLISH Aspect Switching Each time the ASPECT button of the remote control is pressed, the screen display aspect is switched in sequence, and the status will be displayed at the bottom of the screen.
FUNCTION (continued) Aspect Switching (continued) HDMI/Composite Signal Input (continued) Position Adjustment 1. Press the ◄► Vertical picture position can be adjusted for Panoramic 1, Zoom 1 and Zoom 2 mode as follows. button while operating the picture aspect display. 2. “Position” display will appear. button. ◄► 3. Adjust the position using the The adjustment ranges of each picture aspect are as shown below.
FUNCTION (continued) ENGLISH Power Save Mode When HDMI/Composite Input is Selected You are provided the function to save power consumption when no signal is detected in the HDMI/Composite input. Set to On in “Video Power Save” from the Setup Menu, which leads to the power save mode. 1. Press the Setup Video Power Save RGB Input Color System Select button when in HDMI/Composite mode. 2. Select the “Setup” menu and press the 3. Select “Video Power Save”. OK On/Off Off RGB Auto Return button.
TROUBLESHOOTING About LCD Display Technology The following are common phenomena occurring when viewing LCD display devices due to its characteristics. Please note that these are not malfunctions. Defective Spots on Panel The LCD panel is manufactured with high-precision technology. However, there might be some spots that are not illuminated, or are brighter than others, or are in different colors, etc. Surface on Panel The LCD panel displays images by the fluorescent lamps internally.
TROUBLESHOOTING (continued) Symptoms Checklist ENGLISH Symptom and Checklist (continued) Page Check the volume level. Check audio settings on HDMI source must be set to PCM. Normal picture, but no sound button has been pressed or not. Check if the Check the connections to external equipment. Check if input signal is HDMI or DVI by pressing DVI audio must be input by separate.
TROUBLESHOOTING (continued) Symptom and Checklist (continued) Symptoms Checklist Page The image on the screen is moving in an oblique direction. (RGB input mode only) Adjust “Horizontal Clock” and “Clock Phase”. 39 The coarse vertical stripes can be seen in full-display mode. (RGB input mode only) Adjust “Horizontal Clock”. 39 Try “Auto Adjust”. 39 Part of the image is missing.
PRODUCT SPECIFICATIONS Display dimensions Approx. 37 inches measured diagonal (32 5/16 (H) x 18 1/8 (V) in) Approx. 941 mm measured diagonal (820 (H) x 461 (V) mm) Approx. 42 inches measured diagonal (36 3/4 (H) x 20 3/4 (V) in) Approx. 1068 mm measured diagonal (931 (H) x 524 (V) mm) Resolution 1920 (H) x 1080 (V) pixels 1920 (H) x 1080 (V) pixels Pixel Pitch 0.43(H) x 0.43(V) mm. 0.48(H) x 0.48(V) mm.
PRODUCT SPECIFICATIONS (continued) Signal Input RGB terminal (D-sub 15 pin connector) Pin Input signal 1 R 2 G/Composite 3 B 4 No connection 5 GND 6 R.GND 7 G.GND/Composite 8 B.GND 9 +5V 10 GND 11 No connection 12 [SDA] 13 H.sync 14 V.sync. 15 [SCL] HDMI connector pin specifications 47 Pin Input signal Pin Input signal 1 TMDS Data2+ 11 TMDS Clock Shield 2 TMDS Data2 Shield 12 TMDS Clock- 3 TMDS Data2- 13 CEC 4 TMDS Data1+ 14 Reserved(N.C.
PRODUCT SPECIFICATIONS (continued) ENGLISH Recommended Signal List With HDMI input Signal mode No. Signal Name 1 2 3 4 5 6 7 8 9 10 11 12 VGA 576i 480i 576p 480p 1080i/50 1080i/60 720p/50 720p/60 1080p/50 1080p/60 1080p/24 Resolution Vertical frequency (Hz) Horizontal frequency (kHz) Dot clock frequency (MHz) 640 X 480 720(1440) X 576 720(1440) X 480 720 X 576 720 X 480 1920 X 1080 1920 X 1080 1280 X 720 1280 X 720 1920 X 1080 1920 X 1080 1920 X 1080 59.94 50.00 59.94 50.00 59.94 50.00 60.00 50.
PRODUCT SPECIFICATIONS (continued) Dimensions 37" Unit: Inch/(mm) 19-3/4 (501.5) 36-7/8 (936) 5-3/8 (136) 1-3/8 (35.0) Min 1-9/16 (39.
PRODUCT SPECIFICATIONS (continued) ENGLISH Dimensions 42" Unit: Inch/(mm) 19-12/16 (502) 40-13/16 (1036.2) 5-3/8 (136) 1-3/8 (35.0) Min 1-9/16 (39.9) Max 16-5/16 (413.7) 20-3/4 (526.
SERVICE INFORMATION 800.HITACHI (800.448.2244) Operational, hook up and warranty questions for your product. Monday ~ Sunday 8:00 am - 8:30 pm CST www.hitachi.us/tv HITACHI HOME ELECTRONICS (AMERICA), INC. HITACHI HOME ELECTRONICS (CANADA) HITACHI has made every effort to assure you hours of trouble free operation from your Hitachi product. Should you require service assistance with OPERATIONAL, HOOK UP, TECHNICAL ASSISTANCE OR WARRANTY SUPPORT, please contact our Support Hotline at 800. HITACHI (800.
LIMITED WARRANTY O Visit our website and register your product online: Hitachi’s website features a wealth of information on Hitachi products and technologies, as well as downloadable operating guides and other useful information. To register your new Hitachi display product online, go to: www.hitachi.us/tv Support and Contact/Warranty Registration MODEL NO. PU E U D .
END USER LICENSE AGREEMENT FOR HITACHI SOFTWARE END USER LICENSE AGREEMENT FOR HITACHI SOFTWARE IMPORTANT – READ CAREFULLY: This End User License Agreement for HITACHI Software (this “Agreement”) is a legal agreement between you (“you” or “your”), in your capacity as the owner of a HITACHI brand display product (the “Product”), and HITACHI Home Electronics (America), Inc. (“HITACHI”).