li! : _i_!ili ;;?i! i!_i!!iil _i ;i̧¸¸ii! ili? iii HITACHI VIDEO CASSETTE RECORDER VT-UX6450A Owner's manual VCR plus+3 Cable box control Using these quality features: • The VCR Plus+* programming system allows you to program the VCR for timer recording by simply entering a PlusCode* number. *VCR Plus+C 3 and PlusCode are trademarks of Gemstar Development Corporation. The VCR Plus+ system is manufactured under license from Gemstar Development Corporation.
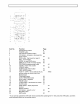
TABLE OF CONTENTS FOR YOUR SAFETY .................................................................................................................. IMPORTANT SAFEGUARDS ..................................................................................................... INSTALLATION ...................................................................................................................... USE ........................................................................................................
i!:(i_!ili (_%! i!_i!!i il L,i ii¸¸_i!ili_ !_ ] Locating the start of preview ................................................................................................. SHUTTLE CONTROL ............................................................................................................... Using the shuttle ring on the remote control .......................................................................... How to use the shuttle ring .........................................................
Hi! _i_!ill _/__;!i_i!;!iil _,i;i _i!i_i_ i!¸ ] POWER SUPPLY: AC 120V, 60 Hz ONLY. The POWER button turns the VCR on and off, leaving the clock!timer unaffected. If the unit is to be left unattended for a long period, it is recommended that the unit be completely switched off and unplugged. Illustrated below is the label on the back of your unit. _._"_) This symbol warns the user that uninsutated voltage within the unit may have sufficient magnitude to cause electric shock.
liiTii!!i? _i i!!_;iTii S_ii̧!!!_71 ¸ ¸ :17 ji_i! _i!!L _i;;!!_/7¸;i¸11iL;_ :!i !7_ ] In addition to the careful attention devoted to quality standards in the manufacture of your video product, safety is a major factor in the design of every instrument. But, safety is your responsibility too. This page lists important information that will help to assure your enjoyment and proper use of a Video Cassette Recorder and accessory equipment.
liii_ii!! ;i̧¸¸¸_¸ _i i!!_iiiiS_ii̧_!; ¸ _¸il:i;!ji_i! _i!!_i;;!!_/;i:iiiili!_ :!i i_ 9 Attachments - Do not use attachments unless recommended cause hazards. ] by the video product manufacturer as they may Caution: Maintain electrical safety. Powerline operated equipment or accessories Connected to this Unit should bear the UL listing mark or CSA Certification mark on the accessory itself and should not have been modified so as to defeat the safety featu[es.
liii_i!!ii̧ ¸¸¸_¸ _i i!!_iiiiS_ii̧_!! ¸ _¸il:i:!ji_i! _i!!_il_!!_J ii:iiiili!_ :!i ? ] O 17 Servicing - Do not attempt to service this video product yourself as opening or removing covers may expose you to dangerous voltage or other hazards. Refer all servicing to qualified service personnel. 18 Conditions Requiring Service - Unplug this video product from the wall outlet and refer servicing to qualified service personnel under the following conditions. a. When the power-supply cord or plug is damaged.
li?;! !;i!!!il !il_!i;i_il;i!iilii¸ _! _?i?ii!ii ¸ !!iii! ?ii :ii VCR Customer Item No. 1 2 3 4 5 6 7 8 9 :i!!i ¸ Controls Page 25 2 9 9 23 35 30 40 23 29 10 11 Function Infrared transmitter POWER button EJECT button Cassette compartment STOP button Shuttle ring PLAY!STILL button REC/IRT button CHANNEL (channel up/down) TRACKING buttons Infrared receiver REC indicator 12 13 14 AUDIO IN L (MONO), R jacks VIDEO IN jack ANT.
Tapecounter, 37 Taperemaining or 37 VCRmodeindicator 28 PLAY- playback SRCH- double-speed play andvisualsearch["-"appears duringreversedirectionviewing] SLOW- slowplay 31 REW- rewind 28 S:REW- highspeedrewind 29 FF- fastforward S:FF- highspeedfastforward 29 STILL-playpauseandframeadvance30 REM(taperemaining time)indicator 37 VCR,operatemode 41 Audioindicators 32 _1- record(flashesduring recordpause) 40 TapespeedSP!EP 39 Delayed recordingindicator 46 Tape-inindicator TVchannelor 39 Auxiliary(L1/L2) 56 17 18
I ] = _ ._ r, =r ___ _ _, _ , J : ,r' _ _ _ _ _ i _ L_,E ____ _ _ I_ _1 L_ • II j- i"_'_,,_ o" _'L_ '1''_'_ i, Item No.
I i! !i!7;i!L71i_17; i_:ii ¸ !if! !!i!!i;i!7!i 71ii I?:L!iiiii:i?_i;i!! Install batteries ii7ii7 ] in the remote control The remote control requires two "AA" batteries. 7 BQ@@ 1 Push the tab of the battery compartment cover in the direction of the arrow to remove the cover. Note: When replacing the batteries, remove the otd batteries and keep the POWER button depressed for 10 seconds before inserting fresh batteries, Hold for 10 seconds 2 Install batteries.
Ji!!i !;_i! _i_ii _(i_i_ ¸ ;if!_!i!_i: ¸¸¸¸¸ i!!iiliiļ,,: _i; ill:i?_i; ¸¸i_! ;iii!ii! Operating the VCR: 1 Make sure there is no obstacle between the remote control and VCR's infrared receiver. Note: You cannot operate the VCR if there is an obstacle (for example, coffee table, sofa, etc) between the VCR and remote control. 2 Point the remote control at the VCR's infrared receiver and press the required button on the remote control.
Only use video cassettes with the mark in this VCR. The table shows the recording time of different cassettes. JTypes SP Recording EP time T-120 T-160 120 160 min. min. 360 480 min. min. T-180 T-210 180 min. 210 min. 540 min. 630 min. i • To get the best quality picture, record at standard recording speed (SP). • This VCR does not record at the LP speed, but it can play cassette that were recorded at the LP speed.
li j ii iii:i! ili !ilii:ii!ii¸ _!!ii?iii!ii Press the EJECT button on the VCR. The cassette will come papally out of the compartment so you can pull it out. • The "Tape-In" indicator :_ turns off. • The cassette can be ejected with the power on or off.
WITH THIS HOOKUP YOU CAN • WATCH AVAILABLE TV CHANNELS • RECORD AND WATCH THE SAME CHANNEL • RECORD ONE CHANNEL AND WATCH ANOTHER Basic Hookup with Antenna: RF Hookup *PURCHASED SEPARATELY TABLE A FUNCTION CHANNEL TV VCR SELECTION VCR indicator 'Press the VCR/TV _ode select _utton to turn the /CR indicator on tnd off.
buttonalternates betweenRFCH03(channel3)andRFCH04(channel4)in theVCR'sdisplay. Displaythechannelwhichis notusedbya commercial channelinyourarea.
WITH THIS HOOKUP YOU CAN • WATCH AVAILABLE TV CHANNELS • RECORD AND WATCH THE SAME CHANNEL • RECORD ONE CHANNEL AND WATCH ANOTHER • - !i ! ii ...... . Advanced Hookup with Antenna: *PURCHASED .= Ii AV Hookup SEPARATELY TABLE B FUNCTION CHANNEL TV VCR SELECTION VCR indicator 'Press the VCR/TV _ode select _utton to turn the _CR indicator on tnd off.
I ilLAi?;;iiii; ! v%;,i!_iL!;i! _iiii_:]_;q,_iil;!_!,_i;_ ii!Yi!;i!i! ¸ [ ;ii:i:i; ] WITH THIS HOOKUP YOU CAN • WATCH AVAILABLE CABLE CHANNELS • RECORD AND WATCH THE SAME CHANNEL • RECORD ONE CHANNEL AND WATCH ANOTHER Basic Hookup with Cable: RF Hookup * PURCHASED SEPARATELY TABLE C FUNCTION CHANNEL SELECTION TV VCR Selectand 7VatchChannels JsingTV Selectand 7VatchChannels JsingVCR Record and 7Vatchthe Same Shannel SelectChannel toWatch Record One Shannel Watch _,nother SelectChannel SelectChann
Displaythechannelwhichis notusedbya commercial channelinyourarea.
WITH THIS HOOKUP YOU CAN • WATCH AVAILABLE CABLE CHANNELS • RECORD AND WATCH THE SAME CHANNEL • RECORD ONE CHANNEL AND WATCH ANOTHER Advanced Hookup with Cable: AV Hookup * PURCHASED SEPARATELY TABLE D FUNCTION CHANNEL TV VCR SELECTION VCR indicator Press the VCR/TV _ode select )utton to turn the /CR indicator on _nd off.
WITH THIS HOOKUP YOU CAN • WATCH AVAILABLE CABLE CHANNELS • RECORD AND WATCH THE SAME CHANNEL YOU CAN'T. • RECORD ONE CHANNEL AND WATCH ANOTHER ALL CHANNEL SELECTIONS MUST BE MADE AT THE CABLE BOX. BE SURE TO CONSULT YOUR CABLE BOX MANUAL FOR THE CABLE BOX OUTPUT CHANNEL. Basic Hookup with Cable Box: RF Hookup * PURCHASED SEPARATELY TABLE E FUNCTION CHANNEL TV VCR SELECTION VCR indicator Press the VCR/TV mode select button to turn the VCR indicator on and off.
Switch the RF Channel When the VCR is on, its video signal can come into your TV on either channel 3 or channel 4. You need to select the appropriate channel. • Turn on the power of both the TV and the VCR. Press the ANT. OUT button on front of the VCR. Pressing the button alternates between RFCH 03 (channel 3) and RFCH 04 (channel 4) in the VCR's display. Display the channel which is not used by a commercial channel in your area.
WITH THIS HOOKUP YOU CAN • WATCH AVAILABLE CABLE CHANNELS • RECORD AND WATCH THE SAME CHANNEL YOU CAN'T. • RECORD ONE CHANNEL AND WATCH ANOTHER ALL CHANNEL SELECTIONS MUST BE MADE AT THE CABLE BOX. BE SURE TO CONSULT YOUR CABLE BOX MANUAL FOR THE CABLE BOX. Advanced Hookup with Cable Box: AV Hookup *PURCHASED SEPARATELY TABLE F FUNCTION CHANNEL TV VCR SELECTION VCR indicator Press the VCR/TV _ode select Outton to turn the VCR indicator on _nd off.
WITH THIS HOOKUP YOU CAN • WATCH AVAILABLE CABLE CHANNELS • RECORD AND WATCH THE SAME CHANNEL • RECORD ONE CHANNEL AND WATCH ANOTHER TO RECORD, ALL CHANNEL SELECTIONS MUST BE MADE AT THE CABLE BOX. BE SURE TO CONSULT YOUR CABLE BOX MANUAL FOR THE CABLE BOX OUTPUT CHANNEL. E _CK (_ 'IV Advanced Hookup with Cable Box and Splitter: AV and RF Hookup * PURCHASED SEPARATELY TABLE G FUNCTION CHANNEL TV VCR SELECTION VCR indicator Press the VCR/TV mode select button to turn the JCR indicator on and off.
Note: An antenna or cable must be connected to the VCR before you begin this operation. Tips You'll need to set the clock when first hooking up your VCR, and any time the power goes out for more than 1 hour. When you first plug in the VCR or after a power outage, the clock display will read "--:--". This function sets the VCR's clock automatically when the VCR is tuned to a station which transmits a time signal together with TV programs.
1 Turn on the TV and select the video channel (3 or 4). Or. if you are hooked up with an audio/video cable, set the TV to AUX or VIDEO. @ 2 Press the GUIDE button. The main on-screen menu will appear on the TV screen. REVIEW SETUP CLOCK CHANNEL ENGLISH FRAN(_AIS END O_ You may view all the on-screen instructions in English or French. When you first set up your VCR, it will be set to English. Press the (8) button for French. 3 Press the (3) button to bring up the CLOCK SET menu.
• If SETMODE"MANUAL" is highlighted, pressthe(1)buttontoswitchit toSETMODE"AUTO". 5 Pressthe (2) button. Thisscreenappearsto showthattheclockis beingset. PLEASEWAIT CLOCKISSETTING CANCEL O_ : • It may take about five minutes. • Since the VCR is searching for a broadcast station that transmits a time signal, the channel indication on the cable box changes automatically. When = the clock is set, the screen changes to a TV picture and the correct time appears in the VCR's display.
1 Press the GUIDE button. The main on-screen menu will appear on the TV screen. REVIEW i SETUP CLOCK ill CHANNEL ENGLISH FRAN?AIS END _ i 2 Press the (3) button to bring up the CLOCK SET menu. Make sure that item 1 is highlighted SET MODE "AUTO". AUTO SET MODE TIME / DAY INITIAL SET AUTO TIME ZONE AUTO D.S.T. MODE END (7 ii 3 Press the (3) button to select your local time zone.
AUTO SET MODE TIME / DAY INITIAL SET ATLANTIC TIME ZONE ON D.S.T. MODE END O_ 5 Press the (2) button to set the time. This screen appears to show that the clock is being set.
To set the clock manually 1 Press the GUIDE button. The main on-screen menu will appear on the TV screen. REVIEW SETUP CLOCK CHANNEL ENGLISH FRAN(_AIS END o _ You may view alt the on-screen instructions in English or French. When you first set up your VCR, it will be set to English. Press the (8) button for French. 2 Press the (3) button to bring up the CLOCK SET menu. AUTO SET MODE TIME / DAY INITIAL SET AUTO TIME ZONE AUTO D.S.T. MODE END 3 Press the (1) button to select SET MODE "MANUAL".
m END C7 1 5 Press the number buttons to fill the hour and minutes. • For times with only one number (1-9) press the (0) button first, then the hour or minute. For example, if it is now 10:20AM, press (1)(0)(2)(0). "AM" and "PM" will now appear on the screen. Example 10:20 AM_ i ! i il i i i i PM_ _ i i END C7 6 Press the (1) button forAM or (2) for PM. For example, press the (1) button for AM.
An i!logical time (like 13 for the hour or20 for the month) will not be accepted.
Presetting the received channels without using a cable box (Hookups [A],[B],[C]or [O]) 1 Press the POWER button to turn on the VCR. 2 Turn on the "IV and select the video channel (3 or 4). Or, if you are hooked up with an audio!video cable, set the TV to AUX or VIDEO. £ 3 Press the GUIDE button. The main on-screen menu will appear on the TV screen. REVIEW SETUP CLOCK im CHANNEL ENGLISH FRAN_AIS END _ i 4 Press the (4) button to select the CHANNEL PRESET operation.
Iii : i!¸:II!_:!! ¸¸;;i_J0:; i_i ¸ii ii;i_ ¸:̧!!;[ii_ii! if!i;i_ii V (:: !i:i:i ¸ i;i;:i;Di! iL!¸ili ¸i ¸ ] CATV1 : Ordinary cable CATV2: Alternate cable (If CATV1 doesn't give you the channels you expect). 6 Press the (2) button. ANT CH SOURCE AUTO CHANNEL SET CH LIST ADD/ERASE VCR PLUS+ SETUP CABLE BOX SETUP END (:7 The VCR will automatically store channels received in your area. It takes about 2 - 3 minutes.
CATV1 CH SOURCE AUTO CHANNEL SET CH LIST ADD/ERASE VCR PLUS+ SETUP CABLE BOX SETUP 3 Press the (3) button _i)i) END O_ to select ADD/ERASE ; CHANNEL. !;_iiiiii CHANNEL 02 SELECT CHANNEL ERASE@_ ADD (Z END (Z ; 4 Use the number buttons to select the number of the channel you want to add or erase. CHANNEL 07 SELECT CHANNEL ERASE_ ADD (Z END (Z ; 5 Press the STOP button to delete the channel, or press the PLAY button to add it.
@ 2 Press the GUIDE button. The main on-screen menu will appear on the TV screen. REVIEW SETUP CLOCK im CHANNEL ENGLISH FRANOAIS END _ i 3 Press the (2) button to select VCR SETUP. i i i ii ON AUTO BLUE HIFI STEREO SAP OFF AUDIO SETUP END O_ 4 Press the (1) button to select AUTO BLUE "ON" or "OFF".
The VCR can be programmed to: • Automatically select channels on the cable box during a timer record or VCR Plus+ delayed recording operation. • Change channels on remote controlled cable boxes with the VCR remote control. BEFORE YOU BEGIN... Make sure the cable box is positioned properly on the VCR. 1 Turn on the "IV and select the video channel (3 or 4). Or, if you are hooked up with an audio/video cable, set the TV to AUX or VIDEO. 2 Press the GUIDE button.
CH LIST ADD/ERASE : VCR PLUS+ SETUP CABLE BOX SETUP END C7 5 Press the (5) button to select CABLE BOX SETUP menu. IS CABLE BOX BEING USED? YES(Y NO O_ 6 Press the (1) button to answer "YES" to the question "IS CABLE BOX BEING USED?" TURN ON CABLEBOXAND TUNEIT TO CH 02 }iiii_!i END C7 7 Turn on your cable box and select channel 2. 8 Using the VCR remote, enter the cable box output channel numbers. For example, press (0)(3) for channel 3.
ENTERCABLEBOXTYPE FROMOWNER'S MANUAL END(7 ; 10 Press the two number buttons that match the code number of your cable box brand from the table below. For example, press (3)(7) for the Hitachi brand cable box.
YES[7 NO O_ END C7 12 Cable box channel changed to channel 9: Press the (1) button to end this setting. Your cable box and VCR are now set for VCR Plus+ program recording. Depending on the manufacturer and model of the cable box, you may also be able to use the VCR remote control to: • Change channels on the cable box with the remote's channel Up/Down buttons. • Use the numbers on the VCR remote to select cable box channels directly.
To playback a recorded tape 1 Turn on the TV and select the video channel (3 or 4). Or, if you are hooked up with an audio/video cable, set the TV to AUX or VIDEO. L. - 2 Insert a recorded tape. The power comes on automatically and the tape indicator lights on the display. • When a cassette without its safety tab is inserted, playback starts automatically. 3 Press the PLAY button to start playing the tape. 4 Press the STOP button to end playback.
Auto Tracking Pressing the PLAY button starts the auto tracking feature, which automatically adjusts playback to eliminate static lines or picture noise that may appear on the screen. Manual Tracking Scratched tapes or poorly recorded tapes may require additional picture adjustment. You can do this with the remote control. 1 Press the TRACKING button when viewing a cassette. Press either the + or - buttons until picture is clear.
Variable speed playback ] Press the PAUSE button on the remote control or PLAY/STILL on the VCR to still the tape during play. The picture will "freeze". You may see some minor noise or interference on the screen. This is normal. • To resume play, press the PLAY button or PAUSE (PLAY!STILL) button again. Note: The sound is muted and cannot be heard during "Special Playback Effects". Notes: • After 1 minute in the PAUSE mode the VCR automatically switches to STOP mode to protect the tape.
Thisfunctionletyousearchbackwardandforwardthroughthevideotape whileviewingit. Duringplay: Pressthe REWbuttonto searchin reverse. Pressthe F.FWDbuttonto searchahead. • Press the PLAY button to return to normal playback. Press REW or F.FWD and hold it; you can search backward or forward through the tape at a higher speed while viewing it. • Press PLAY and REW, then hold REW for backward search at a higher speed. • Press PLAY and F.FWD, then hold F.FWD for forward search at a higher speed. • Release REW or F.
I END C7 J 4 Press the GUIDE button to end the setting. "MOVIE ADVANCE TM is a trademark of SRT, Inc. A Jerry Iggulden invention licensed in association with Arthur D. Little Enterprises, Inc." MOVIE ADVANCE TM locates the start of a movie on rented tape, etc., by automatically skipping commercials, logo marks, previews, information on copyrights, etc. You can also locate the start of previews.
SEARCHING FOR START OF MOVIE CANCEL 0_ MOVIE IS READY START (Y • When the start of the movie has been located, the screen on the right will appear. 5 Press the PLAY button to start playing. _'Vl£_ __E (MA SKIP) 1 Turn on the TV and select the video channel (3 or 4). Or, if you are hooked up with an audio/video cable, set the TV to AUX or VIDEO. I 2 Insert a recorded tape. • The power comes on automatically and the tape indicator lights on the display. • Playback starts automatically.
GOTO FIRSTPREVIEW (Z END0_ Press the (2) button to select "GO TO FIRST PREVIEW". • The tape is fast forwarded, and a preview will play automatically. • If you press the MA SKIP button while viewing the preview, the tape is fast forwarded, and the next preview will play automatically.
I Using the shuttle ring on the remote control The shuttle feature lets you control all the playback functions - PLAY, PAUSE, SLOW MOTION, and SEARCH using one convenient ring. [A] Turn the shuttle ring during playback or still playback (pause). • As you turn the ring, you get different playback speeds and forward or reverse motion. • Try using the shuttle to explore backward and forward through your next video. [B] Turn the ring in the stop mode to fast forward or rewind the tape.
I To find specific sections on a tape using the "INDEX" feature ] Jump to an Index Mark with INDEX A quick way to access specific program segments is with the index search feature• This lets you move through a tape that has several recordings on it by searching for the INDEX "mark". This function only works with recordings that have been set up with indexing. You create an INDEX mark (VISS signal) every time you pres the REC or REC/IRT button while recording.
I Switching between the clock, time counter and time of remaining tape Press the DISPLAY button while the on-screen display is displayed. The on-screen display switches in the order below together with the VCR's display. On-Screen and VCR Displays Illustration Press the DISPLAY button to see the clock. Press the DISPLAY button a second time to see just the time counter.
Indexing with the Time Counter You can set the time counter to memorize a certain point in the video programming, point automatically. and you can return to that 1 Press the DISPLAY button two or three times. The counter will appear in the VCR's display. 2 Begin recording or playing back a tape. 3 At the point that you want to go back to, press the CLEAR button. This resets the counter to 0:00:00. 4 Press the STOP button when you are done recording or playing back the tape.
I Before you record ] Note: The cassette safety tab must be in place in order to record. To re-record on a cassette which has its safety tab removed. Cover the hole with cellophane tape. The VCR must be hooked up properly for recording. See the Simple Hookups at the beginning of this manual. Copyright infringement warning Most television programs and films are copyrighted. This means that someone has legal rights governing the reproduction and distribution of this material.
• 100/ENT and (2) and (4) for channel 124. 5 Press the REC button on the remote control or the REC/IRT button on the VCR. Recording will start and the REC indicator on the VCR will light red. Notes: • Recording will not start unless the cassette has the safety tab in place. If this tab has been removed the VCR will eject the tape • Press the PAUSE button to set the VCR to the recording pause mode.
1 Onceyou havesetthe VCRfor recording,presstheVCR/TV button. The VCR indicator disappears. Now, you will be viewing through your TV only. 2 Switch channels using your TV controls or the VCR remote, if it's programmed to control your TV (see page 56). Notes: • You can check on the recording by pressing VCR/TV again. This will switch you back to viewing through the VCR. and you'll see the program you are recording.
ON AUTO HIFI BLUE STEREO SAP ON AUDIO SETUP END O_ 4 Press the (3) button to set the STEREO/MONO i option to "STEREO". i i il ON AUTO BLUE HIFI STEREO SAP ON AUDIO SETUP END O_ 5 Press the GUIDE button to end the setting. 6 Follow the Step 1 through 5 on "Basic Recording Steps" on pages 39 and 40. When you select the STEREO option in the initial setup operation, your VCR records in stereo any station that broadcasts stereo sounds.
The Instant Recording Timer (REC/IRT button on the VCR) will let you make a simplified timer recording without having to use the programming timer. In order to set the IRT properly the clock must be set before starting. 1 Follow the steps 1 through 5 on "Basic recording steps" on pages 41 and 42. 2 Press the REC/IRT button twice to indicate the recording time on the display. • You may increase the recording time by 30 minutes each time you press the REC!IRT button.
Settinq the VCR to record later Note: The cassette safety tab must be in place in order to record. To re-record on a cassette which has its safety tab removed. Cover the hole with cellophane tape. With the delayed recording feature, you can set this VCR so that it automatically turns on and records programs whenever you like - without your being around! You can record a program one time only, or you can automatically record a show every weekday or every week at the same time.
END EXAMPLE: Set the VCR to record "one time", a program on Channel 8 that starts at 6:00 PM and ends at 6:30 PM on 7/10/99, at the EP recording speed. 4 Press the (0) and (8) buttons to select channel 8.
113 ¸ii!/!_i/__ ;if!!ii} _i'i_;:: !;_i! _}i{3¸¸ii_!!11¸3¸¸ iii_!_S CH 08 !_:i'_ START 06 : 00PM DATE --/--/-- END -:- SP CORRECT (:7 END (7 7 Enter the end time by pressing (O), (6), (3) and (0) for 6:30. The VCR automatically selects PM for you. iii;!x i i il !i { < i AM ¸¸¸! Yi ii ¸ PM 12 12 3 4 5 6 7 8 9 1011m_iR_lJl_l_l_m CH START END 08 06 : 00PM 06:30PM SP ONE TIME / DAILY / WEEKLY (7 DATE 7/08/98WED CORRECT (:7 END(7 8 Press the (5) button to select One Time Recording.
DATE CORRECT O_ 07 / 10 / 99SAT ENDO _ 11 Press the PROGRAM button to set the program in memory. • This message will appear. FOR TIMER RECORDING TURN POWER OFF 12 Press the POWER button to turn off the VCR. The delayed recording indicator will display on the VCR. This tells you that the VCR will automatically record at the times and dates you have programmed. • If you are using a cable box, you must select the channel you want to record on the cable box (in this case 8); and turn on the cable box.
I About the VCR Plus+ system This handy feature makes timed recording a snap. You don't need to enter the specific channel, date, time or duration of a program. All you enter is its PlusCode programming number- a number of up to eight digits. This special code is easy to find in your favorite TV program guide or daily newspaper. Here's a sample page from TV Guide showing PlusCode numbers next to each program. Your local channels may be different from the VCR Plus+ channel codes.
b6 Af_£ IPSS @ 3S "_elw{H k Note in the example that the channel numbers are the same except for 20 (received on channel 8) and 42 (received on channel 38). These two channels must be assigned.
This setup should be performed if you are using an Antenna or Cable without a cable box. (Hookups [A], [B], [C] or [D].) If you receive all your channels through a cable box (Hookups [E], [F] or [G]) please refer to page 25 "cable box setup" in "First Time Setup" section. The following shows the procedure you should perform when you are receiving the Cable News Network (channel 42 with the VCR Plus+ system) on channel 38.
I ii!j:_i!i ? _ii! ;!_i:ii! _!_! ?::_:_i:ii! _!_! _;!il;_!il !,_;i_?_i,i:;_!ii ;i;_;i il; ; _i_¸¸_II _ _ii ii _ili_i!i_;i!VC _,_ ;i:fill:!i _i: ;;_ _:i;: :!i ;_i ¸¸¸ i!;;i_ii _;i!! _/ii 5 Press the OH ( i/IZ! i_;;i_i ] ) button to move up and down through the channel list until you reach VCR Plus+ CH42. 41 42 43 -- A -- T SCROLL _, _' O_ END O_ _' _, 6 Press the number buttons to assign your broadcast channel number to the corresponding VCR Plus+ channel.
I ii! i+:+ :i:!i? +if! !++i:ii! _!_! ?::+ ++i:ii! _!_! ++!il_!ii!,_ i+?+i,i _!ii!+i;+_;i i+;i ++i_+ ¸¸_II _++ii ii _ili_i!i_;i!_+ +,+ ;i:+i_i !i +i: j;+ _:ii: :!i +i¸¸¸i!;:_ii_;i!! _ +i i+¸+: ] AND THEN PRESS ! FOR MANUAL PROG G_ 3 Press the number buttons to enter the PlusCode number of the program you want to record. ii FOR VCR PLUS RECORDING ENTER PLUS CODE NUMBER AND THEN PRESS i 123 PPROCEED Notei This number Can be up to eight digits.
I ii!j:_i!i:?¸ _ii!;!_i:ii!_!_! ?::_i_i_i:ii!_!_! _;!il;_!ii!,_;i_ ?_i,i:;_!ii?i;_?il;: ; _i_ii _ _iiii_ili_i!i_;i!VC_,_;I:fill:!i _i:;;_:i;/:!i/_ii!;;i_ii _;i!!/_/ii DATE 07/17/99SAT i_;,!i; ] ERASE O_ END O_ Types of Delayed Recordings ONE TIME Records one show at a particular date and time. DAILY Records a show at the same time every day of the week, Monday throught Friday. WEEKLY Records a show at the same day and time every week.
You can use the VCR Plus+ system to program the timer, observing the VCR's display, without turning on the power to the VCR and TV. 1 Notes: ; ; . • !f YOUuse the VCR Plus÷ system to program the timer white observing the VCR s display,you can on!y program I a one-time recording. To stop programming, press the POWER button to turn the VCR power on. 1 Insert a blank or erasable tape. The power comes on automatically and the tape indicator lights on the display.
Thedelayedrecording indicatorwilldisplayontheVCR. ThistellsyouthattheVCRwillautomatically recordatthetimesanddatesyouhaveporgrammed. Whenyouhavesetupallthetimedrecordings youwant: • Don'tforgetto loada videocassette (withthesafetytabstillattached) to recordon. • If usinga cableboxtheVCRcancontrol,turnonthecableboxbeforethetimetherecording is tobegin.Please referto "CableBoxSetup",onPage25 inthe"FirstTimeSetup"section. Important:Yourtimedrecording settingstakeeffectwhenyouturnoffthepowerontheVCR.
You can look back over any of the recordings you have preset and if you need to, clear out any of the programs. Normal programs will clear automatically once recording is complete, but daily and weekly setting must be cleared out manually. 1 Press the GUIDE button. The main on-screen menu will appear on the TV screen. REVIEW SETUP CLOCK CHANNEL ENGLISH FRAN_AIS END _ i 2 Press the (1) button for the PROGRAM REVIEW option. This brings up the screen setting for the first program.
TheVCRremotecontrolcan beprogrammedto controlmanyTVbrandsthatareremotecontrolled. 1Turn on theTV. \_J 2 Point VCR remote control toward TV. 3 Press and hold the "TV" button. 4 Press the remote button corresponding to your TV brand as shown in the set-up chart. The TV channel will change to confirm that the remote control has been set.
The VCR remote control can be programmed to control many cable boxes that are remote controlled. You can easily change channels. 1 Turn on cable box. 2. Point VCR remote control toward cable box. 3. Press and hold the CATV button. 4. Press the number button corresponding to your cable box as shown in the set up chart. The cable box channel will change to confirm that the remote control has been set.
When your VCR is connected to a stereo system, you can: • Make high quality "audio only" recordings for up to 6 hours (on a T-120 video cassette tape). • Receive quality stereo sound from your VCR through your stereo system. • Use the VCR as an extra audio tape deck for dubbing. BEFORE YOU BEGIN... • Make sure the VCR is connected to your stereo system, as shown above. • Make sure that "STEREO" audio is selected from the VCR Set-Up Menu, as shown on Page 42, of "RECORDING OPERATION" Section, "Stereo vs.
4 Pressthe STOPbuttonor remotecontrolto stop recording.
You may use your VCR to copy tapes from any camcorder onto standard VHS cassette tapes. /,,N _/, O ....... A'_ NOTE: If YOur camcorder is not stereo (has 0n!y One audio plug), connect it to the AUDIO IN-L(MONO) input On the front of the MOB. * It is not necessary to connect the S-VIDEO jack. BEFORE YOU BEGIN... Connect the camcorder's AV output cable to the audio/video jacks on the front of your VCR. 1 Press the AVX button on remote control, to display L2 (line) on the TV display.
4 When you see the part of the Camcorder tape you wish to copy, press the VCR PAUSE button again to release pause and start copying the camcorder tape. • Press the stop button to finish recording.
I i _?!_i:i!_!;i_ii_il!i_i:!ii:ii_;_i!i _ _il;iii! i_! !i!:i _;!_i__,!ii!!_ _;;_i;i_;ii:_! _;_i:i: _(!ii_;:;!_!;i!_',!i!,_i!i!!ii:;!!ii_i;i;iii_iil; ¸ ?!i ] If you have two VCRs, you may use one VCR to record a tape that is being played back in the other VCR. ,_CR2 * PURCHASED SEPARATELY 1 Press the AVX button on the remote control of VCR-1 so that L1 (line) appears in the display. LINE1 2 Press the REC, then PAUSE buttons on VCR-I. The VCR will go into Record/Pause.
No power Remote control doesn't work Won't record Won't play back Won't make timer recordings Snowy picture in playback Snow'/picture Clock shows in normal TV viewing : Erratic VCR display • Make sure the VCR is plugged into an AC outlet. • Make sure the batteries are fresh, and properly installed. • Safety tab has been removed from cassette (VCR will automatically eject the tape). • Make sure the TV!VCR switch is set to the VCR mode.
the Auto HeadCleaningSystem,andmayrequirethe video headsto beprofessionallycleanedby a qualifiedservicedealer.
Format: .............................................................................. VHS Video Signal System: ............................................. NTSC color EIA standard Record!Playback System: ............................................................. Video: 4 head Audio: VHS Hi-Fi stereo record!playback system Tape Speed: .......................................................... 33.35 mm!sec (SP), 16.67 mm!sec (LP) (playback only), ..........................................................