TABLE OF CONTENTS HITACHI Video Deck VT-MX231A Owner's Manual Your Complete Guide to Videocassette Viewing and Recording Using these quality features: n Bilingual on-screen menu display selectable in English or Spanish n Infrared remote control n Real time tape counter n 181 channel capability PLL frequency synthesizer tuner with direct station call n Digital Display n Auto power on and off system n Auto counter reset n Auto rewind when the end of a tape is reached n Direct Button Operation n 2 Step Pictu
TABLE OF CONTENTS TABLE OF CONTENTS TABLE OF CONTENTS ............................................................................................................................ 2 IMPORTANT SAFEGUARDS .................................................................................................................. 4 PRECAUTIONS ......................................................................................................................................... 6 LOCATION ...............................
TABLE OF CONTENTS TO MONITOR THE PROGRESS OF YOUR RECORDING ............................................................. 29 IRT (Instant Timer Recording) ............................................................................................................. 30 TIMER RECORDING .............................................................................................................................. 31 AUTOMATIC TIMER RECORDING .......................................................................
IMPORTANT SAFEGUARDS IMPORTANT SAFEGUARDS 1. Read instructions-All the safety and operating instructions should be read before the appliance is operated. 2. Retain Instructions-The safety and operating instructions should be retained for future reference. 3. Heed Warnings-All warnings on the appliance and in the operating instructions should be adhered to. 4. Follow Instructions-All operating and use instructions should be followed. 5.
IMPORTANT SAFEGUARDS 18. Servicing-Do not attempt to service this VCR yourself as opening or removing covers may expose you to dangerous voltage or other hazards. Refer all servicing to qualified service personnel. 19. Damage Requiring Service-Unplug this VCR from the wall outlet and refer servicing to qualified service personnel under the following conditions: a. When the power-supply cord or plug is damaged. b. If liquid has been spilled, or objects have fallen into the VCR. c.
PRECAUTIONS PRECAUTIONS LOCATION For safe operation and satisfactory performance of your VCR, keep the following in mind when selecting a place for its installation: • Shield it from direct sunlight and keep it away from sources of intense heat. • Avoid dusty or humid places. • Avoid places with insufficient ventilation for proper heat dissipation. Do not block the ventilation holes on the sides of the VCR. • Install unit in a horizontal position. • Avoid locations subject to strong vibration.
PRECAUTIONS Model No. Serial No.
FEATURES FEATURES • Bilingual on-screen menu display selectable in English or Spanish • Infrared remote control • Real time tape counter- This shows the elapsed recording or playback time in hours, minutes, and seconds. (Does not work in blank areas of the tape) • 181 channel capability PLL frequency synthesizer tuner with direct station call- (A converter may be necessary to view scrambled cable channels.
VIDEO CASSETTE TAPE INFORMATION VIDEO CASSETTE TAPE INFORMATION This VCR will operate with any cassette that has the VHS mark. For best results, we recommend the use of high-quality tapes. Do not use poor quality or damaged tapes. PRECAUTIONS • Avoid moisture. Moisture condensation may occur on the tape if it is moved from a cold place to a warm place.
VIDEO CASSETTE TAPE INFORMATION • You can prevent accidental erasing of recording by breaking off the tab on the back edge of the cassette. If you decide to record on the tape again, cover the hole with plastic tape.
OPERATING CONTROLS AND FUNCTIONS OPERATING CONTROLS AND FUNCTIONS NOTES: • Some controls are located on both the VCR and on the remote control, some are only located on one, some controls operate certain functions only in one location. See each description for details. • We do not recommend the use f universal remote controls. Not all of the functions may be controlled with a universal remote control.
OPERATING CONTROLS AND FUNCTIONS 17. RENTAL SELECTOR button- Press to set the Rental Play mode on and off during playback. (only on the remote control) 18. AUTO REPEAT button- Press to repeat playback automatically. (only on the remote control) 19. CLOCK/COUNTER button- Press to display or alternate between clock and counter on the TV screen. (only on the remote control) 20. COUNTER MEMORY button- Press to set counter memory on and off. (only on the remote control) 21.
PREPARATION FOR USE PREPARATION FOR USE ANTENNA/CABLE CONNECTIONS For some of the most common types of connections, please follow the drawings below. Use only one connection. For any further complex connections, please contact your local dealer or other qualified persons. (You may need additional accessories which are not supplied). 1 Disconnect the antenna or cable from your TV. 2 Connect the antenna or cable to the ANT.IN jack of your VCR. 3 Connect one end of the coaxial cable (supplied) to the ANT.
PREPARATION FOR USE 3) Set the channel to be recorded on the Box. 4) Set the TV and VCR to channel 3 or 4. 5) Set the CH3/CH4 switch on the back of the VCR to match the channel set on the TV and VCR. 6) Press the RECORD button, or for AUTOMATIC TIMER RECORDING the VCR must stay on channel 3 or 4 at step [9] on page 23. Continued on next page. Some customers with cable boxes may record one channel and view another, with either one of the connections below.
PREPARATION FOR USE This reminder s provided to call the CATV system installer's attention to Article 820-40 of the NEC that provides guidelines for proper grounding and, in particular, specifies that the cable ground shall be connected to the grounding system of the building, as close to the point of cable entry as practical.
PREPARATION FOR USE Fig. 8: INSTALLING THE BATTERIES 1) Open the battery compartment cover by pressing the cover on the remote unit in the direction of the arrow. 2) Insert 2 "AA" penlight batteries into the battery compartment in the direction indicated by the polarity (+/–) markings. 3) Replace the cover. You can program the tuner to scan only the channels you receive in your area. You must use the remote control for this procedure.
PREPARATION FOR USE FOLIOHG2  3 Turn on the VCR Press POWER button to turn on the VCR. Both the "PWR." indicator and the "VCR" indicator on the VCR come on. • Use the remote control for this procedure. 4 Select "ENGLISH" or "ESPANOL" Select "ENGLISH" or "ESPAÑOL"=Spanish using Then, press MENU or F.FWD/ /PLAY or /STOP button. button. LANGUAGE SELECT → ENGLISH [ON] ESPAÑOL NOTE: This WILL NOT change the audio (sound) coming out of the VCR only the screen menu.
PREPARATION FOR USE • If "TUNER SET UP" appears on the TV screen again, check the cable connections. Then, press MENU, F.FWD/ REW/ or button once again. The VCR will begin preset again. TO SELECT A DESIRED CHANNEL You can select the desired channel by using CHANNEL (CH) remote control. or button or directly pressing number buttons on the Note for using number buttons: • When selecting cable channels which are higher than 99, press +100 button first, then press the last two digits.
PREPARATION FOR USE SETTING CLOCK MONTH DAY 03 / - HOUR MINUTE -- : -- YEAR ---AM/PM -- 3 Select the day Press /PLAY or /STOP button repeatedly until your desired day appears. (Example: 1st → 01) Then, press F.FWD/ button. SETTING CLOCK MONTH DAY 03 / 01 HOUR MINUTE -- : -- YEAR ---AM/PM -- 4 Select the year Press /PLAY or /STOP button repeatedly until your desired year appears. (Example: 1998) Then, press F.FWD/ button.
PREPARATION FOR USE 6 Select the minute Press /PLAY or /STOP button repeatedly until the desired minute appears. (Example: 40) Then, press F.FWD/ button. SETTING CLOCK MONTH DAY YEAR 03 / 01 SUN 1998 HOUR MINUTE 05 : 40 AM/PM -- 7 Select "AM" or "PM" Press /PLAY or /STOP button repeatedly to point to "AM" or "PM". (Example: PM) SETTING CLOCK MONTH DAY YEAR 03 / 01 SUN 1998 HOUR MINUTE 05 : 40 PM AM/PM AM →PM 8 Start the clock Press RESET/EXIT or F.FWD/ button.
PREPARATION FOR USE 3) Follow steps [2] to [8]. TO DELETE OR ADD CHANNELS The channels you no longer receive or seldom watch can be deleted from the memory. (Of course, you can add the deleted channel into the memory again.) • Use the remote control for this procedure. • The "PWR." and the "VCR" indicator must appear on the VCR's digital display. • Turn on the TV and set the TV to channel 3 or 4. Now set the CH3/CH4 switch on the back of the VCR to match the channel selected on the TV.
PREPARATION FOR USE ADD/DELETE CH 02 (TV) 5 Delete it from memory Press the F.FWD/ or REW/ button again, the channel is memorized again. ADD/DELETE CH 02 (TV) -DELETED• To delete another channel, repeat steps [4] and [5]. • If you press the the F.FWD/ or REW/ button again, the channel is memorized again. ADD/DELETE CH 02 (TV) -MEMORIZED6 Exit the preset mode Press RESET/EXIT button to return to TV mode. NOTE: To confirm that channel(s) has been deleted or added, press CHANNEL or button.
PREPARATION FOR USE • Use the remote control for this procedure. 1) Press MENU button repeatedly so that the INITIALIZE menu appears. 2) Confirm "CHANNEL SET UP" is pointed to then, press F.FWD/ button. 3) Confirm "AUTO TUNING" is pointed to, then press the F.FWD/ memorized channel. button. After scanning, the tuner stops at the lowest • The VCR distinguishes between standard TV channels and cable channels.
PLAYBACK PLAYBACK NORMAL PLAYBACK • The "PWR." and the "VCR" indicator must appear on the VCR's digital display. • Turn on the TV and set the TV to channel 3 or 4. Now set the CH3/CH4 switch on the back of the VCR to match the channel selected on the TV. 1 Insert a prerecorded tape Counter mode appears at counter 0:00:00 on the TV screen. If the erase-protection tab has been removed, the VCR will start playback automatically. 2 To begin playback Press PLAY button.
PLAYBACK This is not a fault of the machine but merely a by-product of the technology involved in producing a 2 Head VCR with SP and LP mode. • If it is left in the Still mode for more than five minutes, the VCR will automatically switch to the Stop mode. NOISE CANCEL (in the Still mode) This feature allows you to reposition or reduce the noise lines of a still picture.
PLAYBACK M 0:00:00 • The COUNTER MEMORY button does not function if the Auto Repeat mode is set to [ON]. In this case, set the Auto Repeat mode to [OFF]. 4 Begin recording or playback Press REC or PLAY button. Press STOP button when recording or playback is completed. 5 To activate the Counter Memory Press the REW (or F.FWD) button, the VCR will stop automatically when the counter has returned to approximately 0:00:00 NOTE: The displayed time will not change during blank portions on the tape.
PLAYBACK • You may also select the Auto Repeat mode by pressing the AUTO REPEAT button on the remote control. • Once you select the Auto Repeat mode, it stays in effect even after you turn off the VCR. • The Counter Memory button does not function if the Auto Repeat mode is set to [ON]. In this case, set the Auto Repeat mode to [OFF]. • To stop playback, press STOP button. TO EXIT THE AUTO REPEAT MODE • Repeat steps [1] to [2] and press the F.FWD/ button to return to TV mode.
RECORDING RECORDING • Please refer to the connection you are using, through pages 10, 11, or 12 on "ANTENNA/CABLE CONNECTIONS" before continuing. • The "PWR." and the "VCR" indicator must appear on the VCR's digital display. • Turn on the TV and set the TV to channel 3 or 4. Now set the CH3/CH4 switch on the back of the VCR to match the channel selected on the TV. • Insert a cassette tape with its erase prevention tab in place.
RECORDING SP NOTE: If any menu is activated on the TV screen, the REC button on the remote control does not function. Press RESET/EXIT button to clear the menu. Then, press REC button. 4 Stop recording Press STOP button when recording is completed. SKIPPING UNWANTED SCENES DURING RECORDING Press PAUSE button to temporarily stop recording. Press PAUSE or REC button to resume recording. PAUSE NOTE: When the VCR is in the Pause mode, you may view the time remaining with n marks on the TV screen.
RECORDING IRT (Instant Timer Recording) This function enables you to set a recording length simply by pressing the REC/IRT button on the VCR. • Please refer to the connection you are using, through pages 10, 11, or 12 on "ANTENNA/CABLE CONNECTIONS" before continuing. • It is not possible to perform this function with the remote control. • The "PWR." and the "VCR" indicator must appear on the VCR's digital display. • Turn on the TV and set the TV to channel 3 or 4.
TIMER RECORDING TIMER RECORDING AUTOMATIC TIMER RECORDING You may set the VCR to start and end a recording while you are away. You can set seven programs to record on specific days, daily or weekly within a 1 year period. In the example below, the timer is being set to record: DATE: May 6th, 1998 SETTING TIME:from 7:30PM to 8:30PM CHANNEL: CH16 TAPE SPEED: SP PROGRAM NO: No. 1 • Please refer to the connection you are using, through pages 10, 11, or 12 on "ANTENNA/CABLE CONNECTIONS" before continuing.
TIMER RECORDING 2 Select your desired program number (1 ~ 7) Program number which is not set up flashes. /PLAY or /STOP button repeatedly until your desired program number appears. (Example: 1) Press Then, press F.FWD/ button. PROGRAM NUMBER 1 DATE --/-START TIME - - : - - - END TIME --:-- -CHANNEL -REC SPEED - - 3 Select once, daily or weekly recording For once recording: Press /PLAY or /STOP button repeatedly to point to "ONCE". Then, press F.FWD/ PROGRAM NUMBER button.
TIMER RECORDING PROGRAM NUMBER → • When you press F.FWD/ • Press REW/ 1 ONCE DAILY WEEKLY button during steps [4] to [10], you may forward to next step. button to go back one step from current step during steps [2] to [10]. 4 Set the date when you want to start First, press /PLAY or /STOP button repeatedly until your desired month appears. (Example: "05" for May) Then, press F.FWD/ button.
TIMER RECORDING ONE TIME PROGRAM DATE START TIME END TIME CHANNEL REC SPEED 05 / 06 WED 07 : 30 PM --:-- ---AM → PM 7 Set the end hour Press /PLAY or /STOP button repeatedly until your desired hour appears. (Example: 08) Then, press F.FWD/ button. ONE TIME PROGRAM DATE START TIME END TIME CHANNEL REC SPEED 05 / 06 WED 07 : 30 PM 08 : - - - --AM → PM 8 Set the end minute Press /PLAY or button. Next, press /STOP button repeatedly until your desired minute appears. (Example: 30) Then, press F.
TIMER RECORDING CHANNEL REC SPEED 16 -- • Remember refer to "ANTENNA/CABLE CONNECTIONS" on pages 11 and 12 if you have a cable box or satellite box before setting the channel number. 10 Set the tape speed Press /PLAY or /STOP button repeatedly until your desired tape speed appears. (Example: SP) ONE TIME PROGRAM DATE START TIME END TIME CHANNEL REC SPEED → 05 / 06 07 : 30 08 : 30 16 SP SP SLP WED PM PM LP 11 Finish setting the program Press F.FWD/ button. Program 1 is now completed.
TIMER RECORDING Press STOP/EJECT button on the VCR. NOTE: The STOP button on the remote control will not function in the Automatic Timer Recording mode. CANCELING OR CHECKING THE START/END TIME 1) Turn the power on. 2) Press MENU button. 3) Select a program number you want to check using on the TV screen. /PLAY or /STOP button. The details of selected program appears You may cancel the entire program by pressing REW/ button. 4) Press RESET/EXIT button to return to original mode.
TIMER RECORDING NOTE: To exit the auto return programming, repeat steps [1] to [2]. Then, press F.FWD/ disappear from the menu. Press RESET/EXIT button to return to TV mode. button. [AUTO] will then WATCH THE RECORDED PROGRAM Press POWER button to turn on the VCR. Then, press PLAY button.
COPYING A VIDEO TAPE COPYING A VIDEO TAPE You can make copies of video tapes made by friends or relatives for your enjoyment. Warning: Unauthorized recordings of copyrighted video tapes may be an infringement of copyright laws. Connect the editing (recording) VCR, source (playing) VCR and your TV using the following diagram. Fig. 9: 1) Insert a pre-recorded video cassette into the source (playing) VCR.
ON SCREEN DISPLAY ON SCREEN DISPLAY NOTE: VCR power and the "VCR" indicator must be on. • To check the Count, Clock and Channel number, press DISPLAY button. Each time you press DISPLAY button, TV screen will change as shown below. click for image of display • It is normal for the status display (STOP, PLAY etc.) and the tape speed display (SP,LP,SLP) to disappear after 5 seconds. • To check the Count, Clock and Channel number, press the CLOCK/COUNTER button on the remote control.
TROUBLESHOOTING GUIDE TROUBLESHOOTING GUIDE If you have followed the instructions contained in this manual and have difficulty in operating your VCR, locate the PROBLEM in the left column below. Check the corresponding CORRECTIVE ACTION columns to remedy the problem. PROBLEM CORRECTIVE ACTION No power. • Make sure the AC cord is connected to an AC outlet • Make sure the power is turned on. Timer recording is not possible. • Make sure the timer recording is set correctly. • Make sure the power is off.
MAINTENANCE MAINTENANCE SERVICING Should your VCR become inoperative, do not try to correct the problem by yourself. There are no user-serviceable parts inside. Turn off, unplug the power cord, and take the unit to Hitachi Authorized Service Center for servicing. CABINET CLEANING • Wipe the front panel and other exterior surfaces of the VCR with a soft cloth immersed in lukewarm water and wrung dry. • Never use a solvent or alcohol. Do not spray insecticide liquid near the VCR.
TECHNICAL SPECIFICATIONS TECHNICAL SPECIFICATIONS Format: VHS Video Signal System: NTSC color EIA standard Record/Playback System: Video: 2 heads Tape Speed: 33.35mm/sec (SP), 16.67mm/sec (LP), 11.12mm/sec (SLP) RF Input: UHF/VHF 75 ohm Tuner: 181 channel tuning ability *(125 cable channels) Type: Auto programming frequency synthesis Power Input: AC120V 60Hz Power Consumption: 16 W nominal Cabinet Size: 14-1/4" (W) x 3-5/8" (H) x 9-1/16" (D) 36.0cm (W) x 9.2cm (H) x 23.0cm (D) Weight: 5.51 lbs. (2.
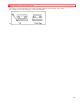
CABLE CHANNEL DESIGNATIONS CABLE CHANNEL DESIGNATIONS If you subscribe to cable TV, the channels are displayed as 1-125. Cable companies often designate channels with letters or letter-number combinations. Please check with your local cable company. The following is a chart of common cable channel designations.