
User's Instructions


Aircraft
(ACRO)
Section
– 27 –
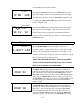
If you're happy with the wing or swash type that is displayed, go on to the next step. If you wish
to change the wing or swashplate type from that displayed, press on the
Left
or
Right
Cursor
buttons until the wing/swash type you want appears. CAUTION: if you change types, you may
lose settings in the menus.
4. Press the
Up
or
Down
arrow keys to get to another setup menu, or switch power off.
5. Switch power back on. You may now set up the details of your model in the Edit mode.
Model Name
The Model Name function is used to create an alpha-numeric name which is stored in the
model memory along with the rest of the model settings. You will find it useful to help keep
track of multiple models.
The model name can be four alphabetic characters, along with up to three numbers
following. The letters may be used to abbreviate the model’s name, and the numbers may be
used for the memory number, or you may wish to store that model’s channel number so you can
remember easier.
Inputting a Model Name
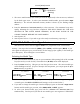
1. With the transmitter switched off, turn on your transmitter while pressing both of the two
Edit
keys (the two keys on the far left). The model select (M.SEL) menu will be displayed, with
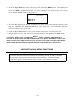
"stars" to represent letters to be chosen. “NAME” should be added below “MODEL” in the
graphic below
****- 0
421 3 567
MODEL
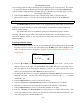
2. Press the
Up or Down
arrow key until you get into the model name menu. You’ll see the
display as shown to the right, with the MODEL and NAME indicators in the upper left on.
The first character of the name will be flashing on and off. (If you’re already in the setup
menus, you can just press the
Up
or
Down
arrow key to get here.)
3. To change the first character, press the +
Increase
and –
Decrease
Data
keys until you see the
character you desire. You may select from the upper case letters A — Z, *, +, –, /, and the
numbers 0 — 9.
4. Press the
Right Cursor
key to move to the next character.
5. Press the +
Increase
and –
Decrease
Data
keys until you see the character you desire.
6. Repeat the previous two steps to input the third and fourth characters of the display.
7. Press the
Right Cursor
key to move to the number displays on the right.
8. Press the +
Increase
and –
Decrease
Data
keys until you get to a number that you like. This
can be any number from 0 to 199. If you have lots of models with different frequencies, you
may wish to input your channel number here.