User Guide FreeSpeak Edge™ User Guide Part Number: 399G304 Rev A Date: April 22, 2020
FreeSpeak Edge | User Guide Document reference FreeSpeak Edge™ User Guide 399G304 Rev A Legal disclaimers Copyright © 2020 HME Clear-Com Ltd All rights reserved Clear-Com, the Clear-Com logo, and Clear-Com Concert are trademarks or registered trademarks of HM Electronics, Inc. The software described in this document is furnished under a license agreement and may be used only in accordance with the terms of the agreement.
FreeSpeak Edge | User Guide Table of contents 1 Important Safety instructions 1.1 Safety symbols 2 Introduction to FreeSpeak Edge™ 7 8 2.1 FreeSpeak Edge 5 GHz 8 2.2 System capacity 9 3 Installing FreeSpeak Edge 10 3.1 Installing the FreeSpeak Edge transceiver 10 3.2 Clear-Com cable recommendations 12 3.3 Daisy-chain transceivers 13 3.4 Installing and removing an E-IPA-HX card 14 3.5 Adding an E-IPA-HX card to the software 14 3.6 Configuring the E-IPA-HX card for FreeSpeak Edge 15 3.
FreeSpeak Edge | User Guide 6.2 Front controls 50 6.3 Beltpack bottom connectors 50 6.4 Beltpack batteries and power 50 6.5 Menu mode 52 6.6 Use/persist local settings (beltpacks) 52 6.7 Edge beltpack menu access 53 6.8 FreeSpeak Edge beltpack menus 55 7 Operating the Edge transceiver 70 7.1 IP rating (Protection Marking) 70 7.2 FreeSpeak Edge transceiver connector panel 71 7.3 Powering the transceiver 71 7.4 Edge transceiver status LEDs 72 7.
FreeSpeak Edge | User Guide 10.9 European Union (CE mark) 90 10.10 Waste Electrical and Electronic Equipment (WEEE) 91 10.11 General Battery Safety Instructions for Battery Models: BAT41, BAT50, BAT60, BAT70, BAT80 91 10.12 배 터 리 모 델 에 대 한 일 반 배 터 리 안 전 지 침 : BAT41, BAT50, BAT60, BAT70, Page 5 BAT80 93 10.
FreeSpeak Edge | User Guide 1 Important Safety instructions The following safety instructions apply: l Read these instructions. l Keep these instructions. l Heed all warnings. l Follow all instructions. l Do not use this apparatus near water. l Clean only with dry cloth. l l l l l l l l l Page 6 Do not block any ventilation openings. Install in accordance with the manufacturer’s instructions.
FreeSpeak Edge | User Guide l l l This product uses Lithium Ion Batteries which can be a fire hazard, if used improperly. Use only HME/Clear-Com supplied BAT80 or equivalent battery packs to ensure safe operation of the beltpack. When using AA Batteries follow all safety instructions from manufacturer. Do not mix different battery chemistries. When depleted, replace all batteries. The in-beltpack USB charging feature has only been tested utilizing USB2.0 port.
FreeSpeak Edge | User Guide 2 Introduction to FreeSpeak Edge™ FreeSpeak Edge™ is a member of Clear-Com’s FreeSpeak™ family of digital wireless intercom solutions. It uses the 5 GHz radio frequency range. The FreeSpeak Edge system includes full duplex multi-channel wireless beltpacks and transceivers for use in a matrix with Clear-Com's SMPTE 2110-30/AES67 compatible IP audio card, the E-IPA-HX. FreeSpeak Edge uses encryption (AES256) between beltpack and transceiver for security. 2.
FreeSpeak Edge | User Guide 2.2 System capacity FreeSpeak Edge supports up to a maximum 64 beltpacks and 64 transceivers per E-IPA card. Each FreeSpeak Edge transceiver supports 10 beltpacks within one coverage zone. The technology within FreeSpeak permits the beltpack user to go between coverage zones created by different transceivers, and for the system to hand over the communication from one transceiver to the next. Thus, a larger, customizable communications area may be designed.
FreeSpeak Edge | User Guide 3 Installing FreeSpeak Edge To install the FreeSpeak Edge system use the following general guidelines (overview). In the first instance you will need: l l l An RF scan of the local area. You can scan the local area using the beltpack Channel Scanning mode. Use this to find out which channels have the least existing RF traffic and will therefore provide the best environment for reliable audio transmission.
FreeSpeak Edge | User Guide fixed in an upright position in order for the cooling mechanism to work properly. Note: This unit MUST have a 4-inch clearance above and below to allow for safe operating conditions. Note: This unit MUST NOT be installed above other heat sources because this will reduce the performance. Wall Mounting The transceiver can be attached to the wall mounting plate with a simple push and downward press movement (lift and pull to remove).
FreeSpeak Edge | User Guide Orientation of unit Upright Environmental performance l l Upside down l Up to 50°c (with 4 inch clearance above and below plus no heat sources below) IP rating 55 (to be confirmed) Up to 50°c (with 4 inch clearance above and below plus no heat sources below) l IP rating not guaranteed l Up to 32°c l No IP rating On its side Note: For best performance the transceiver should be positioned 6 - 8 feet (1.8 - 2.4 m) above the floor and 2 feet (0.6 m) below the ceiling.
FreeSpeak Edge | User Guide Specification Description l Category (Cat) l Example: Cat 5; up to 1GB. Cat 6; up to 10GB. l Use Cat 5e or higher. l American Wire Gauge (AWG) l 3.3 Higher Cat numbers will support a higher bandwidth. Therefore, by using a higher Cat number, you are future proofing your system to some extent. The lower the AWG number, the less temperature rise there will be in the cable when using PoE. This is particularly important for bundles.
FreeSpeak Edge | User Guide 3.4 Installing and removing an E-IPA-HX card To install an E-IPA-HX card: 1. Carefully place the card in the appropriate slot. Make sure the card is aligned with the top and bottom precision guides. 2. Push the card toward the backplane connectors. 3. When the card has almost reached the backplane connectors, open the two ejector tabs, allowing them to clear the edges of the matrix. Gently insert the card further until it touches the backplane connector guides. 4.
FreeSpeak Edge | User Guide 1. In the EHX configuration software go to: Hardware > Cards and Ports, and then navigate to an available slot number (marked Empty). Do either of the following: a. Double click the slot. b. Right click the slot and select Set Card Type. 2. Select a card type from the drop-down menu listing the available card types. Note: You cannot have both E-IPA-HX cards and E-Que card on the same matrix. 3.
FreeSpeak Edge | User Guide 3.6.2 Add beltpacks When using FreeSpeak Edge on E-IPA-HX , each beltpack takes up a matrix port. Select the number of beltpacks you require. 1. Navigate to Cards and Ports and select the E-IPA-HX Card slot. 2. Click +Port. The following screen appears. Note: If you are adding more than one port, you can enter values in the Characters to Replace and Seed value fields to automatically generate labels.
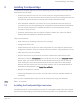
FreeSpeak Edge | User Guide transceivers of the same type on one card. This eliminates the possibility of beltpacks roaming between cards. When using a single E-IPA card, FS II and FS Edge transceivers can co-exist on the same card (up to 64 transceivers on one card). Transceivers can be allocated to particular E-IPA cards in the EHX software. See image below. 3.8 Connecting the FreeSpeak Edge transceivers to a matrix The FS Edge transceiver connects to an E-IPA-HX card in an Eclipse HX Digital Matrix.
FreeSpeak Edge | User Guide Recommendation: l Rule: Page 18 The IP transceivers have a higher than average requirement for network timing accuracy. For this reason it is advisable to use different VLANs to route Admin/IVC traffic and AES67 IPT traffic.
FreeSpeak Edge | User Guide l Note: If you separate Admin and IVC traffic then they must be on different VLANs. The bandwidth usage per Edge transceiver is ~9.6 Mbps. Warning: If you change the IP address of the AES67 ports (transceiver or E-IPA matrix card), the devices will reset automatically. Reset can take up to five minutes.. When connecting the E-IPA-HX card to the Edge transceiver over your network certain scenarios will work while others do not.
FreeSpeak Edge | User Guide 3.8.1 Network setup for the FreeSpeak II and FreeSpeak Edge transceivers Bear in mind the following network considerations. For more information, refer to the ClearCom network recommendations document. l l l l l l l l Clear-Com recommends that AES67 traffic has its own dedicated network or VLAN. If there is no DHCP server, AES67 connections will use the link-local range of IP addresses (169.254.XXX.XXX).
FreeSpeak Edge | User Guide 3.8.2 Cabling the FreeSpeak Edge TCVR Run Ethernet cable from one of the LAN connectors on the E-IPA card (default AES67 connector = LAN 3) to the FS Edge TCVR via a properly configured IP network port. 3.9 Adding transceivers to the matrix When at least one beltpack has been allocated to the card, you will see a Transceivers button appear under Hardware. Click this button to add and remove IP transceivers. Two methods can be used for adding transceivers; 1.
FreeSpeak Edge | User Guide Note: Page 22 If you reset a transceiver to default settings, the device reverts to DHCP. To reset the transceiver, press and hold the Mode button on the transceiver base until the status light turns red (approximately 12 seconds).
FreeSpeak Edge | User Guide The color of the detected transceiver indicates Blue Transceiver is available and ready for use Amber Transceiver is configured, but not connected to the matrix. A download is required Green Transceiver is connected to the matrix Gray Transceiver is connected to another matrix, but it is not online Purple Transceiver is already connected to another matrix From the AoIP Devices screen, use the up and down arrows to add or remove matrices from your current configuration.
FreeSpeak Edge | User Guide 3.9.3 Static configuration By default, the E-IPA-HX card is DHCP enabled, and any IPTs are in DHCP mode. However, you can allocate static IP addresses for an IPT. If the IP AES67 Admin and AES67 Audio IP addresses are in DHCP mode, you must set them to static mode. 1. Navigate to Hardware > Cards and Ports, and then double-click the card slot containing the E-IPA-HX card. The Card Properties screen appears.
FreeSpeak Edge | User Guide 2. Select the AES67 tab, and then deselect DHCP Enabled. 3. Enter the required static IP address, and then Apply Changes. 4. Click Close. 5. Navigate to Hardware > Transceivers. 6. Click the cog icon for the required transceiver. The Transceiver Properties screen appears. 7. Select Edit, and then deselect DHCP Enabled for both AES67 Admin and AES67 Audio. Note: You cannot mix DHCP and static IP addressing on the IPT.
FreeSpeak Edge | User Guide Note: The IP Transceiver must be connected. 8. Enter the required static IP addresses for AES67 Admin and AES67 Audio. Note: You cannot set static IP addresses that are within the Link Local range (169.254.0.0 to 169.254.255.
FreeSpeak Edge | User Guide 9. Click the tick or cross icon to accept or discard changes. 10. Click Close. 11. Click Apply Map to Matrix. 3.10 Beltpack roles Beltpack roles are used to define your Edge beltpack properties and audio configuration. Roles should be created in your configuration software before you connect your beltpacks to the system. Once a role has been generated in EHX, audio and keys can be configured in panel programming.
FreeSpeak Edge | User Guide The beltpack role is treated like a panel in the EHX software. Beltpack keys and other audio entities can be dragged and dropped onto the keys. To configure audio for your beltpack navigate to: EHX>Matrix>Configuration>Panels. Then select the beltpack you wish to configure from the dropdown list. 3.10.1 More information on programming roles To configure your audio entities see Chapter 17. Panel Programming in the EHX Configuration Software User Guide.
FreeSpeak Edge | User Guide 3.11 Registering the beltpack to a matrix Before registering a beltpack to your system you must have: l At least one transceiver connected l As many beltpack roles as you have beltpacks (1:1) There are two methods for registering beltpacks to your FreeSpeak Edge system: 1. Using a USB cable 2. Over The Air (OTA) wireless registration 3.11.1 USB registration To register a beltpack with a USB, connect the beltpack (USB C) to the PC hosting the EHX software.
FreeSpeak Edge | User Guide 3.11.2 Over The Air (OTA) wireless registration (EHX) If your beltpacks are not within easy reach of the PC hosting the EHX software, you can register them remotely as long as they are within range of an active and registered transceiver. To do this you must: 1. Enable registration mode in EHX (10 minute window). 2. From the beltpack, use the menu to connect to the system and then register. Note: The beltpack menu must be in advanced mode to use OTA registration.
FreeSpeak Edge | User Guide Once registered, the beltpack system will proceed to connection. Note: When you have registered your beltpacks in this way you need to Fetch Registered Beltpacks from the matrix before applying the map to the matrix. 3.12 Connect the beltpacks Once the beltpacks have been registered to a matrix system they can be connected to the transceiver network. You will see Searching... in the main beltpack menu screen.
FreeSpeak Edge | User Guide Transceiver channels can also be viewed from the beltpack. On the beltpack, navigate to: Menu>Diagnostics>Connection status. A transceiver with DFS channels performs a 1 minute radar scanning process before channels become operational. If you are using two DFS channels, they are scanned at the same time, so 1 minute total scanning time. In Europe, DFS channels 120, 124 and 128 are allowed.
FreeSpeak Edge | User Guide l EHX: in the EHX user interface navigate to Matrix>Hardware>Beltpacks>Delete When you have deleted the beltpacks, you must Apply Map to Matrix If you do not de-register at the beltpack and in EHX (you only do one) the beltpacks are not able to connect but they are still listed. This has the potential to cause confusion.
FreeSpeak Edge | User Guide 4 Site survey features The FreeSpeak Edge system provides tools to facilitate your site survey: 4.1 l Standalone mode, transceiver l Local RF scan mode, beltpack Transceiver standalone mode You can use standalone mode to connect the Edge transceiver to two beltpacks with full duplex audio. This is useful for performing an initial survey to find out how the transceiver performs in the local RF environment before the device is connected to a matrix.
FreeSpeak Edge | User Guide 4.2 Local RF scan using a beltpack Your Edge beltpack has the capacity to conduct an RF scan of the local environment, in order to find out which 5GHz channels on your site are available and do not contain RF traffic. When you put a beltpack in Channel Scan mode, it reboots in a mode that can see the local RF environment. Audio and BLE are not available. 4.2.1 Put the beltpack into Channel Scan mode 1. Power on the beltpack. 2.
FreeSpeak Edge | User Guide Bar color Percentage score Green over 66% Yellow between 33 and 66 % Red below 33% The percentage score is calculated by an algorithm using Received Signal Strength Indicator (RSSI), RF activity and the presence of access points.
FreeSpeak Edge | User Guide 5 RF channel selection 5 GHz The 5 Ghz band has many more RF channels than the 1.9 or 2.4 GHz bands (20 - 30 depending on region). This channel density can allow a high data through put (up to 10 beltpacks in an RF zone) and combined with the Edge system technology gives low latency, high quality (12 KHz) audio transmission. The Edge transceivers make use of antenna diversity.
FreeSpeak Edge | User Guide on the location. When re-using channels, you must be careful that transceivers using the same channels are not located next to each other as this causes interference. A beltpack must not be able to see a particular channel more than once at any time.
FreeSpeak Edge | User Guide For rapid set up you can use the default channels, but in any case you are advised to seek information about existing 5 GHz traffic in your location. This information can be obtained from: l A site frequency coordinator or IT administrator (if there is one) l A scan of channels in the location using the beltpack Typically, the default channel setup will work for a small system (4 transceivers or less) in an environment that has limited equipment competing for the band usage.
FreeSpeak Edge | User Guide Channel power defaults to the highest available value (according to regulatory region). When one channel has a lower power setting than the other, the transceiver will take the lowest power setting. View these settings in transceiver properties. Navigate to: Matrix>Transceiver>Properties>Basic Options. Transceiver channels can also be viewed from the beltpack. On the beltpack, navigate to: Menu>Diagnostics>Connection status.
FreeSpeak Edge | User Guide the EHX software. For a definition of 'adjacent' see Radio Frequency (RF) channel selection and power settings on page 39. For more information see the Freespeak Edge RF Configuration Guide available from the Clear-Com website. 5.3 Channel re-use Channel re-use is a way of making the best use of the available 5 GHz RF channels in your location.
FreeSpeak Edge | User Guide 5.3.1 Guidelines l l l Page 42 Transceiver RF coverage zones ideally overlap by 20% of the coverage cell If transceivers are 3m (10 feet) or less apart, for best performance, Clear-Com recommends that adjacent transceivers do not use adjacent channels. Without this gap between channels and transceivers, there is some possibility of interference. Adjacent transceivers can use the same channels if the channel order is reversed.
FreeSpeak Edge | User Guide Rule l 5.4 The beltpacks must not be able to see more than one transceiver with the same channel at any one time. Using Dynamic Frequency Selection (DFS) channels DFS channels are selected by default by the system software as they are less crowded with wireless traffic than other channels. When DFS channels are used, the FS Edge system makes use of a channel scanning mechanism that switches the signal to a backup channel if radar is detected.
FreeSpeak Edge | User Guide l Reset the channels in the EHX software. Navigate to: Matrix>Hardware>Transceivers>Transceiver>Basic Options, change channel and Apply Map to Matrix. l Power cycle the transceiver (this can take up to 5 minutes) l Reset the transceiver in the EHX software. Navigate to: Matrix>Hardware>Transceivers>Transceiver and click the cog icon for transceiver properties. l 5.4.3 Click the Reset button.
FreeSpeak Edge | User Guide Backup channels are restricted to non-DFS channels to reduce the risk of non-transmission. The EHX software will report scanning for radar activity with explicit messaging. If the transceiver is in standalone mode and radar is detected, the device will stop transmitting. Note: Non DFS channels do not require a channel scan or a backup channel. For more information about transceiver status LEDs, see Edge transceiver status LEDs on page 72 5.
FreeSpeak Edge | User Guide 5.7 Wireless Regulatory Region (WRR) The WRR defines the allowed channels, DFS functionality and RF power limits that are available to the FreeSpeak Edge system according to its regional regulatory requirements. 5 GHz channel use must comply with regional regulations. Each transceiver has a fixed WRR setting and cannot be changed by the user or any third-party. WRR settings must also be configured in the EHX software by system preferences.
FreeSpeak Edge | User Guide You can also see the channels and power ratings available in each region in this screen. Note: The Edge transceiver is the master device with a fixed WRR (Wireless Regulatory Region) that ensures regulatory conformity with respect to allowed channels, DFS functionality and RF power settings. The Edge beltpacks are slave/client devices that follow the WRR settings of the transceiver that they are registered to. Link Transceiver models (regional variations) on page 84 5.
FreeSpeak Edge | User Guide When done Apply Map to Matrix Page 48
FreeSpeak Edge | User Guide 6 Operating the Edge beltpack The FreeSpeak Edge beltpack has the following features: l l Up to 9 audio channels (with reply key re-assigned) l Can be used without a headset (half-duplex, like a walkie-talkie) l Easy USB and over-the-air (OTA) registration of beltpack to system l Build-in flashlight l Touch sensitive reply key with haptic feedback (vibrate) l Intuitive setup of channels using a 'drag and drop' interface l 9 keys are fully user configurable so the
FreeSpeak Edge | User Guide 6.2 Front controls 6.3 Beltpack bottom connectors 6.
FreeSpeak Edge | User Guide You can charge the beltpack by using the beltpack charger. Place up to four beltpacks in the charger bay. It takes about five hours to charge beltpack. Note: You can also remove a battery from a beltpack and charge the battery in the charger. It takes about three hours to charge a battery. 6.4.1 Beltpack batteries The following specifications apply to the BAT80 batteries.
FreeSpeak Edge | User Guide Shut down As well as using the power button, beltpack can also be shut down using the 'shutdown' option in the Administration menu. Note: The beltpack will only shut down if the USB and the cradle are disconnected, otherwise it will reboot. 6.5 Menu mode Although the beltpack is controlled from the EHX configuration software by default, it also has a menu system available in the beltpack display screen. 6.
FreeSpeak Edge | User Guide 6.6.2 Enable Use/Persist Local Settings (beltpack menu) 1. In the beltpack menu, navigate to Roles>Role Default Set. 2. To disable this feature and return beltpack control to the configuration software, uncheck this setting in the configuration software. 6.7 Edge beltpack menu access To enter menu mode on an Edge beltpack, press and hold the + and - keys at the same time (2 second press).
FreeSpeak Edge | User Guide Once in the menu, use, the rotary keys to scroll through the list. Use the D key to select a menu item. Use the C key to go back. Use the C key to exit menu mode, or allow it to time out. Note: Page 54 When in menu mode you can also use the "." and "...." keys to select and cancel menu options.
FreeSpeak Edge | User Guide Note: The beltpack has four menu levels that are defined by the beltpack role: advanced, normal, basic and none . To change the menu level access from your beltpack you must input the menu access pin code. By default this is 4632. To find the menu access code in the configuration software navigate to: Matrix>Configuration>Preferences>Menu Access Code. If you change the menu access code in the configuration software, you must Apply Map to Matrix for the change to take effect.
FreeSpeak Edge | User Guide Audio Menu item Description l Master volume: -70 to 0 dB l Keys A,B,C,D, 1,2,3,4: -80 to 12.1 dB Volume Level Control l Sidetone control: tracking, non tracking, disabled l Sidetone level: -70 dB to 0 dB l Headphone gain: 0, 3, 6 dB l Headset Options l l Limiter: -12 to 8 dB/Off. The limiter prevents audio getting too loud (potential ear damage). Low level limit: Off/ -21, -12, -6 dB.
FreeSpeak Edge | User Guide Beltpack settings Menu item Description Flashlight The power button is the default control for the flashlight but it can also be turned on and off from the menu Call alert mode Off, audio, vibrate, both Low battery alert mode Off, audio vibrate, both Alarm battery threshold 0 - 100% (5% increments) Out/zone alert mode Haptic feedback Off/audio, vibrate, both. l Enable l Disable l Use this setting to disable the vibrate mechanism on the reply button.
FreeSpeak Edge | User Guide System Menu item Description l l l System System connect. Use this to register and connect the beltpack. The beltpack must be registered to a system before it can connect. System delete. Unregister the beltpack from a previous system. Standalone mode (visible only in standalone mode) l Name (read only) l IP address (read only) l l l RF channel 1 (select available channel) RF channel 2 (select available channel) Tx power applied (select the transceiver power in dBm).
FreeSpeak Edge | User Guide Diagnostics Menu item Description l RPN (transceiver) l Channels l Signal strength l Packet loss l # beltpack l Overall score Site Survey RF channel 1 and 2: Connection status Signal strength l Packet loss l Skipped (?) l Channel number Channel scan The beltpack reboots before it enters channel scan mode. Battery status % charge, battery power in V and mA, temperature, lifetime in charge cycles, timeto-empty. Hardware 6.8.
FreeSpeak Edge | User Guide Audio settings Menu item Description l Master volume: -70 to 0 dB l Sidetone: -70 to 0 dB Volume control l Sidetone control: tracking, non tracking, disabled l Sidetone level l Headphone gain: 0, 3, 6 dB l Limiter: -12 to 8 dB/Off l Low level limit: Off/ -21, -12, -6 dB Headset options l Contour filter Mic Type: Electret, dynamic, auto detection On/Off Beltpack settings Menu item Flashlight The power button is the default control for the flashlight Call al
FreeSpeak Edge | User Guide Brightness settings Menu item Description l Off l On Dark mode l Display brightness Dark mode turns the beltpack screen display off completely. For use in environments that need a blackout. Very low, low, medium, high, very high Display dim timeout Off/5 to 120 seconds (5 second increments) Display off timeout 5 to 120 seconds (5 second increments) System Menu item Description l l l System System connect. Use this to register and connect the beltpack.
FreeSpeak Edge | User Guide Administration Menu item Software info Reboot Shutdown Menu access level Description Software version informatiion Power cycle the beltpack Switch the beltpack off Select access level (pin protected) Diagnostics Menu item Description l RPN (transceiver) l Channels l Signal strength l Packet loss l # beltpack l Overall score Site survey RF channel 1 and 2: Connection status l Packet loss l Skipped (?) l Channel number The beltpack reboots before it enters
FreeSpeak Edge | User Guide Speaker Menu item Description On/off Speaker On allows the beltpack to be used without the headset with simplex (one way) audio. The beltpack is used like a walkietalkie. Speaker Off returns audio to the headset (usually duplex, depending on configuration).
FreeSpeak Edge | User Guide Brightness settings Menu item Description l Off l On Dark mode l Dark mode turns the beltpack screen display off completely. For use in environments that need a blackout. System Menu item Description l l l System System connect. Use this to register and connect the beltpack. The beltpack must be registered to a system before it can connect. System delete. Unregister the beltpack from a previous system.
FreeSpeak Edge | User Guide Administration Menu item Software info Reboot Shutdown Menu access level Description Software version informatiion Power cycle the beltpack Switch the beltpack off Select access level (pin protected) Diagnostics Menu item Description l RPN (transceiver) l Channels l Signal strength l Packet loss l # beltpack l Overall score Site survey RF channel 1 and 2: Connection status Signal strength l Packet loss l Skipped (?) l Channel number Channel scan The bel
FreeSpeak Edge | User Guide Speaker Menu item Description On/off Speaker On allows the beltpack to be used without the headset with simplex (one way) audio. The beltpack is used like a walkietalkie. Speaker Off returns audio to the headset (usually duplex, depending on configuration). Menu item Description System l System l System connect. Use this to register and connect the beltpack. The beltpack must be registered to a system before it can connect. System delete.
FreeSpeak Edge | User Guide Diagnostics Menu item Description l RPN (transceiver) l Channels l Signal strength l Packet loss l # beltpack l Overall score Site survey RF channel 1 and 2: Connection status Signal strength l Packet loss l Skipped (?) l Channel number Channel scan The beltpack reboots before it enters channel scan mode. Battery status % charge, battery power in V and mA, temperature, lifetime in charge cycles, timeto-empty. Hardware 6.8.
FreeSpeak Edge | User Guide System Menu item Description l System l System connect. Use this to register and connect the beltpack. The beltpack must be registered to a system before it can connect. System delete. Unregister the beltpack from a previous system. Note: Only RF channels and RF power options that are compliant with Edge system WRR (wireless regulatory region) are available on the beltpack's menu.
FreeSpeak Edge | User Guide Diagnostics Menu item Description l RPN (transceiver) l Channels l Signal strength l Packet loss l # beltpack l Overall score Site survey RF channel 1 and 2: Connection status Signal strength l Packet loss l Skipped (?) l Channel number Channel scan The beltpack reboots before it enters channel scan mode. Battery status % charge, battery power in V and mA, temperature, lifetime in charge cycles, timeto-empty.
FreeSpeak Edge | User Guide 7 Operating the Edge transceiver The FreeSpeak Edge transceiver has multiple radios and antennas (antenna diversity). The device receives and transmits over 2 radio channels and the radios are in continuous use in order to make the best use of whatever signal paths are available between the transceiver and the beltpacks. The two swivel blade antennas provided with the device can be angled for optimum coverage of your intercom environment.
FreeSpeak Edge | User Guide 7.2 FreeSpeak Edge transceiver connector panel 7.3 Powering the transceiver The transceivers can use: l Power over Ethernet (PoE). Connect to LAN 1 RJ45. Note: The transceiver is a Class 3 PoE device. 7.3.1 l Local power. Use the supplied power supply (12V DC 5 amp). l USB power from a USB battery pack. For standalone mode, this is 3 A, 5V. Power redundancy You can simultaneously power the FreeSpeak Edge transceiver using a local power supply and PoE.
FreeSpeak Edge | User Guide 7.4 Edge transceiver status LEDs The status LEDs are also visible from the top of the transceiver.
FreeSpeak Edge | User Guide Transceiver start up sequence Transceiver state Status LEDs LED flash rate and color Transceiver booting 1 and 2 steady blue (up to 3 mins) No connection with the Eclipse matrix frame 1 and 2 flash white (up to 2 mins) Acquiring PTP 1 and 2 flash purple (up to 2 mins) PTP locked 1 and 2 steady purple DFS channel availability check (1 minute per channel). DFS radio channels are scanned to check for radar activity before they are selected for use.
FreeSpeak Edge | User Guide Transceiver state Status LEDs Flash rate color Transceiver has entered standalone mode Release the mode button 1 and 2 steady yellow Transceiver is in standalone mode and is ready for beltpack connection. 1 is steady yellow. LED 2 flashes yellow (double flash). For PTP and radio sync indicators see the transceiver start up sequence table above.
FreeSpeak Edge | User Guide Press and hold the mode button Mode Feature Status LED 2 shows mode selection. < 3 seconds 1 Clear mode selection > 3 < 6 seconds 2 Identify me feature. LED 2 white for 1 second then color mix flashing > 6 < 9 seconds 3 LED 2 green. No feature. > 9 < 12 seconds 4 LED 2 yellow. No feature. 5 LED 2 red. Reset the transceiver to default settings. The device will also reboot. > 12 seconds 7.
FreeSpeak Edge | User Guide Port 7.7 Setting AES67 Admin DHCP (67, 68) mDNS (5553) HTTP (80, 8080, 443) rsync (873) IVP port is configurable AES67 Audio DHCP (67, 68) PTP (319, 320) mDNS (5353) IVP (6001) HTTP (8080) Network and synchronization The following network and synchronization information applies: l l l l l 7.8 The transceiver is shipped with DHCP enabled (default).
FreeSpeak Edge | User Guide System size 7.
FreeSpeak Edge | User Guide 8 Upgrading FreeSpeak Edge This section tells you how to upgrade your transceiver and beltpacks. 8.1 Upgrading FreeSpeak Edge transceivers You can upgrade the transceiver firmware by: 8.1.1 l Upgrading from the matrix (the file extension for the upgrade firmware is .ccf) l Using a USB connection (the file extension for the upgrade firmware is .ccf) Upgrading from the matrix 1. Right-click on the Frame in the Layout window, and then select Firmware > Update Firmware.
FreeSpeak Edge | User Guide The upgrade will begin automatically when you insert the USB stick. Note: Both status LEDs will flash light blue once per second for 5 seconds on successful detection of the upgrade file. Both status LEDs will light solid red if there is an error during the upgrade. When upgrade is complete, both status LEDs will flash green. 8.2 Upgrading FreeSpeak Edge beltpacks You can upgrade the FreeSpeak II beltpack firmware by: 8.2.
FreeSpeak Edge | User Guide 2. Select Next. The following screen appears: 3. Select the Wireless radio button. Select the Automatic option. 4. Select Next, and then browse to the upgrade file (.ccu) and select Open. The upgrade file is downloaded to the connected beltpack. Upgrade status is shown on the beltpack display and also in the EHX Event Log..
FreeSpeak Edge | User Guide 9 Specifications 9.
FreeSpeak Edge | User Guide Specification Value Battery life 12 hours Input Level 70 to -40 dBu Electret headphone voltage 2.3V Microphone and Headset Limiters Selectable Powering Li-Ion Battery. 4400 mAh, 16Wh Latency for AES67 less than 50 ms Battery Charging In unit, using 4-way AC80 charger. Can be charged using USB C.
FreeSpeak Edge | User Guide 9.2 FreeSpeak Edge transceiver Specification Page 83 Value Beltpacks supported per transceiver 10 in one cellular zone Frequency spectrum 5170 to 5875 (20MHz channels set by country) Transceiver transmission range Up to 450 m ( ft.
FreeSpeak Edge | User Guide 9.3 FreeSpeak Edge battery charger and battery Specification 9.4 Value Power Supply Input voltage: 100 to 240 Vac (50 to 60Hz) Output voltage: 12 V at 5 A (60 W) MTBF (min.) 300,000 hours (calculated hours at 25 degrees Celsius, by Telcordia SR-332) Temperature Operating: 0 to 45 degrees Celsius Storage: -30 to 70 degrees Celsius Humidity: 20 to 90%, non-condensing Charger dimensions 11 x 2.8 x 7.2 inches, 279.4 x 71.1 x 182.9 mm (whd) Charger weight Charger alone: 1.
FreeSpeak Edge | User Guide 9.5 Transmission method Specification 9.6 Value RF modulation Orthogonal frequency-division multiplexing (OFDM) Frequencies of operation and maximum RF output Edge supports 20 MHz, ieee 5GHz channels Theory of Operation Dynamic allocation of frequencies and handoff of beltpacks among the transceivers up to their individual limit of up to 10 connected beltpacks at a time; each beltpack is assigned a virtual port within the matrix.
FreeSpeak Edge | User Guide 10 Regulatory compliance Applicant Name: Clear-Com LLC Applicant Address: 1301 Marina Village Pkwy, Suite 105, Alameda CA 94501, United States Manufacturer Name: Clear-Com LLC Manufacturer Address: 1301 Marina Village Pkwy, Suite 105, Alameda CA 94501, United States Country of Origin: USA Brand: Clear-Com Caution: All products are compliant with regulatory requirements detailed in this document when the user follows all installation instructions and operating conditions per Cle
FreeSpeak Edge | User Guide 10.1 Part numbers and regulatory models Part number 10.
FreeSpeak Edge | User Guide 10.3 FCC/IC/EC RF exposure warning This product complies with FCC/IC/EC radiation exposure limits set forth for an uncontrolled environment. Produits Clear-Com sont conformes aux limites IC d'exposition aux rayonnements définies pour un environnement non contrôlé. This product may not be co-located or operated in conjunction with any other antenna or transmitter.
FreeSpeak Edge | User Guide User Restriction in the 5Ghz band: The device for the band 5150-5250MHz is only for indoor usage to reduce potential for harmful interference to co-channel mobile satellite systems. Jusqu’a nouvel ordre, les appareils faisant l’objet de la presente section ne doivent pas transmettre dans la bande 5600-5650 MHz, afin que les radars meteorologiques d’Environnement Canada fonctionnant dans cette bande soient proteges.
FreeSpeak Edge | User Guide 10.8 New Zealand compliance statement User Restriction in the 5Ghz band: This device is restricted to indoor use only when operating in 5150-5250MHz. 10.9 European Union (CE mark) The CE marking indicates compliance with the following directives and standards, whenever applicable to the product in question. 10.9.
FreeSpeak Edge | User Guide 128 must perform a 10 minutes radar scanning (also known as CAC - Channel Availability Check) before becoming an operating channel. 10.10 Waste Electrical and Electronic Equipment (WEEE) The European Union (EU) WEEE Directive (2012/19/EU) places an obligation on producers (manufacturers, distributors and/or retailers) to take-back electronic products at the end of their useful life. The WEEE Directive covers most Clear-Com products being sold into the EU as of August 13, 2005.
FreeSpeak Edge | User Guide 10.11.1 Using the Battery WARNING! Do Not Abuse/Modify Battery Packs Lithium-ion cells and battery packs may get hot, explode or ignite and cause serious injury if modified or abused. 10.11.2 Follow the safety instructions below l Do not place the battery in fire or heat the battery. l Do not connect the battery backward, so the polarity is reversed. l l l Do not carry or store the battery together with necklaces, hairpins or other metal objects.
FreeSpeak Edge | User Guide In the event the battery leaks and the fluid gets into one’s eye, do not rub the eye. Rinse well with water and immediately seek medical care. If left untreated, the battery fluid could cause damage to the eye. If the device causes abnormal current to flow, it may cause the battery to become hot, explode, or ignite causing serious injury. 10.11.3 Charger types Your battery must only be charged with an HME/Clear-Com recommended charger ONLY.
FreeSpeak Edge | User Guide 따르십시오. 배터리 사용 경고! 배터리 팩을 남용하거나 수정하지 마십시오 리튬 이온 전지 및 배터리 팩은 변형되거나 남용 될 경우 뜨겁거나 폭발하거나 발화하여 심각한 부상을 입을 수 있습니다. 아래 안전 지침을 따르십시오. • 배터리를 불 속에 넣거나 배터리를 가열하지 마십시오. • 배터리를 뒤로 연결하지 마십시오. 극성이 바뀝니다. • 금속 물체 (예 : 전선)로 배터리의 양극 단자와 음극 단자를 서로 연결하지 마십시오. • 목걸이, 머리핀 또는 기타 금속 물체와 함께 배터리를 운반하거나 보관하지 마십시오. • 손톱으로 배터리를 찌르거나 망치로 배터리를 치거나 배터리를 밟거나 충격에 강한 충격을 가하지 마십시오. • 배터리에 직접 납땜하지 마십시오. • 배터리를 물이나 바닷물에 노출 시키거나 배터리가 젖지 않도록하십시오. • 배터리를 분해하거나 개조하지 마십시오.
FreeSpeak Edge | User Guide • 배터리를 전자 레인지, 고압 용기 또는 유도 조리기구에 넣지 마십시오. 배터리가 누출되어 액체가 눈에 들어가면 눈을 비비지 마십시오. 물로 잘 씻고 즉시 치료를 받으십시오. 치료하지 않으면 배터리 액이 눈에 손상을 줄 수 있습니다. 장치에 비정상적인 전류가 흐르면 배터리가 뜨거워 지거나 폭발 또는 발화하여 심각한 부상을 입을 수 있습니다. 충전기 유형 또는 화학적 화상이 발생할 수 있습니다. 배터리 충전기 모델 BAT41 충전기 모델 : AC40 및 AC40A BAT50 충전기 모델 : AC50 BAT60 충전기 모델 : AC60 BAT70 충전기 모델 : AC70 BAT80 충전기 모델 : AC80 배터리 충전 배터리를 충전하는 동안 아래 나열된 경고를 따르십시오. 그렇지 않으면 배터리가 뜨거워 지거나 폭발 또는 발화하여 중상을 입을 수 있습니다.
FreeSpeak Edge | User Guide Для обеспечения безопасности и надежности вашей батареи следуйте инструкциям в этом разделе. Использование батареи ПРЕДУПРЕЖДЕНИЕ! Не злоупотребляйте / не изменяйте Аккумуляторы Литиево-ионные элементы и аккумуляторы могут нагреваться, взрываться или воспламеняться, что может привести к серьезным травмам модификации или неправильном использовании. Следуйте инструкциям по безопасности ниже: • Не подвергайте аккумулятор воздействию огня и не нагревайте его.
FreeSpeak Edge | User Guide или возгоранию. Использование батареи таким образом может также привести к потере производительности или сокращению срока службы. • Если батарея изношена, перед утилизацией изолируйте клеммы липкой лентой или аналогичным непроводящим материалом. • Немедленно прекратите использование батареи, если во время использования, зарядки или хранения батареи она издает необычный запах, нагревается, меняет цвет или форму или выглядит ненормальной любым другим способом.
FreeSpeak Edge | User Guide l l Не продолжайте зарядку батареи, если она не заряжается, как указано в Руководстве пользователя HME / Clear-Com, в соответствии с инструкциями по зарядке.