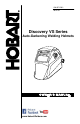
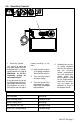
OM-257 076C 2014−02 Discovery VS Series Auto-Darkening Welding Helmets www.HobartWelders.
TABLE OF CONTENTS SECTION 1 − WELDING HELMET SAFETY PRECAUTIONS − READ BEFORE USING . . . . . 1 1-1. Symbol Usage . . . . . . . . . . . . . . . . . . . . . . . . . . . . . . . . . . . . . . . . . . . . . . . . . . . . . . . . . . . . . 1 1-2. Arc Welding Hazards . . . . . . . . . . . . . . . . . . . . . . . . . . . . . . . . . . . . . . . . . . . . . . . . . . . . . . . 1 1-3. Proposition 65 Warnings . . . . . . . . . . . . . . . . . . . . . . . . . . . . . . . . . . . . . . . . . . . . . . . . . . . .
SECTION 1 − WELDING HELMET SAFETY PRECAUTIONS − READ BEFORE USING helmet 2013-09 Protect yourself and others from injury — read, follow, and save these important safety precautions and operating instructions. 1-1. Symbol Usage DANGER! − Indicates a hazardous situation which, if not avoided, will result in death or serious injury. The possible hazards are shown in the adjoining symbols or explained in the text. Indicates special instructions.
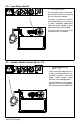
WELDING HELMETS do not provide unlimited eye, ear, and face protection. Arc rays from the welding process produce intense visible and invisible (ultraviolet and infrared) rays that can burn eyes and skin. Sparks fly off from the weld. Use impact resistant safety spectacles or goggles and ear protection at all times when using this welding helmet. Do not use this helmet while working with or around explosives or corrosive liquids. Do not weld in the overhead position while using this helmet.
1-3. Proposition 65 Warnings Welding or cutting equipment produces fumes or gases which contain chemicals known to the State of California to cause birth defects and, in some cases, cancer. (California Health & Safety Code Section 25249.5 et seq.) This product contains chemicals, including lead, known to the state of California to cause cancer, birth defects, or other reproductive harm. Wash hands after use. 1-4. Lens Shade Selection Table Process Electrode Size in.
SECTION 2 − SPECIFICATIONS Discovery VS (No. 9 − No. 13 Variable Shade) Cartridge Dimensions 4.33 x 3.54 x 0.39 in. (110 x 90 x 10 mm) Viewing Field 3.82 x 1.81 in. (97 x 46 mm) Reaction Time 0.000083 Second (1/12,000) Available Shades Darkened State: No. 9 − 13 / Light State: No.
3-2. Low Battery Indicator The auto-darkening lens turns on (darkens) automatically when welding begins and turns off 15 − 20 minutes after welding stops. 1 Low Battery Indicator The low battery indicator lights when 2−3 days of battery life remain. 1 If battery power is low, install new CR2450 lithium battery. 3-3. Weld On/Grind On Switch 1 Weld On/Grind On Switch Do not weld in the Grind On mode; the lens will not darken.
3-4. Lens Delay Control 1 Lens Delay Control The lens delay control is used to adjust the time for the lens to switch to the clear state after welding. 1 The delay is particularly useful in eliminating bright after-rays present in higher amperage applications where the molten puddle remains bright momentarily after welding. Lens delay adjusts from min (0.10 second) to max (1.0 second). 3-5. Variable Shade Control (No. 9 − 13) 1 1 Variable Shade Control (No.
3-6. Sensitivity Control 1 1 Sensitivity Control Use control to make the lens more responsive to different light levels in various welding processes. Use a Mid-Range or 30−50% sensitivity setting for most applications. It may be necessary to adjust helmet sensitivity to accommodate different lighting conditions or if lens is flashing On and Off. Adjust helmet sensitivity as follows: Adjust helmet sensitiv- ity in lighting conditions helmet will be used in.
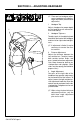
SECTION 4 − ADJUSTING HEADGEAR There are four headgear adjust- ments: headgear top, tightness, angle adjustment, and distance adjustment. 1 Headgear Top Adjusts headgear for proper depth on the head to ensure correct balance and stability. 1 2 Headgear Tightness To adjust, push in the adjusting knob located on the back of the headgear and turn left or right to desired tightness. If adjustment is limited, it may be necessary to remove the comfort cushion.
SECTION 5 − REPLACING THE LENS COVERS 5-1. Replacing Outside Protective Lens 5 4 3 2 1 ! Never use the autodarkening lens without the inside and outside lens covers properly installed. Welding spatter will damage the autodarkening lens and void the warranty. 1 Auto-Darkening Lens Retainer Clips 2 Auto-Darkening Lens Retainer 3 Auto-Darkening Lens Assembly 4 Outside Protective Lens (Clear) 5 Gasket Place helmet upside down on a flat surface.
5-2. Replacing Inside Protective Lens 2 4 3 1 ! Never use the autodarkening lens without the inside and outside lens covers properly installed. Welding spatter will damage the autodarkening lens and void the warranty. 1 Auto-Darkening Lens Retainer Clips 2 Auto-Darkening Lens Assembly 3 Auto-Darkening Lens Retainer OM−257 076 Page 10 4 Inside Protective Lens (Clear) Place helmet upside down on a flat surface. Adjust or remove headgear to improve access to lens assembly.
5-3. Removing Auto-Darkening Lens Assembly 2 3 1 4 ! 1 2 3 4 Never use the autodarkening lens without the inside and outside lens covers properly installed. Welding spatter will damage the autodarkening lens and void the warranty. Auto-Darkening Lens Retainer Clips Auto-Darkening Lens Assembly Auto-Darkening Lens Retainer Shade Control Knob Place helmet upside down on a flat surface. Adjust or remove headgear to improve access to lens assembly.
SECTION 6 − REPLACING THE BATTERY 1 Battery Cover Remove battery by turning battery cover counterclockwise. 1 Replace with CR2450 lithium battery. Be sure Positive (+) side of the battery faces up (toward inside of helmet). SECTION 7 − INSTALLING OPTIONAL MAGNIFYING LENS 1 Optional Magnifying Lens Release lower lens retainer clip. Starting at the bottom, slide magnifying lens into the helmet retaining brackets. Align the magnifying lens with the auto-darkening lens assembly.
SECTION 8 − MAINTENANCE NOTICE − Never use solvents or abrasive cleaning detergents. NOTICE − Do not immerse the lens assembly in water. The helmet requires little maintenance. However, for best performance clean after each use. Using a soft cloth dampened with a mild soap and water solution, wipe the cover lenses clean. Allow to air dry. Occasionally, the filter lens and sensors should be cleaned by gently wiping with a soft, dry cloth.
Trouble Remedy Switching or Flickering – the auto-lens darkens then lightens while the welding or cutting arc is present. Be sure the arc sensors are not being blocked from direct access to the arc light. Check the lens cover for dirt and spatter that may be blocking the arc sensors. Inconsistent or lighter auto-lens shading in the dark-state, noticeable on the outside edges and corners. Referred to as an angle of view effect, auto-darkening lenses have an optimum viewing angle.
SECTION 10 − PARTS LIST 1 3 4 5 2 Figure 10-1. Auto-Darkening Welding Helmet Item No. Part No. Description Quantity Figure 10-1. Auto-Darkening Welding Helmet 1 . . . . . . . . 770676 . . . . Kit, Helmet Hardware . . . . . . . . . . . . . . . . . . . . . . . . . . . . . . . . . . . . 1 2 . . . . . . . . 770493 . . . . Kit, Clear Lens (Includes 5 Outside Lenses/2 Inside Lenses) . . . 1 3 . . . . . . . . 770762 . . . . Replacement Auto-Darkening Lens . . . . . . . . . . . . . . . . . . . . . . . .
SECTION 11 − LIMITED WARRANTY LIMITED WARRANTY – Subject to the terms and conditions below. Hobart Brothers Co., Troy, Ohio, warrants to its original retail purchaser that the new Hobart equipment sold after the effective date of this limited warranty is free of defects in material and workmanship at the time it is purchased at the retailer. THIS WARRANTY IS EXPRESSLY IN LIEU OF ALL OTHER WARRANTIES, EXPRESS OR IMPLIED, INCLUDING THE WARRANTIES OR MERCHANTABILITY AND FITNESS.
Hobart Brothers Co. 2200 Corporate Drive Troy, OH 45373 USA Phone: 800-332-3281 Visit our website at www.HobartWelders.