OM-279 180 060P August 2001 Processes Air Plasma Cutting and Gouging Description Air Plasma Cutter AirForce 750
From Hobart to You Thank you and congratulations on choosing Hobart. Now you can get the job done and get it done right. We know you don’t have time to do it any other way. This Owner’s Manual is designed to help you get the most out of your Hobart products. Please take time to read the Safety precautions. They will help you protect yourself against potential hazards on the worksite. We’ve made installation and operation quick and easy.
TABLE OF CONTENTS WARNING This product, when used for welding or cutting, produces fumes or gases which contain chemicals known to the State of California to cause birth defects and, in some cases, cancer. (California Health & Safety Code Section 25249.5 et seq.) OM-279 SECTION 1 – SAFETY PRECAUTIONS - READ BEFORE USING . . . . . . . . . . . . . . . . . . . . . . . . . . . 1-1. Symbol Usage . . . . . . . . . . . . . . . . . . . . . . . . . . . . . . . . . . . . . . . . . . . . . . . . . . . . . . . . . .
SECTION 1 – SAFETY PRECAUTIONS - READ BEFORE USING pom _nd_9/98 1-1. Symbol Usage Means Warning! Watch Out! There are possible hazards with this procedure! The possible hazards are shown in the adjoining symbols. Y Marks a special safety message. . Means “Note”; not safety related. This group of symbols means Warning! Watch Out! possible ELECTRIC SHOCK, MOVING PARTS, and HOT PARTS hazards. Consult symbols and related instructions below for necessary actions to avoid the hazards. 1-2.
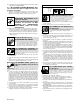
EXPLODING PARTS can injure. D On inverter power sources, failed parts can explode or cause other parts to explode when power is applied. Always wear a face shield and long sleeves when servicing inverters. D D D D FLYING SPARKS can cause injury. D Sparks and hot metal blow out from the cutting arc. Chipping and grinding cause flying metal. D D D Wear approved face shield or safety goggles with side shields. Wear proper body protection to protect skin.
1-3. Additional Symbols For Installation, Operation, And Maintenance HOT PARTS can cause severe burns. D Do not touch hot parts bare handed. D Allow cooling period before working on torch. MOVING PARTS can cause injury. D Keep away from moving parts such as fans. D Keep all doors, panels, covers, and guards closed and securely in place. FLYING METAL can injure eyes. D Wear safety glasses with side shields or face shield. MAGNETIC FIELDS can affect pacemakers. D Pacemaker wearers keep away.
1-4. Principal Safety Standards Safety in Welding and Cutting, ANSI Standard Z49.1, from American Welding Society, 550 N.W. LeJeune Rd, Miami FL 33126 Safety and Health Standards, OSHA 29 CFR 1910, from Superintendent of Documents, U.S. Government Printing Office, Washington, D.C. 20402. Recommended Practices for Plasma Arc Cutting, American Welding Society Standard AWS C5.2, from American Welding Society, 550 N.W.
SECTION 1 – CONSIGNES DE SÉCURITÉ – LIRE AVANT UTILISATION pom_nd_fre_9/98 1-1. Signification des symboles Signifie Mise en garde ! Soyez vigilant ! Cette procédure présente des risques de danger ! Ceux-ci sont identifiés par des symboles adjacents aux directives. Y Identifie un message de sécurité particulier. . Signifie NOTA ; n’est pas relatif à la sécurité.
D Isoler la pince de masse quand pas mis à la pièce pour éviter le contact avec tout objet métallique. Il y a DU COURANT CONTINU IMPORTANT dans les convertisseurs après la suppression de l’alimentation électrique. D Arrêter les convertisseurs, débrancher le courant électrique, et décharger les condensateurs d’alimentation selon les instructions indiquées dans la partie entretien avant de toucher les pièces. Tableau 1.
LES BOUTEILLES peuvent exploser si elles sont endommagées. Les bouteilles de gaz contiennent du gaz sous haute pression. Si une bouteille est endommagée, elle peut exploser. Puisque les bouteilles de gaz font habituellement partie d’un processus de travail des métaux, assurez–vous de les manipuler correctement. D Protégez les bouteilles de gaz comprimé contre la chaleur excessive, les chocs mécaniques, le laitier, la flamme, les étincelles et l’arc.
1-4. Principales normes de sécurité Safety in Welding and Cutting, norme ANSI Z49.1, de l’American Welding Society, 550 N.W. Lejeune Rd, Miami FL 33126 Safety and Health Sandards, OSHA 29 CFR 1910, du Superintendent of Documents, U.S. Government Printing Office, Washington, D.C. 20402. Recommended Safe Practice for the Preparation for Welding and Cutting of Containers That Have Held Hazardous Substances, norme AWS F4.1, de l’American Welding Society, 550 N.W.
SECTION 2 – INSTALLATION 2-1. Specifications Model Amperes Input at Rated Load Output 60 Hz 200 V 230 V 460 V 575 V KVA KW SinglePhase 42.30 (3.40*) 36.80 (2.95*) 18.40 (1.50*) –– 8.49 (0.68*) 6.55 (0.20*) 3-Phase –– 18.40 (2.13*) 9.20 (1.07*) 7.40 (0.85*) 7.32 (0.85*) 6.60 (0.32*) Type of Output Plasma Gas Rated Output Rated Cutting Capacity Direct Current, Straight Polarity (DCEN) Air Or Nitrogen Only 50 A @ 110 Volts DC, 60% Duty Cycle 0.
2-4. Cutting Speed The cutting speed curve shows the recommended maximum cutting speed capabilities of the power source and torch for mild steel of various thickness. Y Exceeding recommended cutting speeds will cause rapid erosion of the tip and electrode. Cutting speed is approximately 10 inches per minute at 0.7 in mild steel thickness at max setting/tip saver mode. 180 909 2-5. Selecting A Location 1 Handle Use handle to roll unit short distances.
2-6. Connecting Gas/Air Supply Use only clean and dry gas/air with 70 to 150 psi (483 to 1034 kPa) pressure. 1 1 Unit Gas Fitting (Female 1/4 NPT) 2 Quick Connect Gas Fitting 3 Standard Gas Fitting Obtain and install desired fitting. 4 Hose Obtain suitable hose according to installed fitting, and connect to fitting. Route hose to gas/air supply. 2 Adjust gas/air pressure according to Section 3-2. 3 4 From Gas/Air Supply Y Incorrect plasma gas can cause torch and power source damage.
2-8. Placing Jumper Links Check input voltage available at site. 1 Jumper Link Label Move jumper links to match input voltage and label on unit. Do not overtighten. Single-Phase Models 200 VOLTS L 230 VOLTS L L 460 VOLTS L L L S-083 566-C 1 Three-Phase Models 230 Volts L1 L2 L3 460 Volts L1 L2 L3 575 Volts L1 L2 L3 S-094 120-B Tools Needed: 3/8 in Ref.
2-9. Connecting Input Power 1 Strain Relief Clamp Route input and grounding conductors through clamp to terminal board. 2 Three-Phase Connections Input And Grounding Conductors Line Disconnect Device 3 Select type and size of overcurrent protection using Section 2-7. Single-Phase Connections 1 Three-Phase System Y Always connect grounding conductor first. Single-Phase System = GND/PE 3 3 L1 (U) 2 L2 (V) L1 (U) L3 (W) L2 (V) 2 OR 2 Tools Needed: 7/16 in 1/2 in Ref. 801 455 / Ref.
SECTION 3 – OPERATION 3-1. Front Panel Controls 4 2 5 3 7 6 1 Ref. 190 676 1 Pilot Arc Switch Use switch to control pilot arc. Place switch in Expanded Metal position for continuous pilot arc. Use while cutting expanded metals only. . The Expanded Metal position keeps the pilot arc in the circuit at all times. Life of consumables will be significantly reduced while in Expanded Metal mode. Place switch in Tip Saver position to provide pilot arc output for arc starting only.
3-2. Setting Gas/Air Pressure Place controls in positions shown to adjust air pressure. Only gas/air circuit is activated when the Power switch is turned On with Output Control in Gas/Air Set position. 1 Pressure Gauge 2 Pressure Adjustment Knob Lift knob and turn to adjust pressure. Push knob down to lock in setting. Place output control in desired cutting output. Set pressure to 70 PSI (483 kPa).
3-3. Sequence Of Operation Do not clean torch by hitting it against a hard surface. Hitting hard surfaces can damage torch parts and stop proper operation. Install & Connect Equipment Put On Personal Safety Equipment Check Torch Tip, Electrode, And Retaining Cup Check Gas/Air Pressure Inspect shield cup, tip, and electrode for wear before cutting or whenever cutting speed has been significantly reduced (see torch Owner’s Manual). Do not operate torch without a tip or electrode in place.
SECTION 4 – MAINTENANCE & TROUBLESHOOTING 4-1. Routine Maintenance Y Disconnect power before maintaining. . Maintain more often during severe conditions.
4-2. Trouble Lights 1 Difficulty establishing pilot arc may indicate consumables need to be cleaned or replaced. Pressure Light Lights if gas/air pressure is below 40 PSI (276 kPa). Turn power Off, and check for proper gas/air pressure (see Section 3-2). 2 Cup Light Lights if shield cup is loose. Turn power Off, and check shield cup connection (see torch Owner’s Manual). Power must be reset whenever the cup shutdown is activated. 1 2 Check shield cup shutdown system once a week (see Section 4-3).
4-4. Troubleshooting Trouble Remedy No pilot arc; difficulty in establishing an Clean or replace worn consumables as necessary (see torch Owner’s Manual). arc. Check for damaged torch or torch cable (see torch Owner’s Manual). Have Factory Authorized Service Agent check power switch S1, control relay CR1, CR5 and CR6, rectifier SR1 (and SR2 for single-phase models), safety control board PC1, power control boards PC2 and PC3, inductor L1, resistor R1, and check gas air system for leaks.
Trouble Remedy Fan motor FM does not run; Power light Have Factory Authorized Service Agent check fan motor connections. and Ready light both On. Check input power, and check for proper input connections (see Sections 2-7 and 2-9). Trouble lights not working. OM-279 Page 20 Have Factory Authorized Service Agent check safety control board PC1.
SECTION 5 – ELECTRICAL DIAGRAMS 193 215 Figure 5-1.
194 148 Figure 5-2.
Notes OM-279 Page 23
SECTION 6 – PARTS LIST . Hardware is common and not available unless listed. 12 13 11 10 14 15 11 12 31 16 32 9 33 34 35 52 17 25 30 8 29 28 7 6 5 1 36 27 26 25 37 8 18 4 3 2 19 38 24 20 23 21 39 51 40 49 22 50 41 45 46 44 43 42 47 48 801 499-J Figure 6-1.
Item No. Dia. Mkgs. Part No. Description Quantity Figure 6-1. Main Assembly ... 1 ............. ... 2 ............. ... 3 ............. . . . 4 . . . . RS1 . . . . . . 5 . . . . VR3 . . . . . . 6 . . . . CR5 . . . ... 7 ............. . . . 8 . . . CR1,6 . . . . . . 9 . . . . . L1 . . . . . . . 10 . . . . . . . . . . . . . . . . 11 . . . VR1,2 . . . . . . 12 . . . SR1,2 . . . . . . 13 . . . . TP2 . . . . . . . 14 . . . . VR1 . . . . . . 15 . . . . SR1 . . . . . . 16 . . . . . . . . . . . . . ...........
Item No. Dia. Mkgs. Part No. Description Quantity Figure 6-1. Main Assembly (Continued) . . . 45 . . . . . . . . . . . . . . . . . . . . . . . . PANEL, front (consisting of) . . . . . . . . . . . . . . . . . . . . . . . . . . . . . . . . . . . . . . . . . . . . . . . . . . . . . . . . . . +206 446 . . . . PANEL, front . . . . . . . . . . . . . . . . . . . . . . . . . . . . . . . . . . . . . . . . . . . . . . . . . . . . . . . . . . . . . . . . . . . . . . . . . . . . . . . . . . .
Effective October 1, 1999 Warranty Questions? Call 1-877-HOBART1 for your local Hobart distributor. Service You always get the fast, reliable response you need. Most replacement parts can be in your hands in 24 hours. Support Need fast answers to the tough welding questions? Contact your distributor or call 1-800-332-3281. The expertise of the distributor and Hobart is there to help you, every step of the way.
Owner’s Record Please complete and retain with your personal records. Model Name Serial/Style Number Purchase Date (Date which equipment was delivered to original customer.) Distributor Address City State Zip Resources Available Always provide Model Name and Serial/Style Number. To locate a Distributor, retail or service location: Contact your Distributor for: Welding Supplies and Consumables Call 1-877-Hobart1 or visit our website at www.HobartWelders.