RANGES MODEL HCR SERIES ELECTRIC RANGE MODELS HCR40 HCR41 HCR42 HCR43 HCR44 HCR45 HCR46 HCR47 HCR48 HCR49 HCR50 HCR51 HCR56 HCR58 HCR401 HCR411 HCR421 HCR431 HCR441 HCR561 ML-43796 ML-43797 ML-43798 ML-43799 ML-43800 ML-43801 ML-43802 ML-43803 ML-43804 ML-43805 ML-43806 ML-43807 ML-43808 ML-43809 ML-43810 ML-43811 ML-43812 ML-43813 ML-43814 ML-43815 EXECUTIVE OFFICES 701 RIDGE AVENUE TROY, OHIO 45374-0001 FORM 18504 (10-92)
HCR RANGE MODELS HCR40 HCR46 HCR401 HCR41 HCR47 HCR411 HCR42 HCR48 HCR421 HCR43 HCR49 HCR431 HCR50 HCR56 HCR561 HCR58 HCR441 HCR44 HCR40 HCR51 HCR45 HCR46 PL - 50911 © HOBART CORPORATION, 1992 –2–
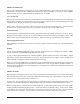
TABLE OF CONTENTS PAGE GENERAL ........................................................................................................................................................... 4 INSTALLATION ................................................................................................................................................... 5 UNPACKING ..............................................................................................................................................
Installation, Operation and Care of MODEL HCR SERIES ELECTRIC RANGE SAVE THESE INSTRUCTIONS GENERAL The various Hobart Model HCR Series Ranges are equipped as follows: MODEL EQUIPPED WITH RANGE WITH STANDARD OVEN HCR40 HCR41 HCR42 HCR43 HCR56 HCR58 (3) 12" x 24" hot tops, 5 KW each (2) 12" x 24" hot tops and (2) 91/2" diameter round French hot plates (or high speed elements) 36" wide griddle top (6) 91/2" diameter round French hot plates (or high speed elements) (2) 12" x 24" hot tops and (2) 91/2" diame
All ranges are equipped with adjustable 6" legs. Optionally, they may be equipped with no legs (for masonry base mounting) or a 4" toe base in place of legs. Ranges with ovens are equipped with one oven rack. One additional oven rack is available as an option. All full size free standing and modular ranges are provided with two drawers under the cooking tops; the left drawer is a baffled grease drawer, and the right drawer is a warming drawer.
ELECTRICAL DATA CHARTS RANGES WITH STANDARD OVENS "N/A" RANGES NOT AVAILABLE 480 VOLT 3 PHASE LOAD TOTAL KW PER PHASE KW 208V 240V 480V MODEL CONN. X-Y Y-Z X-Z HCR40,42 21.7 7.7 5 9 HCR40,42 / HCB48 27.7 10.7 8 9 HCR46,48 15 5 5 5 HCR46,48 / HCB48 21 8 8 5 HCR41,58 20.7 7.7 5 8 HCR41,58 / HCB48 26.7 10.7 8 8 HCR47 14 5 5 4 HCR47 / HCB48 20 8 8 4 HCR43 18.7 6.7 4 8 HCR43 / HCB48 24.7 9.7 7 8 HCR49 12 4 4 4 HCR49 / HCB48 18 7 7 4 HCR56 20.7 7.7 5 8 HCR56 / HCB48 26.7 10.
OPERATION WARNING: THE RANGE AND ITS PARTS ARE HOT. USE CARE WHEN OPERATING, SERVICING AND CLEANING THE RANGE. BEFORE FIRST USE Clean off the rust preventive compound on the surface units with a cloth dampened with a grease solvent. Wipe with a clean, damp cloth, then dry thoroughly. Seasoning The cast iron surface plates must be seasoned. To do this, grease the top, then turn the element switches to LO (or thermostat to 300°F) and allow the plates to heat up gradually for about 2 hours.
OVEN CONTROLS (Fig. 1) Thermostat — (located on the right side of the switch panel) controls and maintains oven temperature around the desired set temperature. Temperature range of the oven is from 175°F to 550°F. 3-Heat Switches — (two switches which are located one on each side of the thermostat) control the top and bottom oven heating elements, thereby controlling the rate of temperature build-up.
USING THE RANGE TOP Use the high setting to bring food quickly up to its cooking temperature, then reduce to the actual cooking temperature. During traffic lulls, reduce plate temperature to idle around 200°F (or set 3-heat switch to MED). When turned to HI, plates will perform bulk cooking jobs just as rapidly. 12" x 24" Hot Top Each hot top section is thermostatically controlled.
When cooking is completed, open oven door and unload product. After oven cools, any spills should be wiped up as quickly as possible to prevent them from becoming stubborn stains. OPERATING HINTS Preheat the oven and surface units to cooking temperature before cooking the product. Become familiar with the function of the controls and the area of their operation. Avoid excessive door opening. Also avoid direct air current on the oven. Use flat-bottomed, straight-sided pots and pans.
Stewing: Browning Meat in Small Amount of Hot Fat, Then Cooking with Liquid in Covered Utensil — Season meats and dredge in flour, if desired. Brown in hot fat and add liquid. Leave on high heat until food reaches cooking temperature, then switch to low heat for the slow cooking that produces tender foods. (Meats can also be braised in the oven, with a covered pan, after browning on the surface unit.) Stock Pot Work — Use high temperature setting to start food boiling.
TROUBLESHOOTING Unsatisfactory browning of the products baked in the oven is often caused by incorrect installation or operation. The most common problems and their causes are listed below. PROBLEM Bottom of product burned top light, or vice versa Light sides, back, or front Light front and dark back Uneven or spotty browning FORM 18504 (10-92) CAUSES 1. Incorrect switch positions. Use next lowest position for overbrowned surface and/or next highest for light surface. 2.