DGC5 & HGC5 SERIES GAS CONVECTION OVENS MODELS DGC5 HGC5 HGC5X HGC5D HGC5DX ML-126614 ML-126615 ML-126618 ML-126616 ML-126619 701 S. RIDGE AVENUE TROY, OHIO 45374-0001 937 332-3000 www.hobartcorp.com FORM 34312 Rev. E (Apr.
IMPORTANT FOR YOUR SAFETY THIS MANUAL HAS BEEN PREPARED FOR PERSONNEL QUALIFIED TO INSTALL GAS EQUIPMENT, WHO SHOULD PERFORM THE INITIAL FIELD START-UP AND ADJUSTMENTS OF THE EQUIPMENT COVERED BY THIS MANUAL. POST IN A PROMINENT LOCATION THE INSTRUCTIONS TO BE FOLLOWED IN THE EVENT THE SMELL OF GAS IS DETECTED. THIS INFORMATION CAN BE OBTAINED FROM THE LOCAL GAS SUPPLIER.
Installation, Operation and Care of DGC5 & HGC5 SERIES GAS CONVECTION OVENS SAVE THESE INSTRUCTIONS FOR FUTURE USE GENERAL Hobart DGC5 & HGC5 Series Gas Convection Ovens are produced with quality workmanship and material. Proper installation, usage and maintenance of your oven will result in many years of satisfactory performance. It is suggested that you thoroughly read this entire manual and carefully follow all of the instructions provided.
INSTALLATION Before installing, verify that the electrical service and type of gas supply (natural or L.P. gases) agree with the specifications on the rating plate, located behind the top trim panel on the front of the oven. If the supply and equipment requirements do not agree, do not proceed with the installation. Contact your dealer or Hobart Corporation immediately. UNPACKING Immediately after unpacking, check for possible shipping damage.
In Canada: 1. Local codes. 2. CSA B149.1 Natural Gas and Propane Installation Code. 3. STANDARD C22.1 Canadian Electric Code (latest edition). 4. CSA C22.1 Canadian Electric Code (latest edition). 5. CSA C22.2 No. 3 Canadian Electric Code (latest edition). 6. CSA Standard C22.2 No. 3 Electrical Features of Fuel Burning Equipment (latest edition). The above are available from the Canadian Standard Association, 5060 Spectrum Way, Suite 100, Mississauga, Ontario, Canada L4W 5N6.
Assembling the Legs to the Oven The legs must be installed on the bottom of the oven. Gently position the oven on its side, taking care not to scratch or damage it. BACK Attach each of the four leg assemblies to the bottom of the oven with the 24 bolts and lockwashers (six per leg). Carefully raise the oven to its normal position. ASSEMBLING THE STAND TO THE OVEN Attach each of the four leg assemblies to the bottom of the oven with the 24 bolts and lockwashers (six per leg).
LEVELING Ensure that the oven racks are level in the final installed position. If the oven is installed on legs, turn the adjustable feet in or out to level the oven front-to-back and side-to-side. If the oven is installed on casters, loosen set screws and turn casters in or out to level the oven front-to-back and side-to-side. Retighten set screws after leveling. GAS CONNECTION GAS DATA INPUT RATING MODEL DGC5, HGC5, HGC5X, HGC5D, HGC5DX MANIFOLD PRESSURE Natural L. P. Gases (Propane) Natural L. P.
BURNER AIR ADJUSTMENT Although main burner air is adjusted before shipment, it should be checked at the time of installation. Excessive air will cause flames to lift off a burner when cold or may cause flash-back during normal cycling of oven, particularly when propane gas is used. Insufficient air will cause flames to burn with a yellow tip and result in carbon accumulation in the flame chamber and heat exchanger tubes. Contact your local Hobart servicer if required.
ELECTRICAL DATA Models V/Hz/PH Minimum Circuit Ampacity Maximum Protective Device AMPS DGC5, HGC5, HGC5X, HGC5D, HGC5DX 120/60/1 208/60/1 240/60/1 240/50/1 220/380 (3W)/50/3 220/380 (4W)/50/3 240/415 (4W)/50/3 15 15 15 15 15 15 15 –9–
OPERATION WARNING: THE APPLIANCE AND ITS PARTS ARE HOT. CLEANING OR PERFORMING ANY MAINTENANCE.
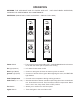
CONTROLS (Models DGC5, HGC5 and HGC5X — With Cook & Hold) POWER ON OFF POWER ON OFF COOL DOWN COOL DOWN ON HEAT ON HEAT IGNITION IGNITION COOK TEMPERATURE COOK TEMPERATURE 350 325 150 200 375 350 100 C 425 450 250 475 500 250 225 475 500 250 150 F 400 275 450 250 200 375 300 425 275 225 325 150 400 300 100 C 150 F COOK & HOLD TIME OFF COOK & HOLD TIME OFF 0 0 5 4 1 1 5 2 4 2 3 3 COOK TIME COOK TIME 0 0 5 OFF 10 60 1 5 15 55 20 50 25 45 40 35 2 4
BEFORE FIRST USE Before using the oven for the first time, it must be "burned in" to release any odors that might result from heating the new surfaces in the chamber. 1. Using a clean, damp cloth, wipe the inside of the oven including the racks. 2. Close the oven doors. 3. Push the Power switch ON 4. Turn the Cook Temperature to 300°F (149°C), and allow the oven to cycle for 2 hours or until no odor is detected before pushing the Power switch OFF. LIGHTING THE DGC AND HGC SERIES OVENS 1.
Cook & Hold (When Equipped) 1. Turn the oven ON. 2. Set the oven Cook Temperature to the desired setting. 3. Position the Function switch to C & H. 4. Set the Cook & Hold Time to the desired Cooking time. • The oven will roast the product for the chosen set time and temperature. The oven controller will automatically switch from the cooking thermostat to the holding thermostat at the end of the preset cooking time.
PROGRAMMABLE CONTROLS (Models HGC5D AND HGC5DX) Always displays [HR:Min] when setting the time. Displays [HR:Min] if the countdown time is more than 1 hour. Displays [Min:Sec] if the countdown time is less than 1 hour. Displays temperature in °F. OVEN READY C&H MODE Indicates the oven is in the Cook & Hold Mode. C&H MODE OVEN HEATING MENU SELECT Indicates the oven is preheated and ready for cooking.
MANUALLY SETTING THE TEMPERATURE AND COOK TIME To Set the Temperature 1. Press the SET button. Press the TEMPERATURE button; StPt displays to indicate Setpoint. 2. Use the Up and Down arrow keys to increase or decrease the displayed temperature value. 3. Press the SET button again to save the temperature setpoint in the computer. To Set the Cook Time 1. Press the SET button. Press the TIME button. Tine displays to indicate time. 2.
Always Set the Temperature Before Setting the Time Open the door; door will display. Place the desired product on any of the five racks. Close the door. The display should return to the set temperature or the GROWING BAR. Press the MENU key once for primary or twice for secondary to select a menu item cook time. Press the START/STOP button. Pressing the START/STOP button after making a menu selection will time all racks for the selected menu time. 6.
SETTING THE OVEN FOR COOK & HOLD 1. Press the COOK & HOLD button to select cook & hold. 2. Set the first stage temperature and the cook time as described in MANUALLY SETTING THE TEMPERATURE AND COOK TIME. Press START/STOP to begin cooking. 3. The hold temperature is preset by the computer control at 150°F (66°C). 4. The low fan speed is present during Cook & Hold. Use Cook & Hold to select low fan speed. COOK & HOLD OPERATION — (When Equipped) Cook & Hold roasts the product in two stages.
RACK ARRANGEMENTS All models are supplied with five racks and have a maximum operating capacity of six racks per oven. The 11-position rack supports provide for maximum flexibility and proper rack spacing. The following arrangements are recommended. The position numbers are in numerical sequence starting at the bottom (Fig. 4). #11 #10 #9 Arrangement #1 — Five racks in positions #2, #4, #6, #8 and #10 are for cookies or reconstitution of frozen lunches at maximum capacity.
RECOMMENDED TEMPERATURES AND TIMES FOR ROASTING Meat roasting is most satisfactory at temperatures of 225 to 325°F (107 to 163°C) for beef, lamb, poultry and ham; 325°F (163°C) for fresh pork as recommended by USDA and American Meat Institute. A pan, approximately 12 x 20 x 1" (30.4 x 50.8 x 2.5 cm) full of water, may be placed in the oven bottom. This water supplies humidity to reduce shrinkage. Water should be added if necessary during roasting.
RECOMMENDED TEMPERATURES, TIMES AND NUMBER OF RACKS FOR BAKING °F TEMP. (°C) TIME IN MINUTES NO. OF RACKS 325-360 335-350 (163-182) (168-177) 20 to 23 22 to 25 5 4 300-325 (149-163) 25 to 35 4 300-325 (149-163) 25 to 35 3 Angel or Sponge Cakes Sheet Pans 18 x 26 x 1" (45.7 x 66 x 2.5 cm) Scaled 5 to 6 lb (2.3 to 2.
RECOMMENDED TEMPERATURES, TIMES AND NO. OF RACKS FOR BAKING, Cont'd. TEMP. PRODUCT °F (°C) TIME IN MINUTES NO. OF RACKS 4 3 4 3 Yeast Breads NOTE: Yeast breads should be fully proofed for best results. Rolls — 1 oz 350-400 (177-204) 5 to 10 11/2 to 21/2 oz 350-400 (177-204) 8 to 15 Loaf Bread — 1 lb (453.4 g) 325-375 (163-191) 20 to 40 3(30)Pans 2(20)Pans Sweet Rolls & Danish Pastry 325-375 (163-191) 5 to 15 4 3 Biscuits — Rolled 1/2" (1.
REHEATING PREPARED FOODS, Cont'd. °F TEMP. (°C) TIME IN MINUTES NO. OF RACKS 350-400 (177-204) 6 to 10 350-375 (177-191) 8 to 15 4 2 to 3 4 2 to 3 Chicken Pieces Broiled or Oven Fried 2 to 21/2 lb (0.9 to 1.1 kg) bird 375-425 (191-218) 8 to 15 21/2 to 3 lb (1.1 to 1.
CLEANING WARNING: DISCONNECT THE ELECTRICAL POWER TO THE MACHINE AND FOLLOW LOCKOUT / TAGOUT PROCEDURES. Allow the oven to cool before cleaning. Heat Circulation Tube The heat circulation tube, located in the back of oven cavity, should never be blocked. The heat circulation tube should be kept clean at all times for proper operation of the oven. Clean with standard oven cleaner at least once a week. Be sure to thoroughly clean all cleansing solution off before using the oven again.
MAINTENANCE WARNING: THE APPLIANCE AND ITS PARTS ARE HOT. USE CARE WHEN OPERATING, CLEANING OR PERFORMING ANY MAINTENANCE. WARNING: DISCONNECT THE ELECTRICAL POWER TO THE MACHINE AND FOLLOW LOCKOUT / TAGOUT PROCEDURES. LUBRICATION The fan motor comes with sealed bearings and requires no lubrication. VENT Periodically check the flue, when the oven is cool, to be sure it is free of obstructions. REPLACING LAMPS • • • • • Allow oven to cool. Remove all racks by pulling forward, lifting up and out.