
User's Manual


7
Mode 2: This mode still has autolevel, but has higher roll rates and a high
tilt angle setting. This mode is for the more experienced pilot.
Mode 3: This mode (rate mode) has no limits on tilt and faster roll rates. The
quad will not autolevel in this mode. This mode offers the most maneuverability
but requires the pilot to be able to control the attitude of the quadcopter
themselves.
It normally takes a week or two of practice to learn to fly rate mode. Start by
flying Line of Sight (no FPV) until you can comfortably control the quad. If possible,
fly in an open area over tall grass to minimize damage to the Vusion when you
crash. When you are comfortable making a flip in this mode, you should be
ready for FPV.
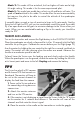
TAKEOFF AND LANDING
Turn on the transmitter and connect the flight battery to the VUSION FPV RACER.
Place the quadcopter on a level surface and let it sit for 10 seconds to let the flight
controller set up the gyros. Calibrate the sensors before your first flight (page 10).
Arm the motors by holding the yaw control to the right for a second, and back to
center. The motors will start spinning when the motors are armed. Advance the
throttle at a moderate speed to take off.
To land, hover the Vusion over the landing spot and slowly reduce the throttle.
When the quadcopter is on the ground, disarm the motors by holding the left stick
at its lowest point and move to the left. Unplug and remove the battery.
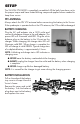
FPV
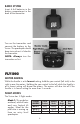
The Vusion has a built in FPV camera
and 8 channel VTX that transmits on
Raceband. The monitor will have to
be set to the correct channel to
display the feed from the camera.
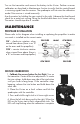
1. Power up the Vusion and raise
the camera by pushing down on
camera icon.
2. Attach the monitor antenna
and turn on the FPV monitor.
3. If the monitor is not displaying a signal from the Vusion, hold the “B” button
on the monitor for 2 seconds and release it. The monitor will scan all the
channels and lock onto the closest signal.
4. Place the monitor in the cradle on the transmitter or inside the goggle.