
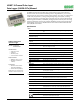
User Manual

1-800-LOGGERS 3 www.onsetcomp.com
3. Choose the logging interval, from 1 second to a maximum
of 18 hours, 12 minutes, and 15 seconds (available for Pulse
or Runtime logging only).
4. Choose when to start logging:
• Now. Logging begins immediately.
• At Interval. Logging will begin at the next even interval.
• Push Button. Logging will begin once you press the
Start/Stop logging button for 3 seconds.
• On Date/Time. Logging will begin at a date and time you
specify.
5. Choose when to stop logging:
• When Memory Fills. Logging will end once the logger
memory is full.
• Never (Wrap When Full). The logger will record data
indefinitely, with newest data overwriting the oldest.
• Push Button. Logging will end once you press the
Start/Stop logging button for 3 seconds. Note: If you also
configured a Push Button start, then you must wait 5
minutes after logging begins before you can use the
button to stop logging.
• Specific Stop Date. Logging will end at a date and time you
specify.
6. Select any other logging options as desired and finish the
launch configuration. Depending on the start type, verify
that the logging or waiting LED is blinking.
Connecting Sensors, Transducers, or
Instruments to the Logger
You can connect the logger to an external sensing device using
the four input channels. To connect a device to the logger:
1. Follow the instructions and wiring diagrams in the user
manual for the device.
2. Connect the device to the terminal block as directed in the
device instructions.
3. Plug in the terminal block into one of the four inputs (labeled
1 through 4).
4. Press the Test button as needed to activate the Activity LEDs
and check whether the logger reads the pulse signal.
5. Configure logger launch settings if you have not already.
Notes:
• Be sure that all devices are connected before logging
begins. Any sensors/devices attached after logging begins
will not record accurate data.
• If connecting an E50B2 Energy & Power Meter
(T-VER-E50B2), you have the option to use the default
meter settings or your own custom settings.
• If any channels have been configured to record raw pulse
counts or events in HOBOware, there is also an option to
specify lockout time. This can prevent false readings from
mechanical contact/closure bouncing. For more
information on setting lockout time, see the HOBOware
Help.
Determining Logging Duration for
Event/State Data
The logger’s storage capacity and logging duration varies
depending on several factors, including logging interval, number
of channels configured, and the type of data being recorded. This
table estimates the logging duration based on recording event or
state changes on one input channel with logging set to stop when
the memory is full. To estimate logging duration for multiple
event or state channels, divide the logging duration by the
number of active channels. If you want to know exactly how long
the logger will run, use pulse or runtime modes.
Time
Between
Events
Approximate
Total Data
Points
Approximate
Logging Duration
(1 Year Battery Life)
Logger Part
Number
1 to 15
seconds
346,795 4 to 60 days UX120-017
2,749,781 32 days to 1.3 years UX120-017M
16 seconds
to
4.2 minutes
260,096 48 days to 2.1 years UX120-017
2,062,336 1 to 16.6 years UX120-017M
4.3 to 68.2
minutes
208,077 1.6 to 27 years UX120-017
1,649,869 13 to 214 years UX120-017M
68.3
minutes to
18.2 hours
173,397 22.5 to 360 years UX120-017
1,374,891 17.8 to 285 decades UX120-017M
Notes:
• Typical battery life is 1 year.
• The logger can record battery voltage data in an additional
channel. This is disabled by default. Recording battery
voltage reduces storage capacity and is generally not used
except for troubleshooting.
Setting Maximum Pulse Frequency
When recording raw pulse counts, the logger dynamically
adjusts its memory usage from 4 to 32 bits instead of a typical
fixed width. This results in the ability to store more data using
less space, which in turn extends logging duration. The default
pulse rate is 120 Hz, which is also the maximum. You can adjust
this rate in HOBOware (see the HOBOware Help for details).
Decreasing the rate will increase logging duration. The
following table shows examples of how pulse rate and logging
interval affect logging duration.
Logging
Interval
Pulse
Rate
(Hz)
Number
of Bits
Required
Approximate
Total Data
Points
Approximate
Logging
Duration
1 minute 4 8 520,192 361 days
1 minute 50 12 346,795 240 days
1 minute 120 16 260,096 180 days
Reading Out the Logger
There are two options for reading out the logger: connect it to
the computer with a USB cable and read out it with HOBOware,
or connect it to a HOBO U-Shuttle (U-DT-1, firmware version
1.14m030 or higher) and then offload the datafiles from the