
Instructions


OPERATION
HOLZMANN MASCHINEN GmbH www.holzmann-maschinen.at
25
BT 1220TOP
13 OPERATION
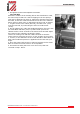
Device to be operated in a perfect state only. Inspect the device visually every time it is to be used.
Check in particular the safety equipment, electrical controls, electric cables and screwed connection
for damage and if tightened properly. Replace any damaged parts before operating the device.
13.1 Operation instructions
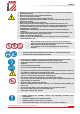
WARNING
Perform all machine settings with the machine being
disconnected from the power supply!
ATTENTION
Please observe the following operating instructions so that their work
can be performed safely and has the expected success.
NOTICE
Check before starting work:
All cables and plugs
Table and safety fence on tight fit
The free and centered run of sanding belt and disc
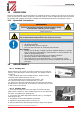
The sanding:
Always use the proper, located in perfect condition abrasives. (Change
wear of abrasives immediately!) With abrasive in good condition you
obtain a good grinding result.
Do not exert too much pressure to the sanding abrasive
Maximum distance table-sanding disc: 1.6mm!
The machine has no clamp opportunity, so it is important, as the
whole area hang up the work piece on the worktable and maintain a
firm grip!
14 ADJUSTMENTS
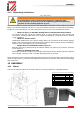
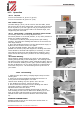
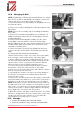
14.1.1 Sanding belt
Belt tracking on the center of the drive wheels is pre-set at the
factory. If an adjustment need to be made, the sander must be
turned on.
- If the sanding belt moves toward the disc, slowly turn the
Tracking Knob (#66) clockwise 1/4 turn.
- If the sanding belt moves away from the disc, turn
the tracking knob slowly counterclockwise 1/4 turn.
10. Slowly turn the belt tracking knob noting the belt movement.
Re-adjust the tracking knob, as necessary, until the belt runs true
in the center of the drums
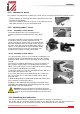
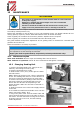
14.1.2 Sanding table
1. To check the trueness of the 90º angle of the disc sanding
table, place a square or other measuring device on the table with
the other end against the sanding disc.
2. Loosen the disc table adjustment handle (#111), and adjust
table angle to 90º.
3. Re-tighten the disc table adjustment handle.
4. Adjust the Angle Scale Pointer (#103) to 0°.
6. Set the table at the desired angle using the angle scale pointer.