
Instructions / Assembly

Assembly
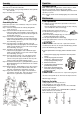
Assembling the tree stand
Step 1. Choose a location near a wall outlet.
Step 2. Open the stand to a 90 degree angle until the hole lines up with the
hole on the tube.
Step 3. Screw three eye bolts into the hole.
Assembling the tree
Please remove protective covers from the base of the pole for each tree
section before assembling.
Step 1. Insert tree bottom (E) into the tree stand (F) and tighten the
screws. (See Fig. 1)
Step 2. Insert lower middle section (D) into the tree bottom (E).
Rotate lower middle section (D) slightly to ensure it matches the
tree bottom (E) and there is proper circuit connection if lights are
not functioning. (See Fig. 2)
Step 3. Insert middle section (C) into the lower middle section (D).
Rotate middle section (C) slightly to ensure it matches the lower
middle section (D) and there is proper circuit connection if lights
are not functioning. (See Fig. 3)
Step 4. Insert upper middle section (B) into the middle section (C).
Rotate upper middle section (B) slightly to ensure it matches the
middle section (C) and there is proper circuit connection if lights
are not functioning. (See Fig. 4)
Step 5. Insert the tree top (A) into the tree center (B).
Rotate the tree top (A) slightly to ensure it matches the upper
middle section (B) and there is proper circuit connection if lights
are not functioning. (See Fig. 5)
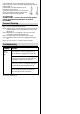
Step 6. Remove the plastic protective cover on the plug fixed on the
pole of the bottom section (E). Insert the plug into the end
connector of the power supply cord with an on/off foot pedal
switch according to the magnified drawing on Fig. 6.
Step 7. Allow branches to fall into place or gently pull branches up and out.
When adjusting branches be sure that all wires are free of branch
hinges. (See Fig. 7)
Step 8. Shape the branches. Starting with tips closest to the pole, shape
one tip to the right, one to the left and one at the center of the
main stem. Repeat pattern for each branch. (See Fig. 8)
Step 9. Plug the well-connected power supply cord from the bottom
section (E) into electrical outlet. Please note this tree comes
with an on/off foot pedal switch for easy illumination.
Operation
Turning on the tree
NOTE: If some bulbs do not light or flicker, search for any loose, broken
bulbs and /or missing bulbs. Replace bulbs promptly with the
replacement bulbs provided in order to maintain the performance and life
expectancy of your tree.
Step 1. Connect each tree section well and plug the power cord into a wall
outlet.
Maintenance
Fuse Replacement
A) Extension cord fuse replacement (1 replaceable 8 A, 125 V fuse is
located in the plug):
Note: This plug will fit in a polarized outlet only one way. If the plug
does not fit fully in the outlet, reverse the plug.
1. Grasp plug and remove from its power source.
2. Locate blown fuse by sliding access cover on top of
plug towards prongs.
3. Remove blown fuse by turning the plug over. Fuses should fall into
your hand (gentle tapping may be required).
4. Locate spare replacement fuse included in plug.
5. Insert spare replacement fuse. Close fuse cover by sliding fuse access
cover towards the cord.
CAUTION:To reduce risk of fire – replace fuse in extension
cord with only 8 A, 125 V fuse. Do not replace attachment plug. Discard
product if the attachment plug is damaged.
B) Fuse replacement of the plug fixed on bottom section
(E):
1. Grasp power supply plug and remove from its power
source.
2. Locate the plug fixed on bottom
section (E). Slide access cover
on top of plug towards prongs.
3. Remove blown fuse.
4. Locate spare replacement fuse
provided with product.
5. Insert spare replacement fuse.
Close fuse cover by sliding fuse
access cover back.
CAUTION: To reduce risk of fire – replace fuse in plug fixed
on bottom section (E) with only 3 A, 125 V fuse. Discard product if the
attachment plug is damaged.
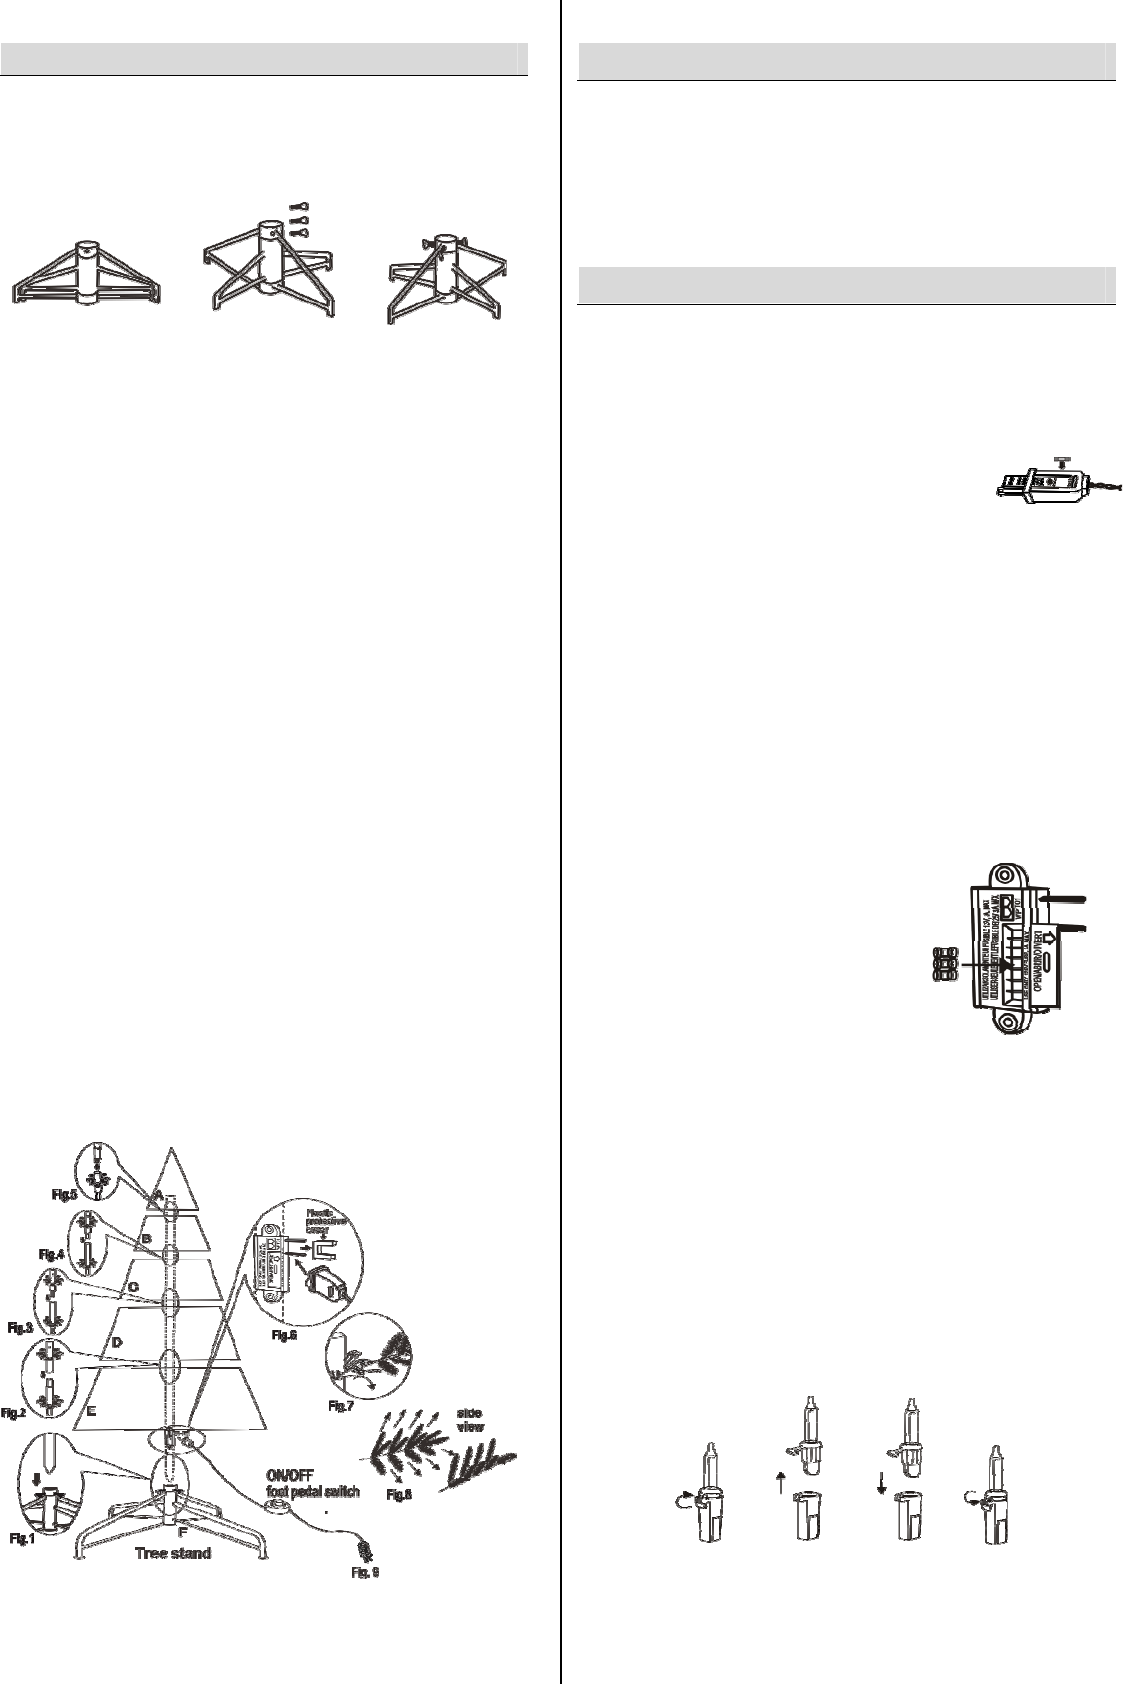
Replacing the bulbs
1. Grasp plug and remove from its power source.
2. Unlock the lamp lock on the socket of the bulb.
3. Pull bulb AND plastic base straight out of socket. Do not twist bulbs
while you are removing them.
4. Replace burnt out bulb with 2.5 V, 0.425 W bulb ONLY. (Additional
bulbs are included for your convenience.)
5. Relock the lamp lock on the socket of the bulb.