Item #702 980 Model #16782 USE AND CARE GUIDE 3-LIGHT ISLAND PENDANT Questions, problems, missing parts? Before returning to the store, call Home Decorators Collection Customer Service 8 a.m. - 7 p.m., EST, Monday-Friday, 9 a.m. - 6 p.m., EST, Saturday 1-800-986-3460 HOMEDEPOT.COM/HOMEDECORATORS THANK YOU We appreciate the trust and co you have placed in Home Decorators Collection through the purchase of this light xture. We strive to continually create quality products designed to enhance your home.
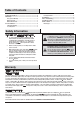
Table of Contents Hardware Included ...................................................................3 Package Contents ....................................................................4 Installation ..................................................................... 5 Care and Cleaning ........................................................ 7 Troubleshooting ............................................................ 7 Service Parts .................................................................
Pre-Installation PLANNING INSTALLATION Read all instructions before installing. To avoid damaging this product, place it on a soft, non-abrasive surface, such as carpet or cardboard. NOTE: This product requires three 60W maximum candelabra base (E12) type B bulbs or 13W maximum candelabra base (E12) SBCFLs (sold separately). IMPORTANT: Inspect the wire insulation for any cuts, abrasions, or exposed copper that may have occurred during shipping. If there is a defect in the wire, do not attempt installation.
Pre-Installation (continued) PACKAGE CONTENTS A B C D E Part A B C Description Canopy assembly Chain Fixture body Quantity Part 1 2 1 D E 4 Description Shade Socket ring Quantity 3 3
Installation 1 Preparing for installation 2 Attaching the chain □ Adjust the chain (B) to the desired height by spreading the end link of the chain (B) apart. Use a pair of pliers and a screwdriver. Wrap a soft cloth around the pliers to protect the Fasten the mounting bracket (AA) onto the outlet box using two outlet box screws (GG). Screw the threaded tube (BB) into the mounting bracket (AA), and secure it using the lock washer (CC) and hex nut (DD).
Installation (continued) 5 □ Installing the canopy assembly to the outlet box Raise and place the canopy assembly (A) over the outlet box, and ensure the threaded tube (BB) come through the hole of canopy □ BB A DD HH 6 Installing the shades and the light bulbs □ □ body (C). Then tighten them with the socket rings (E). Install the light bulbs (not included) into the sockets. Use three 60-watt candelabra base (E12) type B bulbs.
Care and Cleaning Ƒ Do not use any cleaners with chemicals, solvents, or harsh abrasives. Use only a dry, soft cloth to dust or wipe carefully. Ƒ To clean the xture, disconnect the power by turning off the circuit breaker or by removing the fuse at the fuse box, and use a dry or slightly dampened, clean cloth to wipe the exterior surface of the ure. Troubleshooting Problem Possible Cause Solution The lights will not turn on. The bulb is burned out. Replace the light bulb. The power is off.
Service Parts MODEL : 16782 BB AA FF EE CC DD HH GG II A B C D E Part Description Part Description AA BB Mounting bracket Threaded tube Lock washer Hex nut Green ground screw (Pre-assembled to mounting bracket (AA)) Wire connector GG HH II A B C D E Outlet box screw Finial Quick link Canopy assembly Chain Fixture body Shade Socket ring CC DD EE FF 8
Questions, problems, missing parts? Before returning to the store, call Home Decorators Collection Customer Service 8 a.m. - 7 p.m., EST, Monday-Friday, 9 a.m. - 6 p.m., EST, Saturday 1-800-986-3460 HOMEDEPOT.COM/HOMEDECORATORS Retain this manual for future use.
Artículo #702 980 Modelo #16782 GUÍA DE USO Y MANTENIMIENTO LÁMPARA COLGANTE DE 3 LUCES ¿Preguntas, problemas o piezas faltantes? Antes de regresar a la tienda, llama al Servicio al Cliente de Home Decorators Collection, de 8 a.m. a 7 p.m., hora estándar del Este, de Lunes a Viernes, y de 9 a.m. a 6 p.m., hora estándar del Este, Sábados. 1-800-986-3460 HOMEDEPOT.COM/HOMEDECORATORS GRACIAS POR TU COMPRA. ente crear productos de calidad diseñados para mejorar tu hogar.
Índice Aparillage Incluido ...................................................................3 Contenido del Paquete .............................................................4 Instalación ..................................................................... 5 Cuidado y Limpieza ...................................................... 7 Solución de Problemas ................................................ 7 Partes de Servicio......................................................... 8 Tipo de Modelo......
Pre-Instalación PLANIFICACIÓN DE LA INSTALACIÓN Lea todas las instrucciones antes de comenzar la instalación. NOTA: Este producto requiere tres bombillas de 60W IMPORTANTE: Revisa que el aislamiento de los cables no haya sufrido ningún corte, abrasión ni tenga máximo de base para candelabro (E12) de tipo B o tres bombillas CFL equivalentes de 13W máximo de base para candelabro (E12). (se venden por separado). un defecto en el cable suspenda el ensamblaje.
Pre-Instalación (continuación) CONTENIDO DEL PAQUETE A B C D E Pieza A B C Descripción Conjunto del dosel Cadena Cuerpo de la lámpara Cantidad Pieza 1 2 1 D E 4 Descripción Campana Anillo del receptáculo Cantidad 3 3
Instalación 2 Colocación de la cadena 1 Preparando para la instalación □ Separe o abra el último eslabón de la cadena (B) para ajustar la cadena (B) a la altura deseada. Use un alicate y un destornillador. Cubra el alicate con un paño suave para protejer el acabado de la cadena. □ Abra el primer eslabón de enganche rápido (II), conecte una cadena (B) a la argolla en el cuerpo de la lámpara (C) y cierre el eslabón de enganche rápido (II).
Instalación (continuación) 5 Adjuntando el conjunto del dosel a la caja eléctrica □ □ adherido contra el techo. Asegure el remate (HH) al tubo roscado (BB). BB A DD HH 6 □ □ Instalación de las campanas y las bombillas Desenrosque los anillos de los receptáculos (E) en el cuerpo de la lámpara (C), y coloque las campanas (D) sobre los receptáculos en el cuerpo de la lámpara (C), luego asegúrelos con los anillos de receptáculo (E). Instale las bombillas (no incluidas) en los receptáculos.
Mantenimiento y Limpieza No use limpiadores con químicos, solventes ni productos abrasivos. Use sólo un paño suave y seco para desempolvar o limpiar con cuidado. Para limpiar la lámpara, primero corta el suministro de electricidad, apagando el interruptor automático o retirando el fusible correspondiente en la caja de fusibles. Seguidamente, usa un paño limpio, seco o ligeramente húmedo (usa sólo agua limpia, nunca un solvente) para limpiar el exterior de la lámpara.
Piezas de remplazo MODELO : 16782 BB AA EE FF CC DD HH GG II A B C D E Pieza AA BB CC DD EE FF Descripción Soporte de montaje Tubo roscado Arandela de seguridad Tuerca hexagonal Tornillo verde a tierra (Preinstalado al soporte de montaje (AA)) Conector de cable Pieza Descripción GG HH Tornillo de la caja eléctrica Remate II A B C D Eslabón de enganche rápido Conjunto del dosel Cadena Cuerpo de la lámpara Campana E Anillo del receptáculo 8
¿Preguntas, problemas o piezas faltantes? Antes de regresar a la tienda, llama al Servicio al Cliente de Home Decorators Collection, de 8 a.m. a 7 p.m., hora estándar del Este, de Lunes a Viernes, y de 9 a.m. a 6 p.m., hora estándar del Este, Sábados. 1-800-986-3460 HOMEDEPOT.COM/HOMEDECORATORS Conserva este manual para referencias futuras.