
Installation Guide
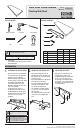


Use and Care Guide
Floating Wall Shelf
Installation
1
PREPARING FOR INSTALLATION
□ Place the backplate (B) against the
wall in the desired position, align
hole marks with the bracket.
□ Helpful Hint:
Use stud nder to locate wall studs to hold the
maximum weight.
□ Ensure that arrow located on
backplate (B) is pointing up. Align
backplate with holes. Double check
backplate with a level and re-mark
holes if neccessary. Remove
backplate.
B
2
INSTALLING THE BACKPLATE
IMPORTANT: Do not pre-drill holes into
a stud.
□ Using a power drill and a 3/16 in.
drill bit, drill holes into the wall at the
pencil marks. (do not pre-drill where
studs are present)
□ Insert the drywall anchors (D) into the
holes that do not have studs.
□ Use a Phillips screwdriver and the
screws (C) to secure the backplate
□ Use drill and installation screws into
studs and secure backplate (B) to
wall.
(B) to the wall.
B
C
C
3
INSTALLING THE SHELF
□ Align the holes on the back of the
shelf (A) with the tubes on the
backplate (B). Slide shelf onto tubes.
□ Use the set screws (E) to secure
the shelf (A) to the backplate (B) by
inserting the set screws (E) through
the bottom of the shelf (A) into holes
on backplate tubes.
TOOLS REQUIRED
Phillips screwdriver Power drill 3/16 in. drill bit
Level Pencil Stud Finder
(optional)
PACKAGE CONTENTS
A
C
D
E
B
Item #
Model #
See page 2
HOMEDEPOT.COM
Please contact 1-877-527-0313 for further assistance.
M244461 244593 244692 1002800405 1002800468 1002800559 E 10.30.19 V2
E
E
B
A
24 in 36 in 42 in
Part Description Quantity
A
Shelf 1
B
Backplate 1
C
Screw 6
D
Drywall anchor 4
E
Set screw 2
Quantity
1
1
6
4
2
Quantity
1
1
6
4
2
IMPORTANT:
Templates will have 7 or
more possible hole locations. Only 6
screws are provided in hardware. Decide
prior to drilling which 6 hole locations will
be used for installation of backplate.
Note: there are more bracket holes than there are installation screws
Top
□
Find desired location to install shelf.
Use stud nder to locate wall studs.
□
Template for easy installation:
Afx the template on the wall in the
desired location. Using a level, adjust
the template until straight, then
attach the template to the wall.
Mark the screw indicator holes and
remove the template.
Make sure that at least one screw will be installed
into a wall stud for best results.