Item # Model # , Item #1000******/ UL Model # 1000****** Model #FC132-BNR , USE AND CARE GUIDE FC132-BNRL 52-INCH CEILING FAN Questions, problems, missing parts? Before returning to the store call Home Decorators Collection Customer Service 8 a.m. - 6 p.m., EST, Monday-Friday 1-800-986-3460 HOMEDEPOT.COM/HOMEDECORATORS THANK YOU We appreciate the trust and confidence you have placed in Home Decorators Collection through the purchase of this ceiling fan.
Table of Contents Table of Contents ................................................................ 2 Assembly .............................................................................. 7 Safety Information ............................................................... 2 Operation ........................................................................... 13 Warranty ............................................................................... 3 Care and Cleaning ...............................
Warranty The supplier warrants the fan motor to be free from defects in workmanship and material present at time of shipment from the factory for a period of lifetime after the date of purchase by the original purchaser. The supplier also warrants that all other fan parts, excluding any glass or acrylic blades, to be free from defects in workmanship and material at the time of shipment from the factory for a period of one year after the date of purchase by the original purchaser.
Pre-Installation (continued) TOOLS REQUIRED Phillips screwdriver Flat blade screwdriver Adjustable wrench Electrical tape Wire cutter / Stripper Step ladder HARDWARE INCLUDED NOTE: Hardware not shown to actual size.
Pre-Installation (continued) PACKAGE CONTENTS Part Decription Quantity Part G A B C Mounting bracket Ball/downrod assembly Canopy 1 1 1 D Canopy ring 1 E Decorative motor collar cover 1 F Fan-motor assembly 1 H I J Decription Blade bracket Blade Remote control &Receiver assembly &include 8 plastic wire nuts and 2 batteries Light kit cover Quantity 5 5 1 1 IMPORTANT: This product and/or components are governed by one or more of the following U.S.
Installation MOUNTING OPTIONS NOTE: You may need a longer downrod to maintain proper blade clearance when installing on a steep, sloped ceiling. The maximum angle allowable is 30° away from horizontal. WARNING: or personal injury, mount the fan to an outlet box marked ‘’acceptable for fan support of 35 lbs. (15.9kg) or less’’, and use the screws provided with the outlet box. An outlet box commonly used for the fan support and may need to be replaced.
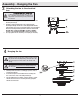
Assembly - Standard Ceiling Mount 1 □ □ 2 Preparing for routing the wires Remove the hitch pin (GG) and lock pin (HH) from the downrod (B). Loosen the two set screws (II) from the fan motor assembly (F) coupling.
Assembly - Hanging the Fan 3 Attaching the fan to the electrical box WARNING: or other personal injury, mount the fan to an outlet box or supporting system marked acceptable for fan support and use the mounting screws provided with the outlet box. □ Pass the 120-Volt supply wires through the center hole in the □ mounting bracket (A). Install the ceiling mounting plate on the outlet box by the mounting bracket (A) over the two screws (AA) provided with the outlet box (M) .
Assembly -Hanging the Fan (continued) 5 Making the electrical connections WARNING: To avoid possible electrical shock, ensure the electricity is turned off at the main fuse box before wiring. WARNING: To avoid possible electrical shock, ensure the electricity is turned off at the circuit breaker or main fuse box before wiring. WARNING: Check to see that all connections are tight, including the ground, and that no bare wire is visible at the wire nuts, except for the ground wire.
Assembly - Hanging the Fan (continued) 6 7 Wrapping the extra wire Mounting the fan-motor assembly (standard mount) WARNING: When using the standard ball/downrod mounting, the tab in the ring at the bottom of the mounting bracket must rest in the groove of the hanger ball. Failure to properly seat the tab in the groove could cause damage to the wiring. NOTE : Follow this step ONLY if you did not cut the extra length off from the wires coming from the ceiling fan.
Assembly - Attaching the Fan Blades 8 9 Attaching the blades to the blade brackets Fastening the blade assemblies to the motor □ Attach a blade (H) to a blade bracket (G) by inserting screws □ Fasten the blade assembly to the motor (F) by inserting the □ □ □ (CC) and paper washer(EE) into the holes in the blade and through the blade bracket. Tighten each screw securely. Repeat these steps for each blade (H) and blade bracket (G).
Assembly - Installing the Light Kit Cover 10 Attaching the light kit cover CAUTION: To reduce the risk of electric shock, disconnect the electrical supply circuit to the fan before installing the light kit cover. □ Loosen the three screws (EE) on the switch cup cover of the light kit fitter assembly. □ Align the three screws (EE) on the switch cup cover of the light kit cover with the three key slots in the switch cup. Position the light kit cover on the switch cup.
Operation Installing the batteries CAUTION: Do not use with a wall light dimmer switch. NOTE: The battery will weaken with age and should be replaced before leaking takes place as this will damage the remote control. Dispose of used battery properly and keep the battery out of the reach of children. □ Remove the battery cover by pressing on the arrow and sliding the cover off. □ Install two 1.5V AAA batteries (S). □ Replace the battery cover on the remote control.
Operation (continued) NOTE: The fan has memory function , it will resume the speed setting on the fan prior to the power being turned off. And The LED display will show the founction for 4 seconds after the button is released. 1. Fan button. - Press and release the or off. 2. Fan button, -Change the fan speed □ button to turn the fan on . Speed/ Light display Pressing and releasing the button one time will circularly change speed of the fan, from speed 1 to speed 6 then speed1. 3.
Care and Cleaning Do □ Do not 8 Check the support connections, brackets, and blade attachments twice a year. Ensure they are secure. Because of the fan’s natural movement, some connections may become loose over time. It is not necessary to remove the fan from the ceiling. □ Clean your fan periodically. Use only a soft brush or lint-free cloth to avoid scratching the finish. The plating is sealed with a lacquer to minimize discoloration or tarnishing.